
Last updated: March 2026
The GitKraken MCP Server gives AI agents direct access to your Git operations, issue tracking, and pull request workflows across GitHub, GitLab, Jira, and Azure DevOps. It works from any supported IDE or agent. Install it through GitLens or the GitKraken CLI.
Quick Start
The fastest way to install the GitKraken MCP Server is through GitLens in VS Code or Cursor. In many cases, updating GitLens is all that’s needed; the server installs automatically.
Requires: VS Code 1.101.0 or later and GitLens 17.5 or later. Earlier versions require manual setup via the command palette. See Install via GitLens below.
Which install method is right for you?
- Use the GitLens path if you work in VS Code, Cursor, Windsurf, Trae, or another VS Code–based IDE and want zero manual configuration.
- Use the GitKraken CLI path if you work in Claude Desktop, JetBrains IntelliJ, Amazon Q Developer, Kiro, or Google Antigravity, or if you need to configure the server once across multiple agents.
| IDE | Install Method | Prerequisites |
|---|---|---|
| VS Code | GitLens (recommended) or CLI | VS Code 1.101.0+, GitLens 17.5+ |
| VS Code Insiders | GitLens deeplink or CLI | VS Code 1.101.0+, GitLens 17.5+ |
| Cursor | GitLens (recommended) or CLI | Windows: VC++ Redistributable |
| Windsurf | GitLens deeplink | None |
| Trae | GitLens deeplink | None |
| Claude Desktop | CLI (manual JSON) | gk CLI authenticated |
| Amazon Q Developer | CLI (form entry) | gk CLI authenticated |
| Kiro | CLI (manual JSON) | gk CLI authenticated |
| JetBrains IntelliJ | CLI (manual JSON) | JetBrains AI Assistant |
| Google Antigravity | CLI (manual JSON) | gk CLI authenticated |
Once updated, see Verify installation below to confirm the server is active.
To use the GitKraken CLI instead, authenticate first:
gk auth loginThen add the GitKraken MCP Server to your preferred agent using the gk mcp command. Each IDE requires a one-time stdio transport configuration. See the IDE-specific steps below.
Install via GitLens
The GitKraken MCP Server is bundled with GitLens version 17.5 and later. In most cases, updating GitLens is sufficient. The server installs automatically with no additional configuration.
If the server does not install automatically, run the following command from the command palette in VS Code, Cursor, Windsurf, or any other VS Code–based IDE:
GitLens: Install GitKraken MCP Server

You can also install directly using the following deeplinks. Each link handles all configuration automatically:
Each link handles all required configuration automatically.
Verify installation
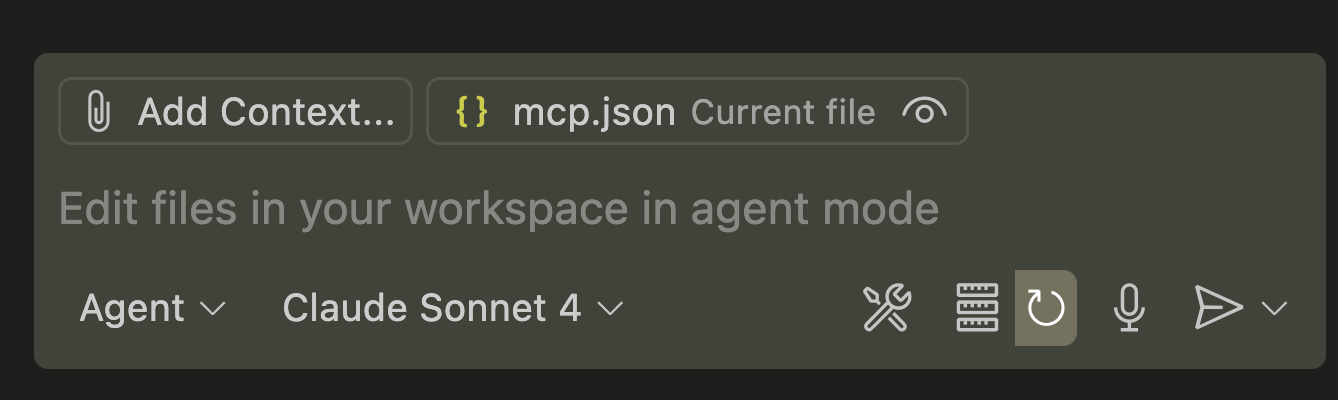
- Ensure you are in Agent Mode.
- Run a test prompt:
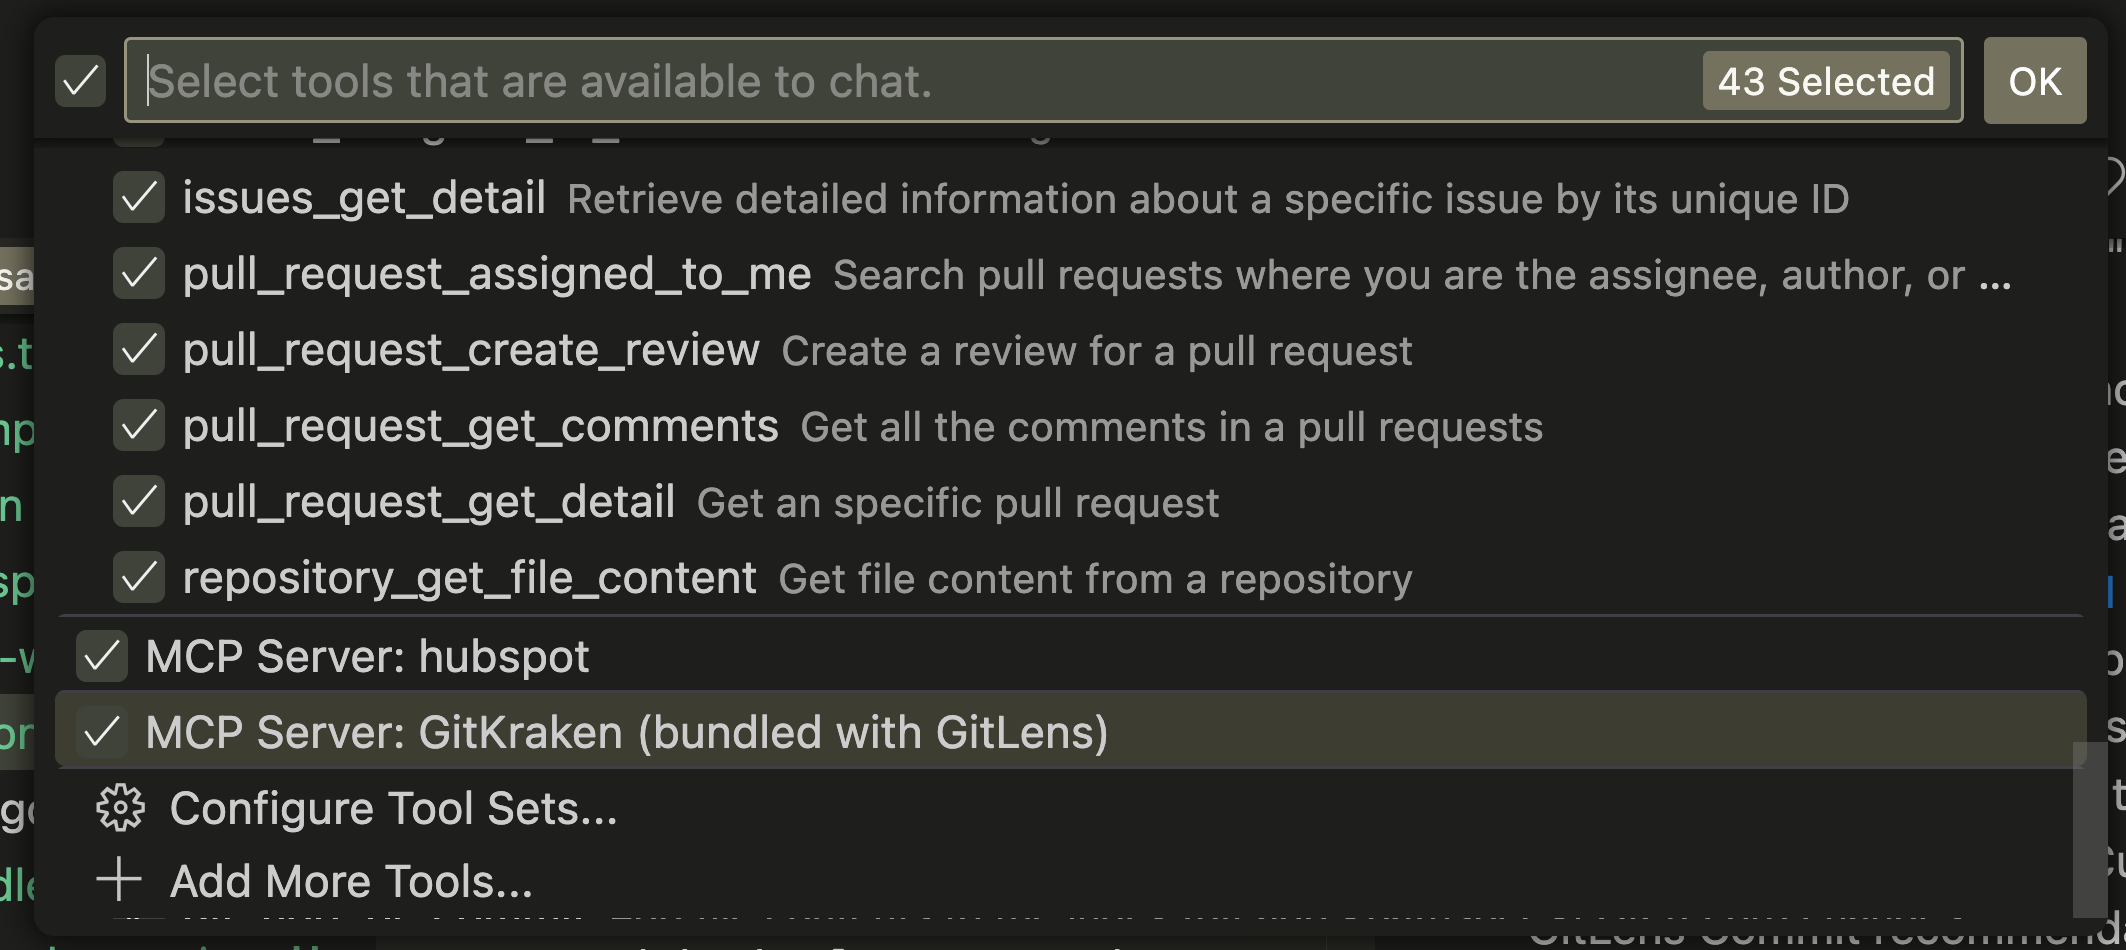
What issues are assigned to me?A working server will display an approval request for theissues_assigned_to_metool. - To inspect all available tools, click the tools icon in the Agent Mode toolbar.
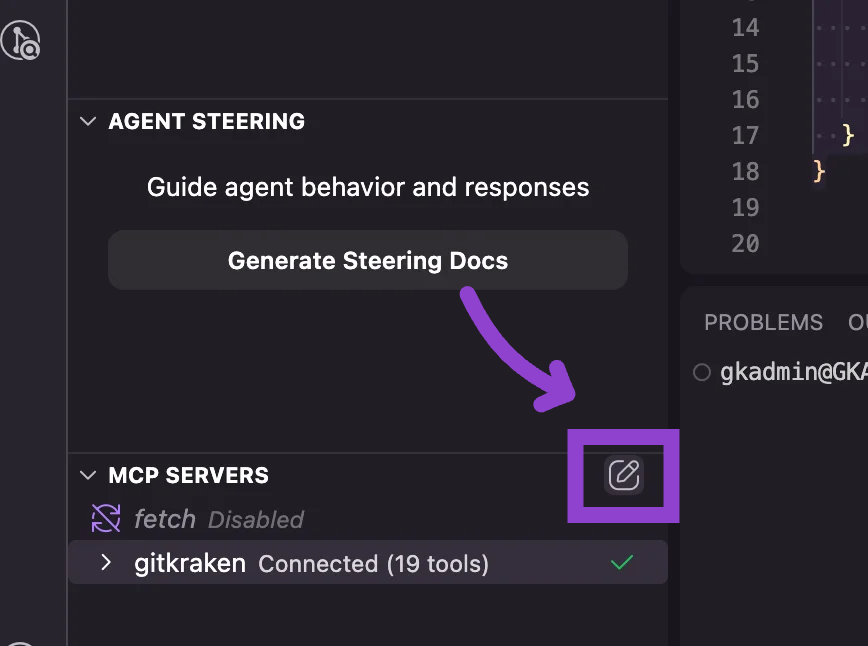
- Scroll to the bottom of the list and confirm MCP Server: GitKraken (bundled with GitLens) is present.
Install via GitKraken CLI
You can also install the GitKraken MCP Server using the GitKraken CLI. Follow these steps to set up the MCP Server across different IDEs.
After installation, run the following command in your terminal to authenticate with your GitKraken account:
gk auth loginOnce authenticated, add the GitKraken MCP Server to your preferred agent.
Third Party Tools Manual Setup
Prerequisites: The GitKraken CLI must be installed and authenticated before configuring any IDE. Run
gk auth loginin your terminal first.
VS Code
To install the GitKraken MCP Server in VS Code, use the command palette:
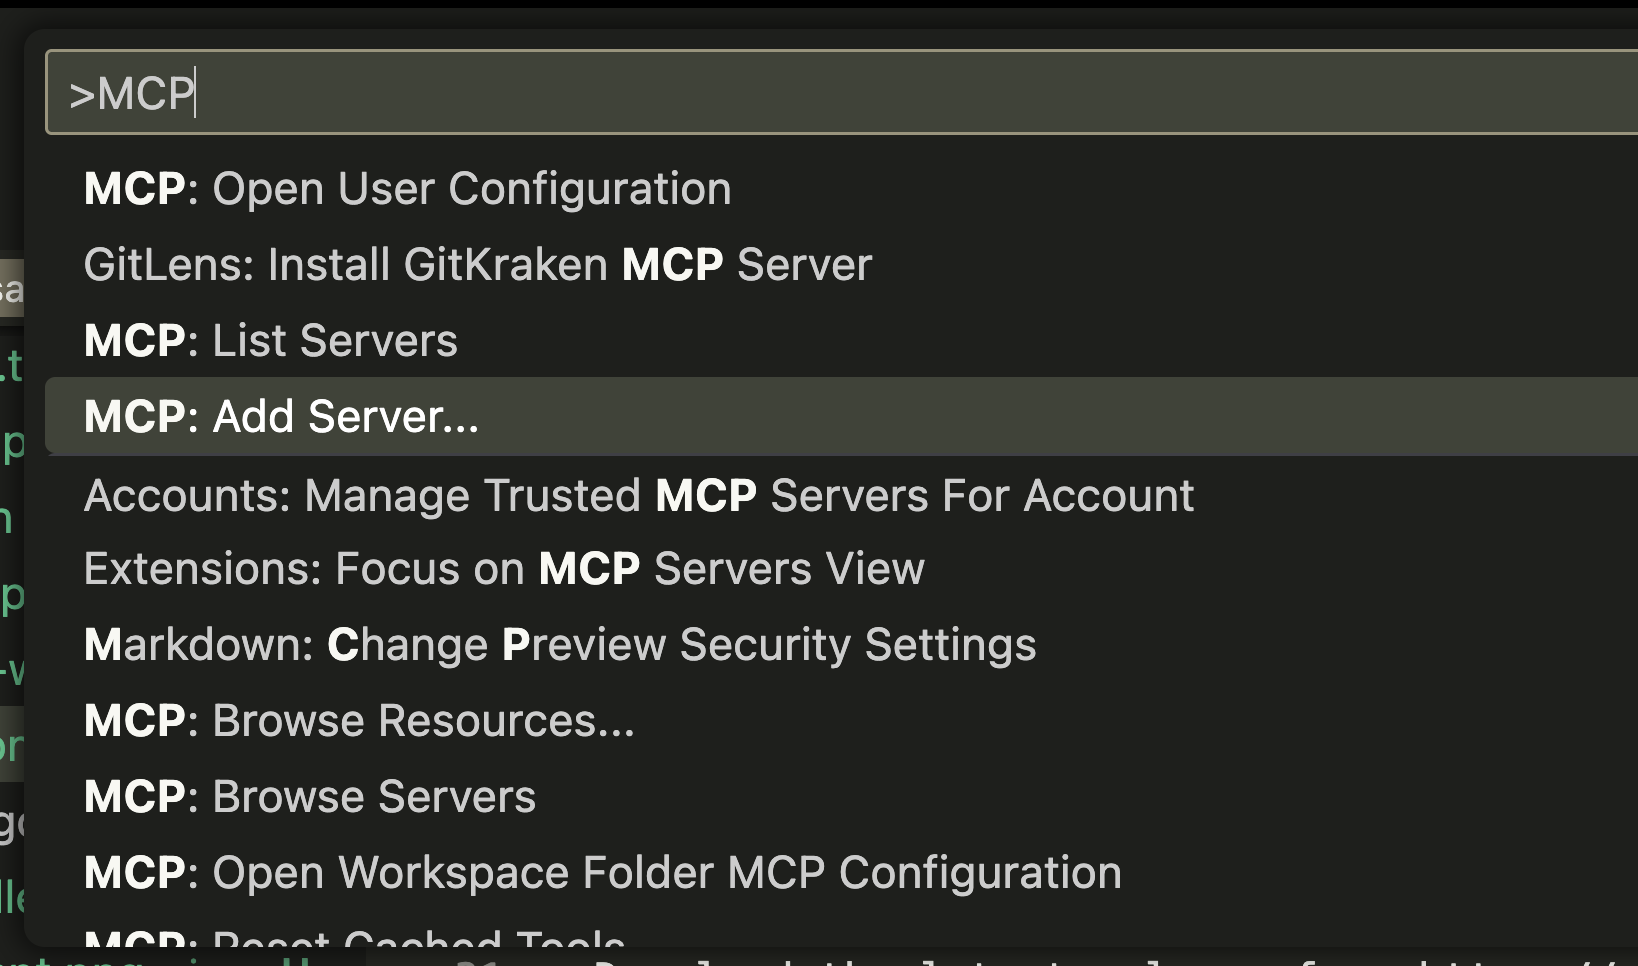
- Open the command palette and select MCP: Add server…
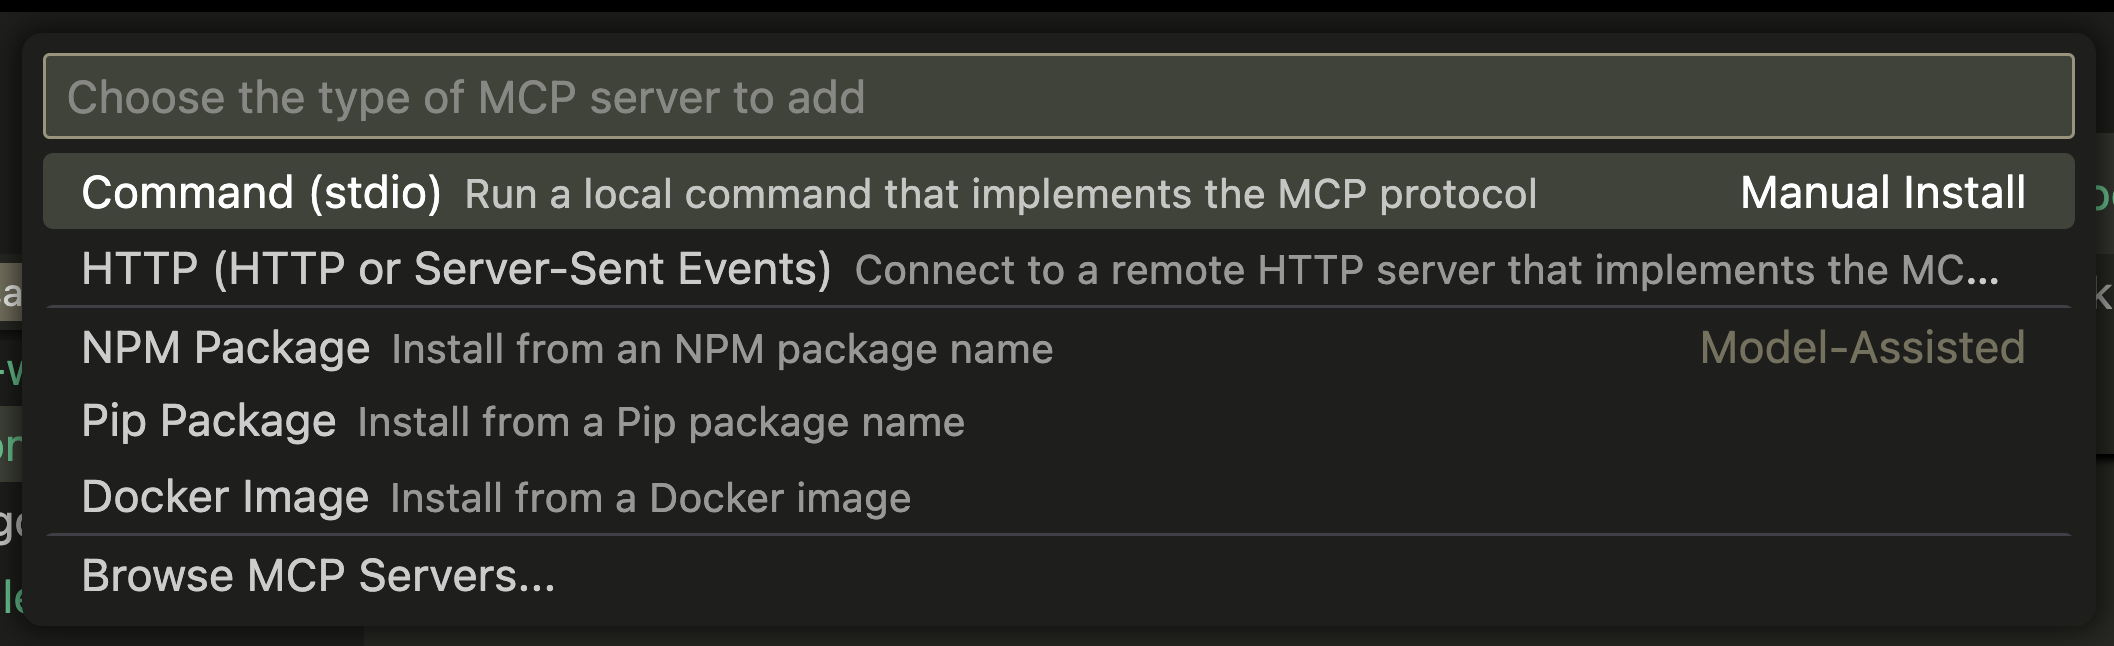
- When prompted, select stdio as the server type.
- In the next prompt, enter the following command:
gk mcp
gk mcp as the server command.- Provide a name for the server and press Enter.

- To verify, make sure you are in Agent Mode, then click the tools icon in the Agent Mode toolbar to confirm the GitKraken MCP Server appears in the list.
Note: MCP Tools must be enabled in VS Code settings for the server to function.
Cursor
To install the GitKraken MCP Server in Cursor:
Option A: GitLens command palette (recommended if you have GitLens installed):
Run GitLens: Install GitKraken MCP Server from the command palette. This handles all configuration automatically.
Option B: Manual JSON config:
- Open the command palette and select View: Open MCP Settings.
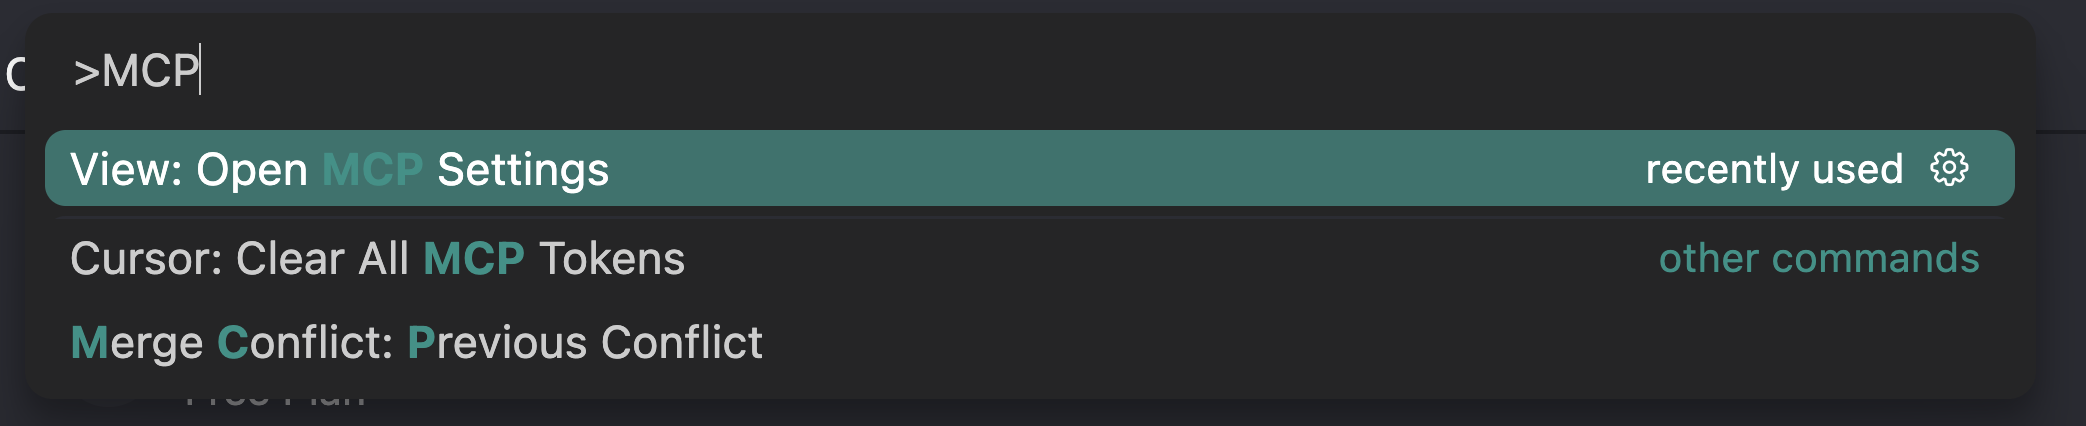
- If no servers are installed, click Add Custom MCP to begin setup.

- Add the GitKraken MCP Server configuration to the JSON file:
{
  "mcpServers": {
    "gitkraken": {
      "command": "gk",
      "args": ["mcp"]
    }
  }
}
Note: Windows users must have the latest Microsoft Visual C++ Redistributable installed.
Claude Desktop
To configure the GitKraken MCP Server in Claude Desktop:
- From the app toolbar, open Settings, then navigate to the Developer tab.
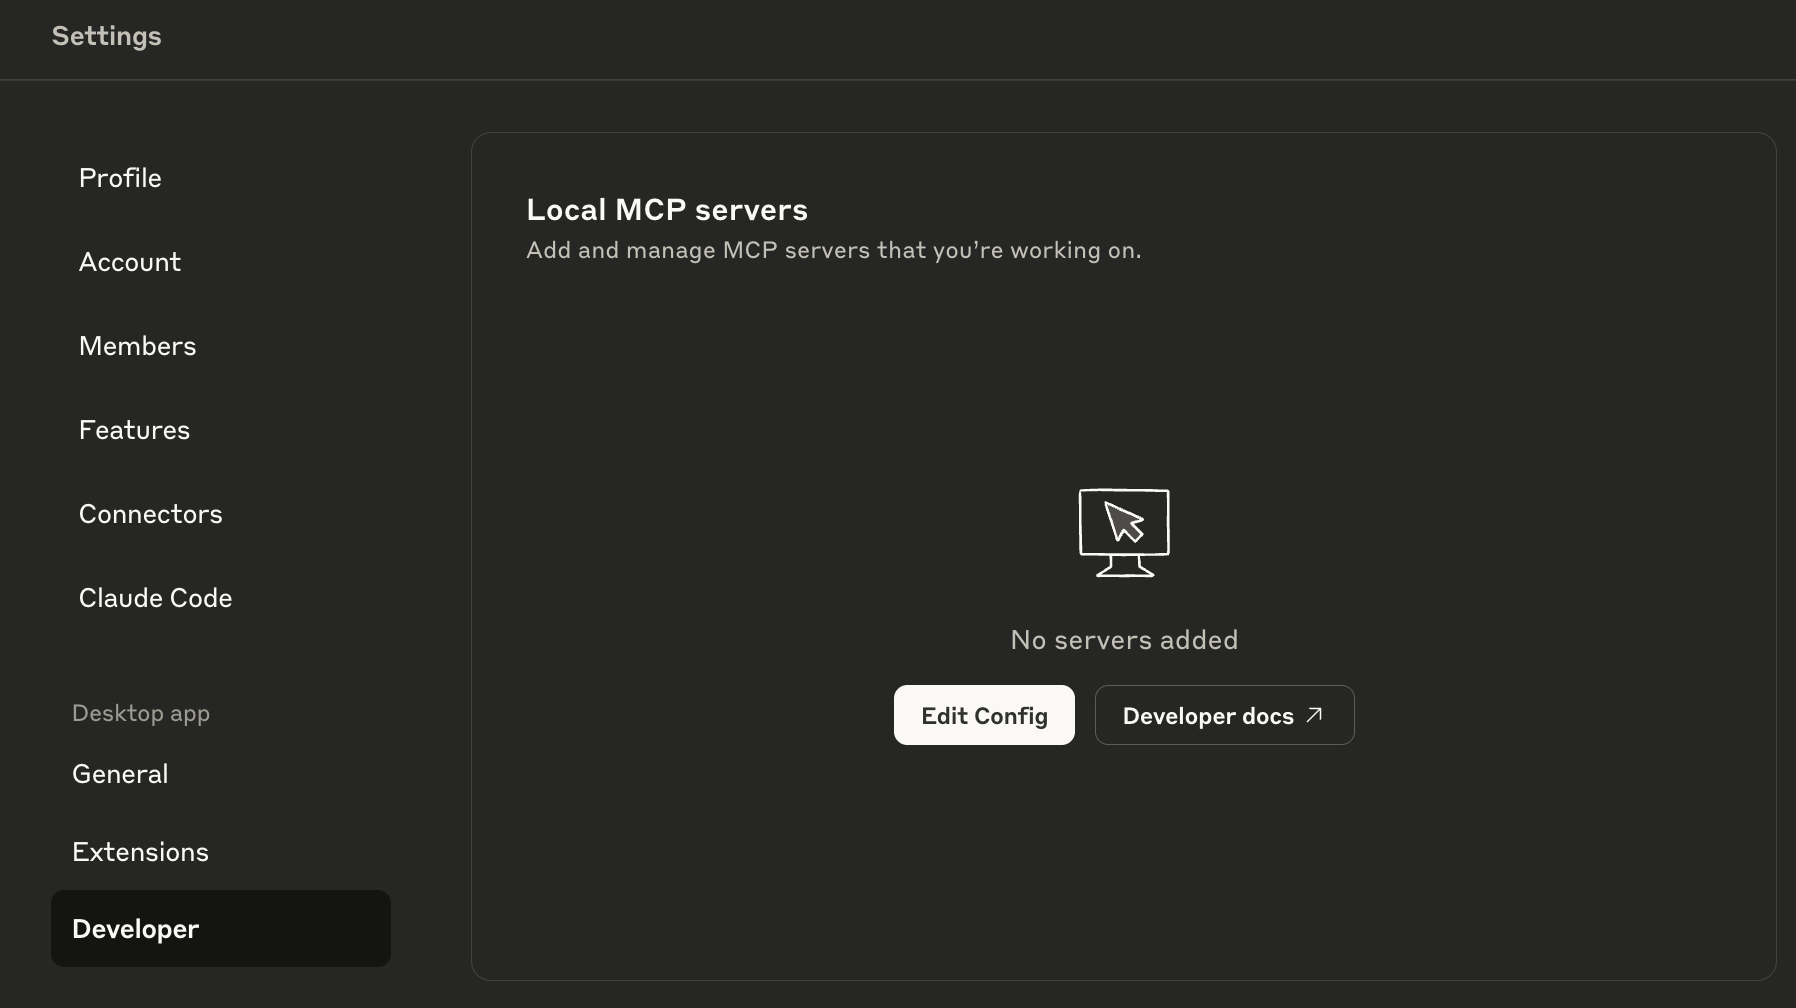
- Click Edit Config to open the
claude_desktop_config.jsondirectory. - Edit the file and paste in the following JSON:
{
  "mcpServers": {
    "gitkraken": {
      "command": "gk",
      "args": ["mcp"]
    }
  }
}- Save the file and restart Claude Desktop.
Amazon Q Developer
To configure GitKraken MCP in Amazon Q Developer:
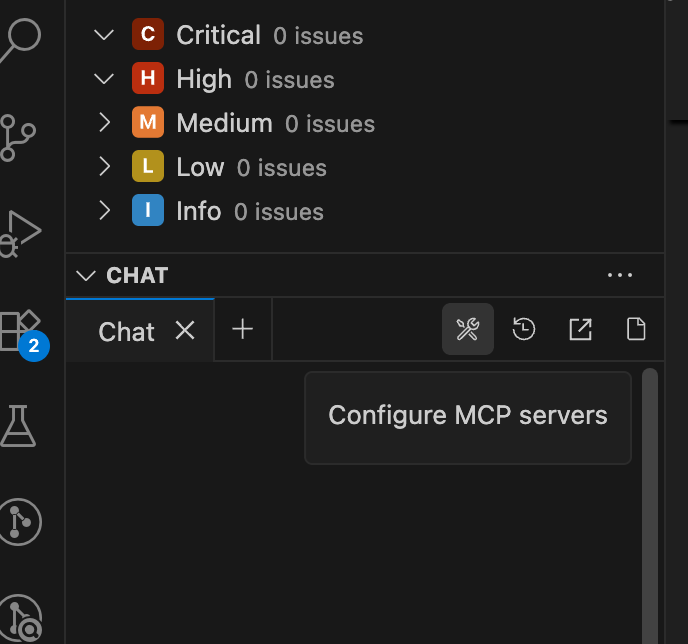
- Inside of the Q Chat window, click the Configure MCP Server icon.
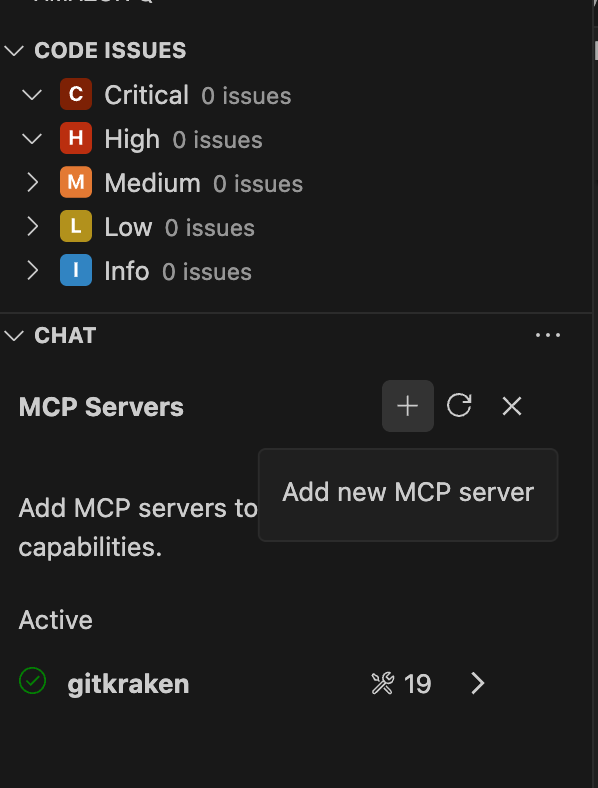
- On the new MCP Servers pane, click the + icon on the top right.
- Please insert the following:
| Field | Value |
|---|---|
| Name | gitkraken |
| Transport | stdio |
| Command | gk |
| Arguments | mcp |
-
Click Save to finish adding the MCP server.
-
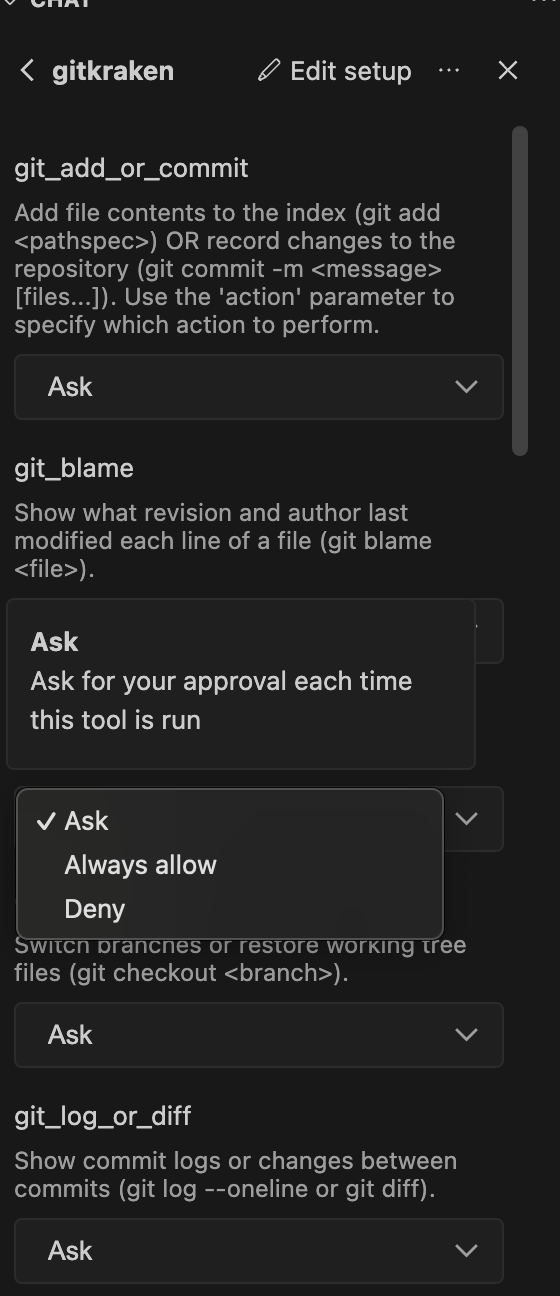
After completing the setup, or as you need, you can edit permissions for individual toolsets to either Ask, Always Allow or Deny. By default, Q will always ask in the chat.
Kiro IDE
To add MCP to the Kiro Agentic IDE:
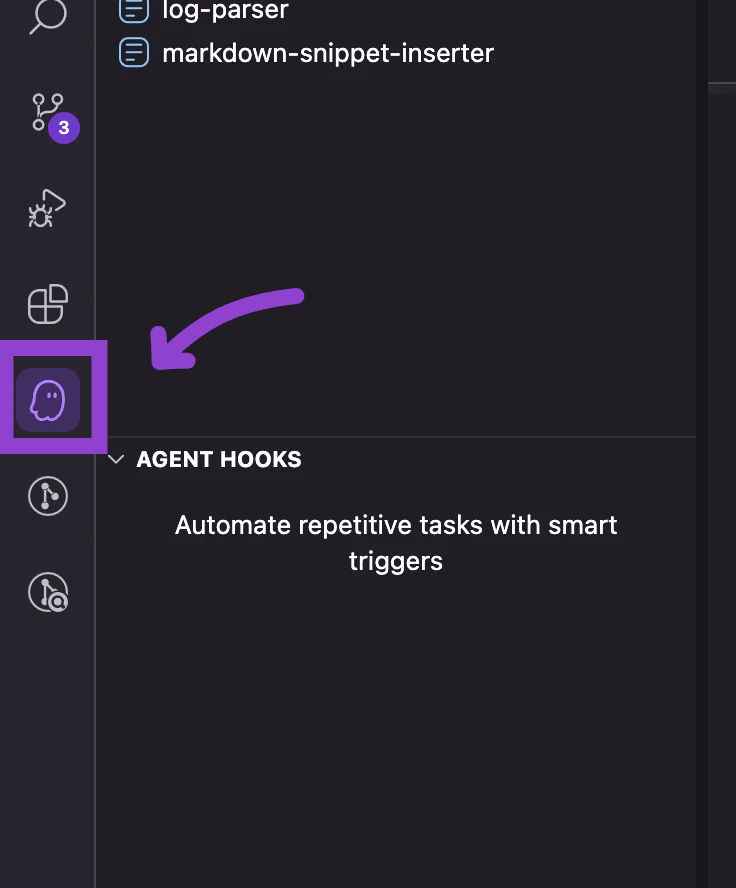
- Click the Kiro icon in the left panel.
- In the Kiro chat window, at the bottom, navigate to the MCP panel and click the Open MCP Config button.
-
On the mcp.json window click User Config
-
Below the uvx entry (the default kiro environment) please add the following and save:
"gitkraken": {
      "command": "gk",
      "args": ["mcp"],
      "env": {},
      "disabled": false,
      "autoApprove": []
    }
Your final json should look like the following:
{
  "mcpServers": {
    "fetch": {
      "command": "uvx",
      "args": ["mcp-server-fetch"],
      "env": {},
      "disabled": true,
      "autoApprove": []
    },
    "gitkraken": {
      "command": "gk",
      "args": ["mcp"],
      "env": {},
      "disabled": false,
      "autoApprove": []
    }
  }
}
JetBrains IntelliJ
To add the GitKraken MCP Server to JetBrains IntelliJ:
- Navigate to Settings > Tools > AI Assistant > Model Context Protocol (MCP).
- Click Add to create a new MCP server configuration.
- In the dialog, select As JSON from the dropdown.
- Paste the following configuration:
{
  "mcpServers": {
    "gitkraken": {
      "command": "gk",
      "args": ["mcp"]
    }
  }
}
Google Antigravity
To add the GitKraken MCP Server to Google Antigravity IDE:
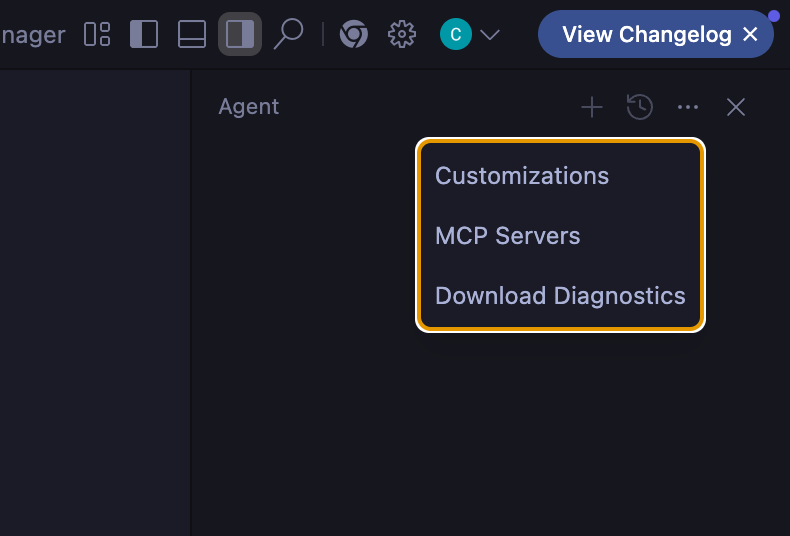
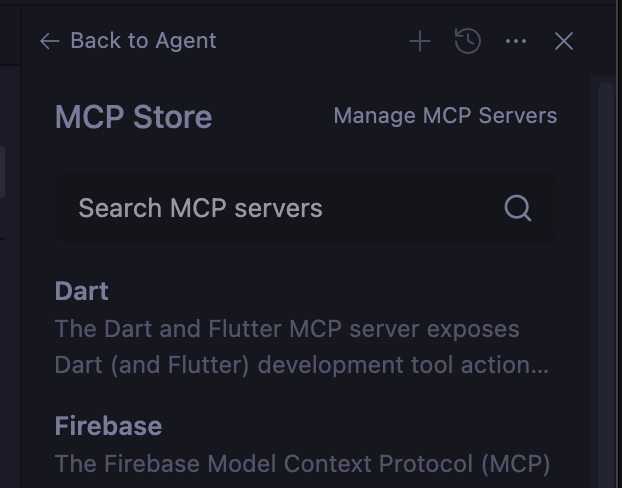
- Navigate to the agent pane, located to the right of the workspace, and click the ellipsis ….
- Select MCP Servers from the drop down.
- Remaining in the agent pane, click Manage MCP Servers.
- On the new Manage MCPs file window, in the middle pane, click View raw config.
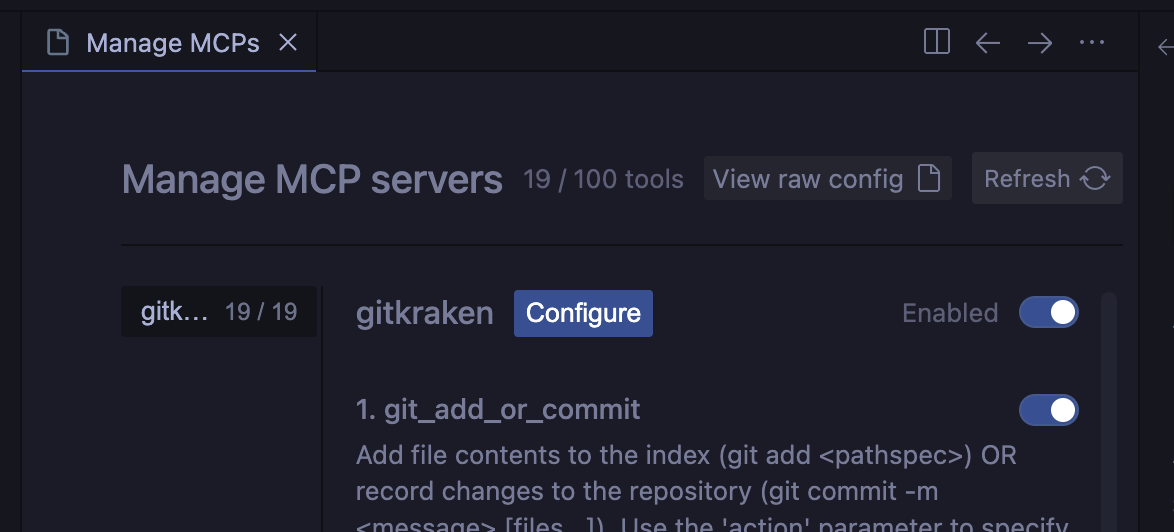
- Paste the following json to the config file.
{
  "mcpServers": {
    "gitkraken": {
      "command": "gk",
      "args": ["mcp"]
    }
  }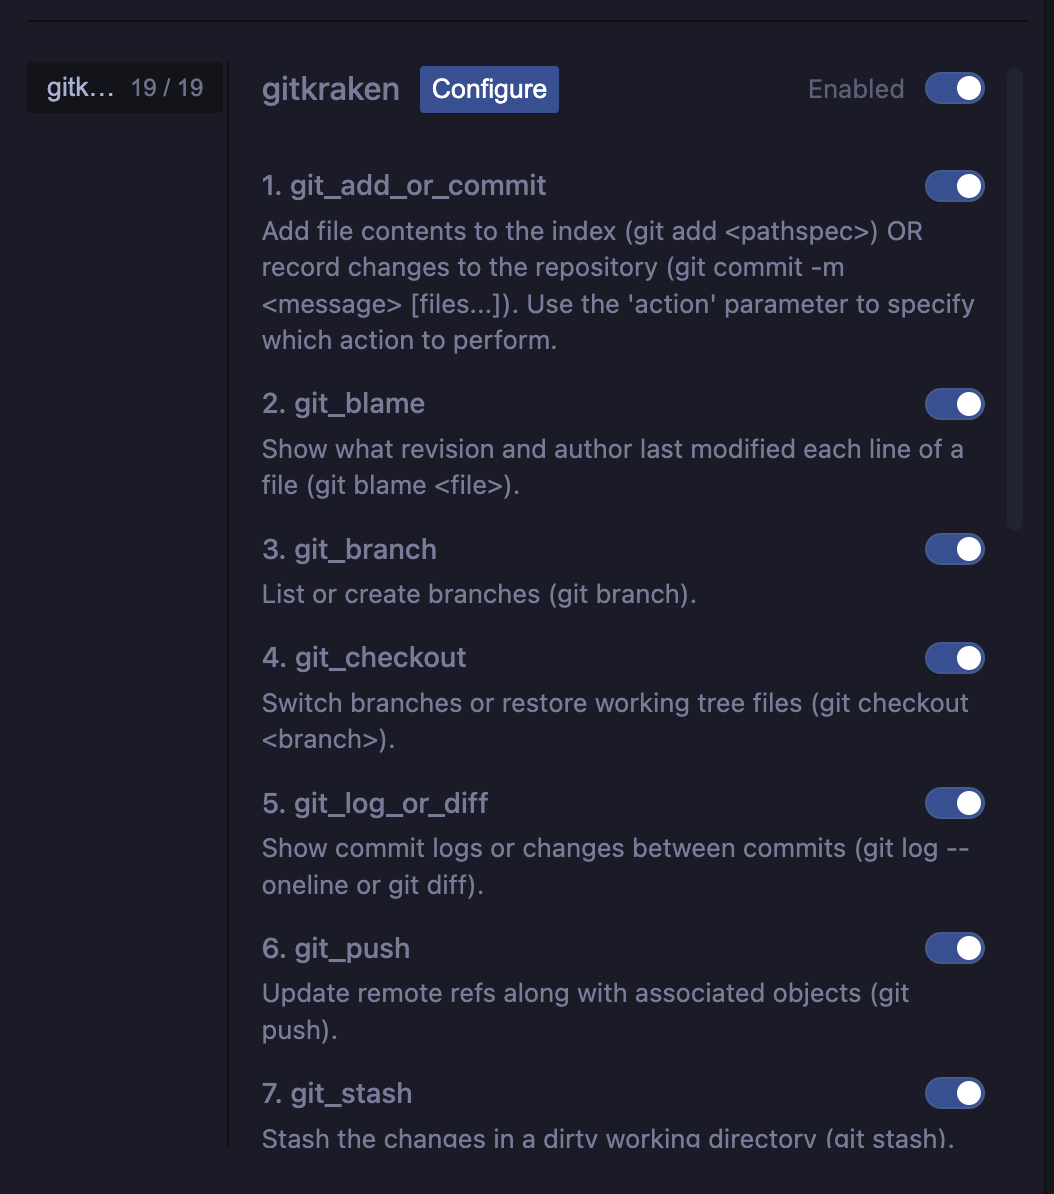
}- Verify the GitKraken MCP Tools are enabled.
Next Steps
After completing installation, visit our Example Workflows to see how the GitKraken MCP Server automates Git operations, issue tracking, and pull request workflows directly from your AI agent.
pre{position:relative;min-height:3.5em}
.copy-btn{position:absolute;top:8px;right:8px;padding:2px 8px;font-size:11px;font-family:sans-serif;background:rgba(128,128,128,.15);border:1px solid rgba(128,128,128,.25);border-radius:4px;cursor:pointer;color:#aaa;opacity:0;transition:opacity .15s,background .15s,color .15s;line-height:1.5;z-index:1}
pre:hover .copy-btn{opacity:1}
.copy-btn:hover{background:rgba(128,128,128,.3);color:#ddd}
.copy-btn.copied{color:#22c55e;border-color:rgba(34,197,94,.4)}
(function(){function cp(t){if(navigator.clipboard&&window.isSecureContext)return navigator.clipboard.writeText(t);var x=document.createElement(‘textarea’);x.value=t;x.style.cssText=’position:fixed;opacity:0′;document.body.appendChild(x);x.select();try{document.execCommand(‘copy’)}catch(e){}document.body.removeChild(x);return Promise.resolve()}function init(){document.querySelectorAll(‘pre’).forEach(function(p){if(p.querySelector(‘.copy-btn’))return;var b=document.createElement(‘button’);b.className=’copy-btn’;b.setAttribute(‘aria-label’,’Copy code’);b.textContent=’Copy’;p.appendChild(b);b.addEventListener(‘click’,function(){var el=p.querySelector(‘code’)||p;cp(el.innerText.replace(/n$/,”)).then(function(){b.textContent=’Copied!’;b.classList.add(‘copied’);setTimeout(function(){b.textContent=’Copy’;b.classList.remove(‘copied’)},2000)})})})}document.readyState===’loading’?document.addEventListener(‘DOMContentLoaded’,init):init()})()
