
Last updated: November 2026
This guide takes you from installing GitLens to using its core features on your own repository. Each step shows where to find a feature and what to try first, then links to the page that covers it in full.
For an overview of what GitLens is and what each feature does, see the GitLens Documentation.
Before You Begin
You need:
- Git installed on your machine
- Visual Studio Code, or a VS Code-based IDE such as Cursor, Windsurf, Trae, or Kiro
- A Git repository open in the editor
Features marked PRO in this guide require a GitLens Pro plan or a free 14-day Pro trial. The Commit Graph and Worktrees are free on public and local repositories, and inline blame, hovers, and Git CodeLens are free everywhere. GitLens Community vs. GitLens Pro compares the plans.
Step 1: Install GitLens
To install GitLens in VS Code:
- Open the Extensions view (
Ctrl+Shift+XorCmd+Shift+X). - Search for GitLens.
- Select GitLens by GitKraken, then select Install.
You can also select Install GitLens above to open the extension’s VS Code Marketplace listing.
To install GitLens in Cursor, Windsurf, Trae, or Kiro: open that IDE’s Extensions view, search for GitLens, and install it.
After installation, the GitLens icon appears in the Activity Bar. The first time GitLens starts, the Welcome view appears above the Commit Graph with a short walkthrough of the Commit Graph, AI features, Git blame, PR reviews, and MCP. Its content adapts to your plan, so it is a good place to see what you have access to.
Step 2: Sign In and Connect Your Git Host
You can use the Commit Graph, inline blame, and hovers without an account. Sign in when you want to start a Pro trial or connect integrations.
Sign In to GitKraken
- Open the Command Palette (
Ctrl+Shift+PorCmd+Shift+P). - Run GitLens: Sign In to GitKraken….
- Sign in, or create an account with GitHub, GitLab, Bitbucket, Azure DevOps, Google, email, or SSO.
To try Pro features, start your free 14-day trial. The GitKraken Account page covers account creation and management.
Connect an Integration
Connecting your code host lets GitLens show pull requests beside your branches and commits. It is also required for Launchpad and Code Suggest.
- Open the Command Palette and run GitLens: Manage Integrations.
- Select Connect for your provider.
- Follow the prompts to authorize GitLens, then return to your IDE.
You can also manage integrations from your GitKraken integration settings.
GitLens integrates with GitHub, GitLab, Bitbucket, Azure DevOps, Jira, and Linear. The Jira integration and self-hosted GitHub Enterprise Server and GitLab Self-Managed integrations require Pro. See GitLens Integrations for provider-specific steps.
Step 3: Open the Commit Graph
The Commit Graph is where most work in GitLens starts. It shows your branches, commits, working changes, and worktrees in one view, and every row has actions you can run directly.
To open the Commit Graph:
- Click the GitLens icon in the Activity Bar. The Commit Graph is the first view in the GitLens sidebar, or
- Open the Command Palette and run GitLens: Show Commit Graph
Open the Commit Graph in GitLens
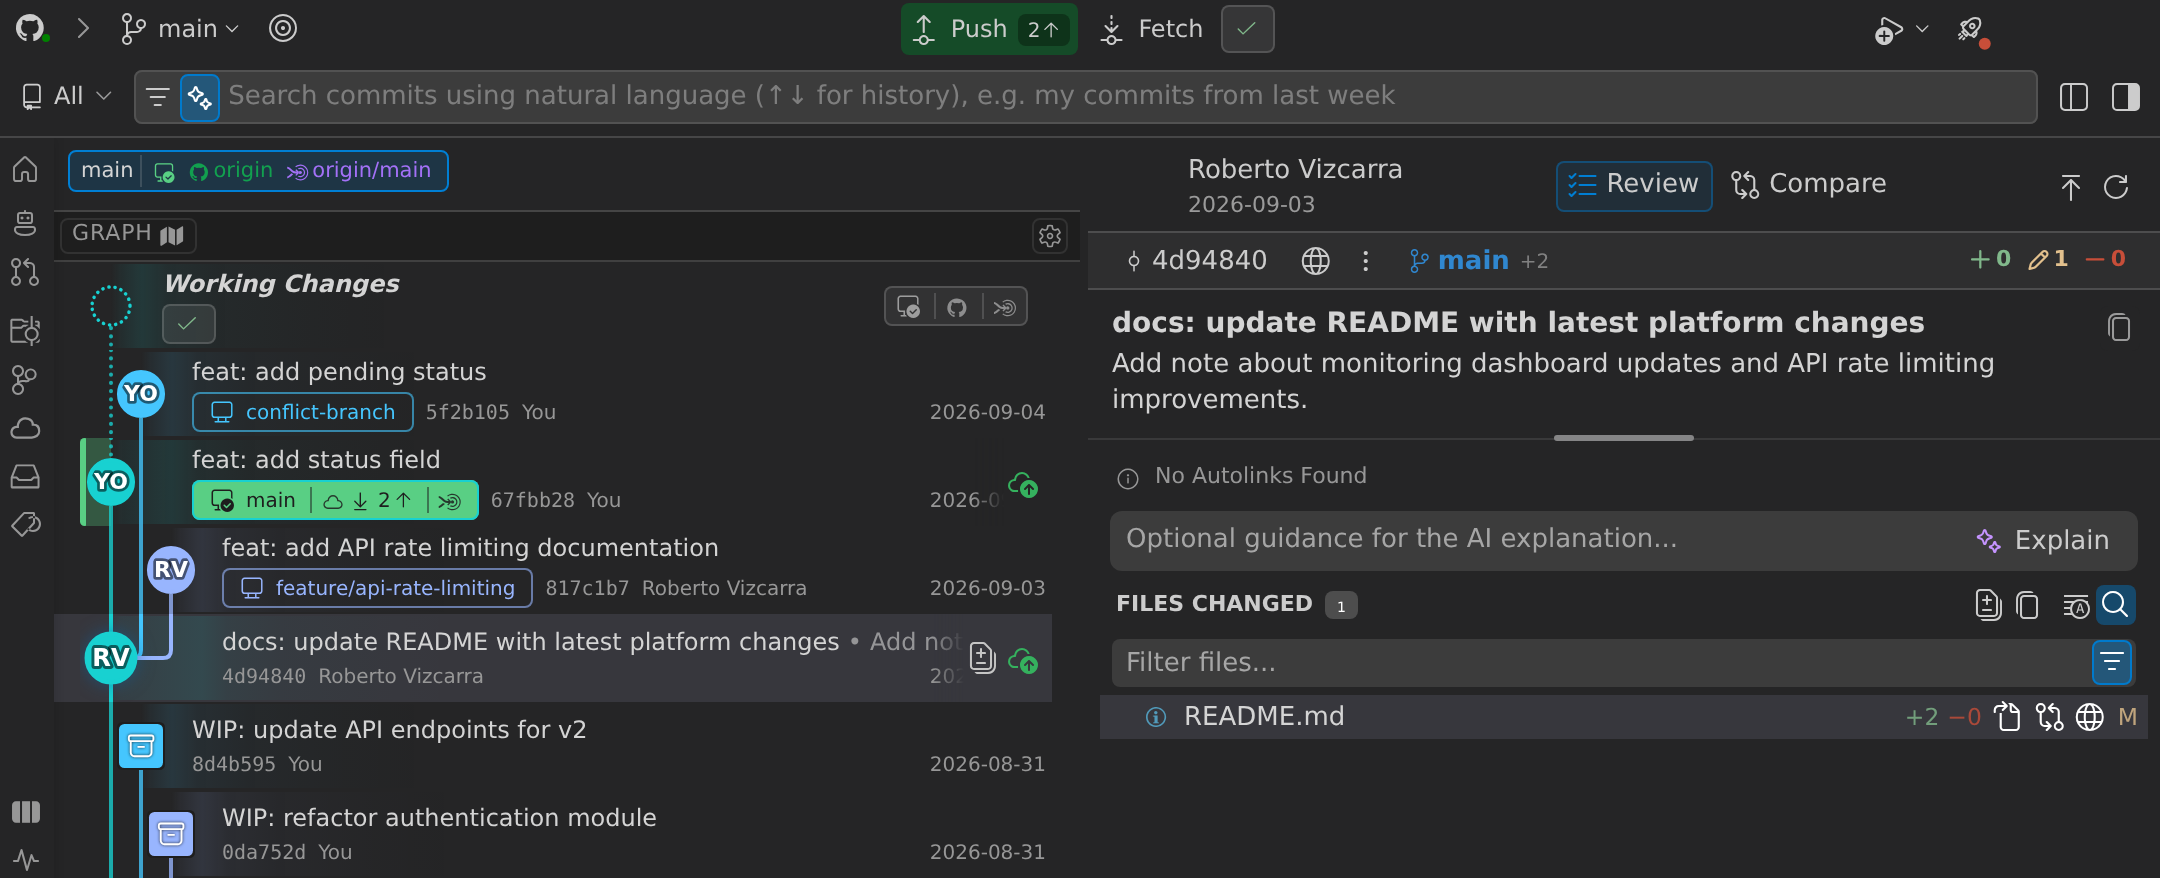
Try this:
- Select a commit. The details panel opens with the commit message, author, and changed files.
- Select the Working Changes row at the top of the graph to see your uncommitted changes.
- Right-click a branch or commit to see the actions you can take, such as merge, rebase, and cherry-pick.
- In the search bar, type
@meto find your own commits, or use a filter such asmessage:fixorfile:README.md. PressF3(Cmd+Gon macOS) to move to the next result.
To use a larger view, open the More Actions (⋯) menu on the Commit Graph and choose Prefer Commit Graph in Editor.
See GitLens Commit Graph for layout options, every search filter, and the full list of actions.
Step 4: Explore Code History in the Editor
Inline blame, hovers, and Git CodeLens are on by default and free for all repositories.
Try this:
- Open any file in your repository and place the cursor on a line. The inline blame annotation at the end of the line shows who last changed it, when, and the commit message.
- Hover over the annotation to see full commit details, the associated pull request, and actions such as opening the previous revision or showing the commit in the Commit Graph.
- Look above functions and at the top of the file for Git CodeLens, which shows the most recent change and the number of authors. Select it to open more history actions.
- To see everything about one commit, open the Command Palette and run GitLens: Show Inspect View. The Commit Details tab updates as you move through the file.
Open the Inspect View in GitLens
To turn these annotations off, run GitLens: Toggle Line Blame Annotations or GitLens: Toggle Git CodeLens (Shift+Alt+B).
See Current Line Blame, Hovers, and GitLens Inspect for customization options, and GitLens Visual File History for a timeline of how a file changed.
Step 5: Review Pull Requests
Open Launchpad PRO
This feature is only available for Pro subscription tiers or higher and requires a connected integration. See Launchpad availability for supported Git hosts.
Launchpad lists the pull requests you are involved in, grouped by what needs to happen next.
- Open the Command Palette and run GitLens: Open Launchpad, or select Pull Request in the status bar.
- Find a pull request under Needs your review.
- Select it to view its details, open it in a browser, or switch to its branch or a worktree.
To start a guided review instead, run GitLens: Start Review. It walks you through selecting a pull request, choosing whether to check out its branch or create a worktree, and optionally opening an AI chat with a review prompt. See Start Review.
The Launchpad page covers pinning, snoozing, and every status group.
Open the Worktrees View
The Community plan supports only public and local repositories.
Worktrees let you check out several branches at once, so you can review a pull request without stashing or committing the work in progress on your current branch. When you open a pull request in a worktree from Launchpad, GitLens creates the worktree for you. Each worktree then gets its own Working Changes row in the Commit Graph.
Open the Worktrees View in GitLens
See GitLens Worktrees to create and manage worktrees.
Step 6: Review and Commit Your Changes with AI
Once you have working changes, you can review them and turn them into clean commits from the Commit Graph details panel. Both workflows use GitKraken AI.
Run an AI Review PRO
- Open the Commit Graph.
- Select the Working Changes row or a commit.
- Open the details panel, then switch to Review mode.
GitLens returns a review summary, suggested focus areas, and findings tagged by severity, so you can fix issues before you commit or open a pull request.
Open the Commit Graph in Review mode
See Run AI Code Review in the Commit Graph for details, and AI Review for custom review instructions and plan requirements.
Compose Commits PRO
- Open the Commit Graph and select the Working Changes row.
- Open the details panel, then switch to Compose mode.
- Review the proposed commit groupings and edit any generated commit message.
- Commit the changes.
Open the Commit Graph in Compose mode
See Commit Composer for other ways to open it, and GitKraken AI Features in GitLens for AI commit messages, AI rebase, and other AI features.
Track Coding Agent Sessions PRO
If you use a supported coding agent such as Claude Code, install its hooks so GitLens can show the agent’s sessions in the Commit Graph. Select the integration prompt in the Commit Graph header, or run GitLens: Install GitKraken Hooks for All AI Agents from the Command Palette. Sessions then appear with their status in the Commit Graph and in the Agent Sessions panel.
See AI Agents in GitLens for setup and the list of supported agents.
Step 7: Share Work with Your Team
You can share changes without pushing a branch, and suggest edits on a pull request, even on files the pull request did not change.
Share a Cloud Patch PRO
This feature is only available for Pro subscription tiers or higher.
- Make and save changes to any file.
- Open the Command Palette and run GitLens: Share as Cloud Patch…. You can also choose Share as Cloud Patch from the Share submenu on working changes, commits, stashes, and comparisons in GitLens views.
- Choose who can open it: Anyone with the link, Anyone in my org, or Only collaborators.
Open the Cloud Patches View in GitLens
See GitLens Cloud Patches to apply and manage patches.
Suggest Changes on a Pull Request PRO
This feature is only available for Pro subscription tiers or higher and is supported only for repositories on GitHub.com.
- Check out a branch with an open pull request.
- Open the Command Palette, run GitLens: Show Inspect View, and open the Overview tab.
- Select Start Review for PR #, then make and save your proposed changes.
- Select Suggest Changes for PR, add a title, and select Create Code Suggestion.
The pull request owner can then review, apply, and commit your suggestions. See GitLens Code Suggest.
Step 8: Link Commits to Your Issues
With an integration connected in Step 2, GitLens turns issue and pull request references in commit messages into links automatically. For example, a connected Jira integration turns issue keys such as ABC-123 into links.
For trackers without an integration, such as Zendesk or an internal tool, add a custom autolink with the gitlens.autolinks setting. Each autolink matches a prefix and builds a URL from the reference:
"gitlens.autolinks": [
    { "prefix": "JIRA-", "url": "https://jira.company.com/issue?query=<num>" }
]
See Autolinks for all options.
Next Steps
You have now used the main parts of GitLens. To put them together into complete tasks, follow one of the end-to-end workflow guides listed on the GitLens Documentation, such as Manage Parallel Development from the Commit Graph.
If something doesn’t work as expected, see GitLens Troubleshooting or the other help resources on the GitLens Documentation.
