
Administer your Organization, Users, Teams, Subscription, and security controls on gitkraken.dev.
GitKraken Account
Your GitKraken account is your key to unlock the most personal experience across GitKraken products.
Login
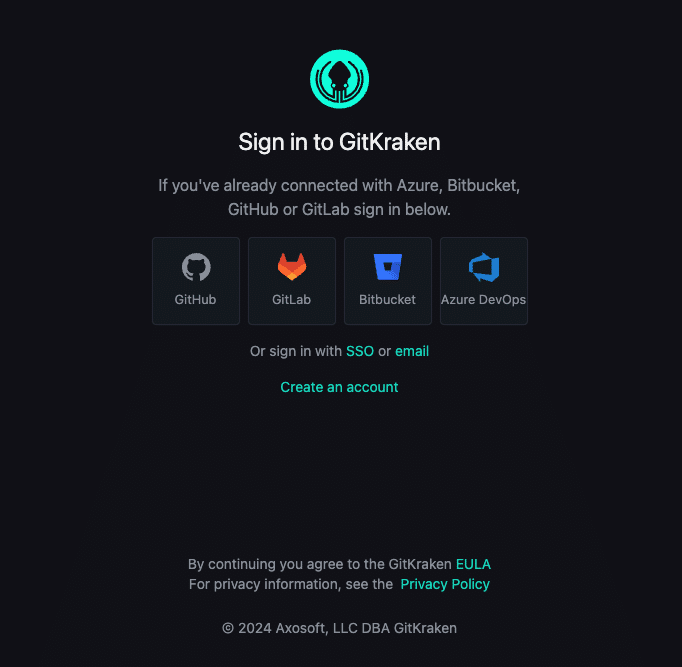
You can create your GitKraken account at gitkraken.dev or GitKraken Desktop. When presented with the login page, you may need to select “Create an account” before selecting how you would like to create your GitKraken account. There are seven options available to create your GitKraken account and login. You can choose your preferred hosting service (GitHub, GitLab, Bitbucket, and Azure DevOps), login with email, Google, or SSO.
Once you have created your GitKraken account, your account is tied to the primary email address of whichever method you selected. If you use the “Sign up with Email” method, you will need to verify your email address with a link sent to your email.
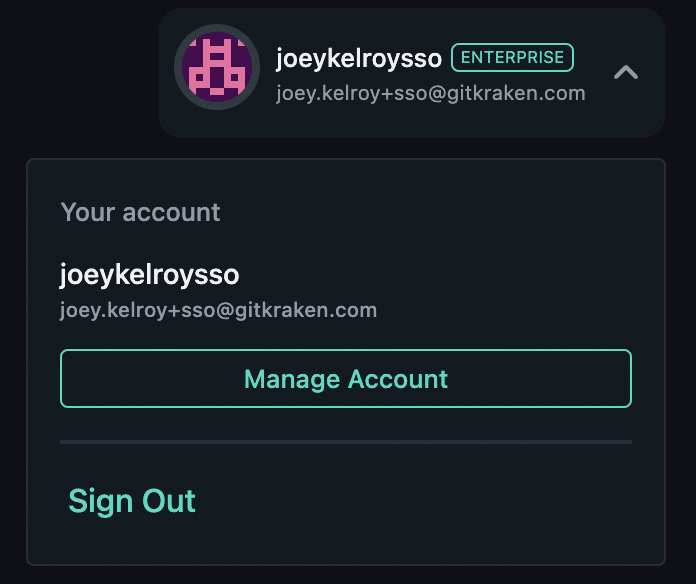
Manage Account
Manage Account can be accessed from the dropdown in the top right to do things like personalize your account, start a multi-user trial, set up SSO and transfer the organization ownership.
Users
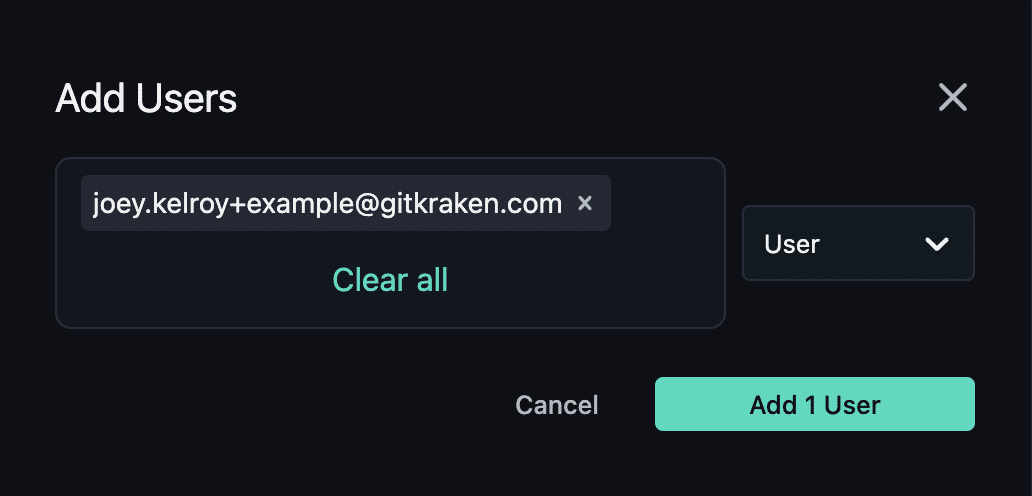
To add someone to your organization select “Users” and then “Add Users”. Here you can enter as many email addresses as you want and the role (in the drop down) you would like to assign them all.
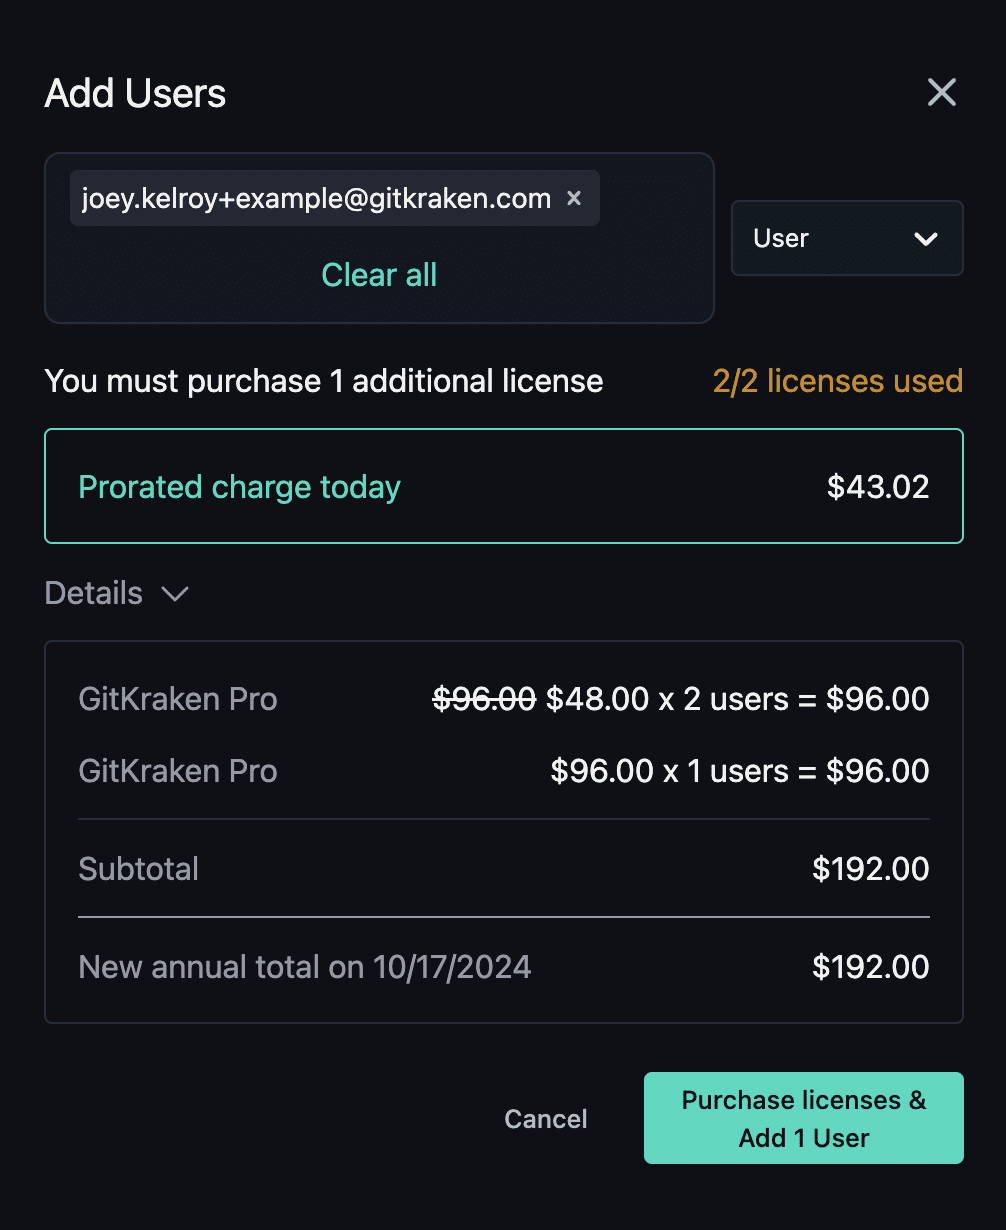
Only members that have a role with permission can add users to an organization. When you do add someone, it will consume a license of your subscription. If all available licenses are consumed when adding a user, a billing summary will show up during the process, select “Purchase licenses & Add X User(s)” to complete the transaction and add the users.
Inviting Users to Your Organization
As a User, you have the ability to invite other users to the organization for an Owner, Admin, or Billing Contact to approve and/or purchase a license for.
To invite a user, navigate to gitkraken.dev > Users > Invite Users. Then provide the email(s) of the desired user(s).

This will send an email to any Owner, Admin, or Billing Contact to review the invited user. They can select Review on the email or see the invitees from gitkraken.dev > Users > Review. Here, they can Approve or Deny the user. If your organization is at its user limit, you will be prompted to purchase an additional license when approving.

Reallocate Licenses
Any Owner, Admin, or Billing Contact may remove users and then add users to reallocate licenses.
The Billing Contact role cannot remove or edit Owner or Admin users.
To reallocate a license, navigate to Users and then select “Remove” for the desired user. Then, you can add the new user.
Roles
Roles grant members permissions within an organization. There are four roles a user may have:
- Owner: there must be exactly one owner per organization. Owners have full permission and consume a license.
- Admin: Admins have full permissions and consume a license. Admins cannot remove or edit the owner.
- User: Users have no administrative permissions but do consume a license.
- Billing Contact: Billing Contacts have the same permissions as admins, except they do not consume a license.
| Permission | Owner | Admin | User | Billing Contact |
|---|---|---|---|---|
| Licensed to use GitKraken | ✅ | ✅ | ✅ | |
| Add, edit, and remove users | ✅ | ✅ | ✅ | |
| Create and manage teams | ✅ | ✅ | ✅ | |
| Manage billing and purchase licenses | ✅ | ✅ | ✅ | |
| Transfer ownership of the organization | ✅ |
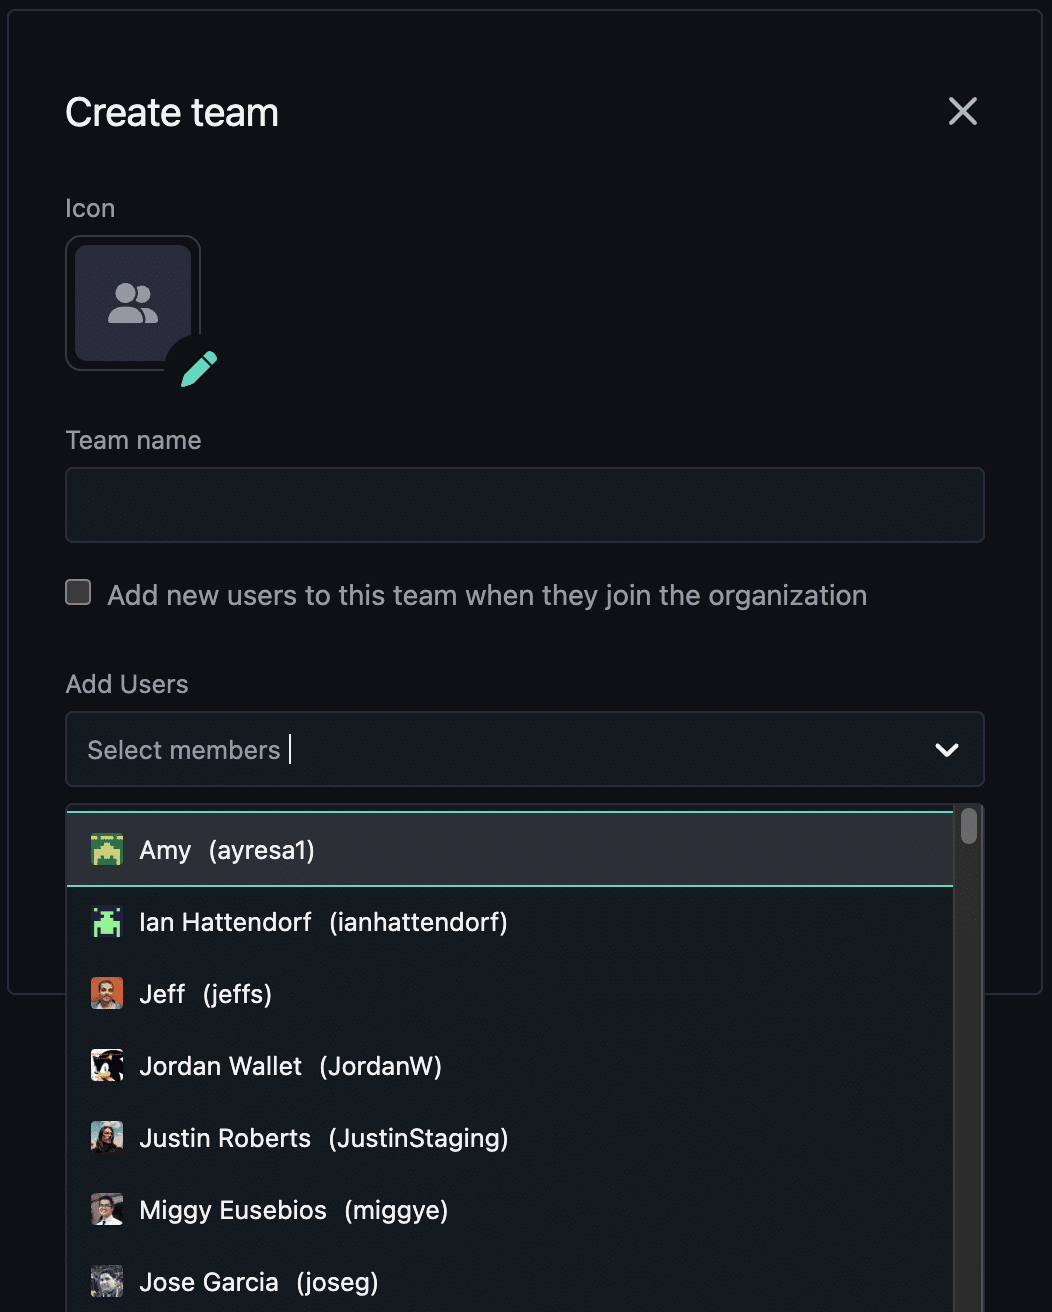
Teams
Teams are the best way to organize members of your GitKraken organization. In addition, teams are offered for a variety of collaborative features like Shared Workspaces, Cloud patches, Code Suggest, and more to come.
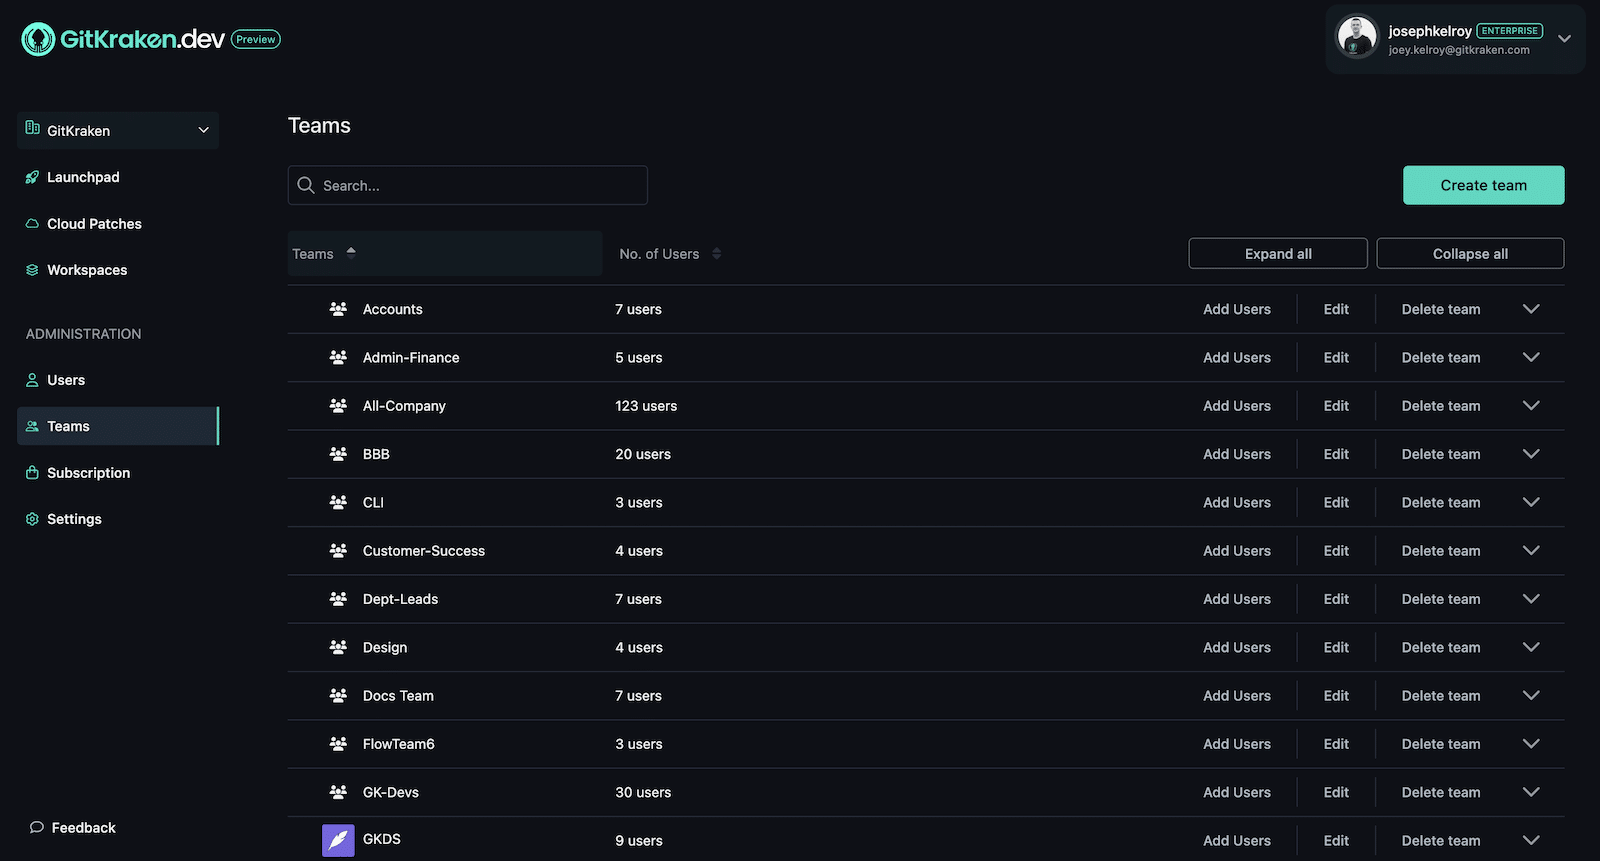
To create a Team, select Create team, provide a name, and select the desired users.
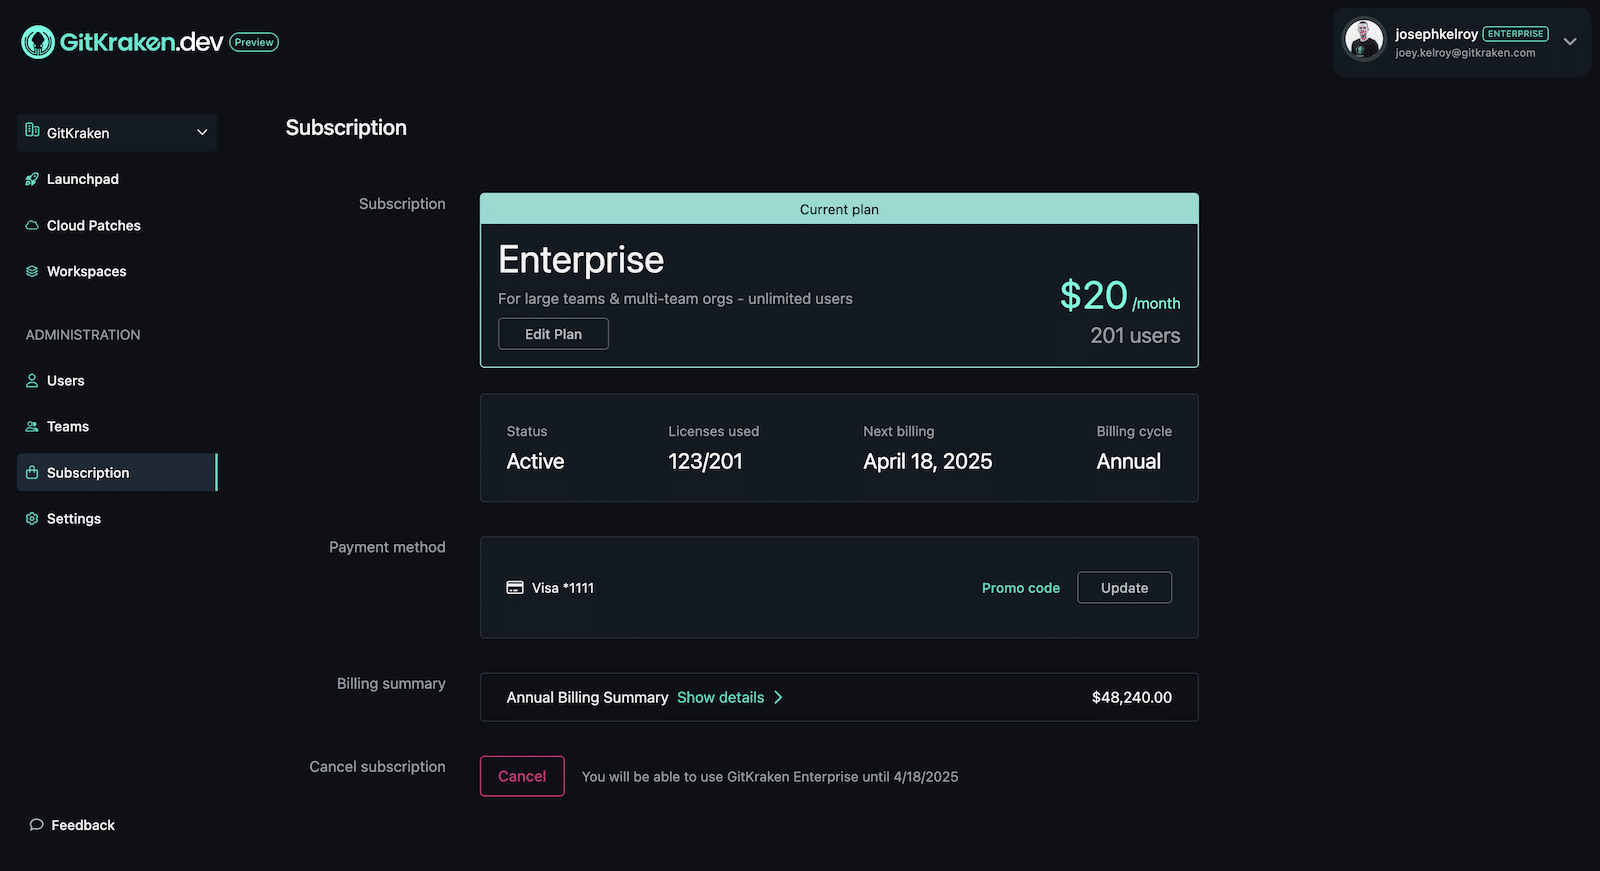
Subscription
Subscriptions are tied directly to an organization, even if the subscription is for one user. The subscription is identical for everyone in the organization and one license is required for every member (unless their role does not use a license).
How to Purchase
To purchase a subscription for the first time follow these steps:
- Visit gitkraken.dev/purchase-subscription.
- Login with your GitKraken account or create an account.
- Select the tier that is best for your organization (Pro, Teams, or Enterprise) and the number of User Seats (one for each member of the organization that will be using the product). There are links at the bottom of each while can further elaborate on the differences.
- Provide an Organization name, First Name, Last name, and Country. You can also provide a promo code if you have one.
- Fill out or select the desired payment method.
- Select the “Review your order Purchase” button to complete your transaction.
- If you added more licenses than there are members in the organization to claim, you will be taken to the “Add Users” screen.
If you encounter trouble while purchasing and you have verified your payment method, please don’t hesitate to contact us for support.
Manage
If you have an existing subscription you can manage it from gitkraken.dev/subscription. This is where you can view, manage, and edit the subscription.
Cancel
You can cancel your subscription at any time. To do so, login to gitkraken.dev, select “Subscription” on the left side, and select “Cancel.” Follow the flow to complete cancellation. Once canceled, you will keep your subscription for the remainder of its billing period. Once the period is up, everyone in the organization will lose access to the subscription.
When your subscription is set to cancel but you can still use it, your organization will be labeled as “non-renewing.” When your subscription is completely canceled and the billing period has passed, it will be labeled as “canceled.”
Only the owner, admins, and billing contacts have permission to cancel.
Reactivation
You can always reactivate a canceled subscription. You can reactivate by logging into gitkraken.dev, select “Subscription” on the left side, and select “Keep GitKraken.”
Edit Billing
To update your billing method, go to gitkraken.dev, select “Subscription” on the left side, and click Update. From here you may select to update your existing payment method or switch between payment methods.
Billing History
Each billing cycle, the owner and billing contacts of the organization will receive an email with the receipt attached. If you would like to receive prior receipts, please contact accounting for additional copies.
Settings
Integrations
To begin working with the Launchpad and Workspaces, start by connecting an integration from https://gitkraken.dev/settings/integrations. To connect an integration, select the desired integration under Add Integration.
- For Cloud integrations: Log in to the desired account and then approve access for GitKraken.
- For Self-Hosted/Server integrations: Fill out Host Domain, select
Generate a token on {service}– this will open the service on the PAT creation page with the required scopes – fill out the PAT and then selectConnect.
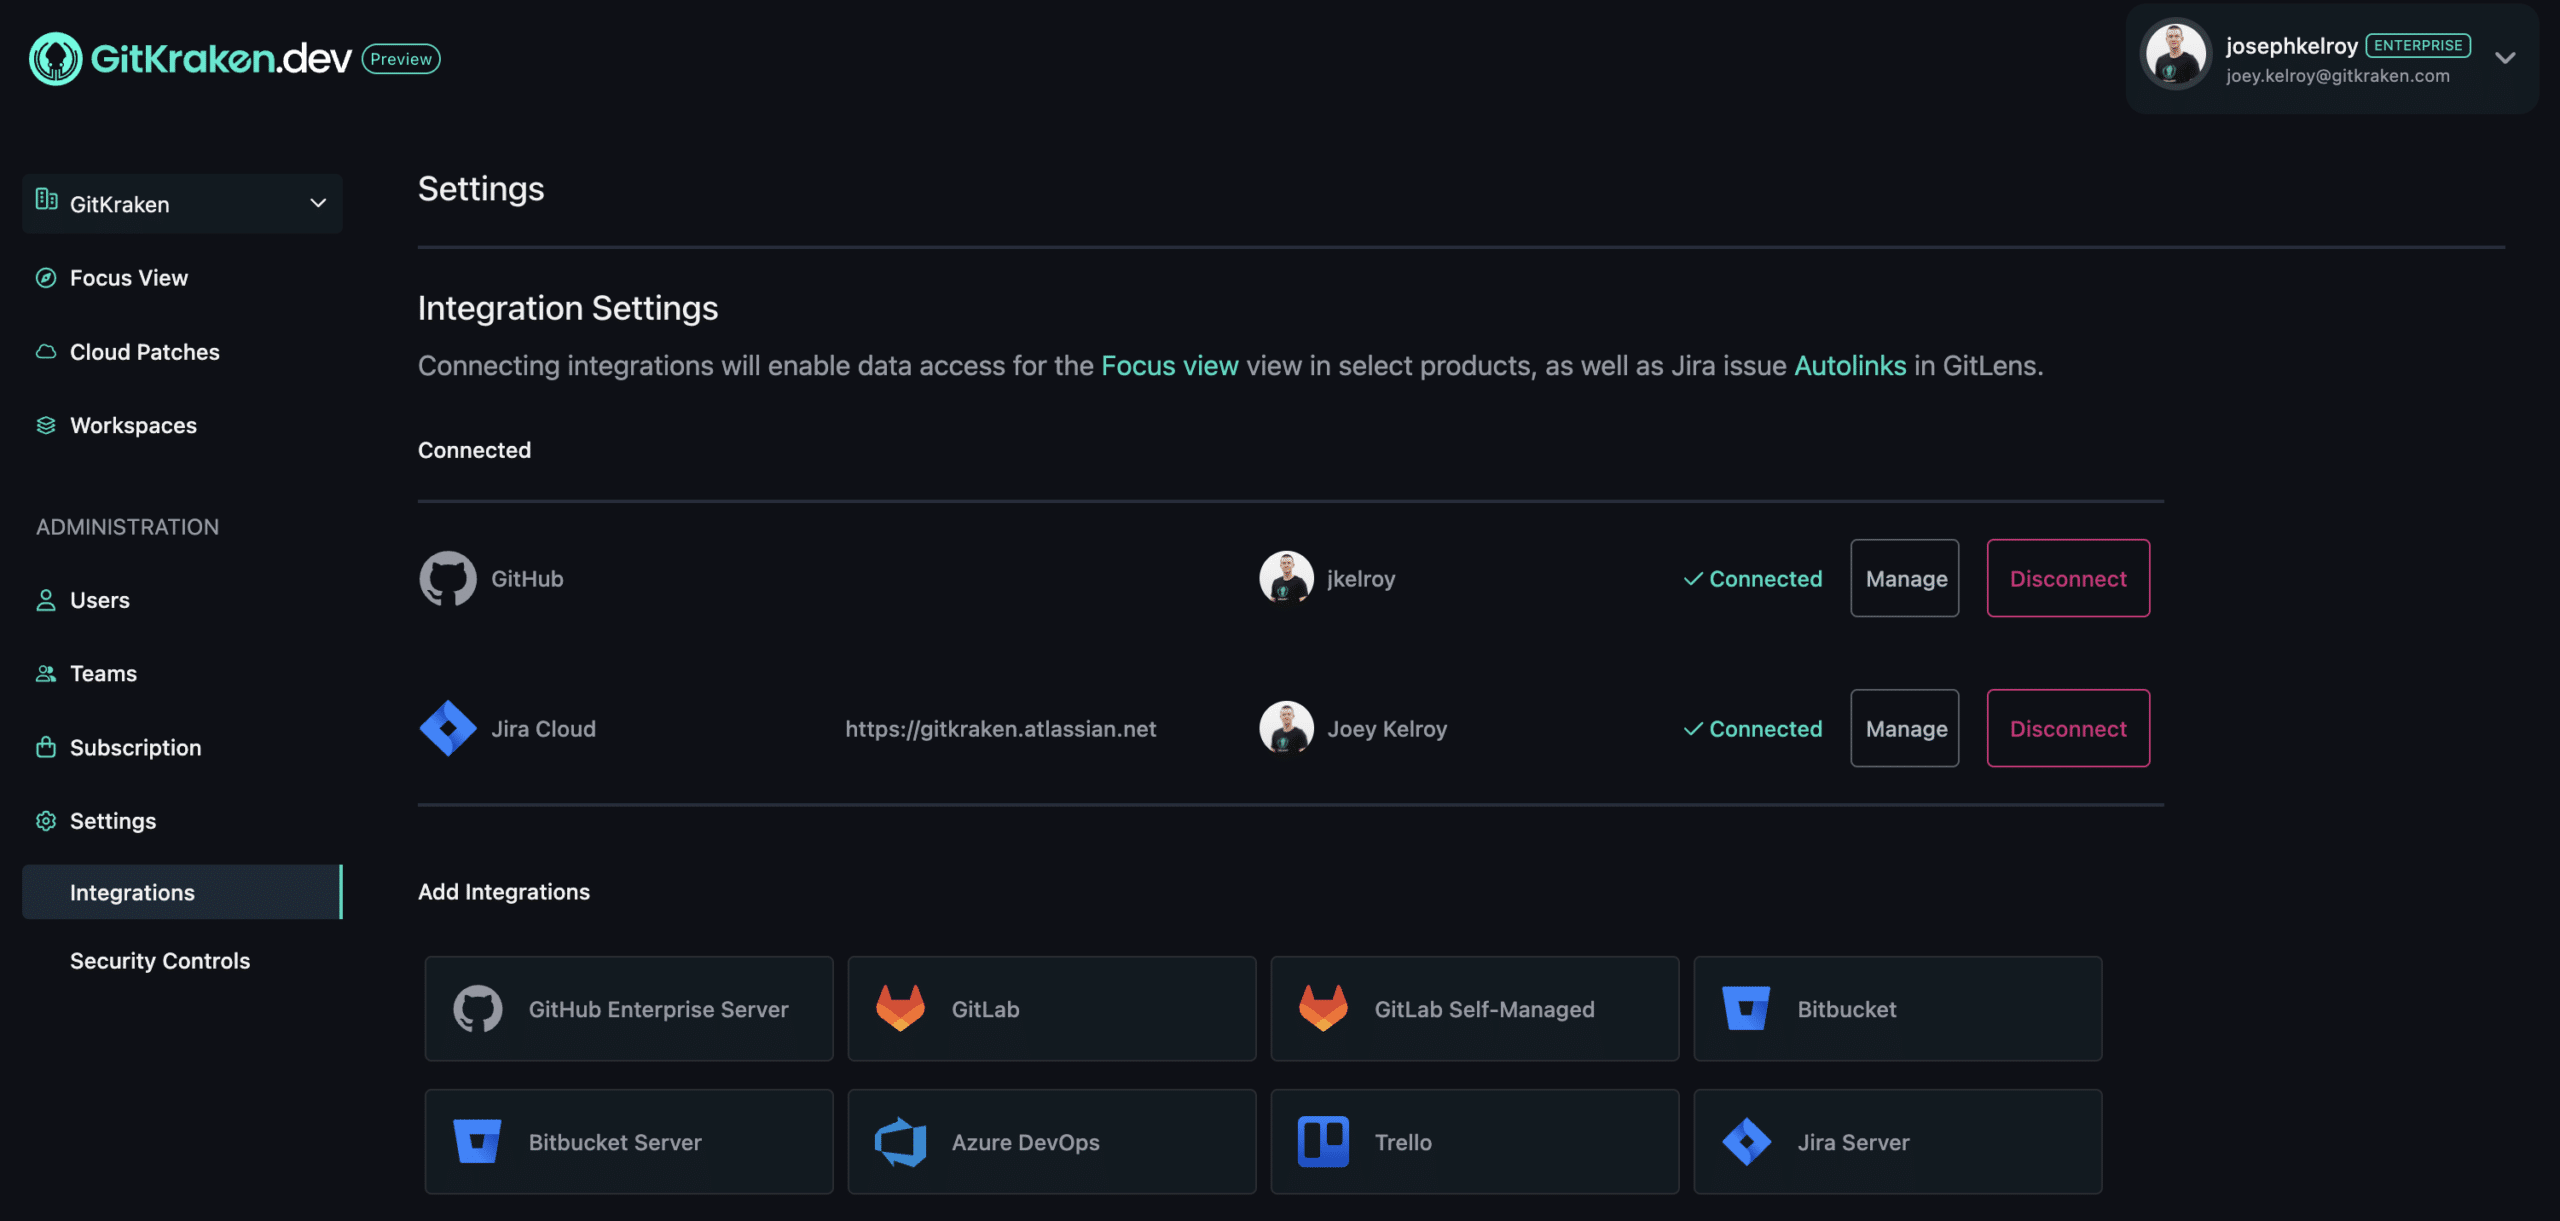
Note for GitHub.com: In order to work with repositories owned by a GitHub organization, the organization will need to allow Organization Approval for GitKraken.
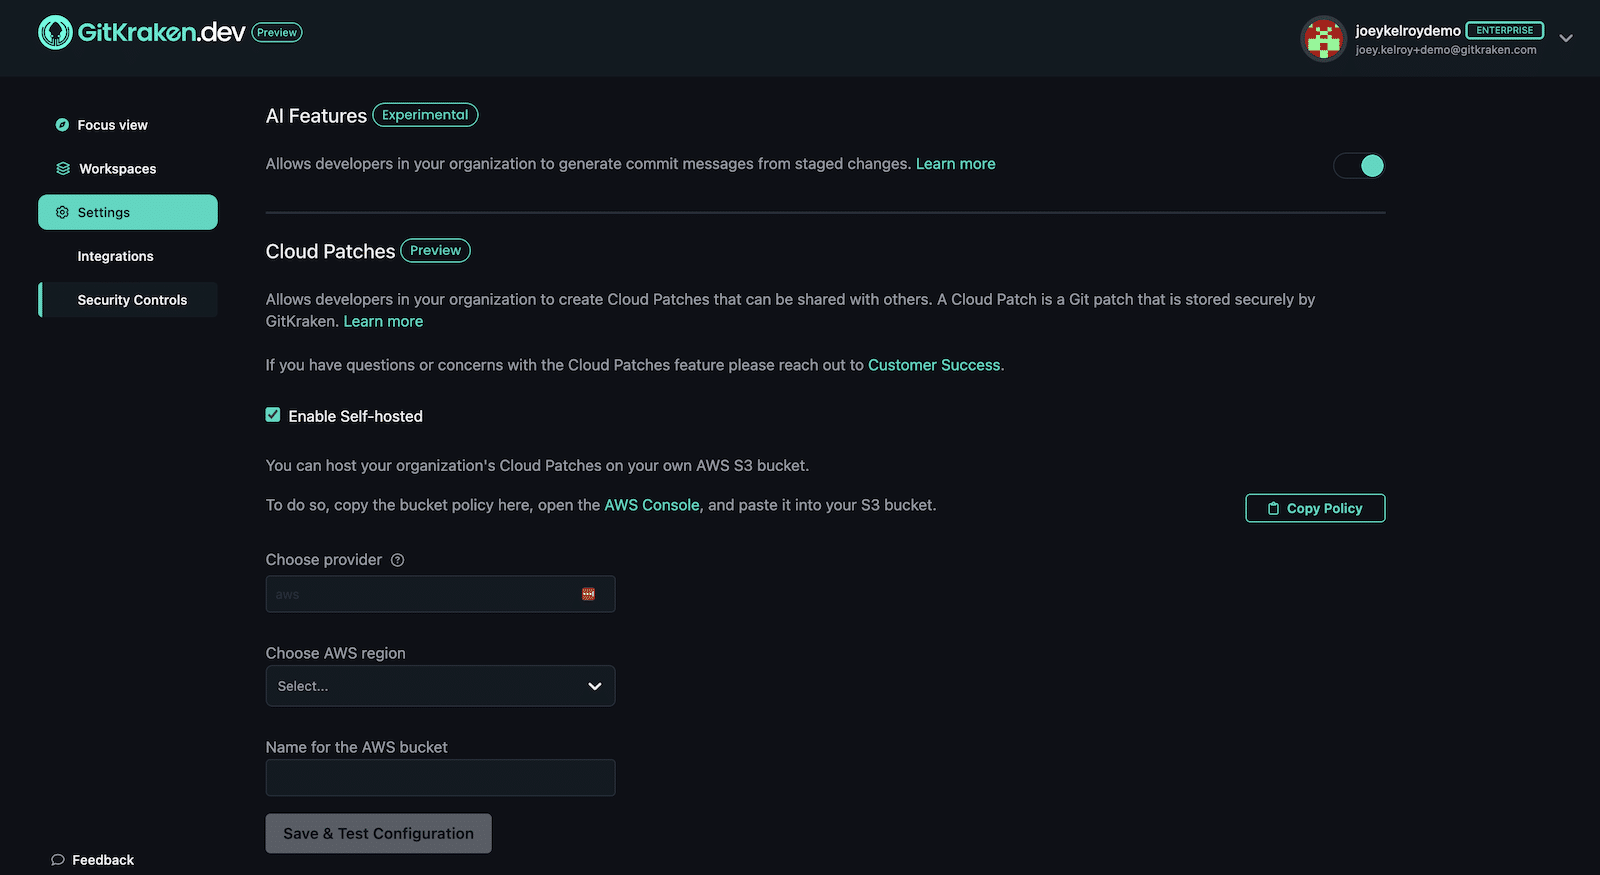
Security Controls
AI features
The GitKraken suite includes a lineup of AI features that are intended to speed up your workflow. These features require sending some of your code to an AI hosted on the cloud such as ChatGPT. If you are concerned that AI features do not comply with your company’s data security, you can disable AI features for everyone in your organization. Please note that changing this setting requires you to have the role owner, admin, or billing contact on a Teams or Enterprise plan.
Cloud Patches
Allow developers in your organization to create Cloud Patches that can be shared with others. A Cloud Patch is a Git patch that is stored securely by GitKraken. If you are concerned that Cloud Patches do not comply with your company’s data security, you can set up self-hosted Cloud Patches for your organization. If this is not an option for you, please contact our customer success team.
Self-hosted
You can host your organization’s Cloud Patches on your own AWS S3 bucket. To do so login to https://gitkraken.dev/settings/security, copy the bucket policy by clicking “Copy policy.” Open the AWS Console and navigate to the S3 service. From there, click on the bucket you want to store Cloud Patches. Click the “Permissions” tab and look for the “Bucket policy” section. Click the “Edit” button and paste the bucket policy into the text box. Rename CUSTOMER_BUCKET_NAME with the name of your bucket. Finally, click “Save changes” and return to https://gitkraken.dev/settings/security to test your bucket.
Please note to setup self-hosted Cloud Patches require you to have the role owner, admin, or billing contact on an Enterprise plan.
Organization
Your GitKraken organization name can be renamed at any time by an Owner, Admin, or Billing Contact. To rename an organization, navigate to Settings, Organization, update the Organization Name, and then select save.
