
Last updated: March 2026
Use GitKraken.dev Automations to create rule-based workflows that trigger actions when pull requests and issues match specific conditions. Automations help you streamline collaboration and enforce consistency across teams.
This feature is only available on Advanced or higher plans. See pricing options.
Quick Start
To create an automation:
- Sign in at gitkraken.dev and select Automations from the left sidebar.
- Click + Create Automation, enter a name, select a Git provider, and choose a target repository. This installs a webhook on the repository.
- Under Conditions, add one or more triggers: pull request content, review status, branch, CI/CD outcome, file path, or GitKraken AI analysis.
- Set the condition logic to All or Any.
- Under Actions, configure the response: notify users, add or remove reviewers or assignees, post a comment, apply a label, close the PR, or add checklist items.
- Save and enable the automation.
From the Automations list view, automations can be enabled, disabled, duplicated, or deleted individually.
When to use automations
Here are a few ways teams are using Automations to reduce manual effort and create scalable workflows:
- Safe deployments: Add a checklist for database migrations.
- Critical code reviews: Assign reviewers to high-impact areas like payments.
- Security checks: Flag sensitive changes (e.g., auth) for review.
- Refactoring guardrails: Prevent conflicts and schedule follow-ups.
- SOC 2 compliance: Automate tasks for encryption and security checks.
- DevOps enhancements: Enforce quality checks and automate infrastructure changes.
Note: Automations currently supports cloud integrations. Self-hosted support will be added in a future update.
Get started with automations
Log in at gitkraken.dev and select Automations in the left menu. If it’s your first time, you’ll see the get started page with the option to create a new automation or use a suggested template.
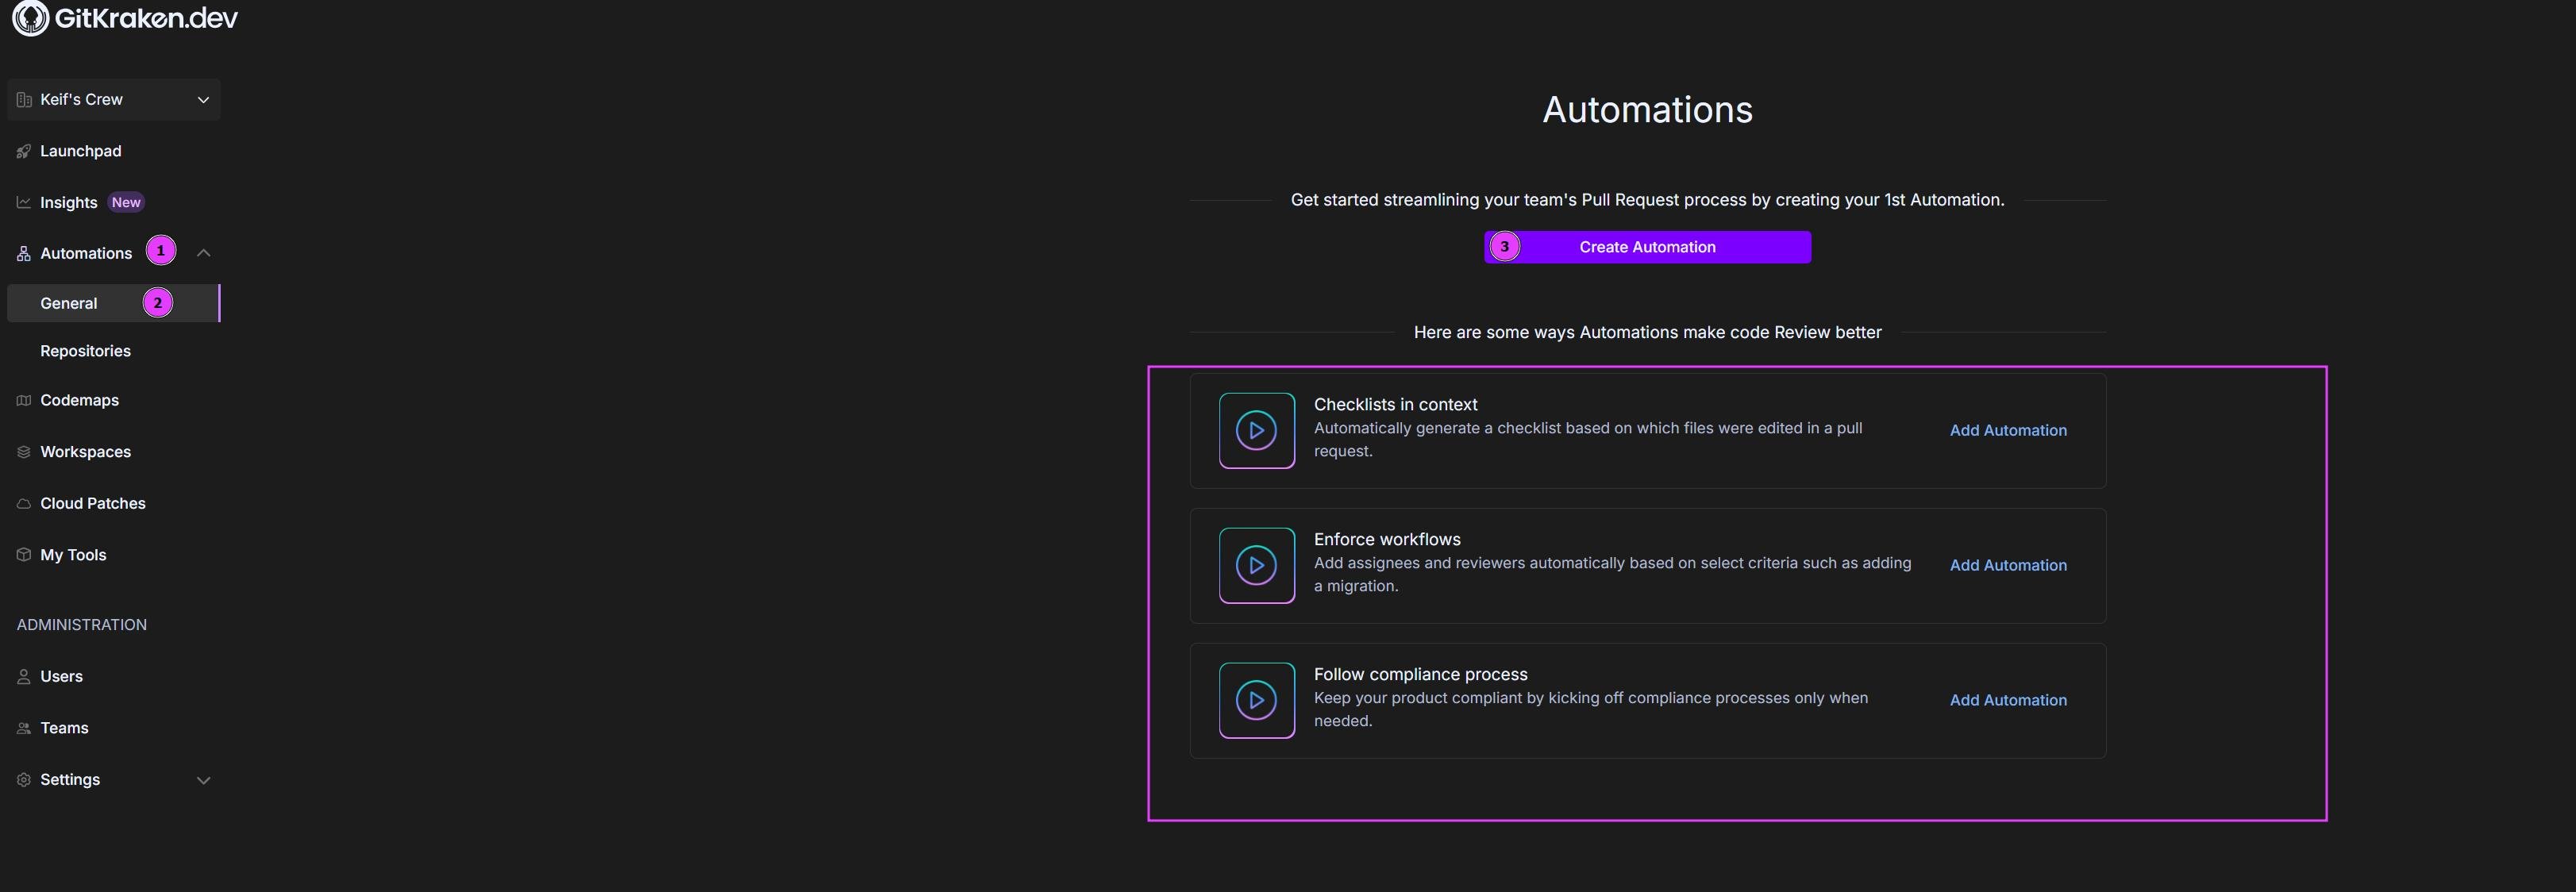
Create an automation
Click .
- Name your automation.
- Choose from the Provider dropdown.
- Pick the target repository.
- (Optional) Enable for draft pull requests by checking the box.
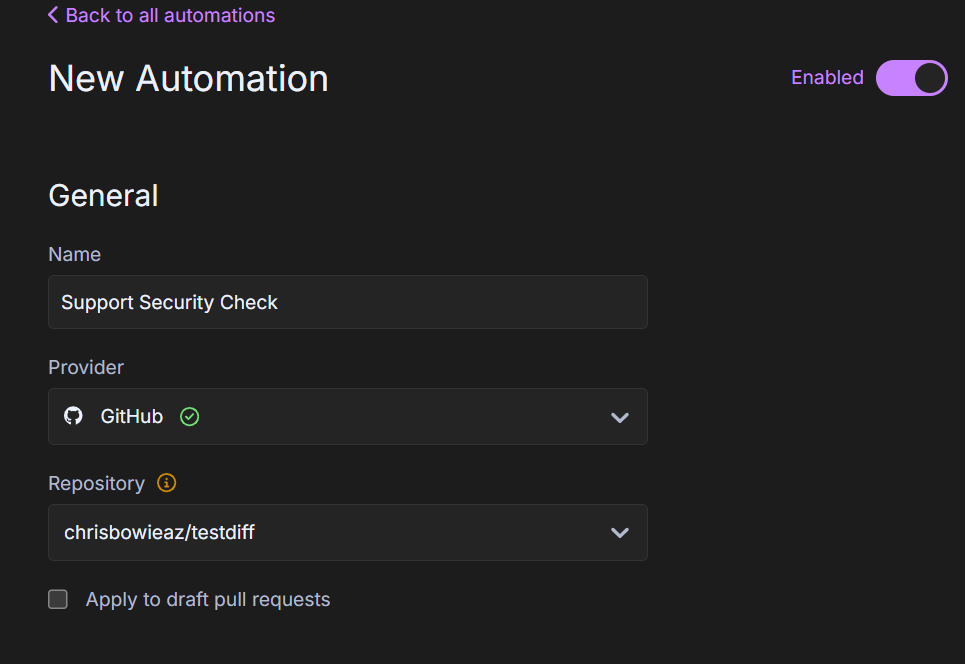
Note: Creating an automation sets up a webhook on the repository. You’ll need the appropriate permissions.
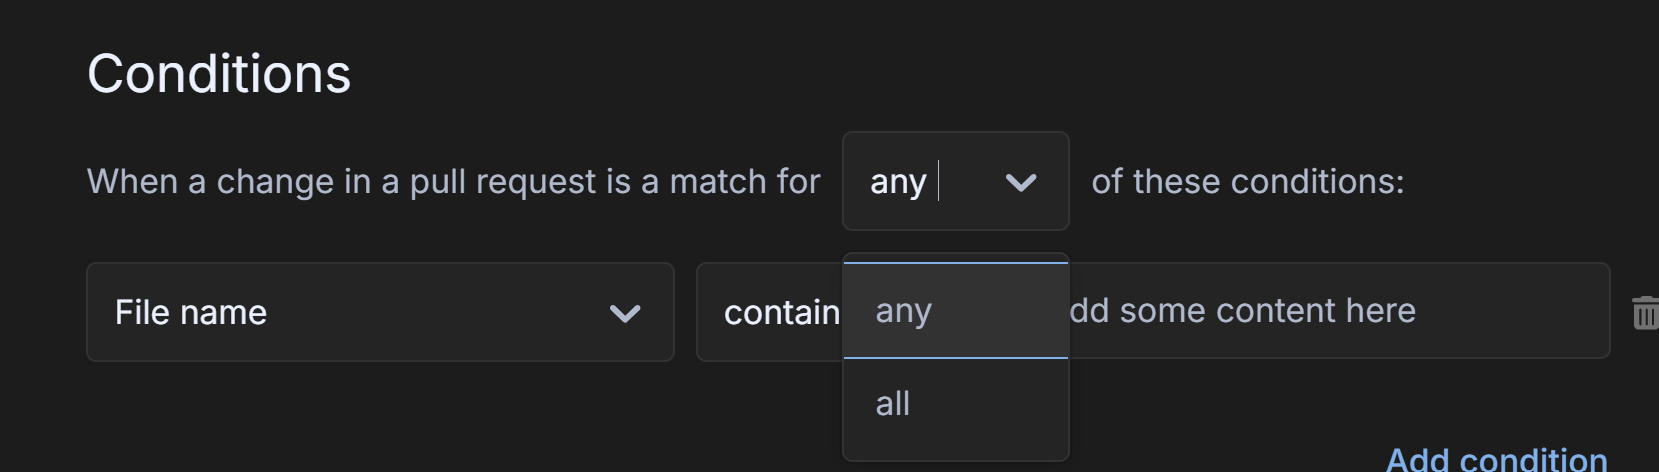
Set Conditions
Conditions define when an automation is triggered. Requires Owner or Admin role to create or edit automations.
| Condition Type | Triggers On | Example |
|---|---|---|
| Pull request content | PR metadata, activity, or discussion | PR title contains “hotfix” |
| Review: Status | Approvals, missing reviews, or stale feedback | PR has no reviews after 24 hours |
| Branch and origin | Source or target branch, or repository | Target branch is main |
| CI/CD checks | Build, test, and deployment outcomes | CI pipeline fails |
| File condition | File paths, folders, or code snippets | File path matches src/auth/* |
| GitKraken AI | AI analysis of PR diffs and metadata | AI detects security-sensitive changes |
Boolean logic
You can choose whether all or any of the conditions must be true.
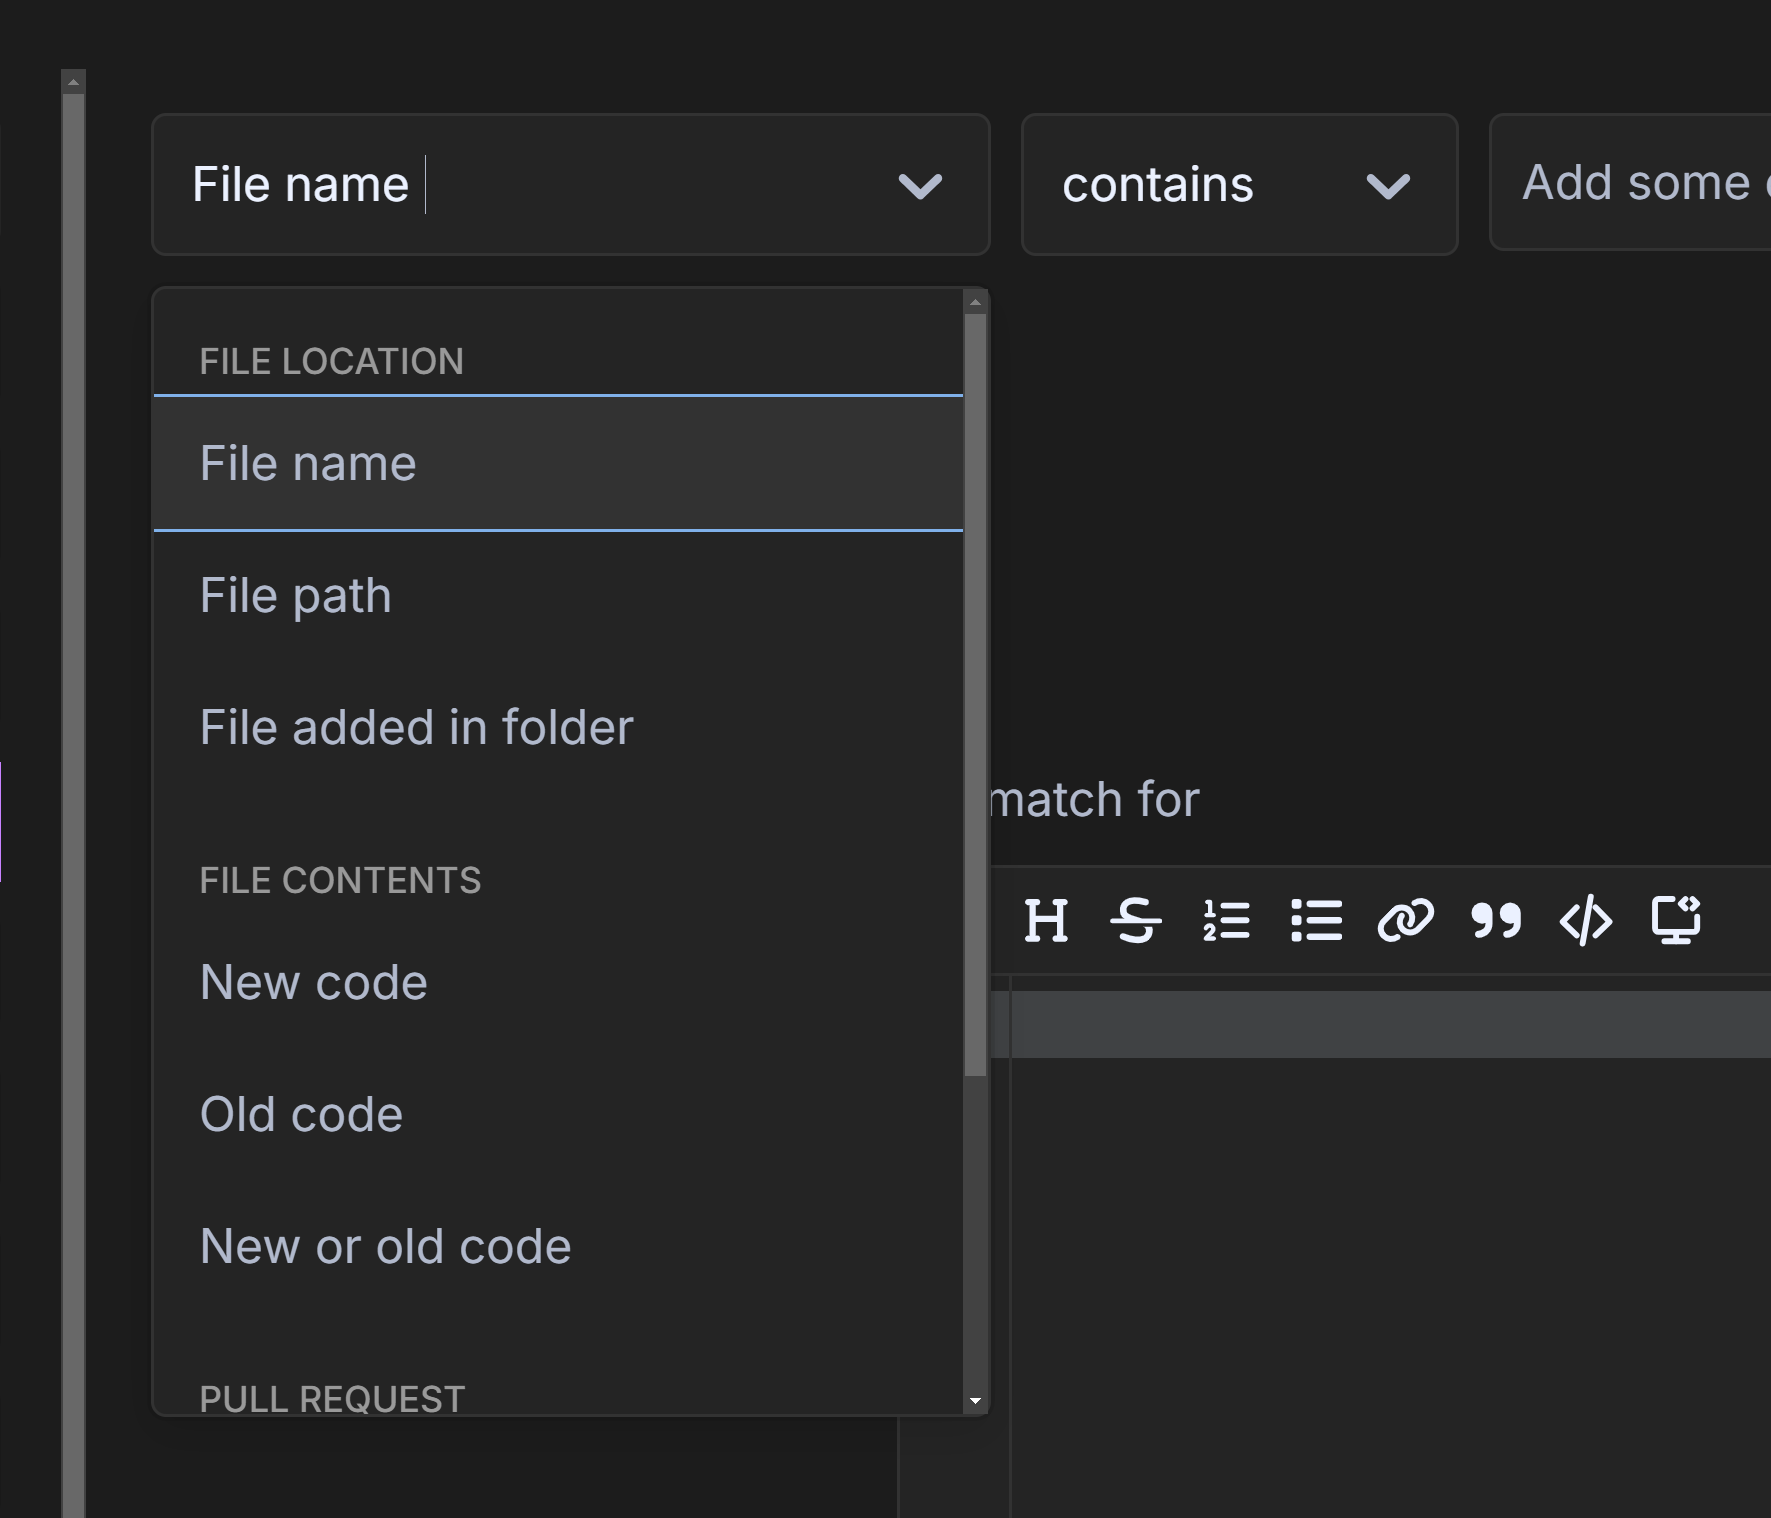
File location conditions
- File name: Matches file names.
- File path: Matches full file paths.
- File added in folder: Triggers when a new file is added to a specified folder in a PR.
Note: A file path includes folders, e.g. src/app/index.ts, while a file name is just index.ts.
File contents conditions
- Old code: Matches the red (left side) of a split diff.
- New code: Matches the green (right side) of a split diff.
- New and old code: Matches both sides.
Pull request conditions
- Number of changed files
- PR author
- PR labels
What actions can an automation perform?
GitKraken supports these automation actions:
| Action | Category | Effect |
|---|---|---|
| GitKraken AI | AI | Posts an AI-generated summary comment on the PR |
| Notify user | People | Sends a custom notification to selected users |
| Add reviewer | People | Assigns a reviewer or team, with an optional message |
| Add assignee | People | Assigns the PR to selected users |
| Remove reviewer | People | Unassigns a reviewer or team from the PR |
| Remove assignee | People | Unassigns a user from the PR |
| Add comment | Pull Request | Posts a comment on the PR |
| Add label | Pull Request | Applies a GitHub label to the PR |
| Close PR | Pull Request | Closes the pull request |
| Add to checklist | Pull Request | Adds checklist items to the PR description |
Note: Authors can’t review their own PRs. If selected, GitKraken will skip that step and apply all others.
Manage saved automations
Once you’ve created automations, manage them at GitKraken.dev.
You can:
- Enable/disable
- Edit
- Delete
- Duplicate
- Sort by status or action
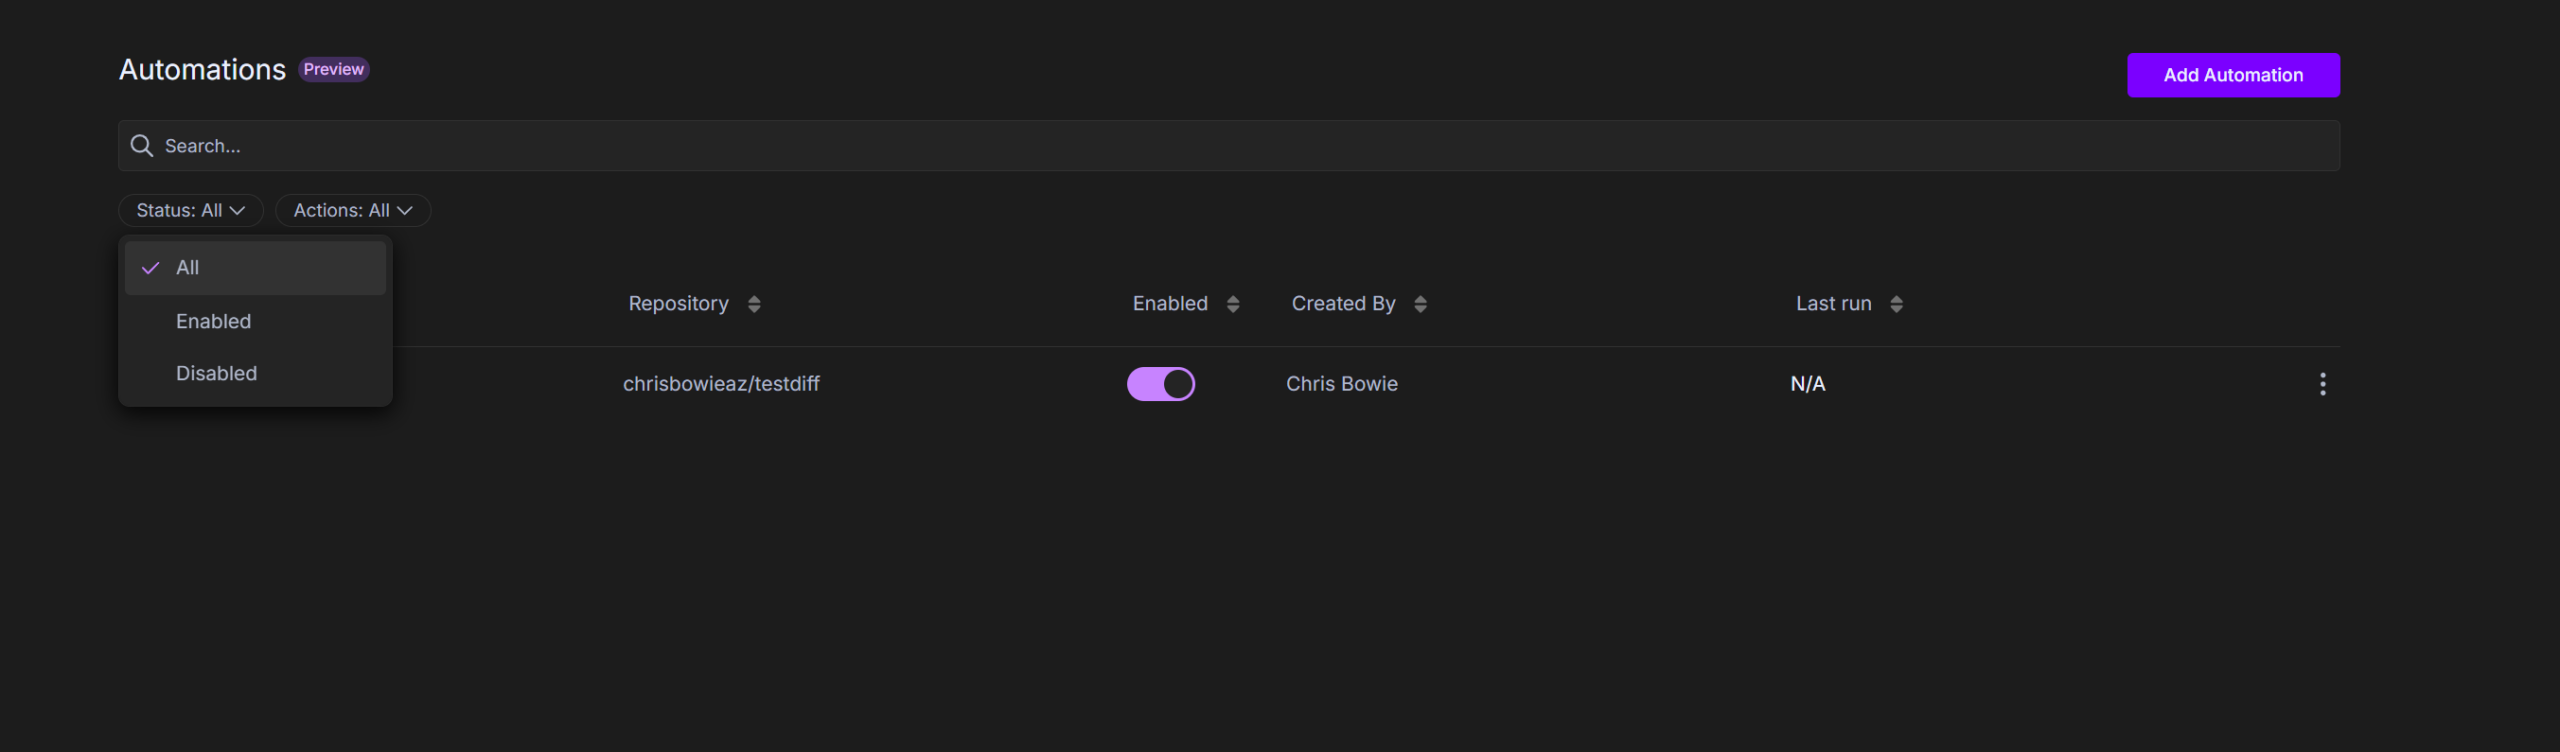
Edit, delete, or duplicate
Use the icon next to an automation name.

Sort automations
Sort by Status (enabled/disabled) or Action (type of triggered automation).

Add another automation
Click again from the list view.
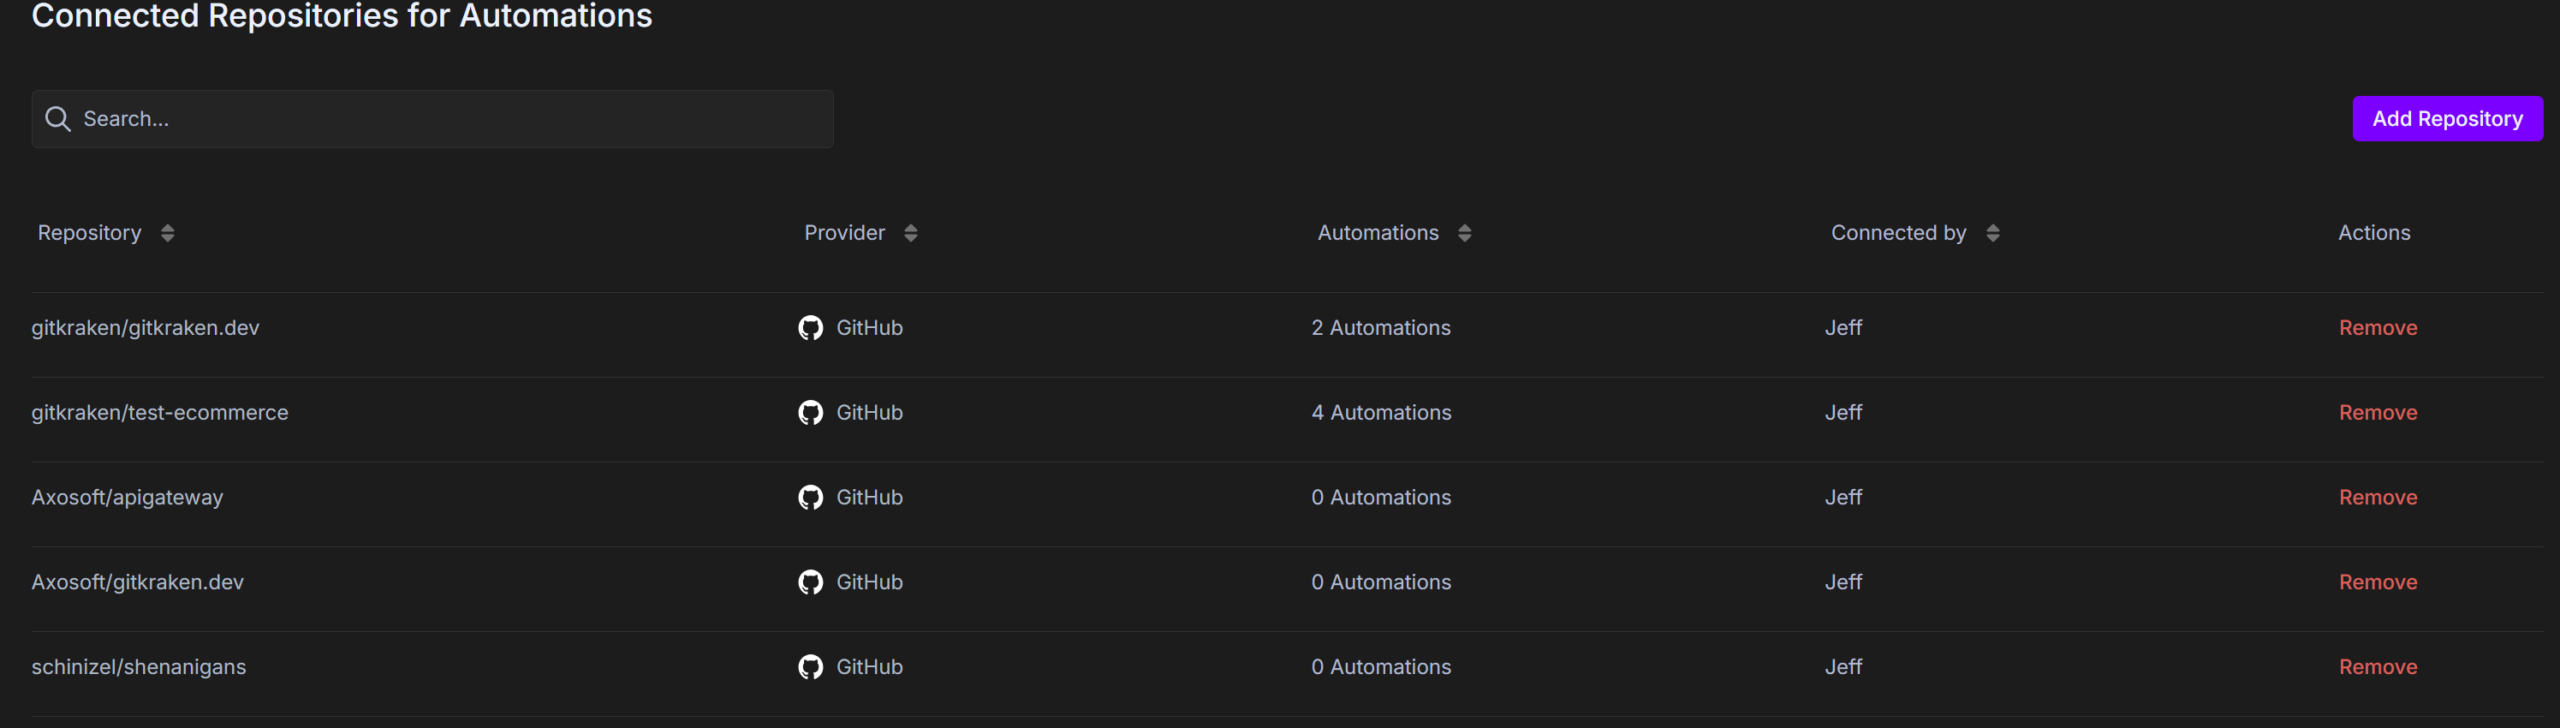
How to manage repositories with automations
The Repository Management screen shows which repos have active automations, who created them, the provider, and automation counts.

Admins can also add/remove repos or perform bulk actions.
Next Steps
Explore more ways to automate and streamline Git workflows:
