
Last updated: June 2026
An agent session is a running coding agent within a Task in Kepler. This page covers how to configure a session before it starts, how to direct the agent from the console, and how to review, stage, and commit the changes it produces.
Configuring an agent session
When you start a session, you can configure four settings. You can override three of them per message; one is fixed for the life of the session.
| Setting | What it controls | Default | Options |
|---|---|---|---|
| Agent | Which agent runtime executes the session | — | Claude Code, Codex, Copilot CLI, Cursor, OpenCode |
| Mode | How the agent handles decisions | Default | See Modes below |
| Model | The model powering the agent | Default | Varies by agent |
| Effort Level | How thoroughly the agent reasons | Default | See Effort levels below |
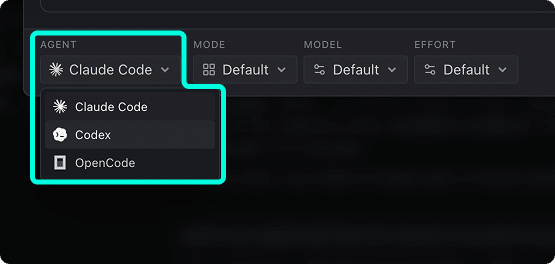
You set Agent at session start and cannot change it mid-session. For details on each supported agent runtime, see Agent Integrations.
You can change Mode, Model, and Effort Level on any individual message from the console input bar without restarting the session.
Modes
Mode controls how the agent handles decisions during a session, from pausing at every decision point to running without interruption.
Effort levels
Effort Level controls how thoroughly the agent reasons before acting. Higher effort produces more thorough results but takes longer.
Using the console to direct agents
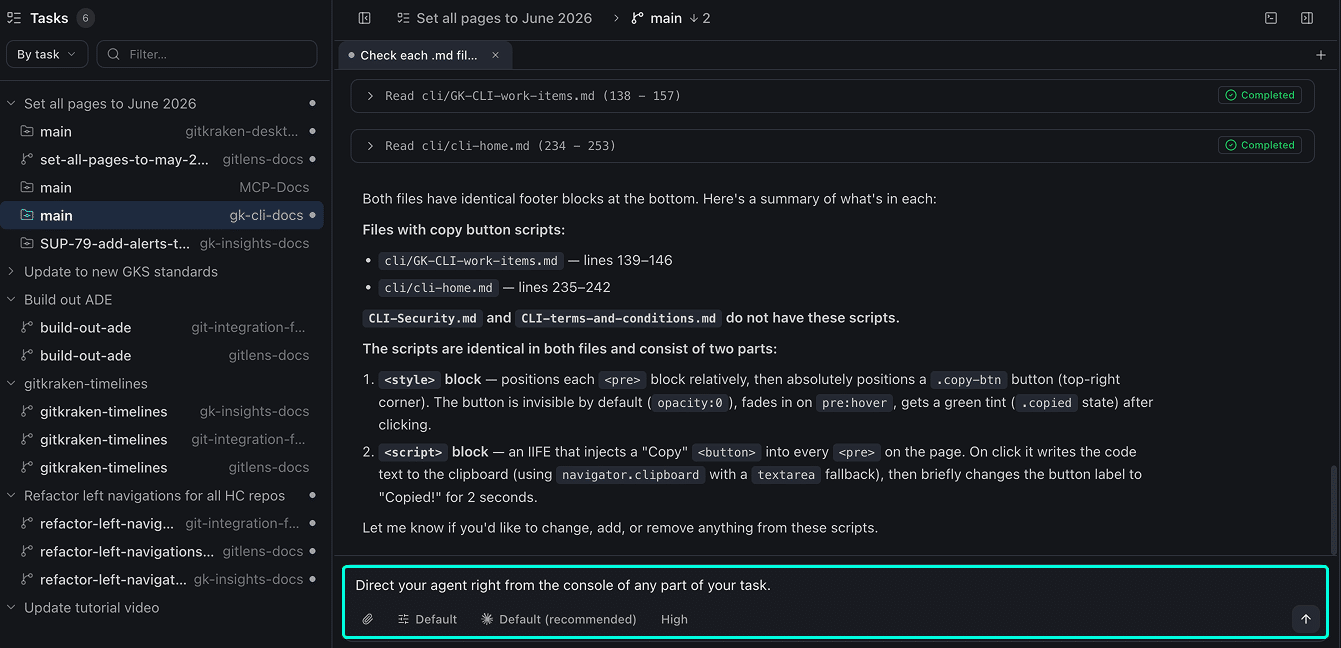
Use the console to send instructions and read agent output. Each session opens in its own tab.
Session tabs
Each session has a tab at the top of the console showing its name (truncated if long). Click × to close a tab. Click + to open a new session tab. Multiple sessions per worktree can be open simultaneously.
Reading agent output
- User messages appear as chat bubbles.
- Agent responses render as formatted markdown: bold text, inline code, lists, and tables.
- Tool calls (file reads, searches, shell commands) appear as collapsible rows, for example
find /path..., with a Completed badge or an error state. Click ▶ to expand the full tool output.
Input bar controls
The input bar at the bottom of the console has these controls:
| Control | What it does |
|---|---|
| 🎤 Mic | Voice input — see Voice Input to enable and configure |
| 📎 Attachment | Attach a file for the agent to reference |
| Mode dropdown | Override the mode for this message only |
| Model dropdown | Override the model for this message only |
| Effort dropdown | Override the effort level for this message only |
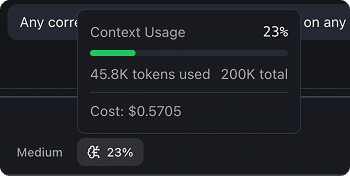
| N% context usage | Shows context window consumption as a percentage. Click to see tokens used, context window size, and cost for the session so far. |
| ↑ Send | Submit the instruction |
How to course-correct
Send a follow-up instruction when you see unexpected output, a tool call error, or a Needs Attention or Disconnected status. You do not need to restart the session.
Review, stage, and commit changes
After the agent runs, open the diff view to inspect what changed, stage files, and commit.
Opening the diff
Click a worktree in the List view sidebar. The diff opens in the center panel.
Reading the diff
- File path and +/- line stats appear at the top of each file’s diff.
- Stacked vs. Split toggle: Stacked shows changes top-to-bottom; Split shows them side-by-side.
- Unmodified sections are collapsed with a line count. Click to expand them.
- Red lines were removed; green lines were added.
Working changes panel
The Working changes panel on the right shows uncommitted changes alongside the worktree’s recent commit history.
Click any commit in the history to see:
- Full title and description
- Author name, email, and timestamp
- Full commit hash and branch tags
- Per-file +/- stats with change type (M / A / D)
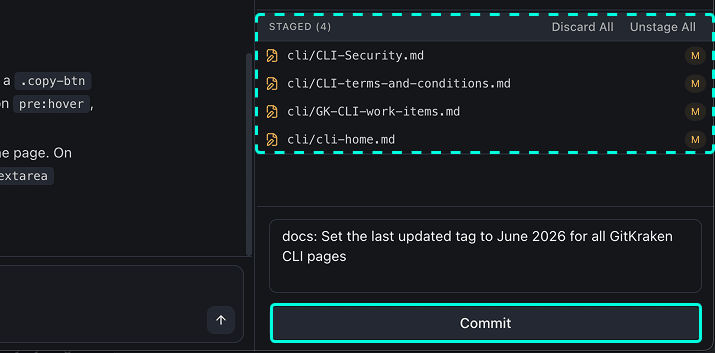
Staged files panel
The STAGED (N) panel lists files queued for the next commit, where N is the file count. Each entry shows the file path and a change type badge (M, A, or D).
- Discard All: discards all staged changes.
- Unstage All: moves all staged files back to unstaged.
- Click an individual file to view its diff. Per-file controls let you unstage or discard that file individually.
Changes panel
The CHANGES (N) panel lists unstaged files. Each entry shows the file path and a change type badge.
- Discard All: discards all unstaged changes.
- Stage All: moves all unstaged files into the staged panel.
Committing
The agent pre-populates the commit message field. Edit it if needed, then click Commit to commit the staged files.
Use Push, Pull, and Fetch from the header bar to sync the current branch without leaving Kepler.
Click Back to session to close the diff and return to the agent session console.
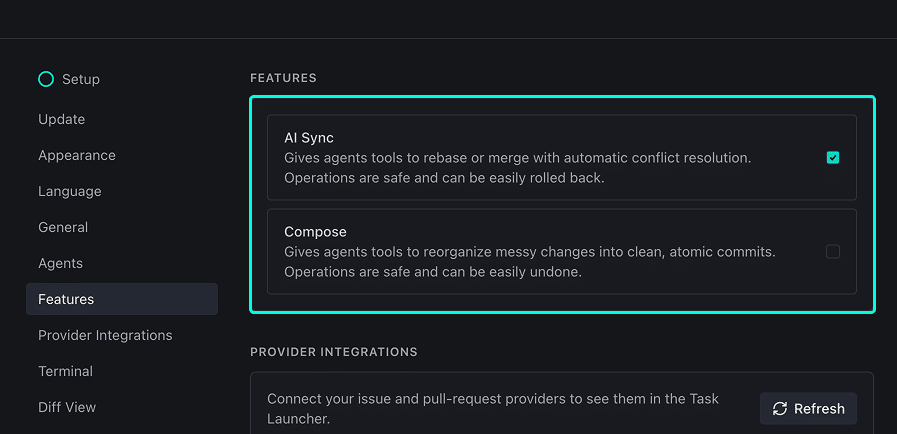
AI Sync (experimental)
Two optional features can be toggled in Settings → Features. Both are safe to enable — every operation they perform can be rolled back or undone.
AI Sync — gives agents tools to rebase or merge with automatic conflict resolution. Enable this when agents are working across branches that need to stay in sync.
Compose — gives agents tools to reorganize messy changes into clean, atomic commits. Enable this when you want agent output committed in a structured, reviewable way rather than as a single bulk commit.
For more on these settings, see Settings.
