Last updated: July 2025
Workspaces in GitLens help you organize and manage multiple repositories from one convenient interface. Whether you’re working solo or collaborating with a team, Workspaces simplify project access and context switching.
A Workspace can include:
- Local repositories: The ones currently open in your VS Code window.
- Cloud Workspaces: Hosted by GitKraken and accessible anywhere (GitKraken account required).
💡 Note: Shared cloud Workspaces require a GitKraken trial or subscription.
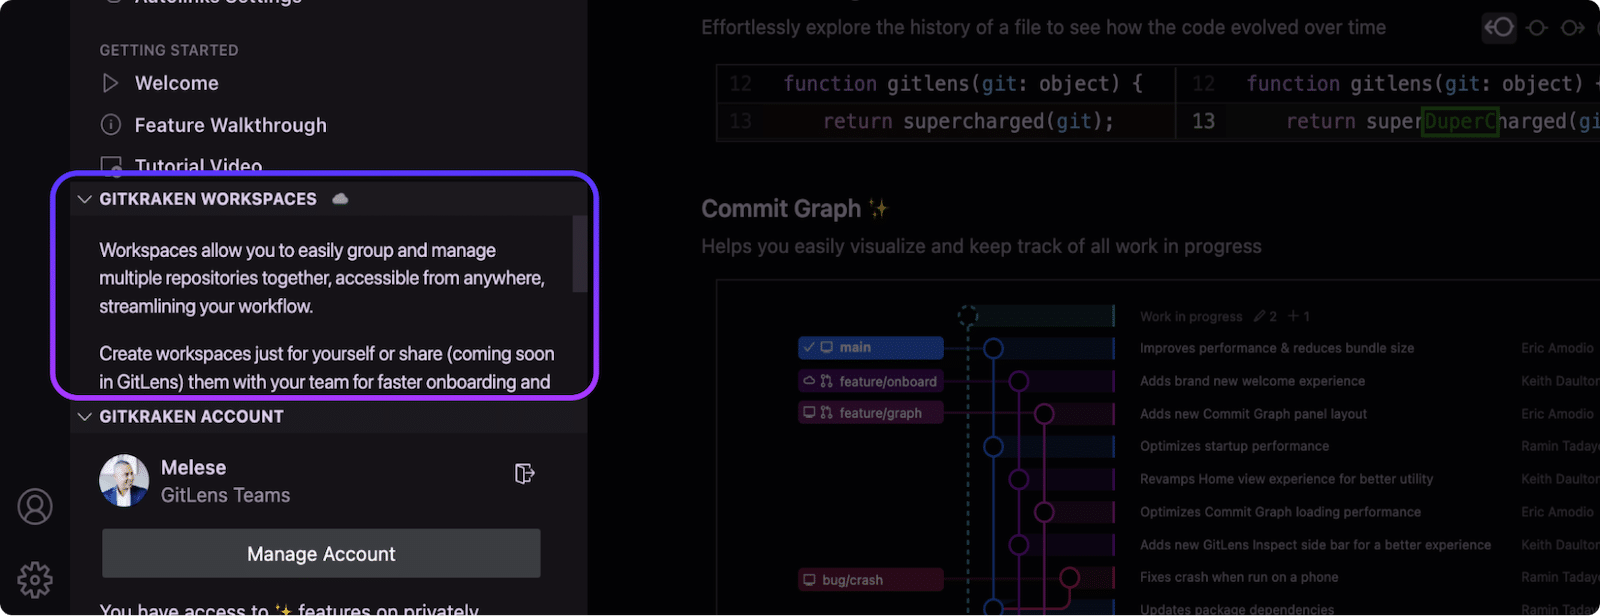
Accessing Workspaces
You can open your Workspaces in two ways:
- Click the GitLens Home icon in the Activity Bar.
- Use the Command Palette (
Cmd+Shift+PorCtrl+Shift+P) and search forGitLens: Open Workspaces.
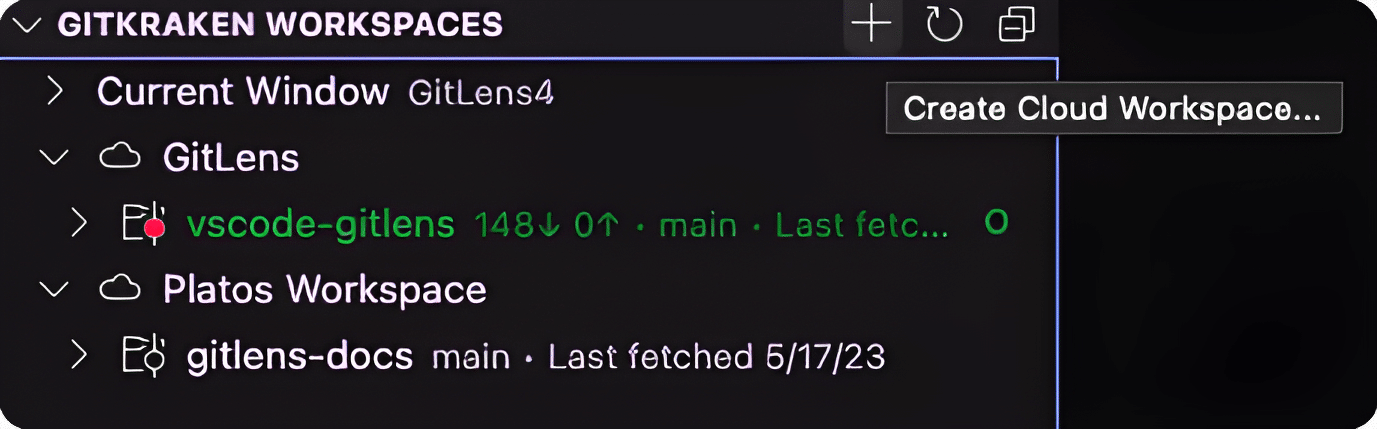
Creating a Workspace
To create a new GitLens Workspace:
- In the GitLens Home panel, click the + button next to GitKraken Workspaces.
- Enter a name and an optional description.
- (Optional) Connect a Git provider (such as GitHub or GitLab) to link repositories.
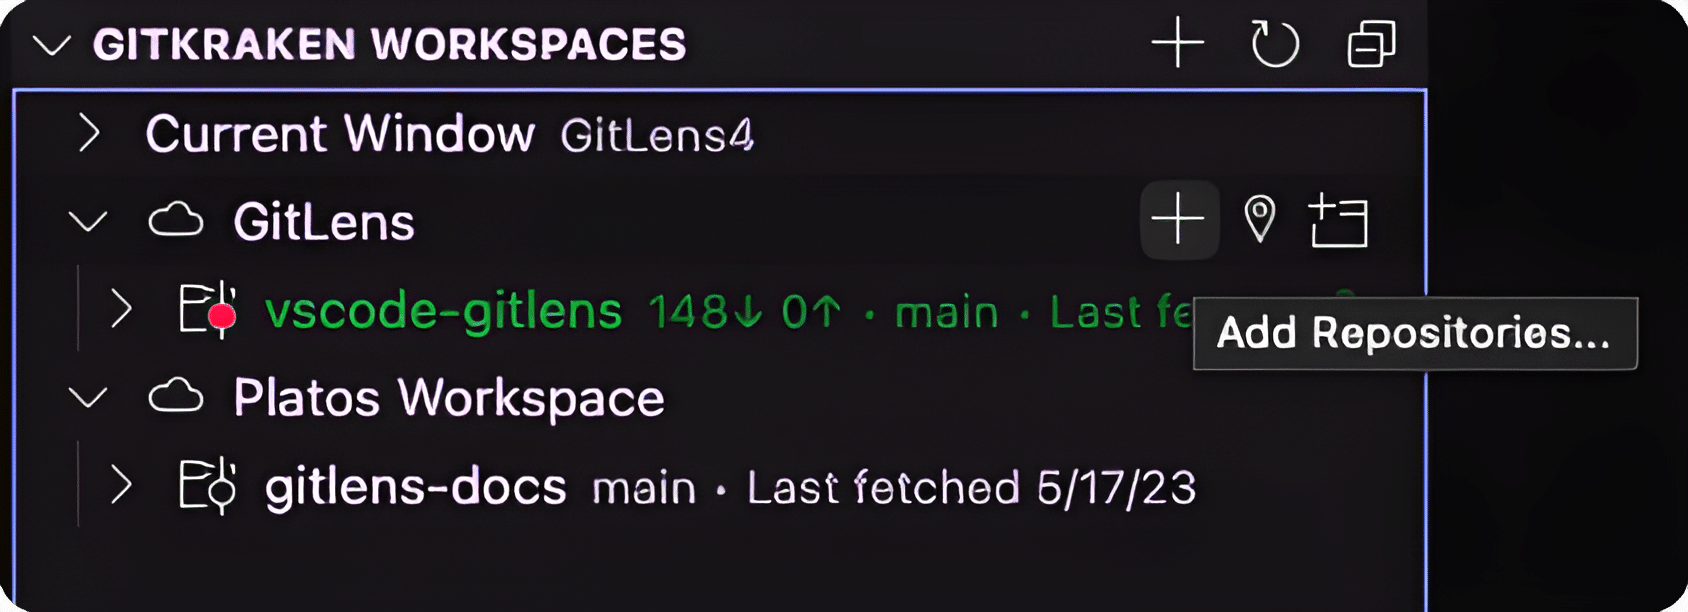
Adding Repositories
To add repositories to a Workspace:
- Click the + button under the Workspace tab.
- To sync repository status, click the Refresh icon.
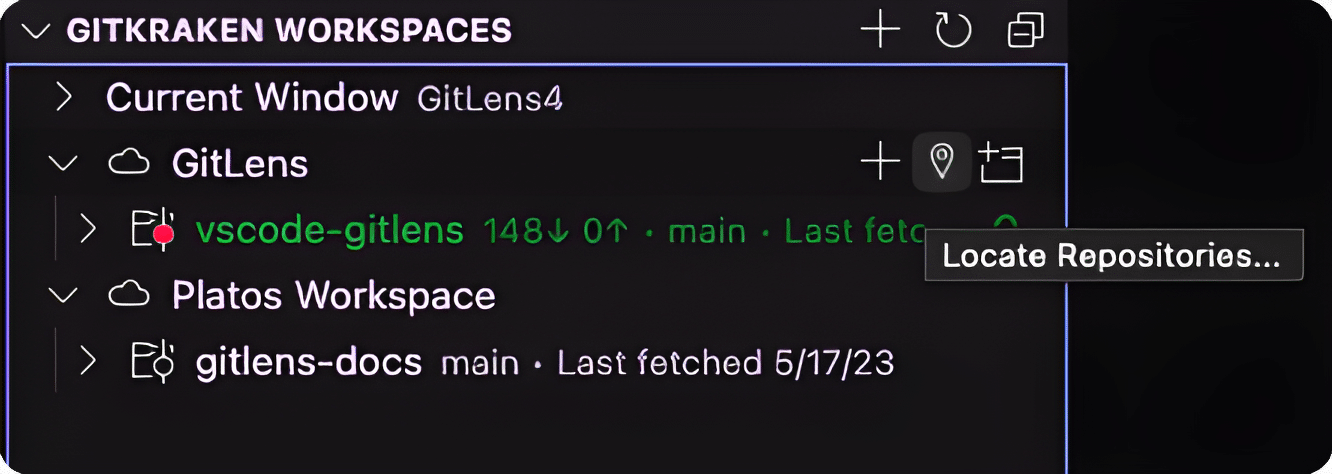
Locating Repositories
To find the disk location of a repository in a Cloud Workspace:
- Click the Locate Repositories (pin icon) next to the repository name.
- If you have a folder with multiple repositories, select the parent folder. GitLens will detect and associate all repositories within it.
Opening Repositories
To open a repository from a Workspace:
- Click the Open Repository in New Window icon.
- Pro Tip: To open the repository in the current window, hold the Alt/Option key (Mac) while clicking Open Repo.
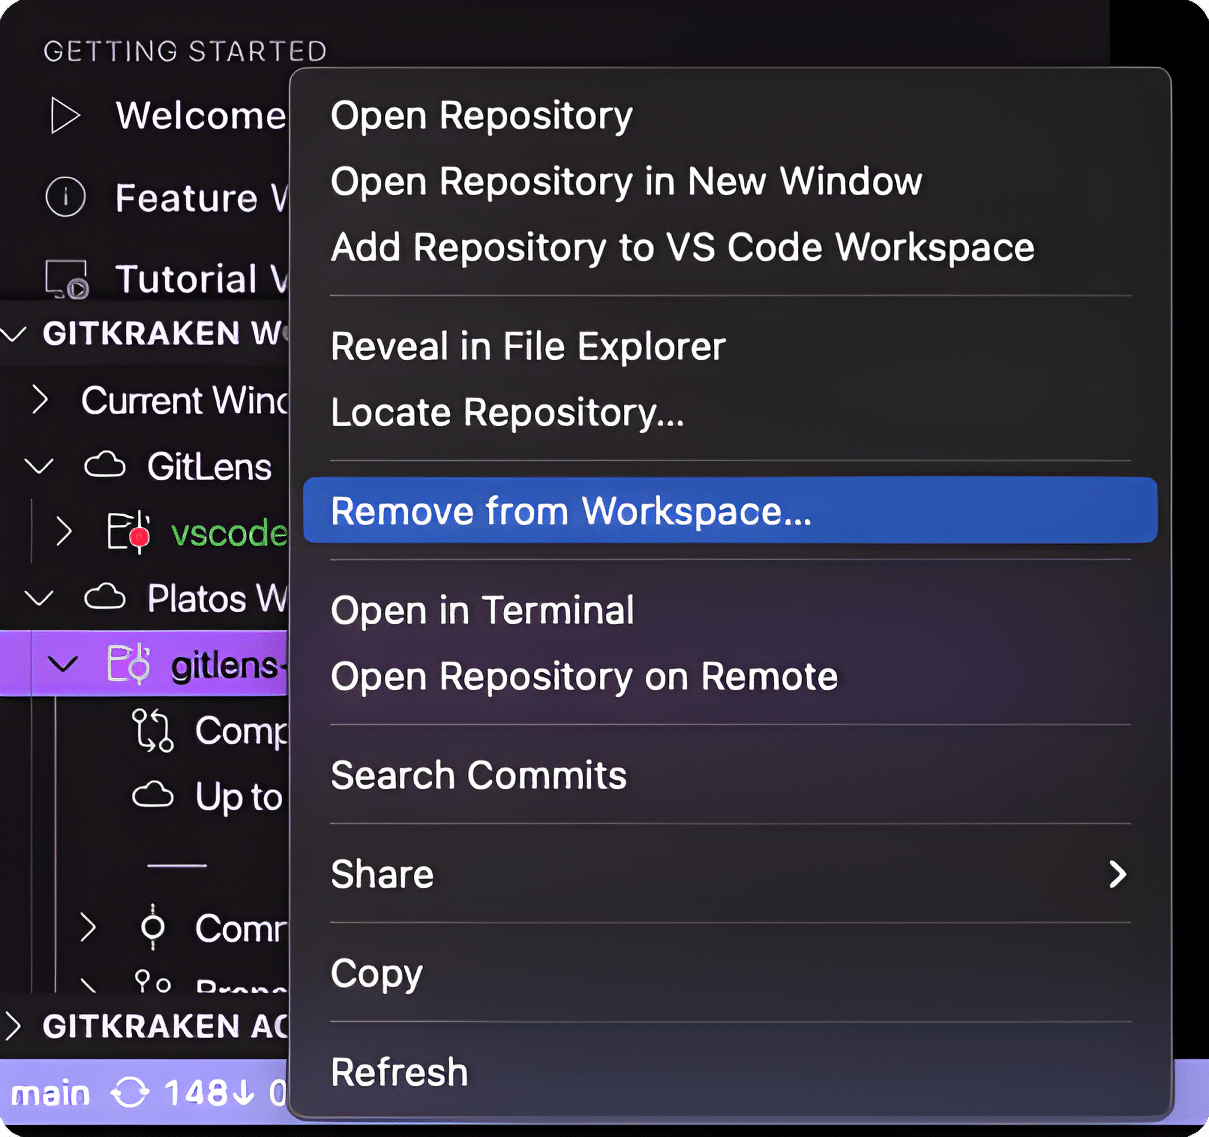
Removing Repositories
To remove a repository from a Workspace:
- Right-click the repository.
- Select Remove repository from Workspace from the context menu.
Converting to Cloud Workspaces
To convert a local VS Code workspace into a GitKraken Cloud Workspace:
- Click the Convert to Cloud Workspace icon.
- Enter a name and description.
Your Cloud Workspace will be synced to your GitKraken account and accessible via GitKraken Desktop, GitLens, and the GitKraken CLI.

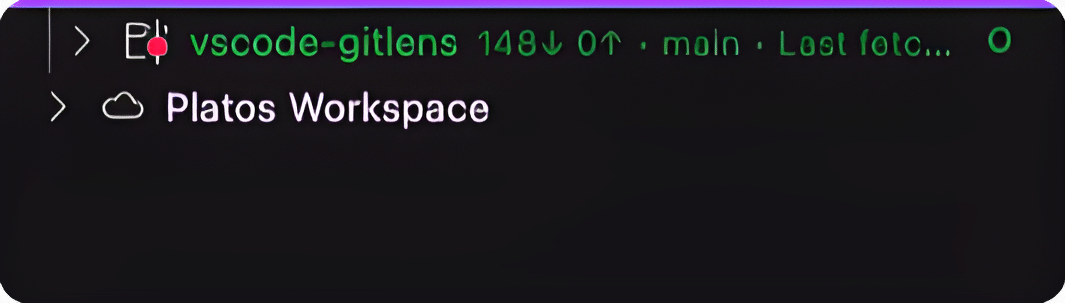
Understanding Workspace Indicators and Colors
Visual indicators in Workspaces help you quickly understand their status. For example:
- A green Workspace with an O symbol indicates it is open in your current window.
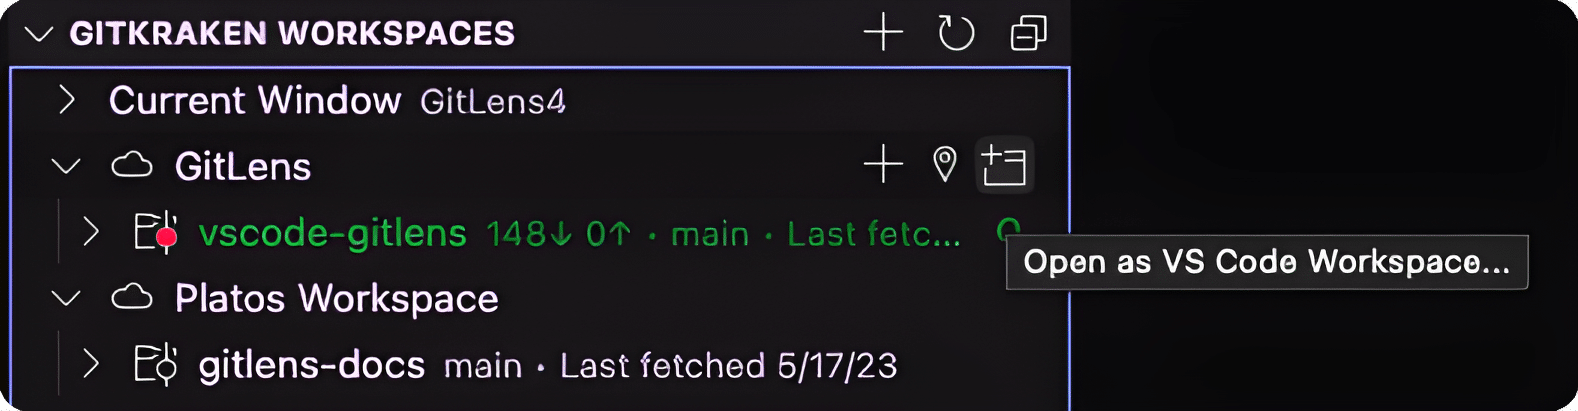
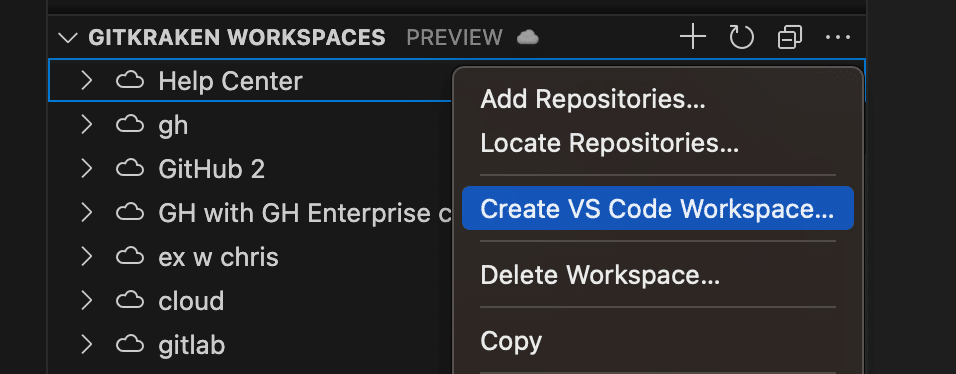
Workspace Linking
You can link a VS Code workspace to a GitKraken Workspace:
- Create a VS Code workspace from an existing GitKraken Cloud Workspace.
- Use the Open VS Code Workspace in New Window option (hold Alt to open in the current window).
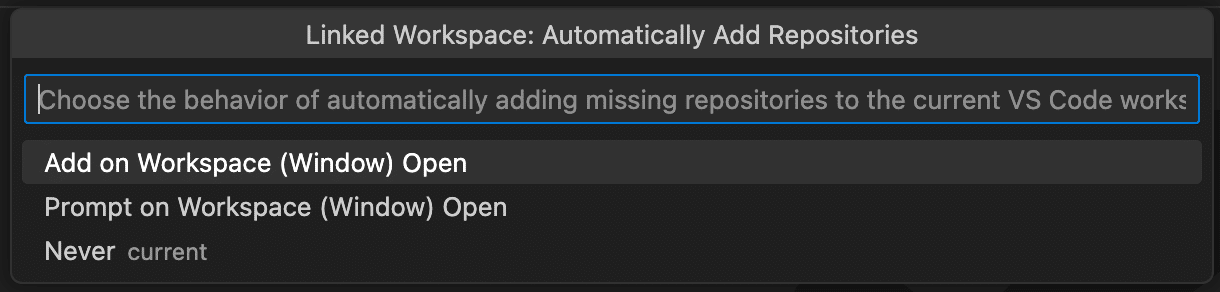
When opening a linked workspace, you can choose how to handle repository auto-adding:
- Automatically add repositories
- Prompt before adding
- Disable auto-adding
This behavior is configurable during setup or later via the Change Linked Workspace Auto-Add Behavior command.
To manually sync repositories:
- Use the
Add Repositories from Linked Workspacecommand at any time.