

Last updated: September 2026
Worktrees View
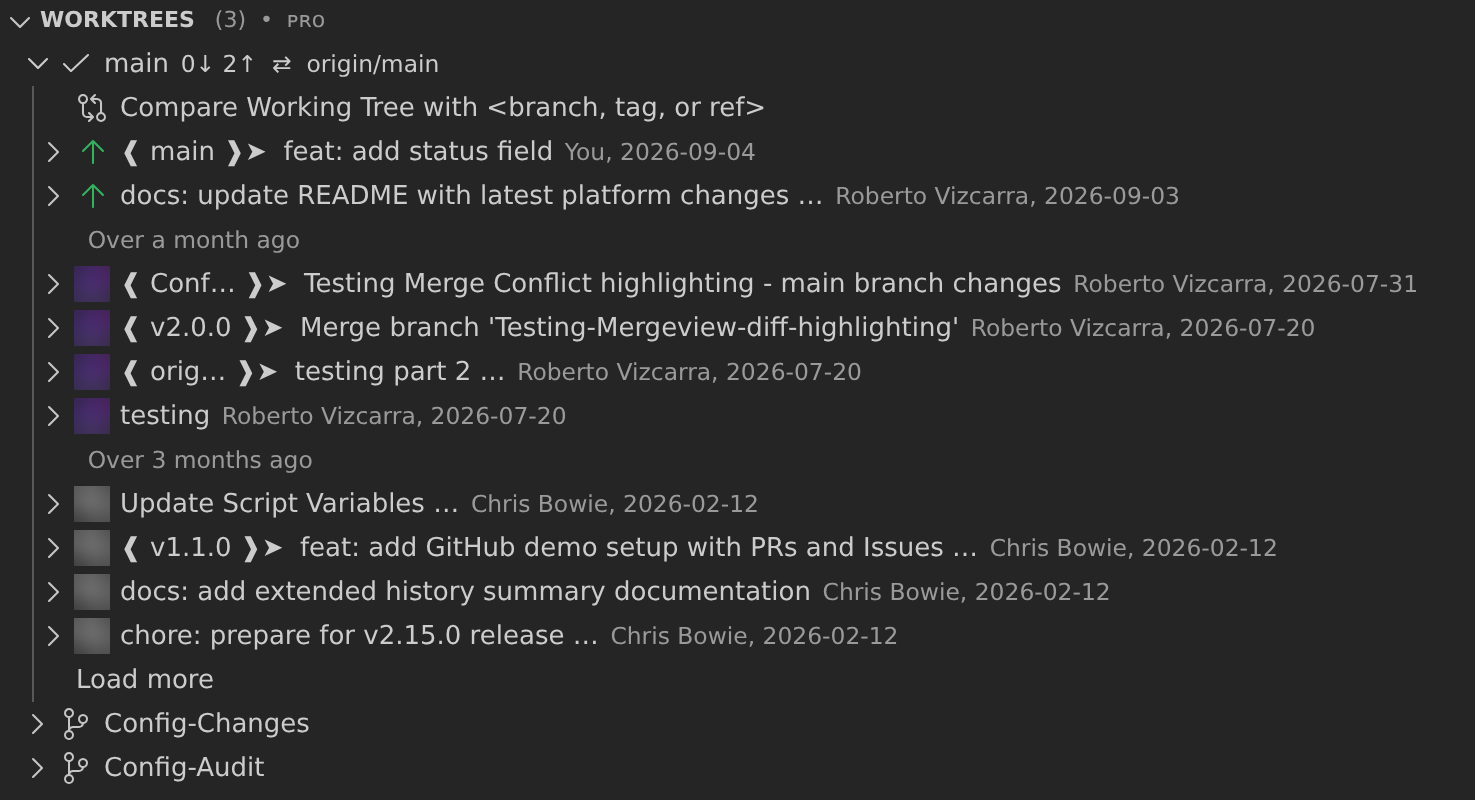
The GitLens Worktrees view lets you create, view, and manage worktrees. Worktrees allow you to check out multiple branches of the same repository at the same time.
This makes it easier to develop or test different branches in parallel while minimizing the context switching between them.
You can also customize Worktrees settings to fit your workflow.
Create a Worktree
Select Create Worktree… in the Worktrees view, then choose the branch to create the worktree from. The final confirmation step shows where GitLens will create the worktree and what happens after it’s created:
- Under Location, select Root Folder… to choose a different root folder for worktrees, or Specific Folder… to create the worktree directly in an exact folder instead of under the root.
- Under After Creating, choose Open in New Window, Open in Current Window, Add to Workspace, or Don’t Open.
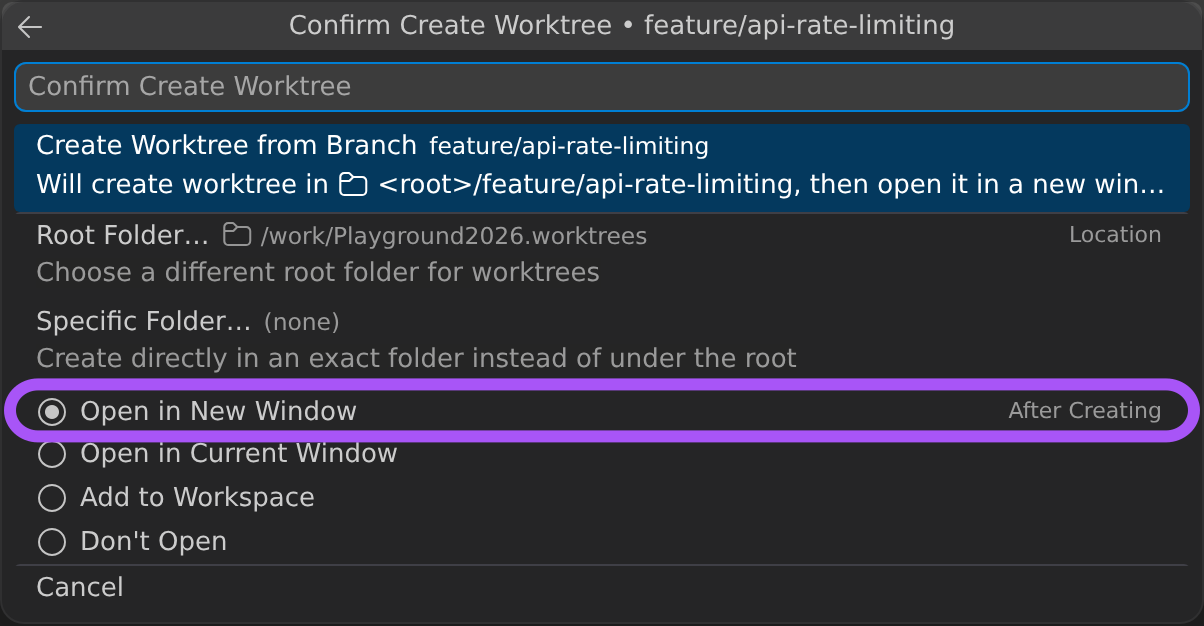
GitLens saves your After Creating choice to the gitlens.worktrees.openAfterCreate setting, so the same option is selected the next time you create a worktree. The setting’s default is newWindow.
Delete a Worktree
Git can’t delete a branch while a worktree has it checked out. When you delete a branch that’s checked out in a worktree, for example with Delete Branch… in the Branches view or the Git Command Palette, GitLens deletes the branch and its worktree together in one step. The confirmation step is titled Confirm Delete Branch & Worktree:
- The Delete Branch & Worktree row shows the branch and the worktree folder that will be deleted.
- Under Options, turn on Force to delete the worktree even if it has uncommitted changes. GitLens warns you first when a worktree has uncommitted changes.
- Under Additional Actions, Delete Branch starts out selected. Clear it to delete only the worktree and keep the branch. Turn on Delete Upstream to also delete the branch’s upstream from the remote. Delete Upstream appears only when the upstream branch still exists.
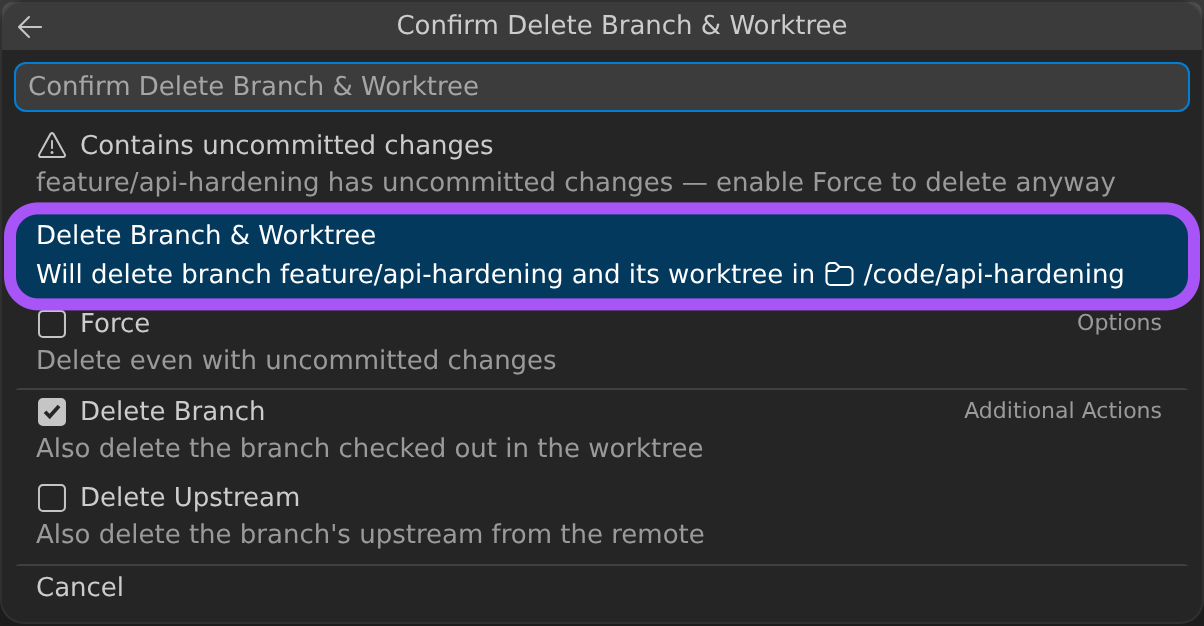
If you delete several branches at once and only some of them are checked out in worktrees, GitLens handles those branches and their worktrees in this step, then deletes the remaining branches. When you prune a branch instead of deleting it, the step reads Prune Branch & Delete Worktree.
Start an Agent Session in a Worktree
Right-click a worktree in the Worktrees view, or a worktree’s Working Changes row in the Commit Graph, and select one of the following:
- Start Agent Session… starts a coding agent in that worktree. GitLens uses your default agent from the
gitlens.ai.defaultAgentsetting when one is set; otherwise, it asks you to choose an agent. - Start Agent Session With… always asks which agent to use.
- Resume Agent Session… lists the worktree’s agent sessions so you can open a live session or resume a past one.
When GitLens asks you to choose an agent, the Choose an Agent list ends with an Always use this agent option. Select it, then choose an agent, to save that agent as your default so Start Agent Session… uses it from then on. Selecting the option on its own saves nothing, and you can change the default later with the gitlens.ai.defaultAgent setting.
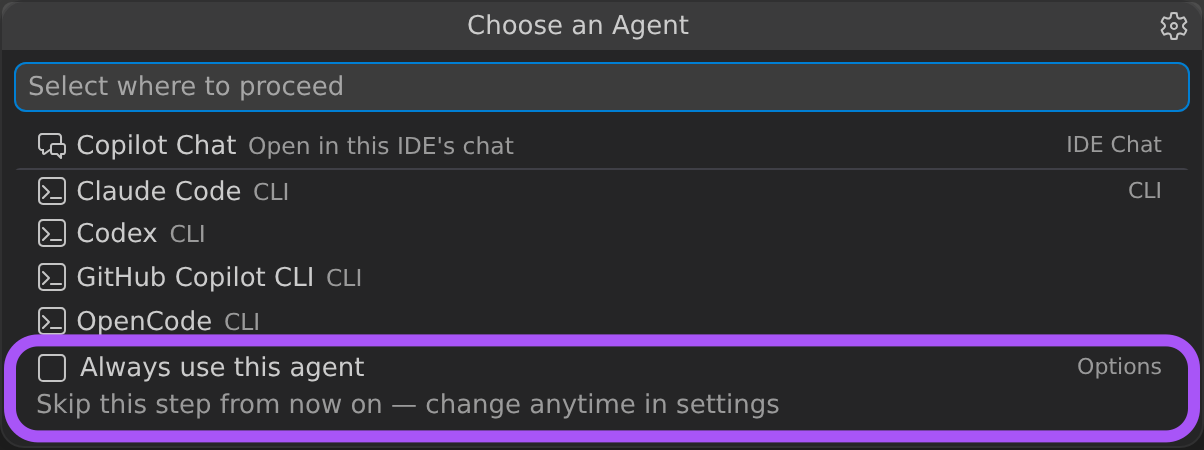
A command-line agent starts in a new integrated terminal opened in the worktree folder. An agent that runs in VS Code chat or in an extension receives a prompt that asks it to work in the worktree. In the Commit Graph, a Working Changes row’s context menu also includes Copy Branch Name.
Run a Task in a Worktree
Right-click a worktree in the Worktrees view, or a worktree’s Working Changes row in the Commit Graph, and select Run Task on Worktree… to run a VS Code task with the worktree as its working folder. In the task list, select the checkmark next to a task to set or unset it as the default task.
In the Commit Graph, each Working Changes row also has a Run Default Task button. The button runs the default task, or asks you to choose one if you haven’t set a default yet. Hold Alt (⌥ on macOS) while selecting the button to choose a different task. While a task runs, selecting the button shows the running task instead of starting another.
Worktrees in the Commit Graph
The Commit Graph shows a Working Changes row for your worktrees, so you can follow and act on parallel work without switching windows.
Scope the Graph to a Worktree
Scoping the Commit Graph to a worktree makes the graph treat that worktree as the one you have open. You see its branch and its working changes, and anything you commit, push, or pull from the graph happens in that worktree. To scope the graph, do one of the following:
- In the Worktrees panel of the Commit Graph sidebar, select Scope to Worktree on the worktree’s row.
- Right-click the worktree’s Working Changes row, or its row in the Worktrees panel, and select Scope to Worktree.
- Double-click the worktree’s Working Changes row or its pill in the overview bar.
To return to your active worktree, select Unscope Worktree in the graph header. The gitlens.graph.scopeBehavior setting controls whether scoping also focuses the worktree’s branch, and gitlens.graph.doubleClickWorktreeAction controls whether double-clicking scopes the graph or toggles branch focus. For more details, see Manage Parallel Development from the Commit Graph.
Follow the Active Terminal
When the Commit Graph is visible, it follows the active terminal or Claude Code conversation tab. Switch to a terminal, and the graph selects the Working Changes row of the repository or worktree that the terminal is in. If an agent session is running in that terminal, the graph selects the agent session’s worktree. The graph never opens itself to follow a terminal. The first time the graph follows a terminal, a Following Your Active Terminal tip explains the behavior and offers Turn Off.
To stop following, select Stop Following Active Terminal from the Commit Graph’s overflow menu, or set gitlens.graph.followTerminal.enabled to false. Select Follow Active Terminal to turn it back on. By default, the graph ignores terminals in other repositories. To let it switch repositories, set gitlens.graph.followTerminal.allowRepositorySwitching to true.
Open a Terminal’s Worktree
Right-click a terminal tab, or use the title bar of a terminal open in the editor area, to act on the worktree that terminal is in:
- Open in Commit Graph opens the Commit Graph with the worktree’s Working Changes row selected.
- Focus in Commit Graph also scopes the graph to the worktree.
- Open in New Window opens the worktree folder in a new VS Code window.
The same actions are available from the title bar and tab context menu of a Claude Code conversation tab, where they act on the worktree of that conversation’s agent session.
