

Last updated: November 2026
Kepler is GitKraken’s agentic development environment (ADE). Use it to direct coding agents on your real work, in as many repositories as you need, at the same time.
You use your own coding agent. Kepler pulls in the issues and pull requests already assigned to you, hands any of them to an agent with the context attached, and takes the result through review to a change you can merge.
Kepler is in public preview. To use it, you need only a free GitKraken account.
Install Kepler
Kepler has installers for these platforms:
| Platform | Installer | Minimum OS |
|---|---|---|
| Windows | 64-bit, ARM64 | Windows 10+ |
| macOS | Apple Silicon, Intel | macOS 12+ |
| Linux (x64) | .deb, .rpm, .AppImage, Flatpak, AUR | Ubuntu LTS 18.04+ / Debian 10+ / RHEL 8+ / Fedora 39+ |
| Linux (ARM) | .deb, .rpm, .AppImage | Ubuntu LTS 20.04+ / RHEL 8+ / Fedora 39+ |
- Go to gitkraken.com/kepler/download and pick the installer for your platform.
- Run the installer.
- Launch Kepler.
If you open an older copy of Kepler than the one that last used your data, Kepler stops at Kepler is out of date before it opens. The older copy cannot read everything the newer one saved, and sessions in particular may seem to have disappeared. The dialog names the version your data needs and offers these choices:
- Open Newer Version, when a newer copy is installed
- Update and Restart, when this copy can update itself (a Snap install does not offer it)
- Quit
- Open Anyway
Sign in
Kepler opens on a welcome screen, Launch any agent. Land every PR. Click Sign in with GitKraken. If you do not have an account, you’ll create one in the next step.
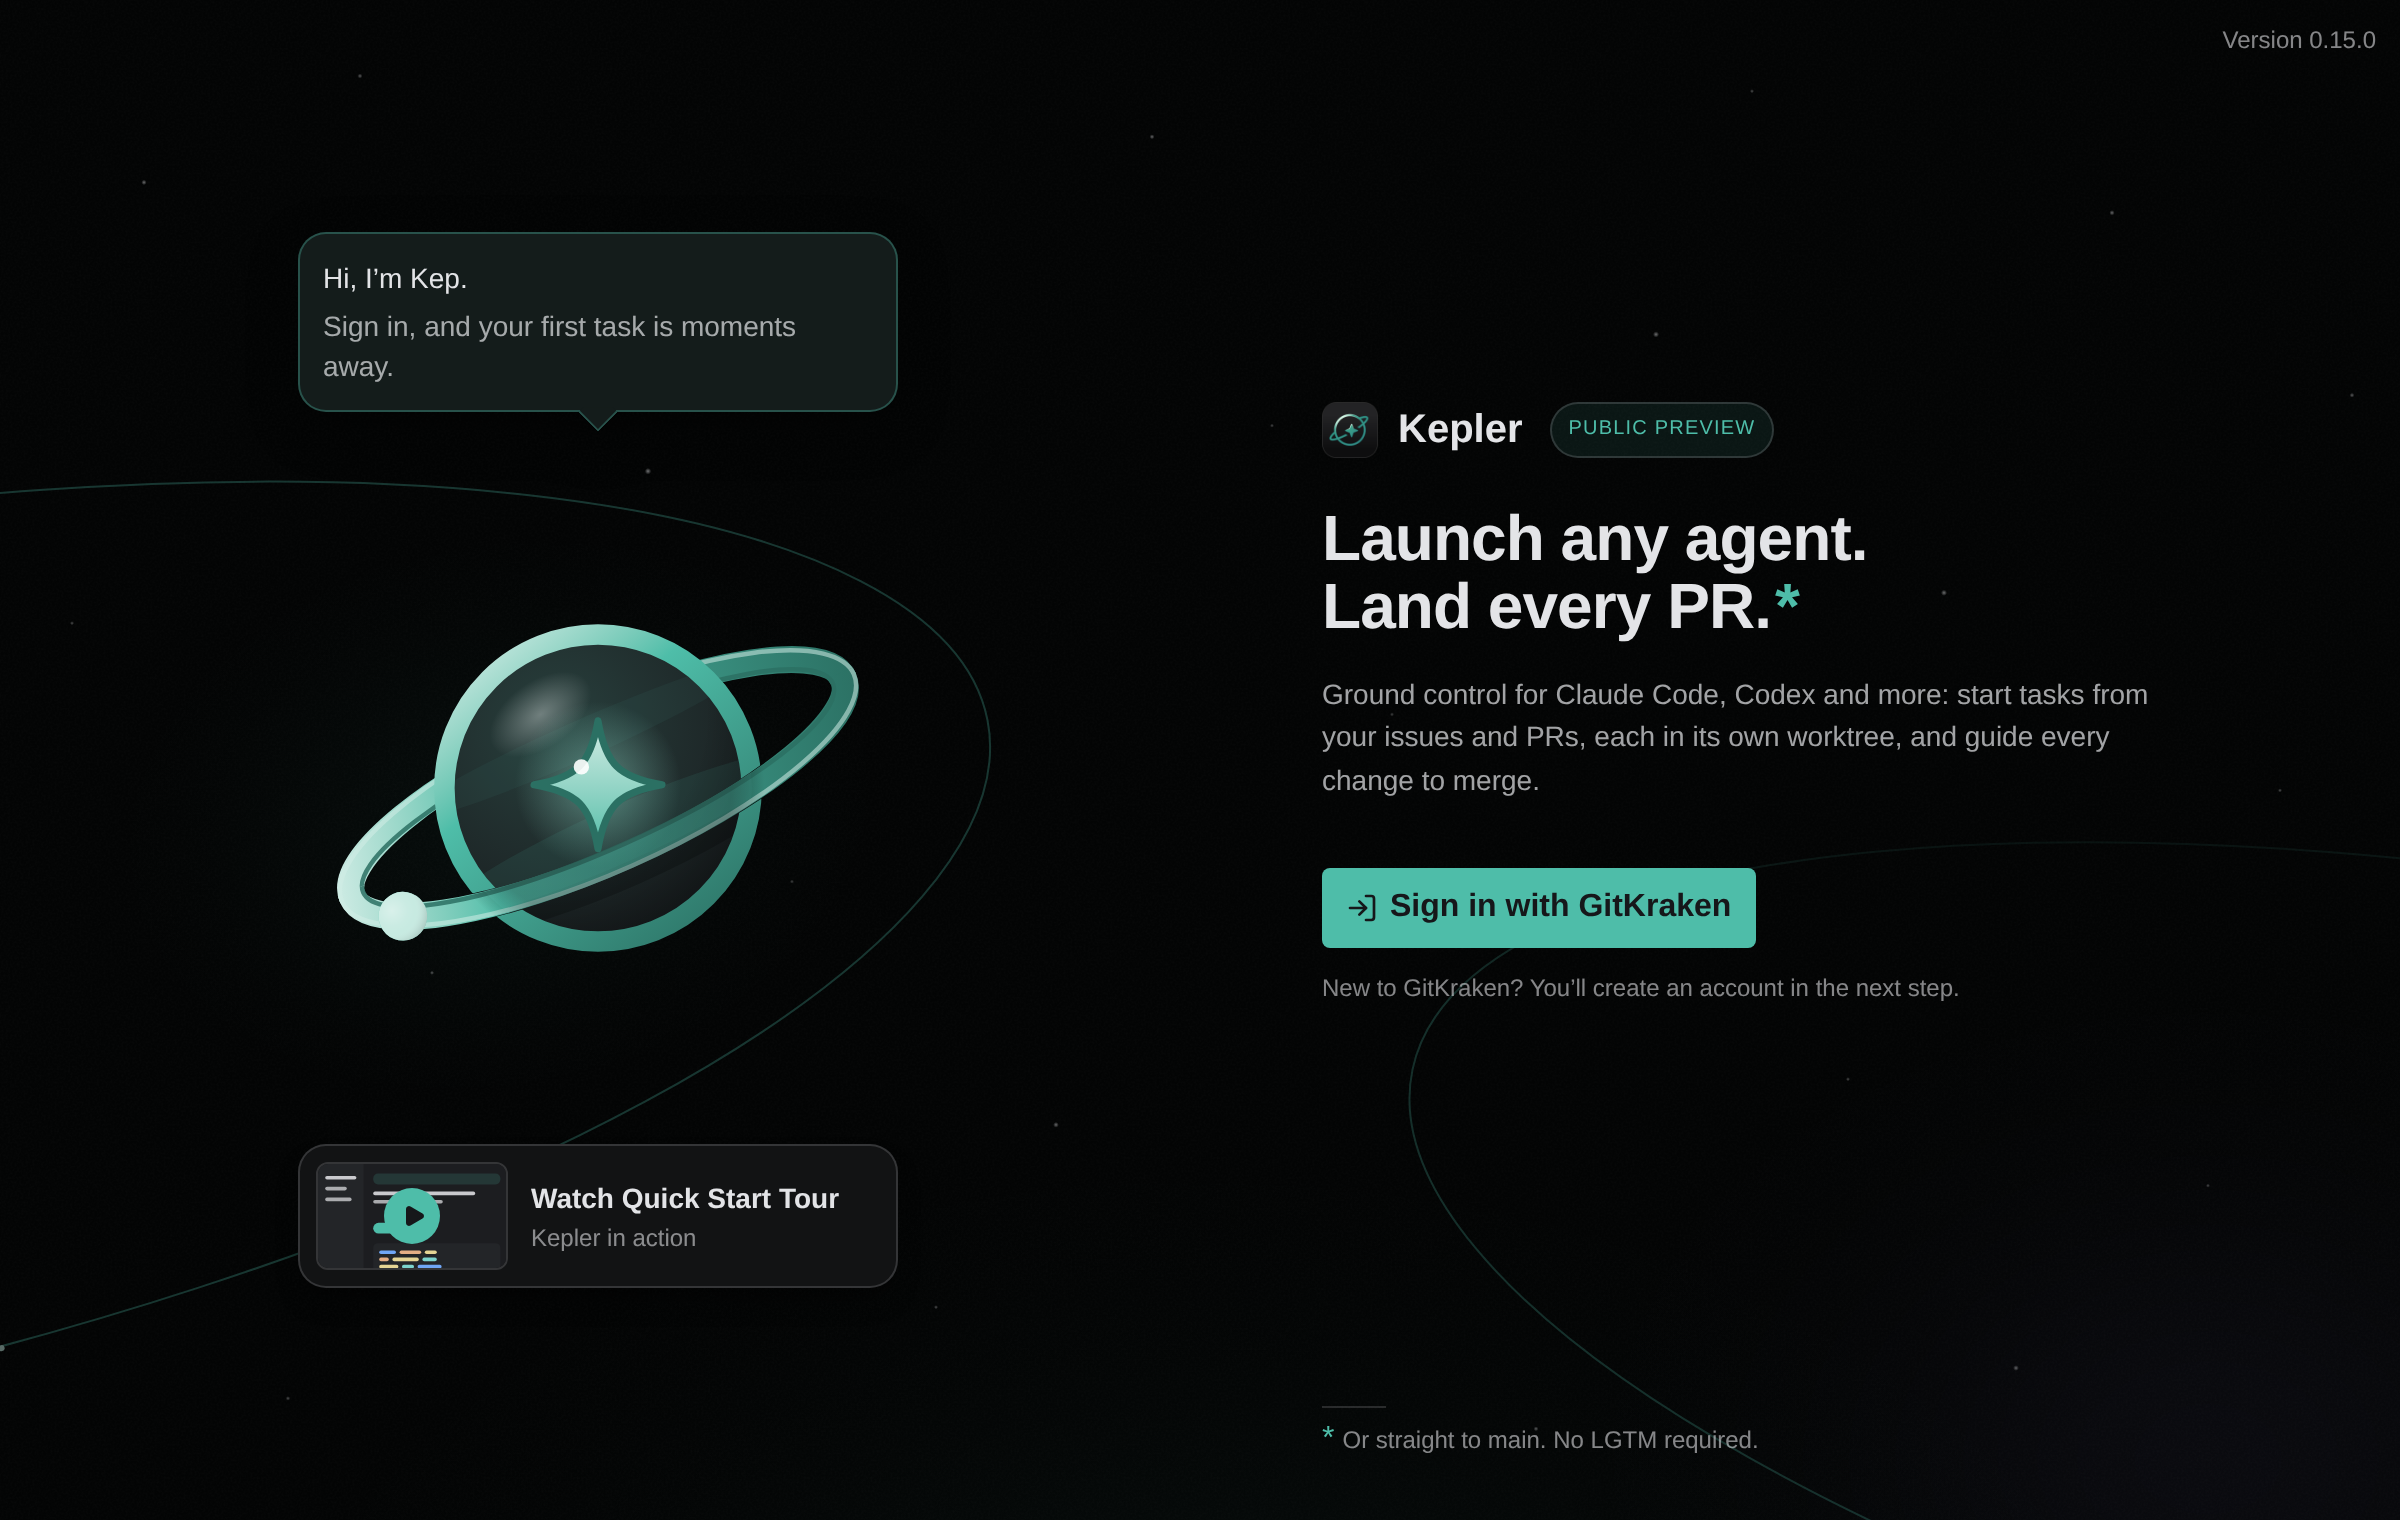
Kepler opens the sign-in page in your browser and replaces the button with a sign-in panel that reads Continue in your browser. Once you sign in, Kepler continues on its own. If no browser opened, click Reopen browser, or click Copy link and open the link in any browser. You can also paste the code from your browser under Or paste the code from your browser, then click Sign in. If Kepler cannot reach GitKraken, it says Unable to reach GitKraken to start sign-in. Check your connection and try again.
The screen’s top corner shows Kepler’s version. Click the version to check for updates. The corner shows Checking…, then Up to date, the download’s progress, or Unable to check for updates with Try again. When an update has downloaded, the corner reads Update ready to install with Update and restart, so you can update before you sign in.
In a window connected to another machine, the screen says Continue in your other Kepler window. You sign in from the Kepler window on this computer, and the remote window continues once you finish there. If Kepler cannot sign the remote window in, it says Unable to sign this window in with your Kepler account. Reconnect it and try again.
To watch a short tour before you start, click the Watch Quick Start Tour tile on the welcome screen, or watch the Kepler Quick Start Tour playlist on YouTube.
Choose your agents and your look
After you sign in, a guided start walks you through setup. To skip it at any point, click I’ll explore on my own.
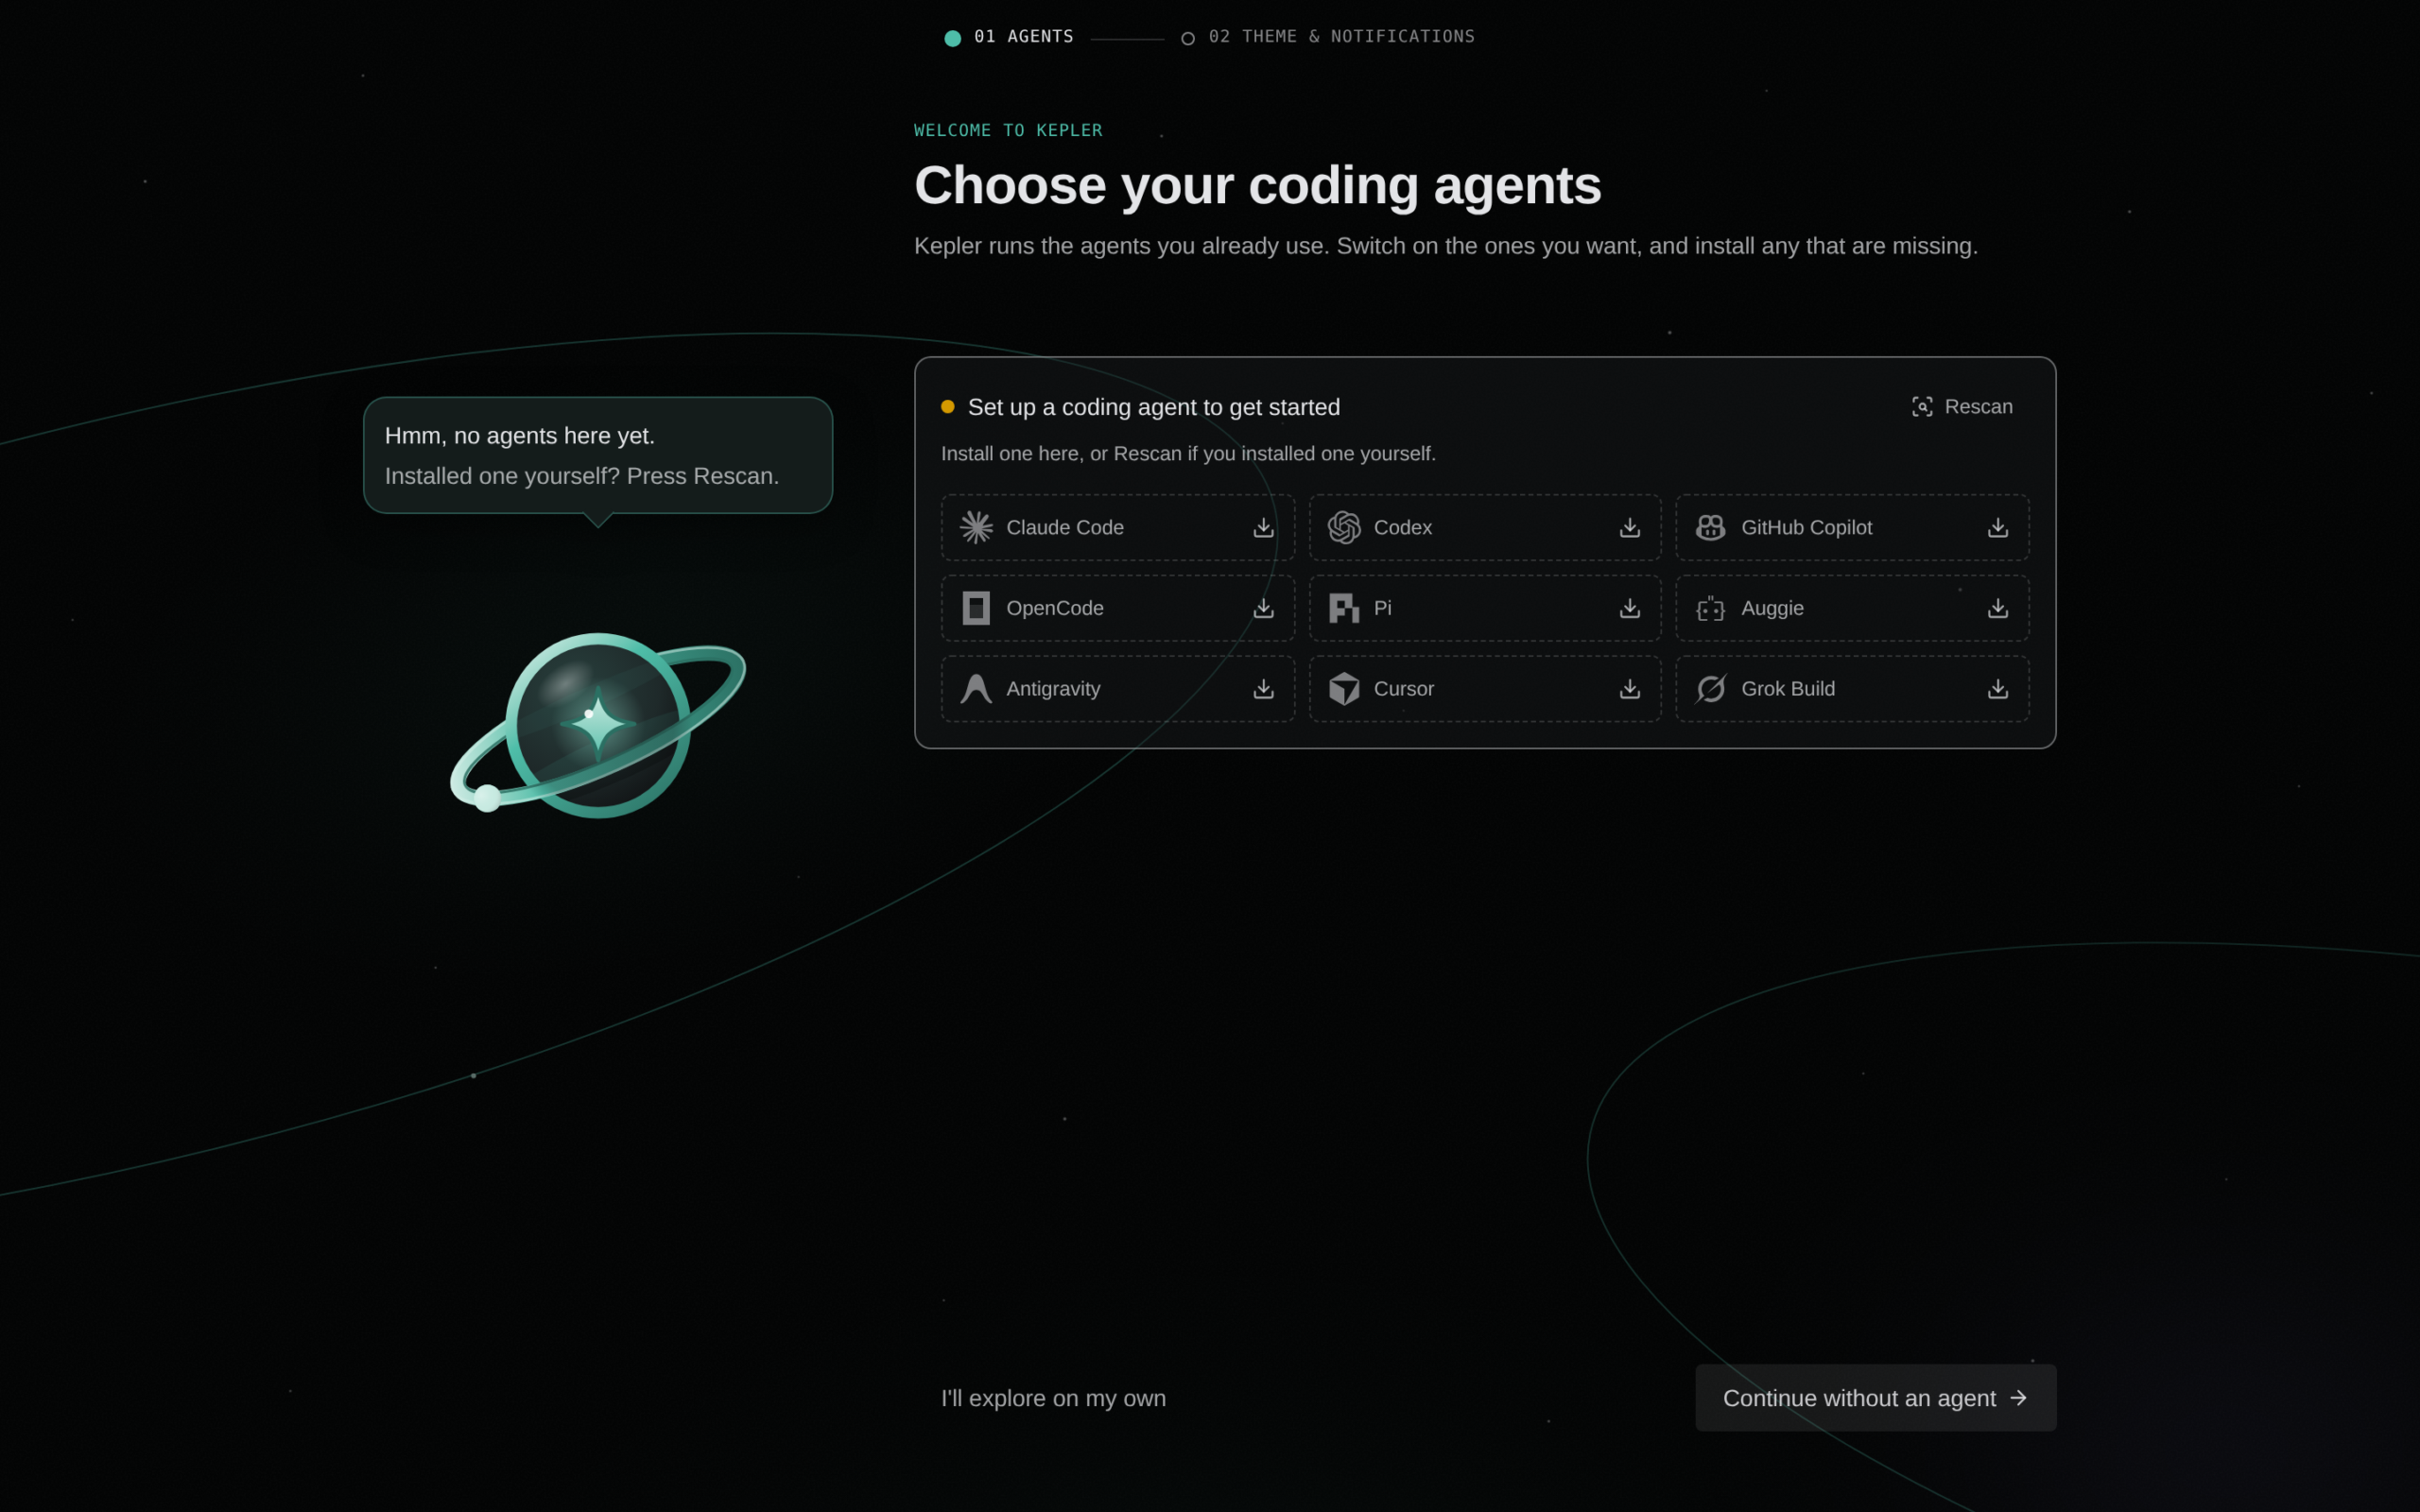
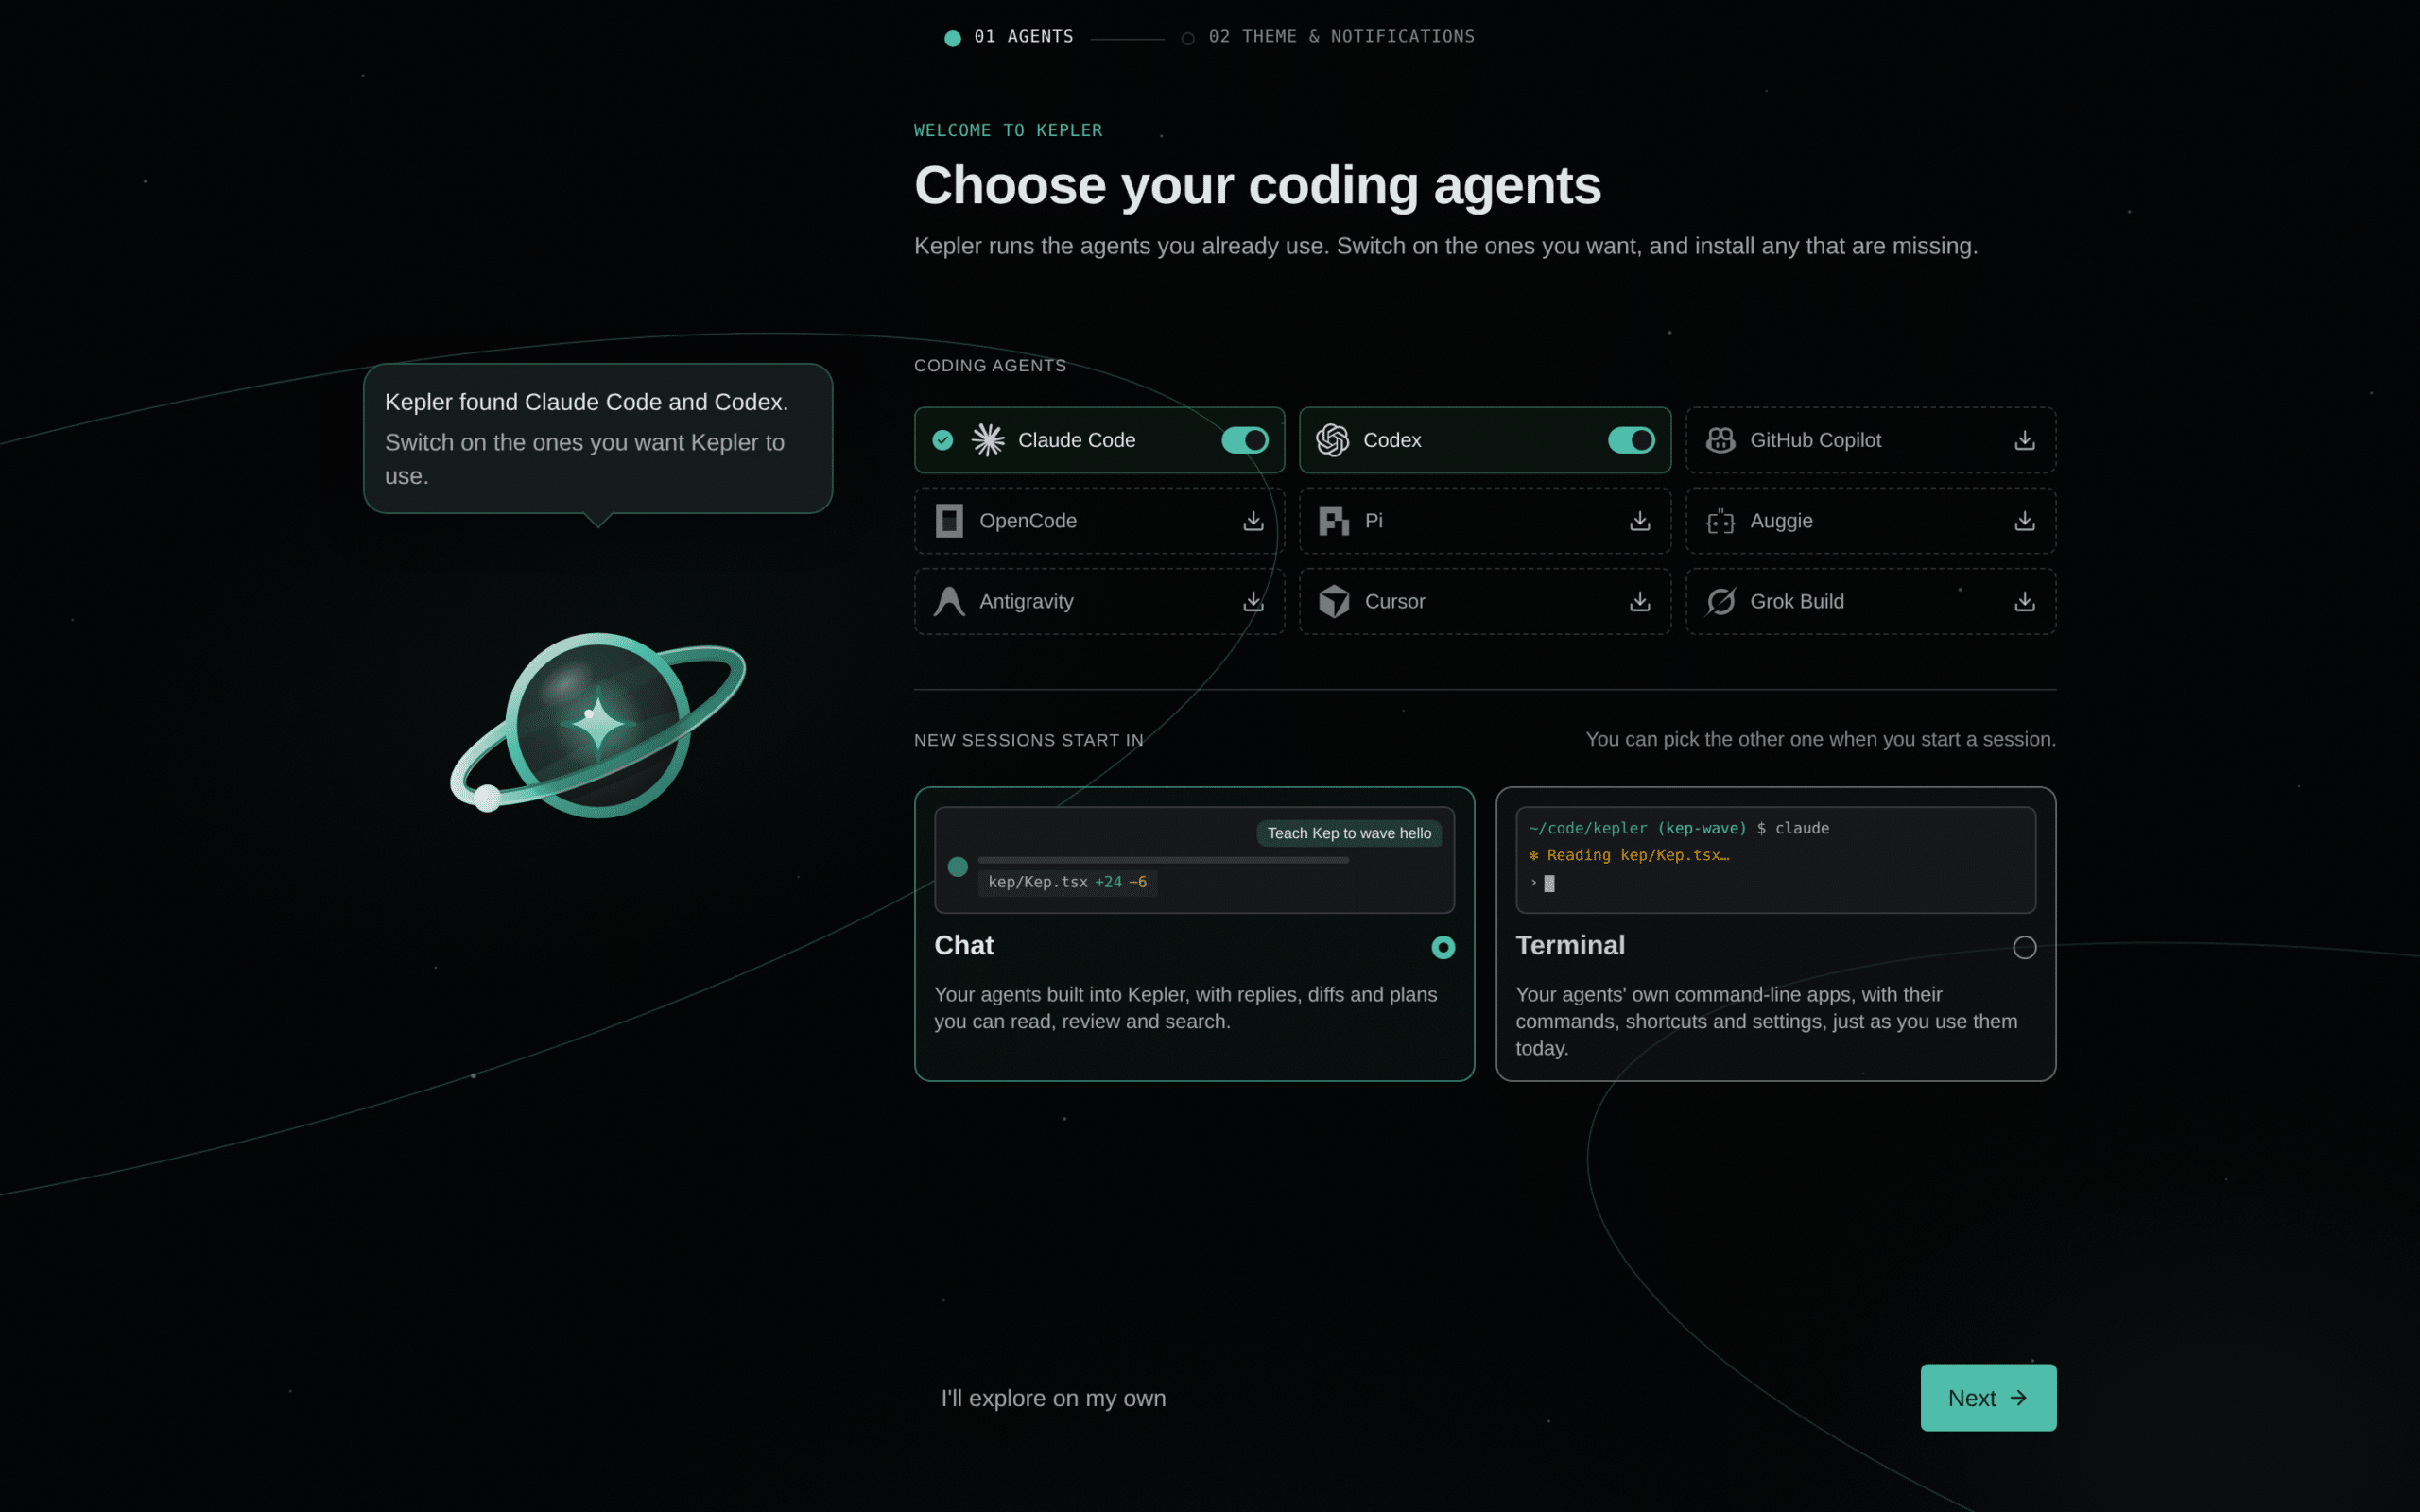
Choose your coding agents. Kepler finds the coding agents installed on this computer. In this step:
- Switch on the agents you want Kepler to use, and make one the default. To add a missing agent, click the download button on its row. See Agent Integrations.
- Under New sessions start in, pick Chat, Kepler’s own view of the agent, or Terminal, the agent’s command-line app.
- If your code is on another machine, use Work on another machine? to move this window there. Remote environments need a paid plan.
If you installed an agent that Kepler did not find, click Rescan. To go on without an agent, click Continue without an agent. You can set one up later in Settings → Agents.
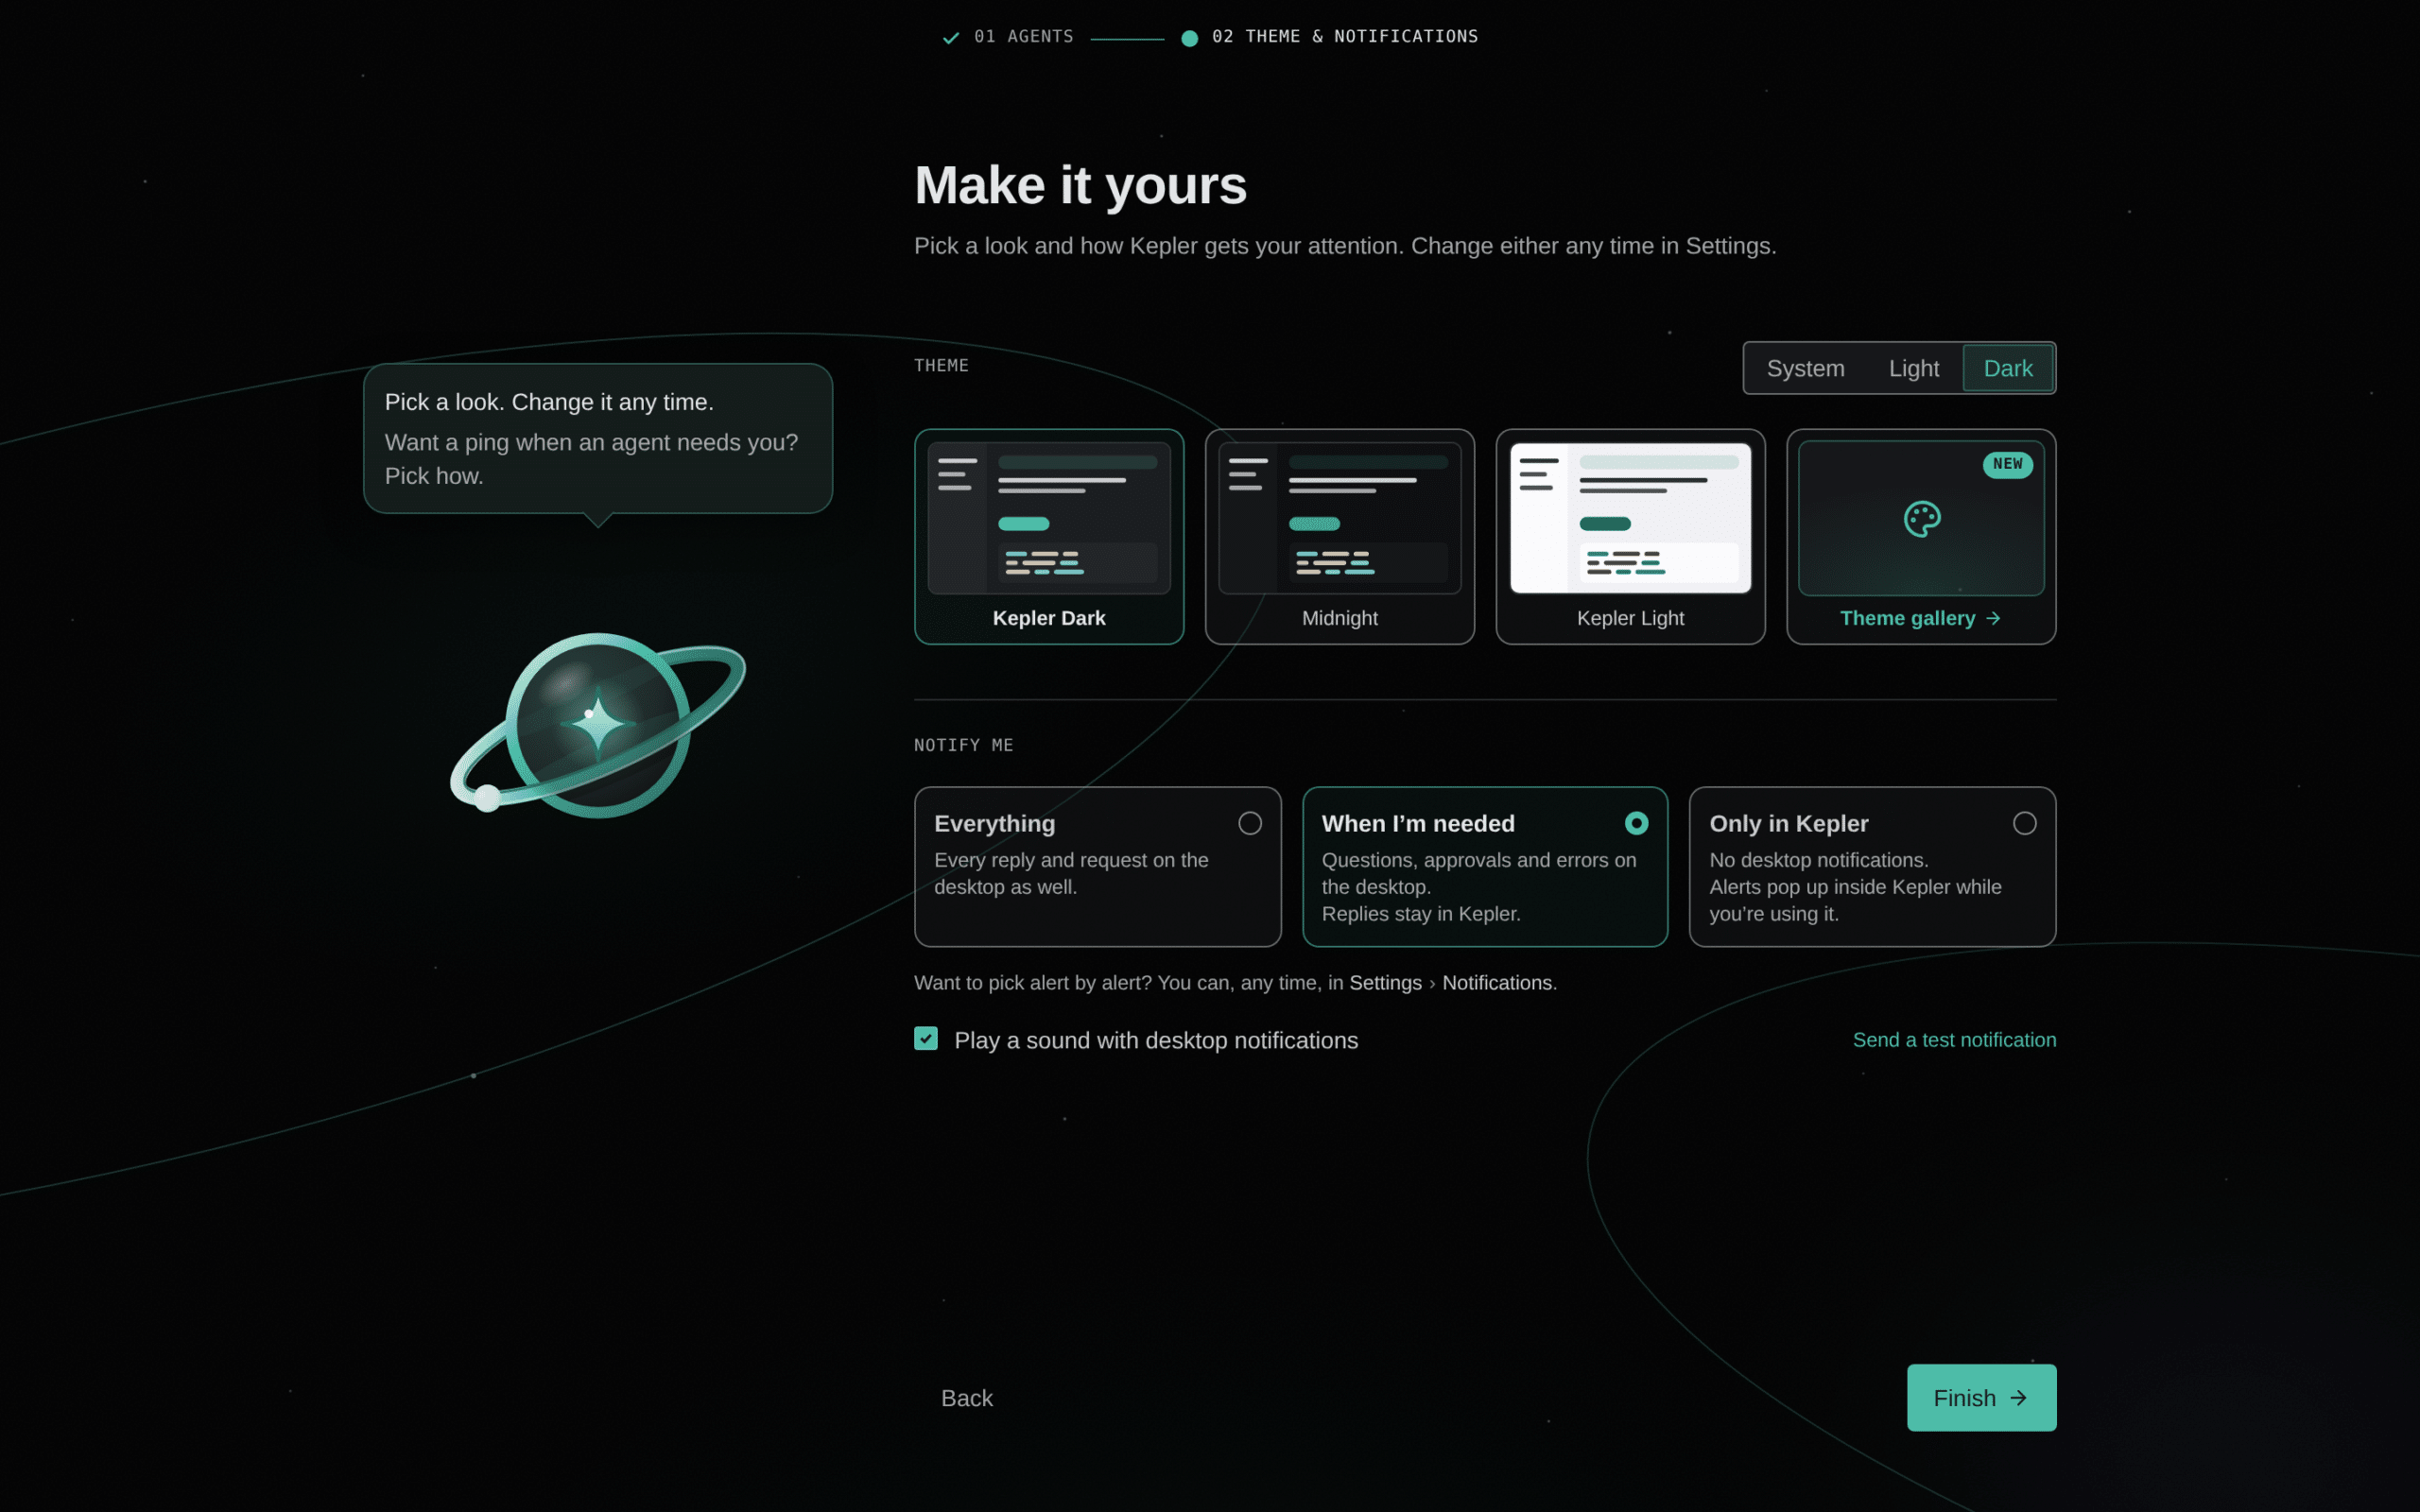
Make it yours. Pick a theme, or open the Theme gallery, and choose how Kepler gets your attention under Notify me:
- Everything: every reply and request on the desktop as well
- When I’m needed: questions, approvals, and errors on the desktop, while replies stay in Kepler
- Only in Kepler: no desktop notifications
To try an alert, click Send a test notification. You can change these choices later in Settings. Click Finish to open the New task composer on the Dashboard and start your first task.
Kepler also adds the repositories you already work in, including those GitKraken Desktop and GitLens know, to your repository picker.
Finish the setup checklist
After the guided start, the Setup entry in the top bar tracks 2 setup items and shows Setup · N/2 until you finish them. Open it to see Finish setting up Kepler and your progress. Once both items are done, the Setup entry disappears from the top bar.
| # | Item | What it does |
|---|---|---|
| 1 | Connect an AI agent | At least one coding agent. See Agent Integrations |
| 2 | Connect issue & PR trackers | Any provider, which fills your Todo list. See Issue Tracker Integrations and Pull Request Integrations |
Expand More setup options for optional items:
- Set a default repositories folder: where Kepler clones repositories it does not find locally
- Set a default worktree folder: where Kepler creates one worktree per repository, per task
- Connect a remote environment, covered in Remote Environments, where your plan can use it
- Control Kepler remotely, also in Remote Environments
- Add repo commands, once you have a repository
If your project needs a setup step, use Add repo commands early. Save a repository’s install or build command once, and Kepler can run it every time it creates a worktree, so an agent never starts in a checkout it cannot build. See Tasks and Resources.
You can set folder paths and everything else on the checklist in Settings. To remove the checklist from the top bar, click Hide from toolbar (still available in Settings). You can still open it from Settings.
Put an agent on real work
After you connect a tracker, the Todo view of the Kepler interface fills with the issues and pull requests related to you.
- Pick an item in Todo.
- Click its Action button.
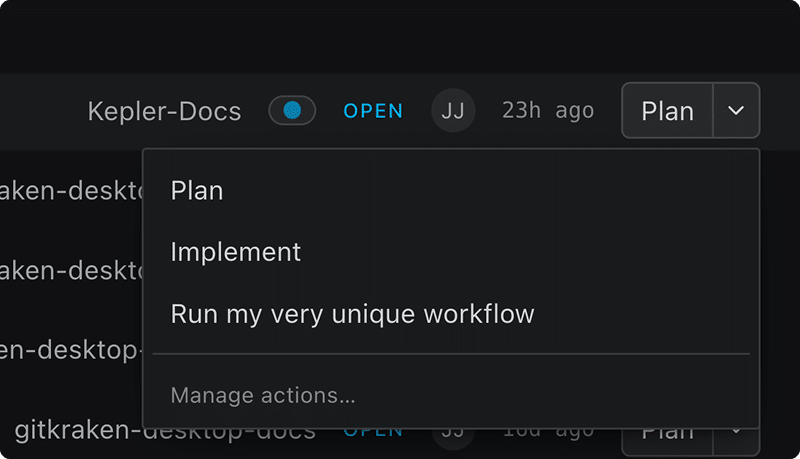
Kepler then does the following on its own:
- Creates a task.
- Attaches the repository and the item.
- Sets up an isolated worktree.
- Starts an agent with the context already in place.
The left half of the button runs the default Action for the item:
- Plan for an issue
- Review for someone else’s pull request
- Address Feedback for one of yours
The chevron next to the button offers the rest of the Actions.
You can change the prompt behind every Action and add Actions of your own. See Actions.
Start something that is not tracked yet
To start a task that has no issue or pull request behind it:
- Click New task or press Cmd/Ctrl+N. From outside Kepler, press Shift+Alt+N to open the quick launcher.
- Write a prompt.
- If the task needs a repository, attach one.
- Start the task.
You can also attach nothing at all and turn the task into real work later. See Create a task.

Where to go next
Pick the next step that fits what you want to do:
| If you want to | Read |
|---|---|
| Change the prompts, or write your own | Actions |
| Understand what a task holds | Tasks and Resources |
| Work inside a task | The Task View |
| Direct an agent mid-session | Agent Sessions |
| See what every agent is doing at once | The Agent Graph |
| Reshape the list to fit how you work | Arranging Your Work |
| Review and ship what an agent wrote | Review Changes |
| Run agents on another machine or in WSL | Remote Environments |
| Find a quick answer to a common question | Quick Answers |
