Last updated: March 2026
Use this page to complete the first-time configuration of GitKraken Self-Hosted Server after installation. It covers license upload, authentication mode selection, LDAP setup, SMTP settings, Super User creation, and initial user-management steps needed before the server is ready for administrators and users.
Requirements and limits
- Use this page after the GitKraken Self-Hosted Server installation is already running and reachable in a browser.
- A valid Self-Hosted license file is required before configuration can be completed.
- Choose either Built-in authentication or LDAP; SMTP is required unless you use LDAP authentication.
- The Super User account manages the server, does not consume a user license, and cannot sign in to GitKraken Desktop directly.
- LDAP setup requires server connection details, group mappings, and user attribute mappings before users can authenticate successfully.
GitKraken Desktop Self-Hosted and On-Premise Serverless products are sold separately from standard subscriptions. Visit our On-Premise Pricing page to learn more.
Quick Start
- Navigate to your GitKraken Self-Hosted server in a browser.
- Click Browse for license and upload the license file included with your installation package.
- Choose an authentication method: Built-in (email and password) or LDAP.
- If using LDAP, enter your server hostname, port, encryption method, base DNs, group CNs, and user attribute mappings. Optionally enable the Sync Server for automatic user syncing.
- If using Built-in authentication, configure your SMTP server: enter the hostname, port, From Address, and credentials, then click the test connection button to verify.
- Create a Super User account by entering an email and password. This account manages the server but cannot log in to GitKraken Desktop directly.
- Click Save to complete configuration. The Manage Users screen will appear, where you can begin adding user accounts.
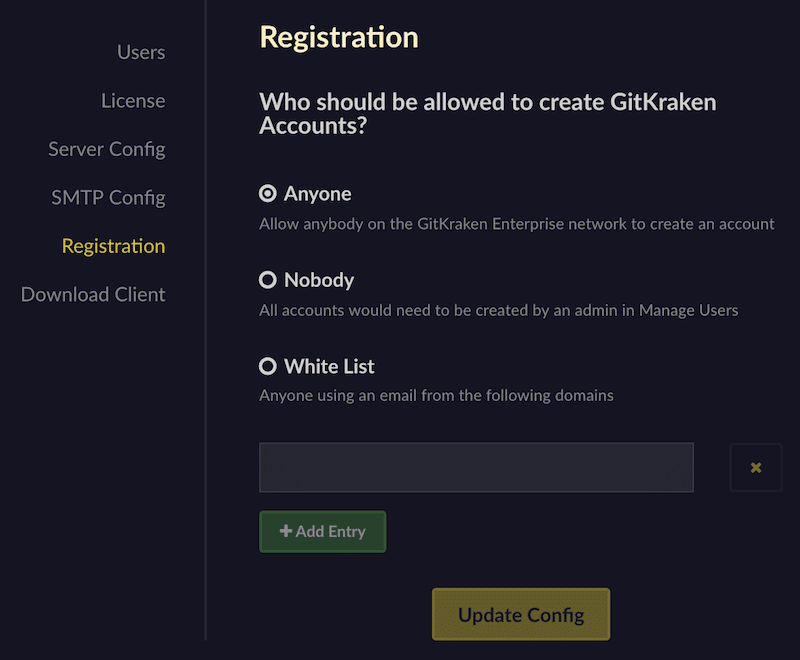
To add users, click Add user and enter the user’s email. To disable self-registration, adjust the setting in the Registration tab.
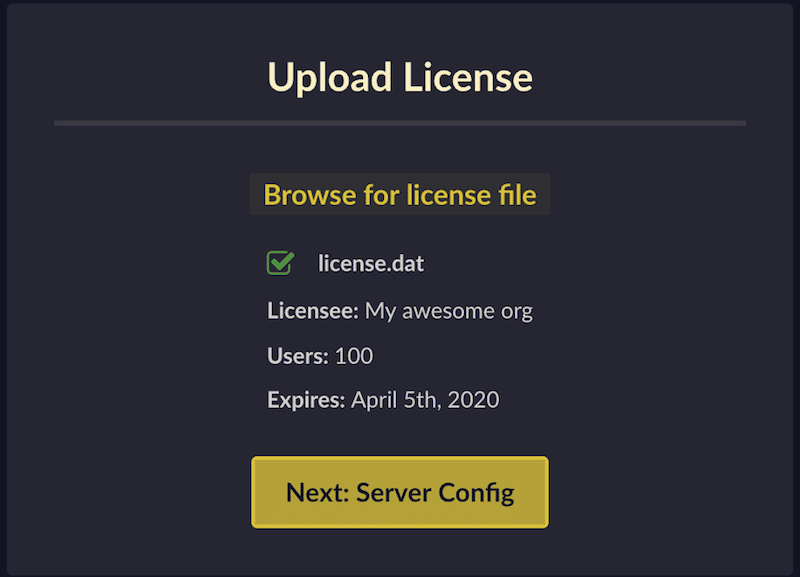
How to upload the server license
Navigate to your GitKraken Self-Hosted server.
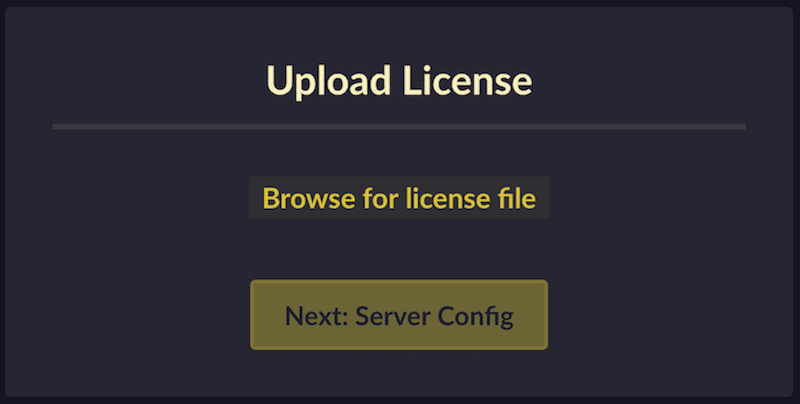
Click Browse for license and upload the license file provided with your installation package. Once selected, license details will be displayed.
How authentication setup works
Choose the authentication configuration for your server:
- Built-in: Users sign in using an email and password.
- LDAP: Users authenticate using LDAP credentials.
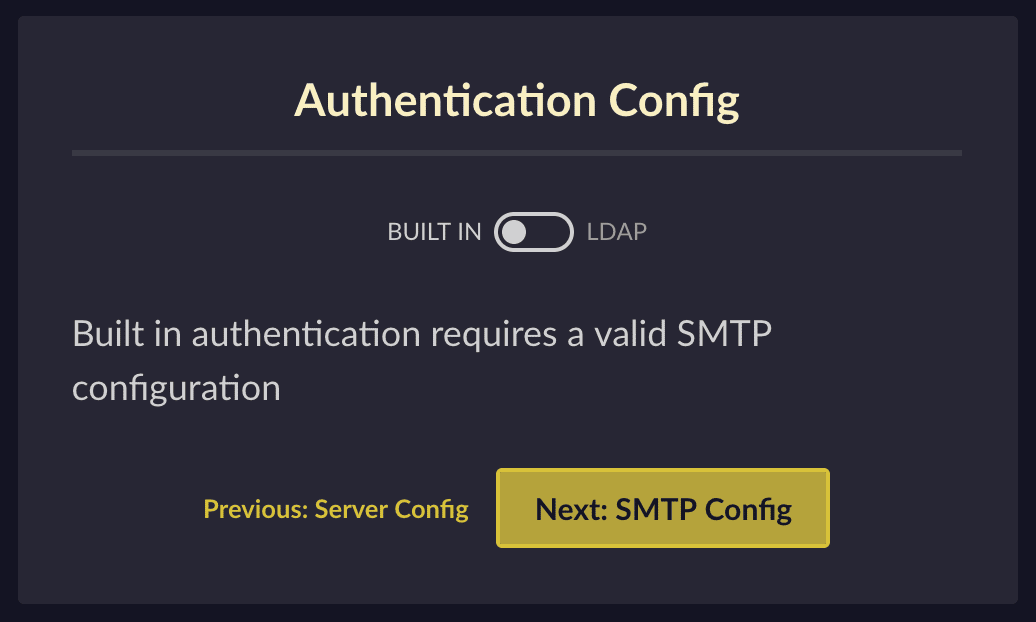
If using Built-in authentication, skip to the SMTP Server section.
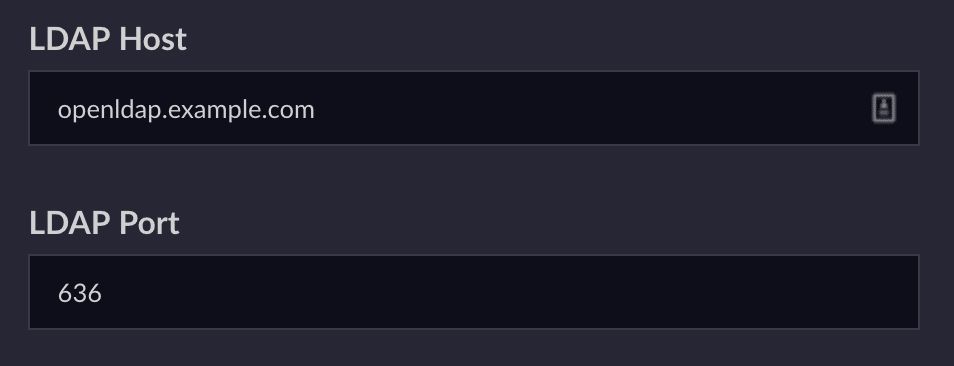
How to configure LDAP
Enter your LDAP server hostname and port:
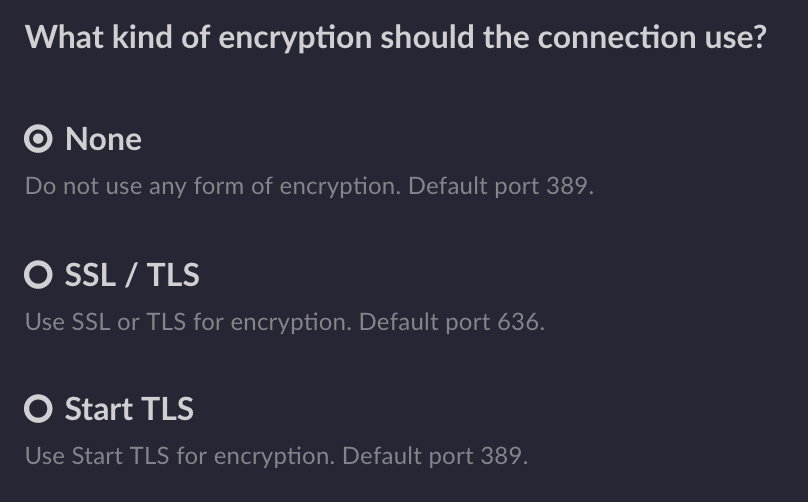
Choose the corresponding encryption method:
Specify the following LDAP configuration fields:
- Base Distinguished Names – Top-level directory paths to search for users.
- Access Group Common Names – Groups that are granted GitKraken licenses. If omitted, all found users are granted access.
- Admin Group Common Names – Groups granted administrative access. If omitted, no users receive admin rights.

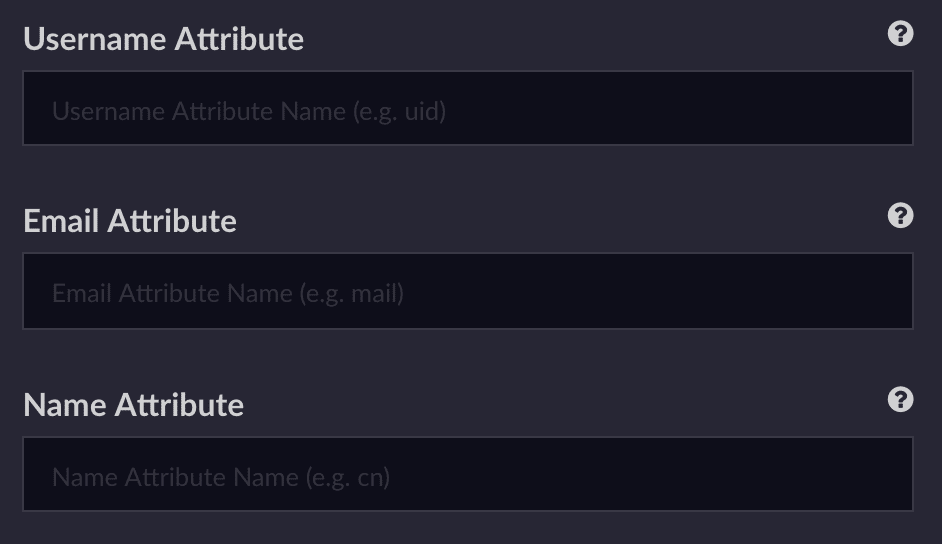
Set the required user attribute mappings:
- Username Attribute – Maps to GitKraken usernames (required).
- Email Attribute – Maps to user emails (required).
- Name Attribute – Maps to user display names (optional).
Provide the DN of a search user account with read access to users and groups:
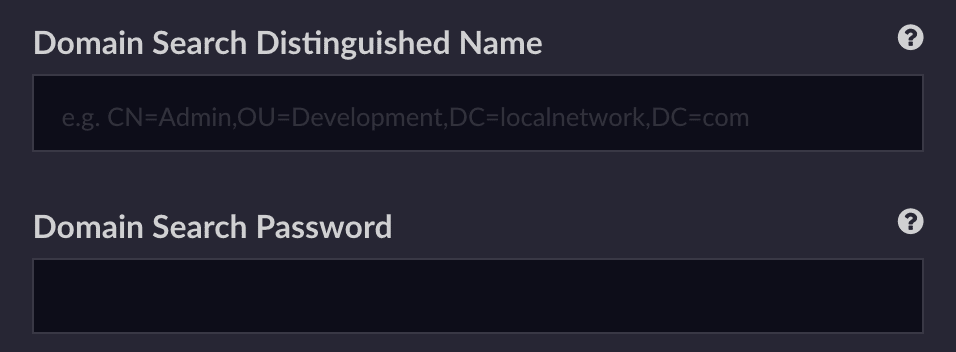
Note: The Domain Search Password field will always appear blank, even when a value is set.
Enable the Sync Server if you want GitKraken to regularly sync with LDAP:
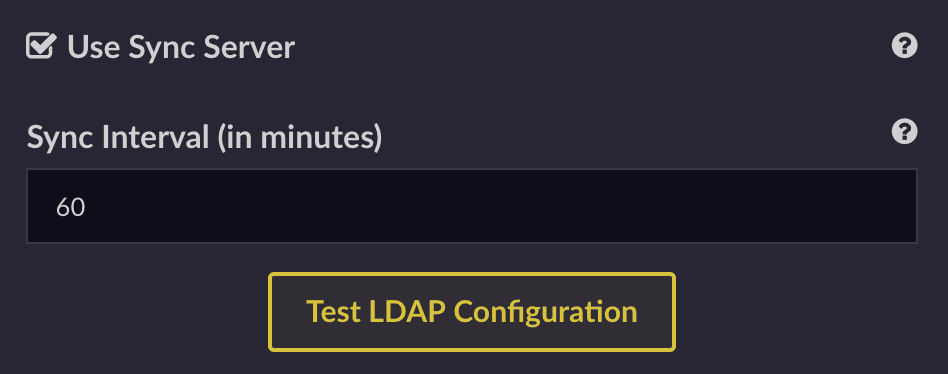
If Sync Server is disabled, you’ll need to manage user accounts manually.
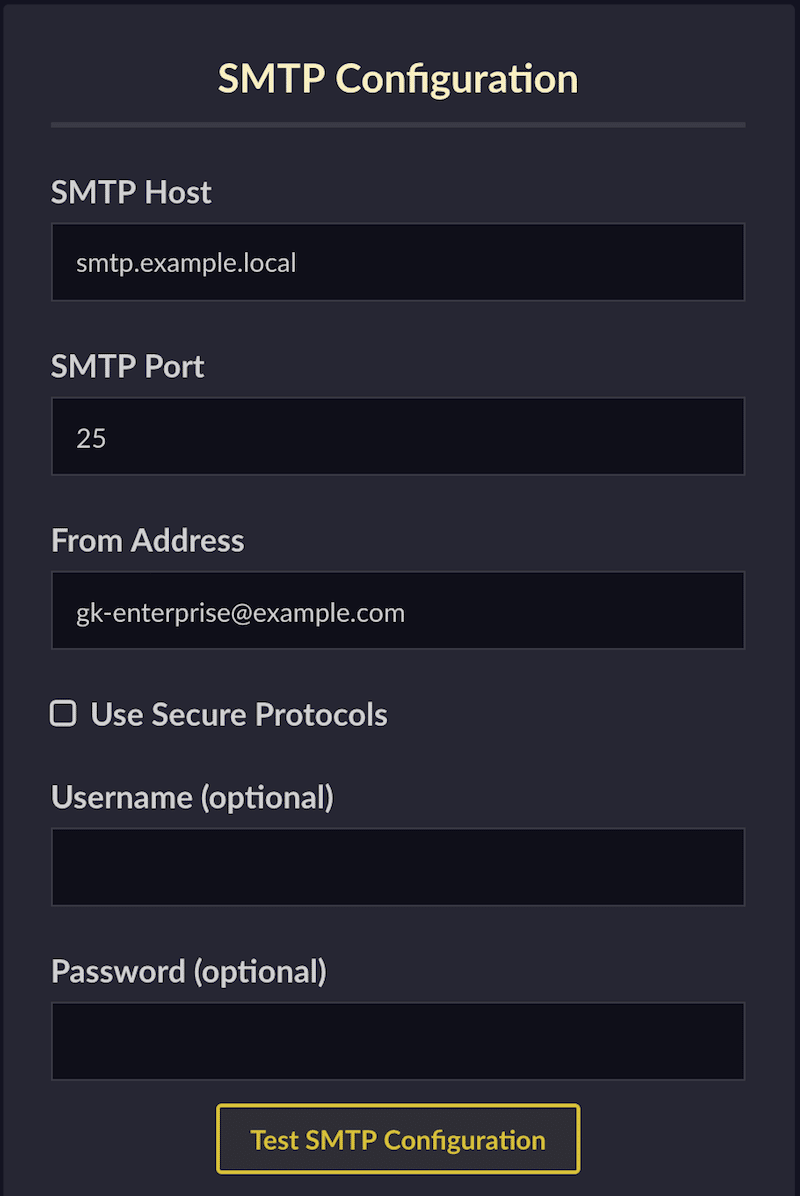
How to configure the SMTP server
An SMTP server is required unless you’re using LDAP authentication.
Specify the server details:
- SMTP IP address or hostname
- SMTP port
- From Address
Enable secure protocols if necessary and provide authentication credentials. Use the test connection button to verify:
How to configure the Super User
The Super User is the license owner of GitKraken Self-Hosted. This account:
- Does not consume a user license
- Cannot log into GitKraken Desktop
- Cannot be viewed or modified via the account site user management page
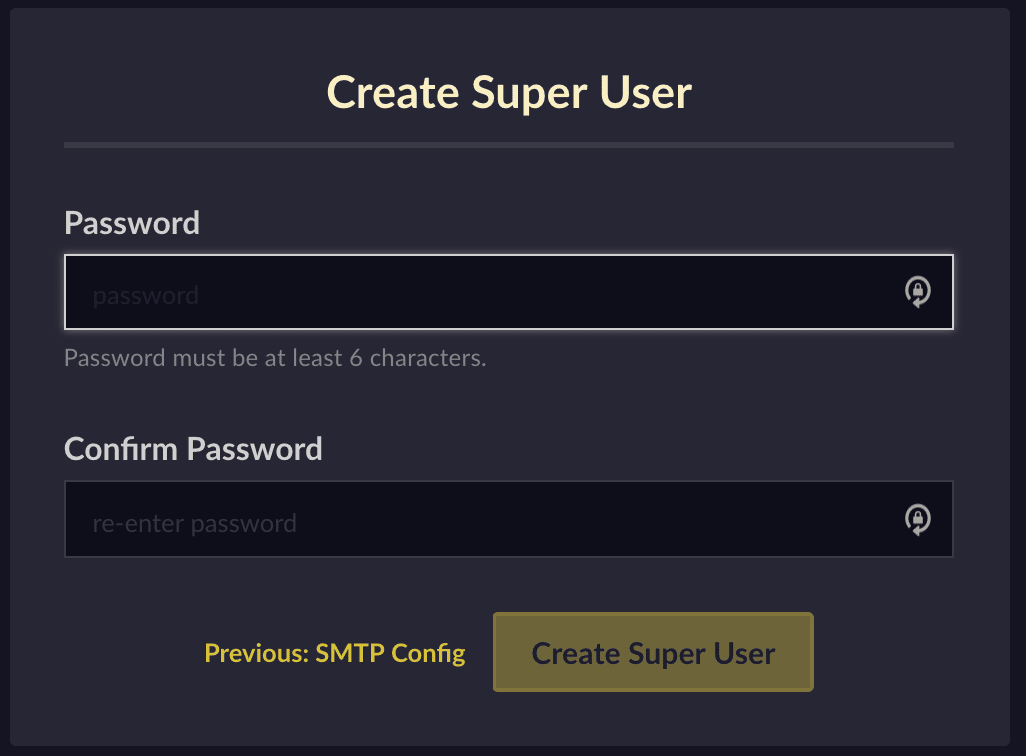
Note: To reset the Super User password, visit the upgrade guide.
Configuration is now complete! You should see the ‘Manage Users’ screen, where you can begin adding users.

How to add users
To add a user, click Add user and enter the user’s email address:

By default, users can self-register on the GitKraken Self-Hosted site. To disable self-registration, go to the Registration tab: