Learn how to branch and merge in GitKraken Desktop. 🌳 🔀
Branches
When starting work on a new feature or bug, create a new branch. Right click on any existing commit to create a branch:
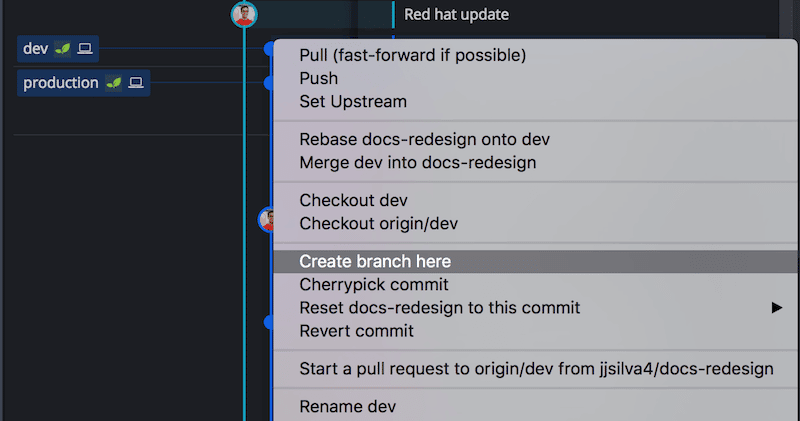
A branch is a pointer to a specific commit in the repo, rather than making entire copies of the working directory files.
Branches allow you to isolate new work from other areas of the repository, and consider implementing GitFlow as a merging strategy.
Checking out branches
Branch checkout updates files in the working directory to reflect the version defined by that branch.
New commits are added to the checked out branch. If you find yourself on the wrong branch, stash your changes, switch to the correct branch, and then pop the stash.
When you create a new branch, GitKraken Desktop will automatically checkout the branch for you:
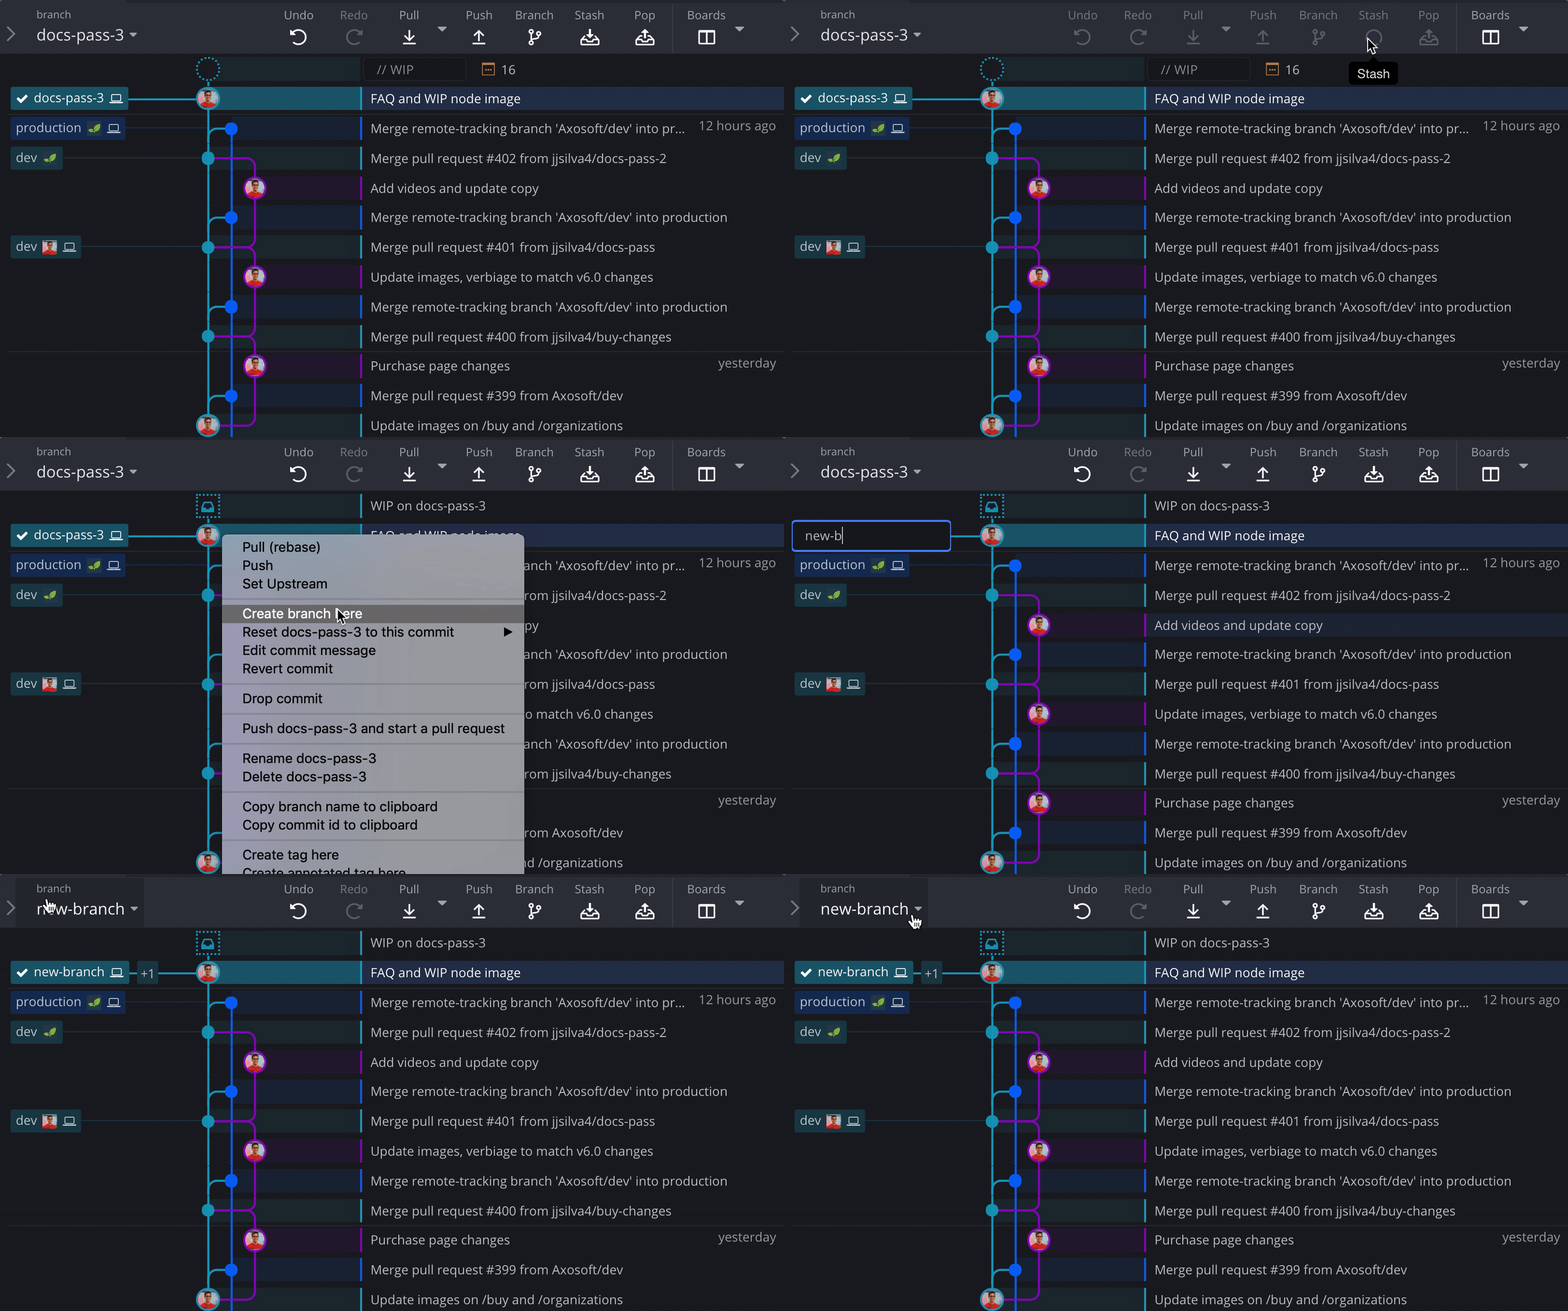
To checkout a different branch, double click on the branch label on the left panel or via the graph. Checkout is also available by right-clicking a branch.
Rename a branch
Rename a branch by right-clicking the branch tag in the Commit Graph (or right-click the branch in the branch list on the left panel) and selecting Rename branch-name.

For hardcore keyboard warriors, you can also rename a branch using the Command Palette (Cmd+P or Ctrl+P) and type Rename Branch.
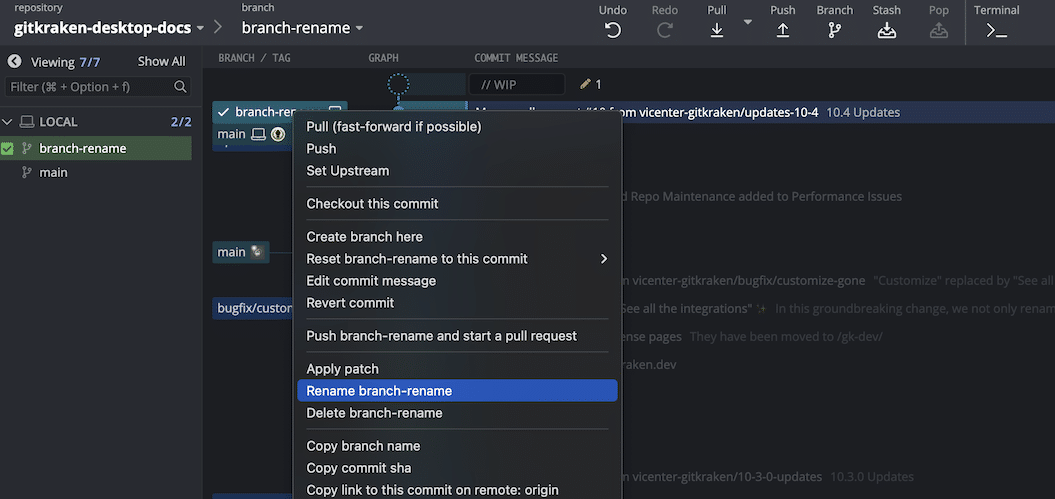
Note: You can only rename the current branch you are on.
Delete a branch
To delete a branch, right-click the branch and select Delete {branch-name}. You cannot delete a branch that is checked out.
To delete multiple local branches in the left panel, hold Shift then click to select a range of branches or hold ⌘ | Ctrl then click to select specific branches. Then right-click to access the delete option.

Caution: Deleting a branch is a destructive action.
Merging
Merging takes the commits on two different branches and combines them.
With a merge, files are automatically merged unless there are two conflicting set of changes, i.e. commits on the different branches updating the same line in different ways.
Drag and drop one branch onto another to initiate a merge, or just right click the branch you would like to merge in and select merge from the menu.

Note 📝 – The In-app merge conflict output editor is only available with a Paid license.
Choose your own adventure
- I want to merge my own stuff in — Continue onward!
- I want someone else to review and merge for me — You want a Pull Request!
Merge Conflict Editor
Merge conflicts may happen when team members make different changes to the same line of the same file, or when one team member edits a file and another deletes the same file. Oops!
When collaboration goes wrong, GitKraken Desktop Merge Conflict Editor is here to clear the murky waters.
If your merge attempt triggers a merge conflict, GitKraken Desktop display the conflicting files in the Commit Panel.

Clicking a conflicted file opens the Merge Tool.
The current branch is on the left, and the target branch that you’re merging into is shown on the right. The Merge Tool output is at the bottom.

Each conflict section has a checkbox. Checking a section adds it to the Output at the bottom so you can see the options in context to decide which makes the most sense to commit.
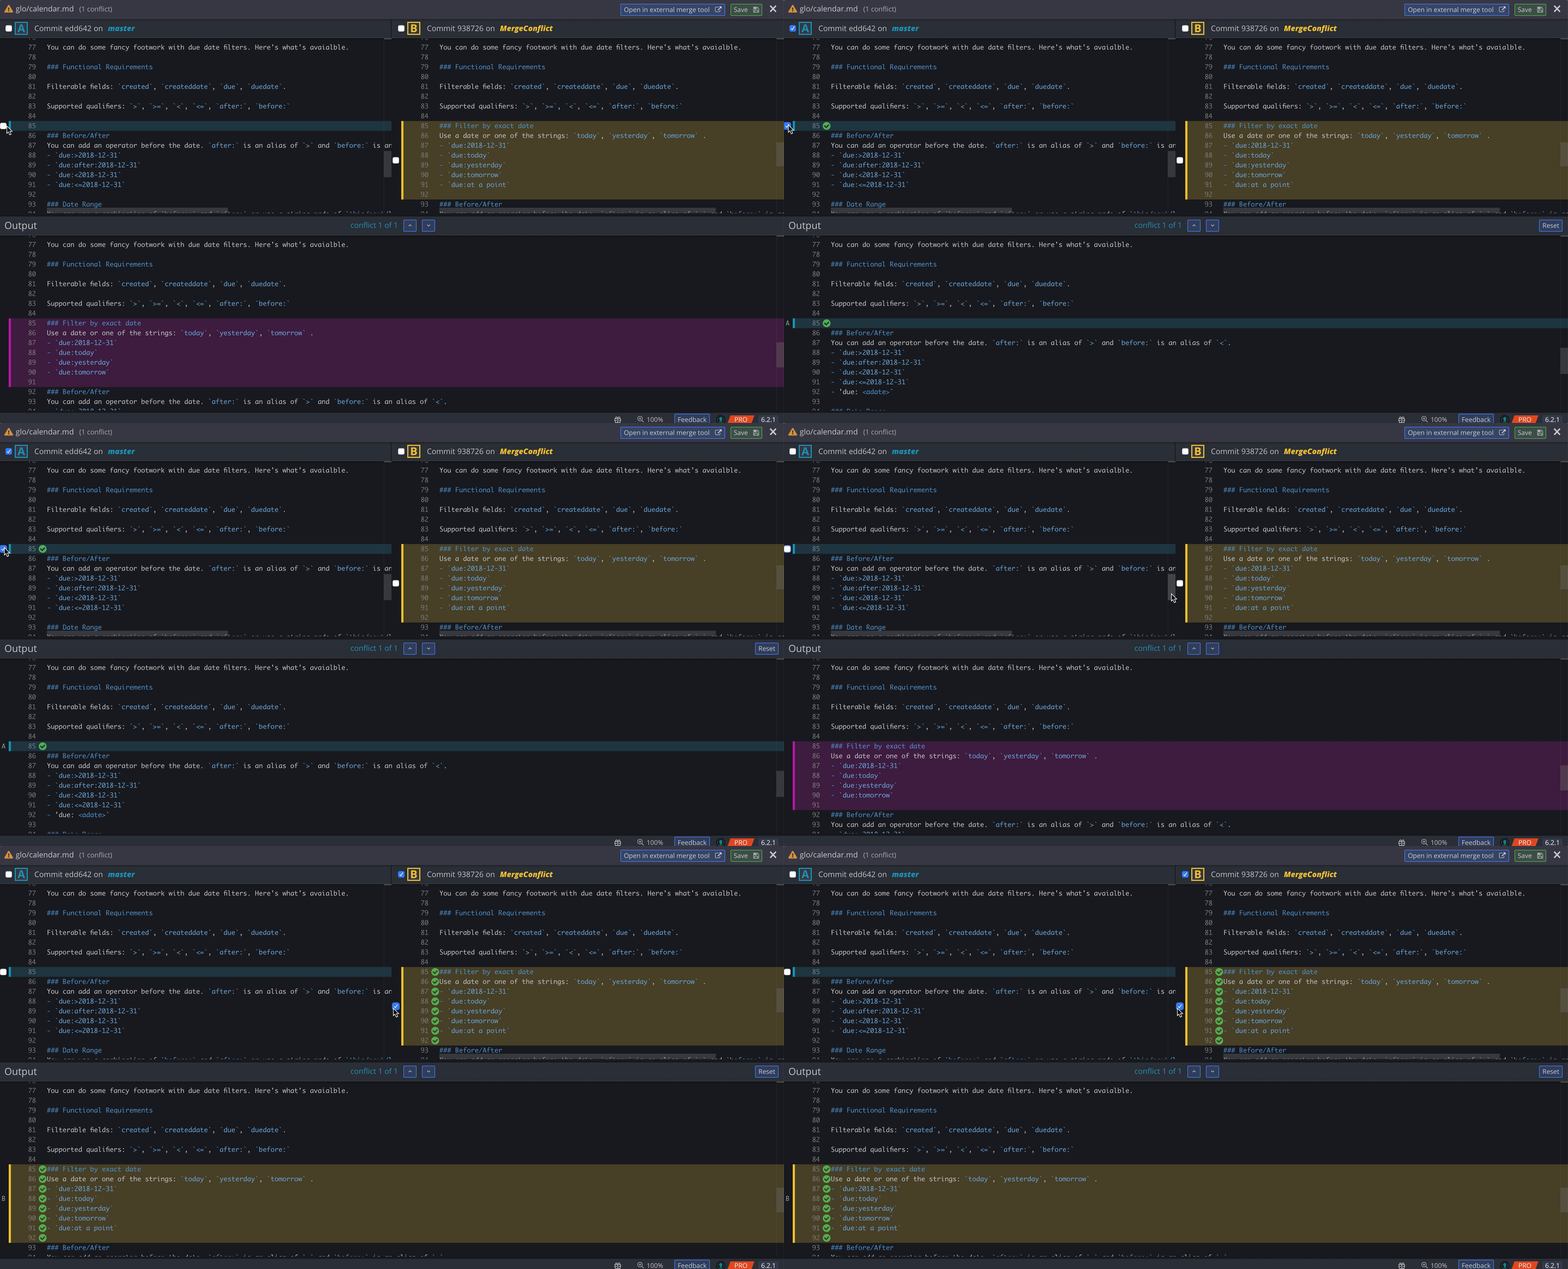
You can also mouse over the line number and click to select specific lines for the Output, or edit the Output window directly.
Clicking the up and down arrows will move you to the next conflict.
Tip – Use the keyboard shortcut Cmd/Ctrl + F to search any of the 3 diffs inside the merge tool.
Note 📝 – The In-app merge conflict output editor is only available with a Paid license.
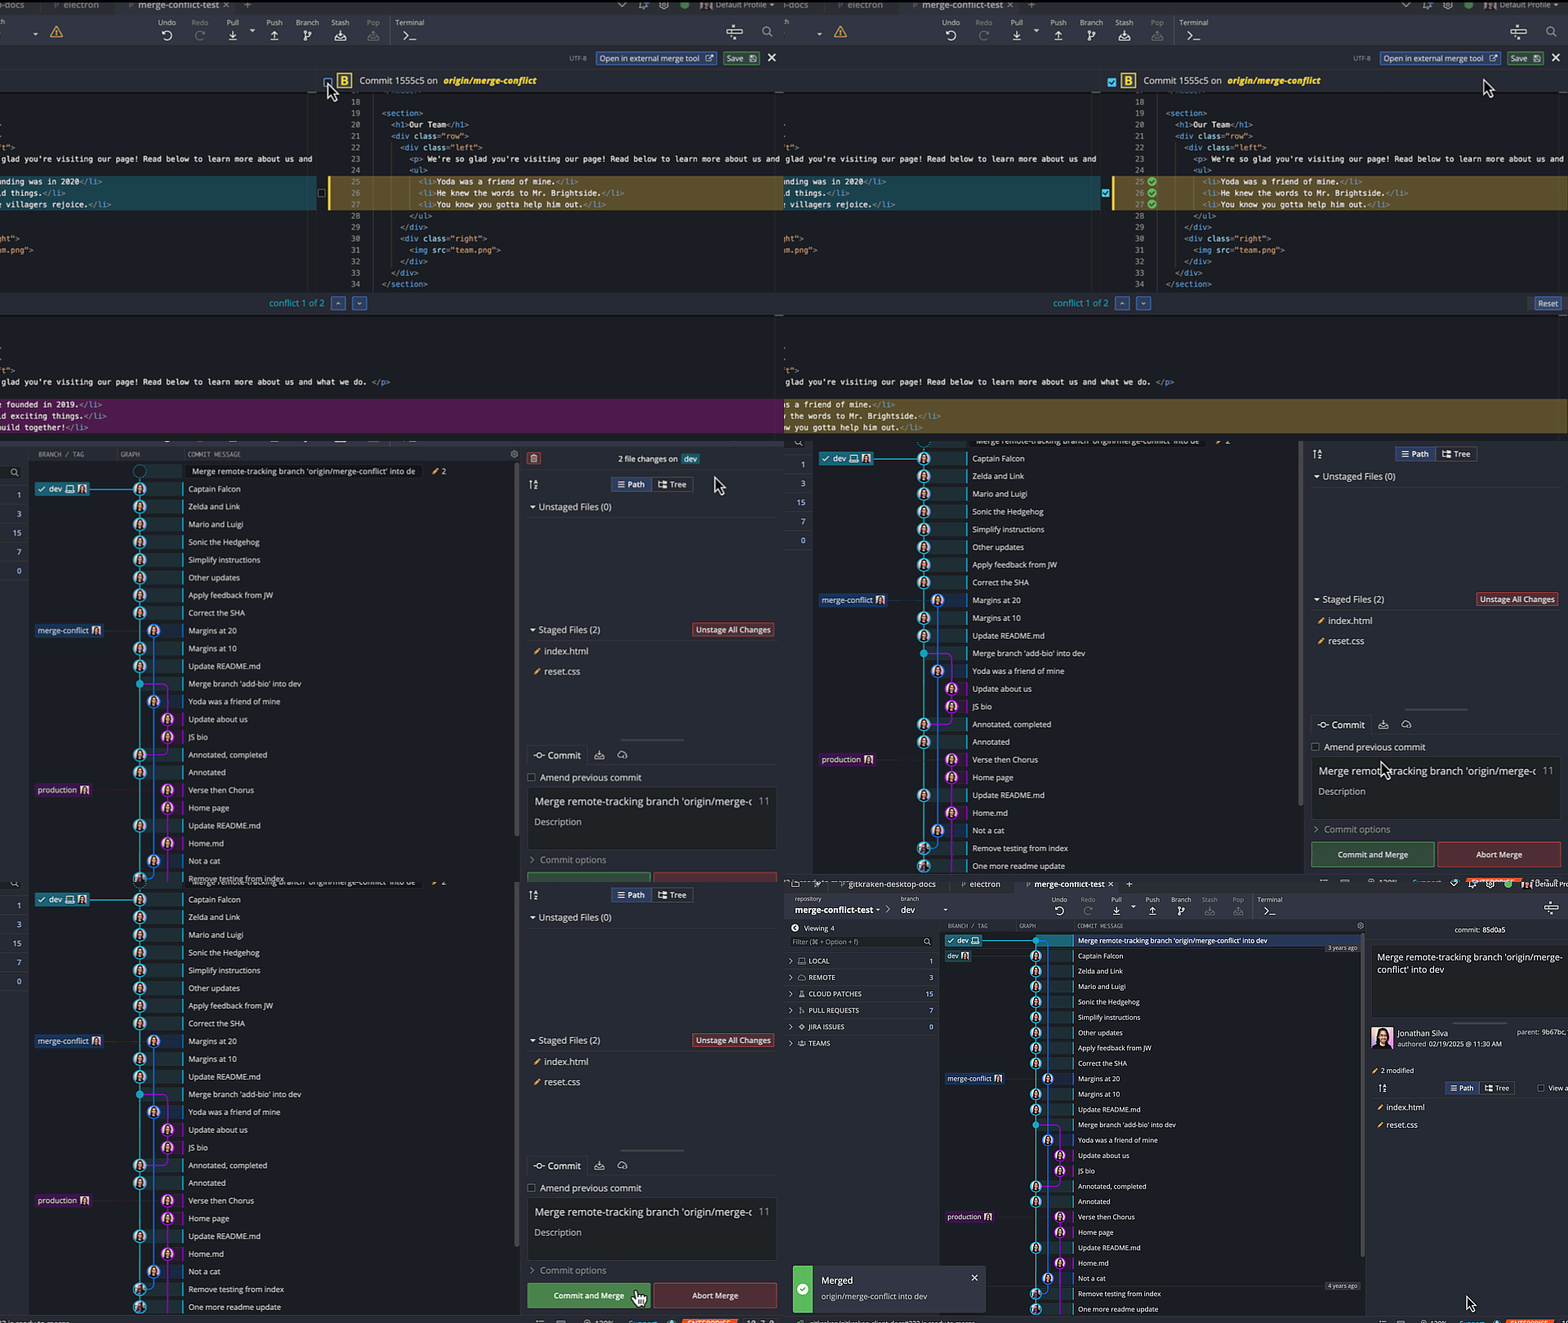
After the conflict is resolved, save the output and commit the changes.
Watch our Learn Git Tutorial on how to resolve merge conflicts in git.
External merge tools
Configure GitKraken Desktop to launch your tool of choice by navigating to Preferences General:

GitKraken Desktop currently supports the following merge tools:
- Beyond Compare
- FileMerge
- Kaleidoscope
- KDiff
- Araxis
- P4Merge
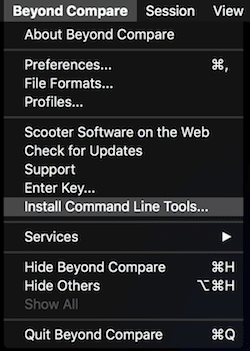
If your merge tool from the list above is installed and is not showing up in the dropdown, then look for an option to install command line tools.
GitKraken Desktop does not support the following merge tools:
- Meld
- SemanticMerge
- TortoiseMerge
- WinMerge
While GitKraken Desktop allows Git Config Default merge tools, not all tools will be compatible. Find more information about configuring a default merge tool in your Git Config.
Resolving a conflicted file using current or incoming
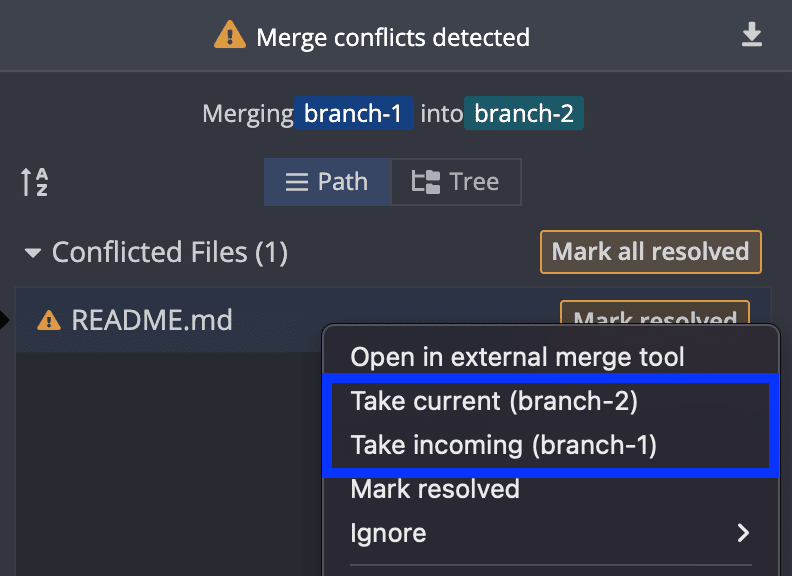
You may resolve a conflicted file by right-clicking the file in the commit panel and selecting the option Take current (branch) or Take incoming (branch).
Take current (branch)will apply the changes of the current branch.Take incoming (branch)will apply the changes of the incoming branch.
Rebasing
Rebasing takes the commits from one branch and places them onto the last commit of another branch. This alters the tree structure by moving the commits and their changes onto the target branch.
To perform a rebase, drag and drop one branch onto another branch then select Rebase.

You can rebase onto a local or remote.

