

Last updated: November 2026
Use this page to connect GitKraken Desktop to Jira Cloud or Jira Data Center so you can preview, create, edit, filter, and branch from Jira issues alongside your repository work. Jira is view-only for Community users, while paid GitKraken subscriptions unlock the full issue management workflow.
Requirements and limits
- Integrations covered here: Jira Cloud and Jira Data Center
- Community plan: View-only access
- Full issue workflows: Paid GitKraken subscription required for create, edit, and branch workflows
- Filter syntax: Uses JQL for custom Jira issue filters
- Data Center note: Jira Data Center uses a Personal Access Token flow instead of the Jira Cloud authorization flow
| Variant | Auth flow | Community access | Full edit support | Filter syntax |
|---|---|---|---|---|
| Jira Cloud | Atlassian browser authorization flow | View-only | Paid GitKraken subscription required | JQL |
| Jira Data Center | Personal Access Token | View-only | Paid GitKraken subscription required | JQL |
The Jira integration is view-only for Community users. To use all features, upgrade to a paid GitKraken subscription.
Quick Start
- Go to Preferences > Integrations or click the ISSUES section in the Left Panel. If the ISSUES section is not visible, right-click any Left Panel header and enable it.
- Select Jira Cloud and click Connect to Jira, then finish connecting in your browser at gitkraken.dev. For Jira Data Center, use a Personal Access Token instead; see Jira Data Center.
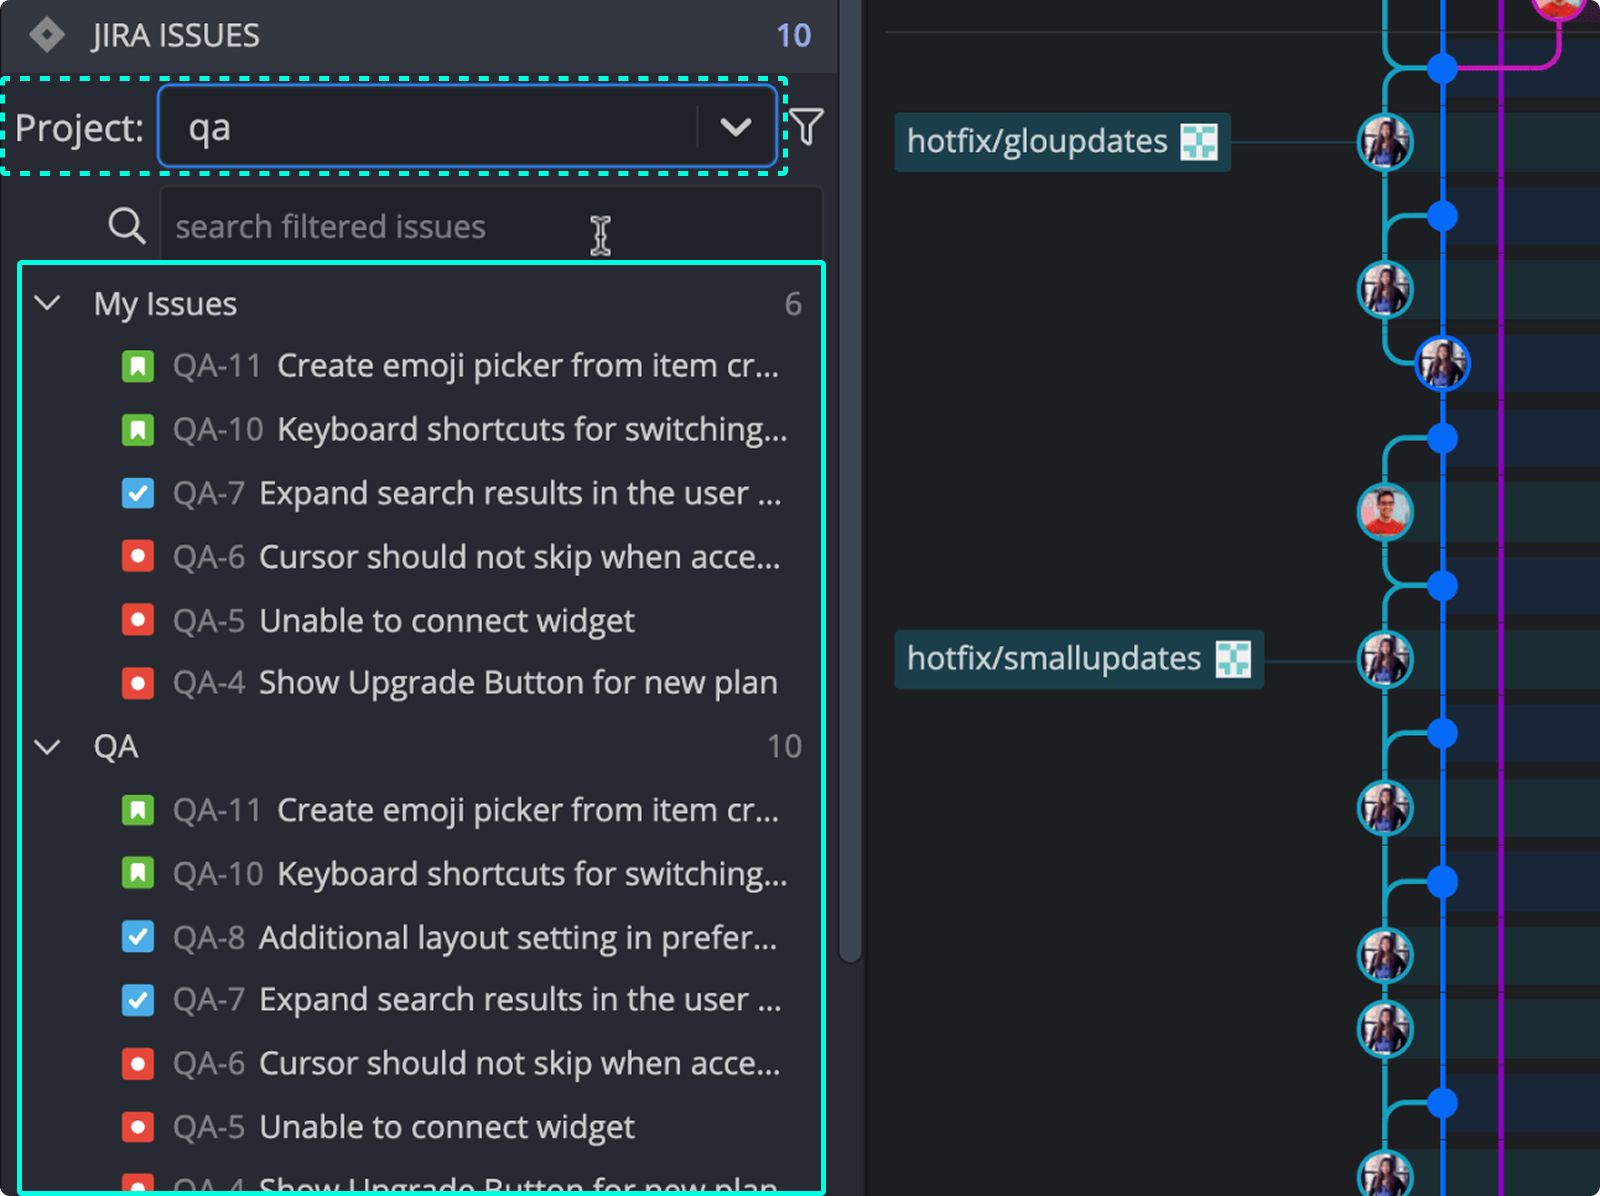
- Find your Jira issues in the Left Panel under the My Issues filter, which is the default.
To view and edit issue details: Click any issue to open its detail view. You can edit the title, description, status, and assignee. Changes sync with your Jira board.
To create a new issue: Click the + icon in the Left Panel, fill in the required fields, and submit. The issue syncs to Jira automatically.
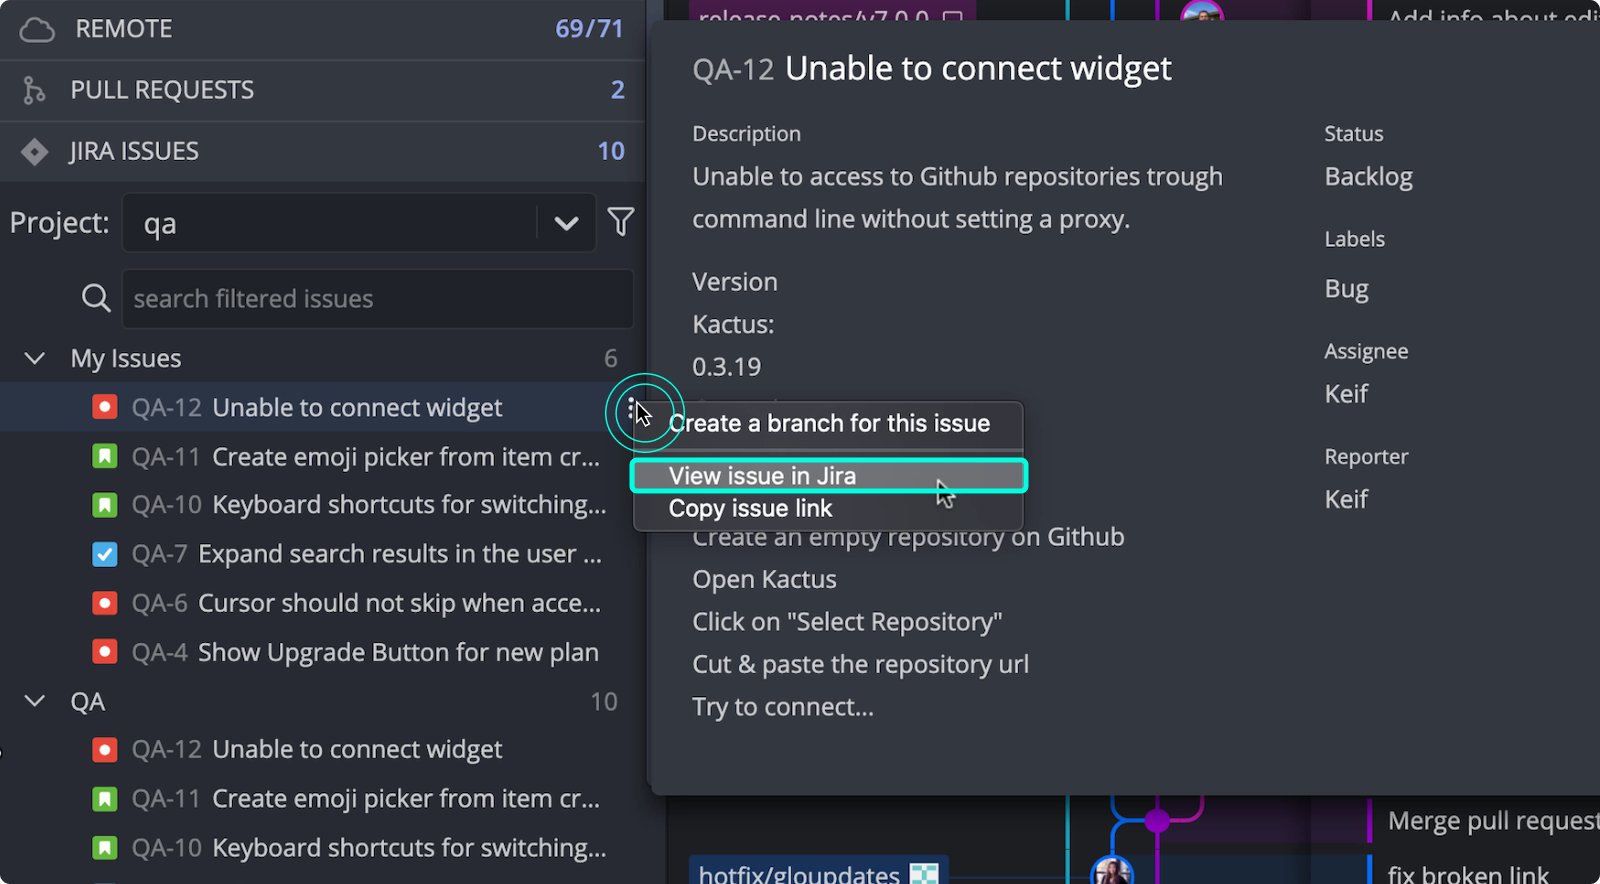
To create a branch from an issue: Open the issue detail view and click Create a Branch for This Issue. GitKraken Desktop pre-fills the branch name from the issue title.
To use JQL filters: Use JQL in the Left Panel to narrow issues by project, label, sprint, or status.
How to connect the Jira integration
Set up the integration from the ISSUES section in the Left Panel or from Preferences > Integrations. If you do not see the ISSUES section, right-click any Left Panel header and enable it from the context menu.
Use Jira Cloud on this page when: your organization uses Atlassian’s hosted Jira authorization flow. Use Jira Data Center instead when: your team runs self-hosted Jira and needs PAT-based setup with Data Center-specific compatibility.
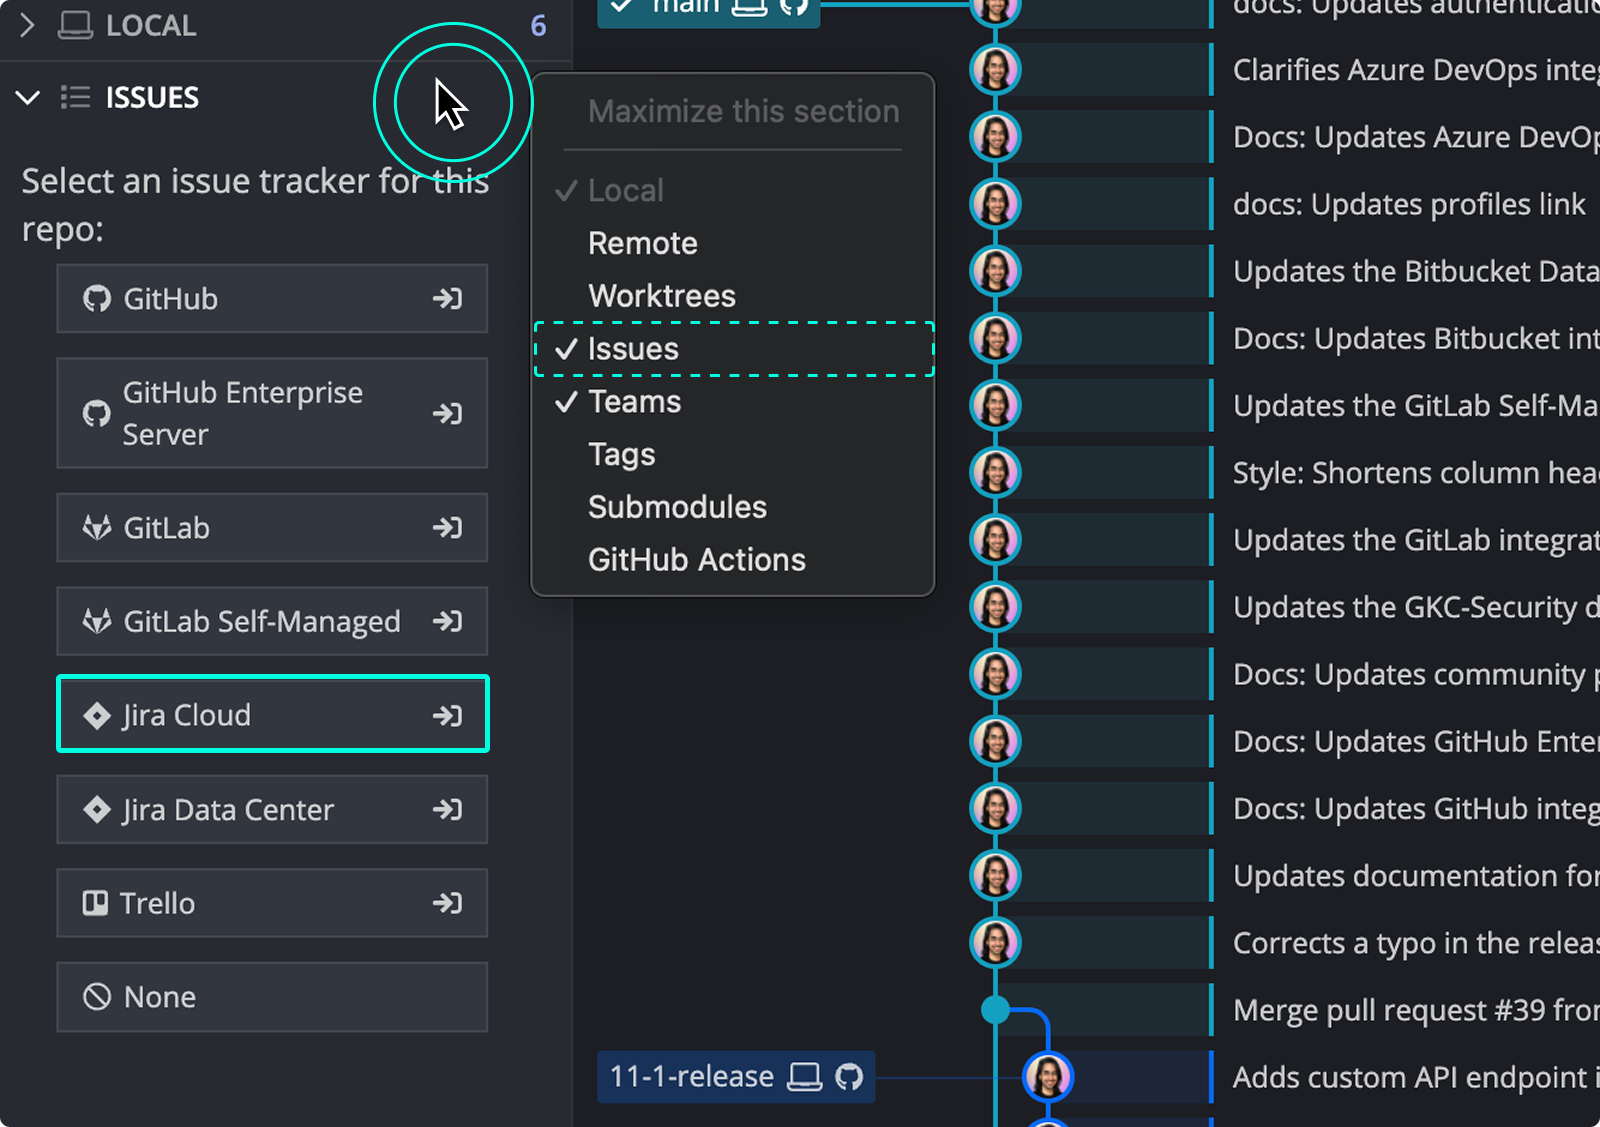
Jira Cloud connects through your GitKraken account, so sign in to GitKraken Desktop first. In Preferences > Integrations, select Jira Cloud and click Connect to Jira. Your browser opens gitkraken.dev to finish the connection. If Atlassian asks you to authorize the connection, click Accept. You can also use the connection on your other computers and profiles. See How integrations connect through your GitKraken account.
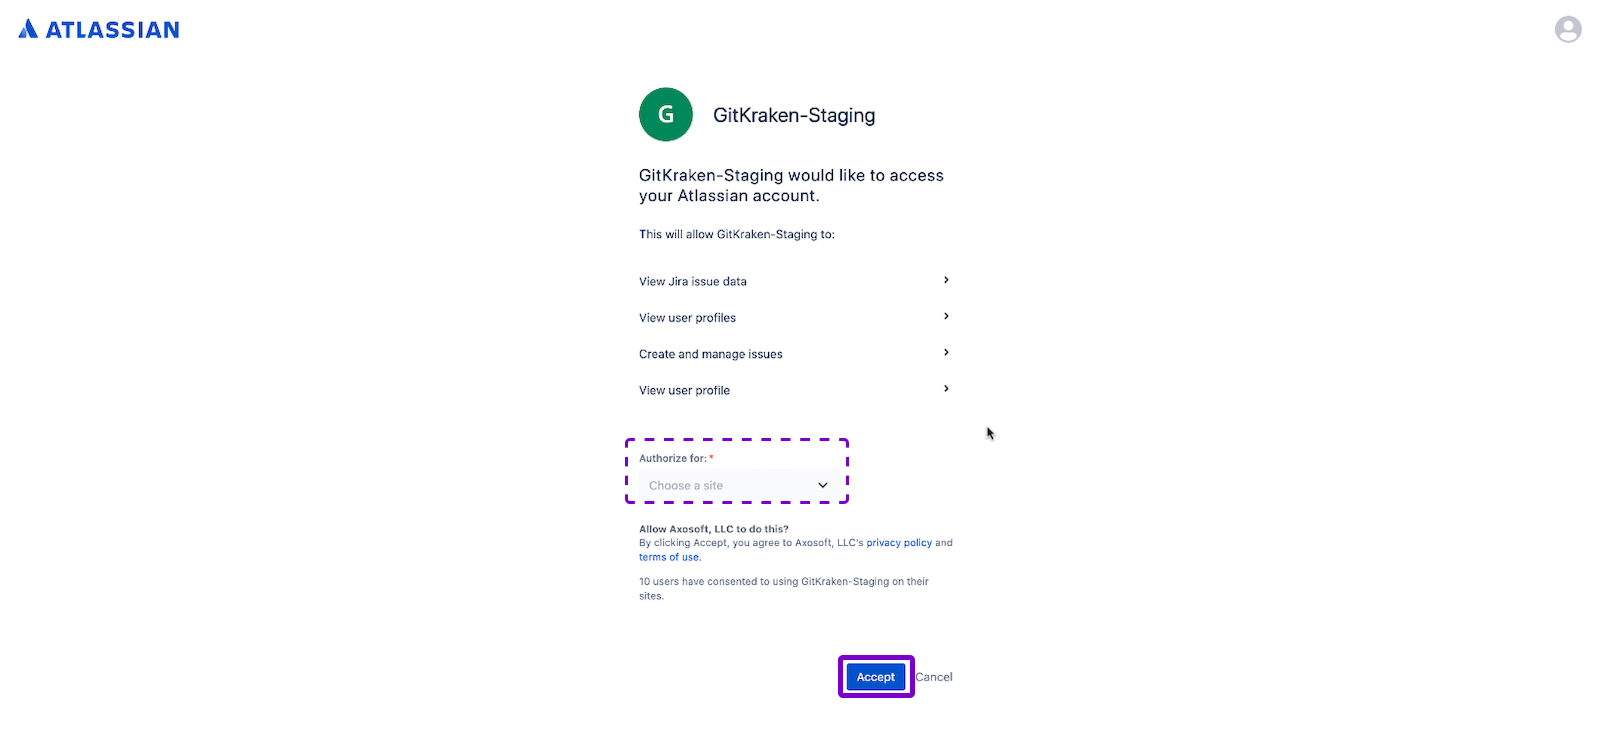
How to preview Jira issues
After you connect, your Jira issues appear in the Left Panel. By default, the My Issues filter shows the issues assigned to you.
Hover over any issue to preview its title, description, status, assignee, and reporter.
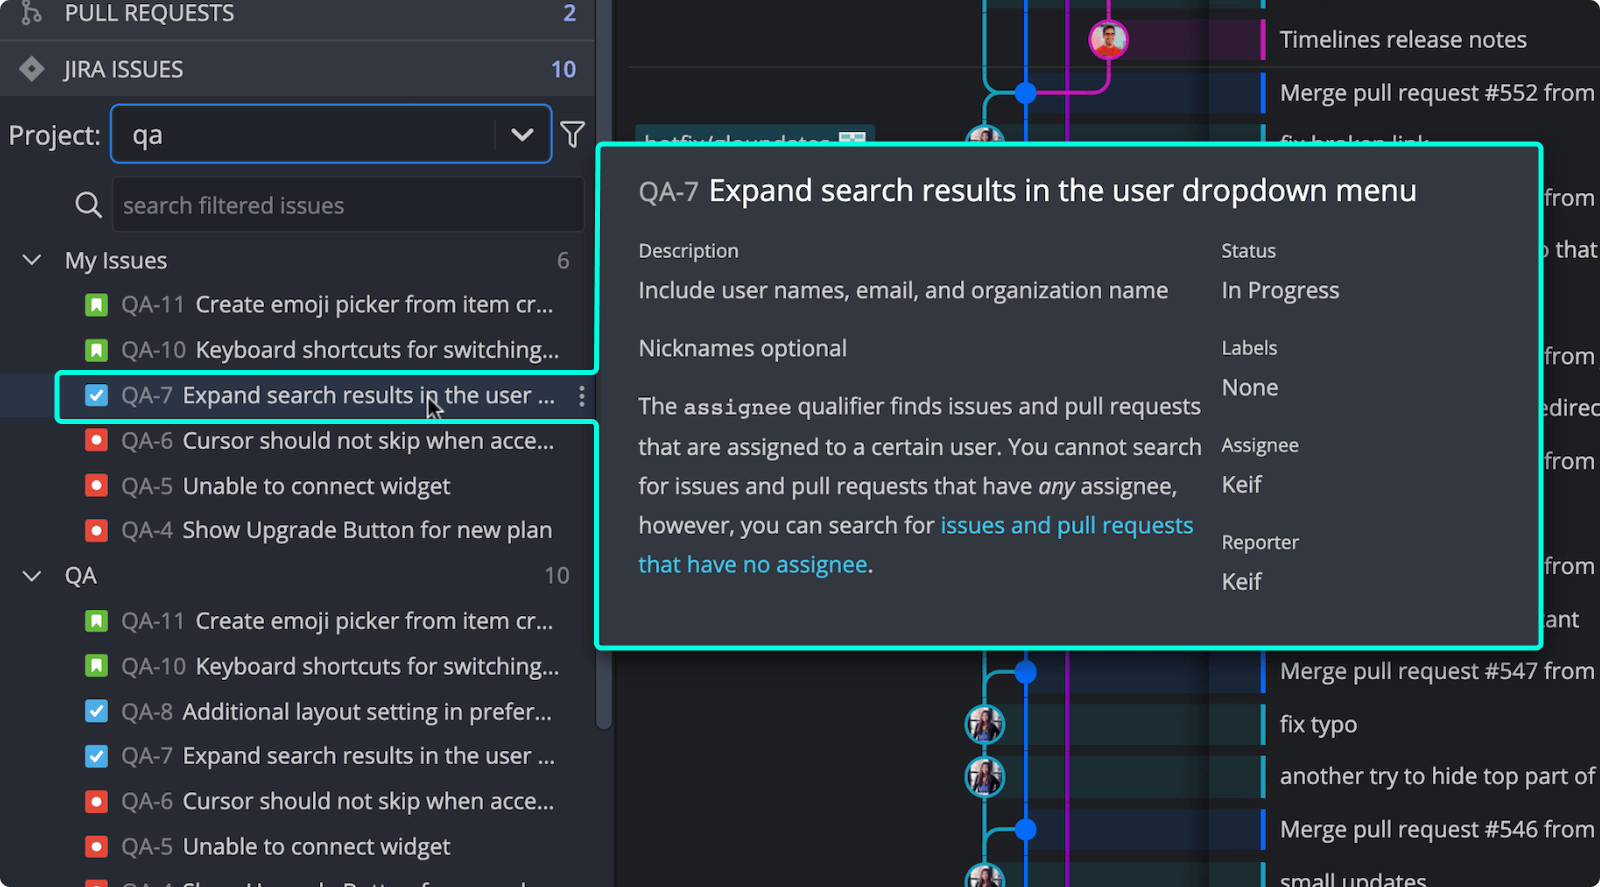
How to view Jira issue details
Click an issue to open its detail view.
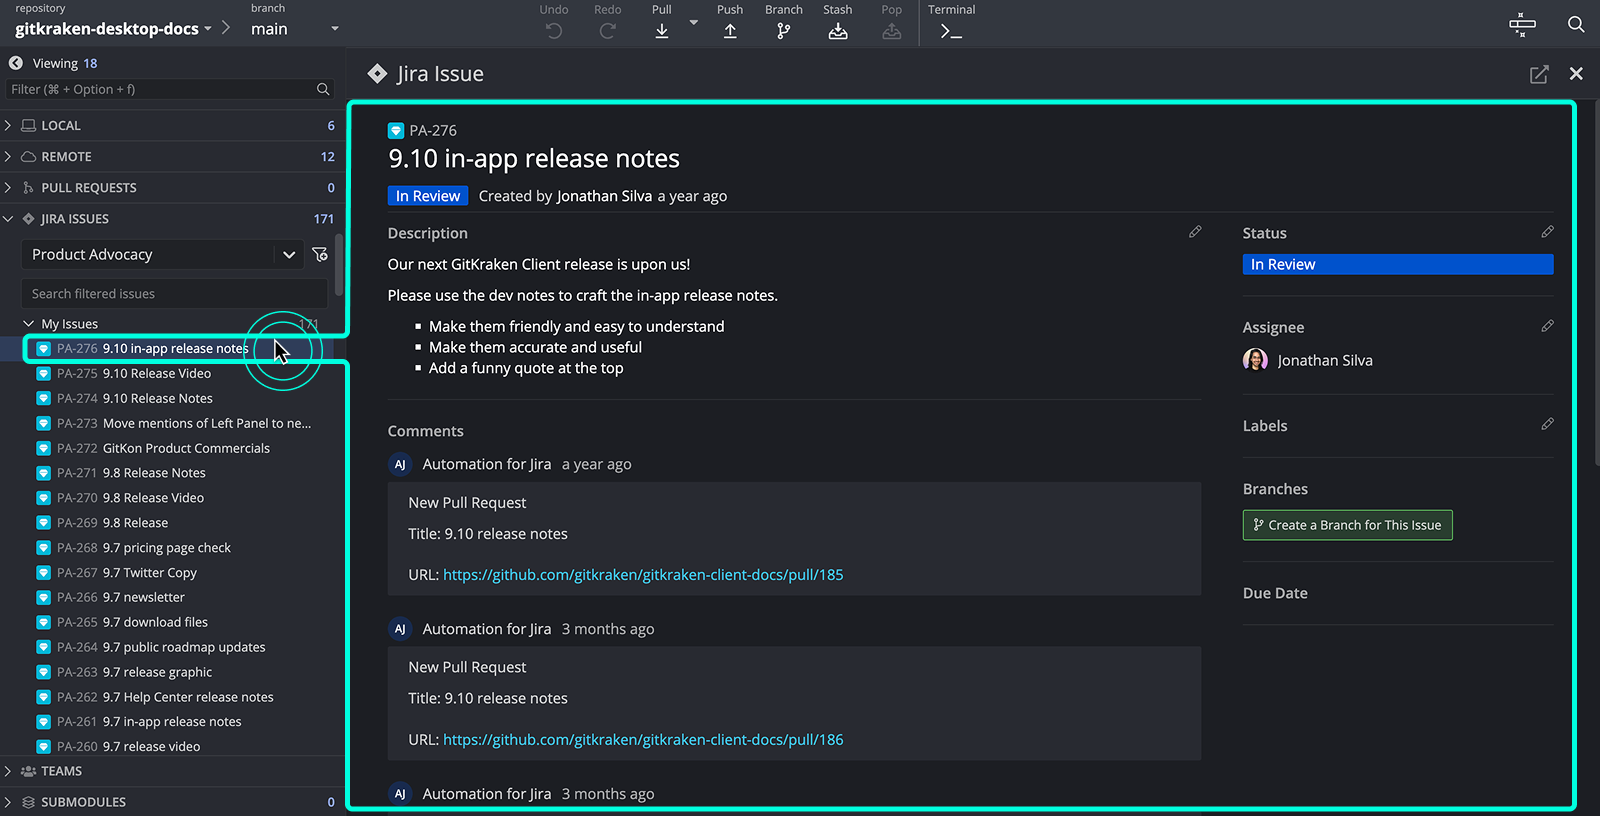
You can:
- Edit the title and description
- Change the status
- Assign or reassign the issue
- Add comments
Your changes sync with your Jira board.
How to create a new Jira issue
From the Left Panel, click the + icon to add a new Jira issue.
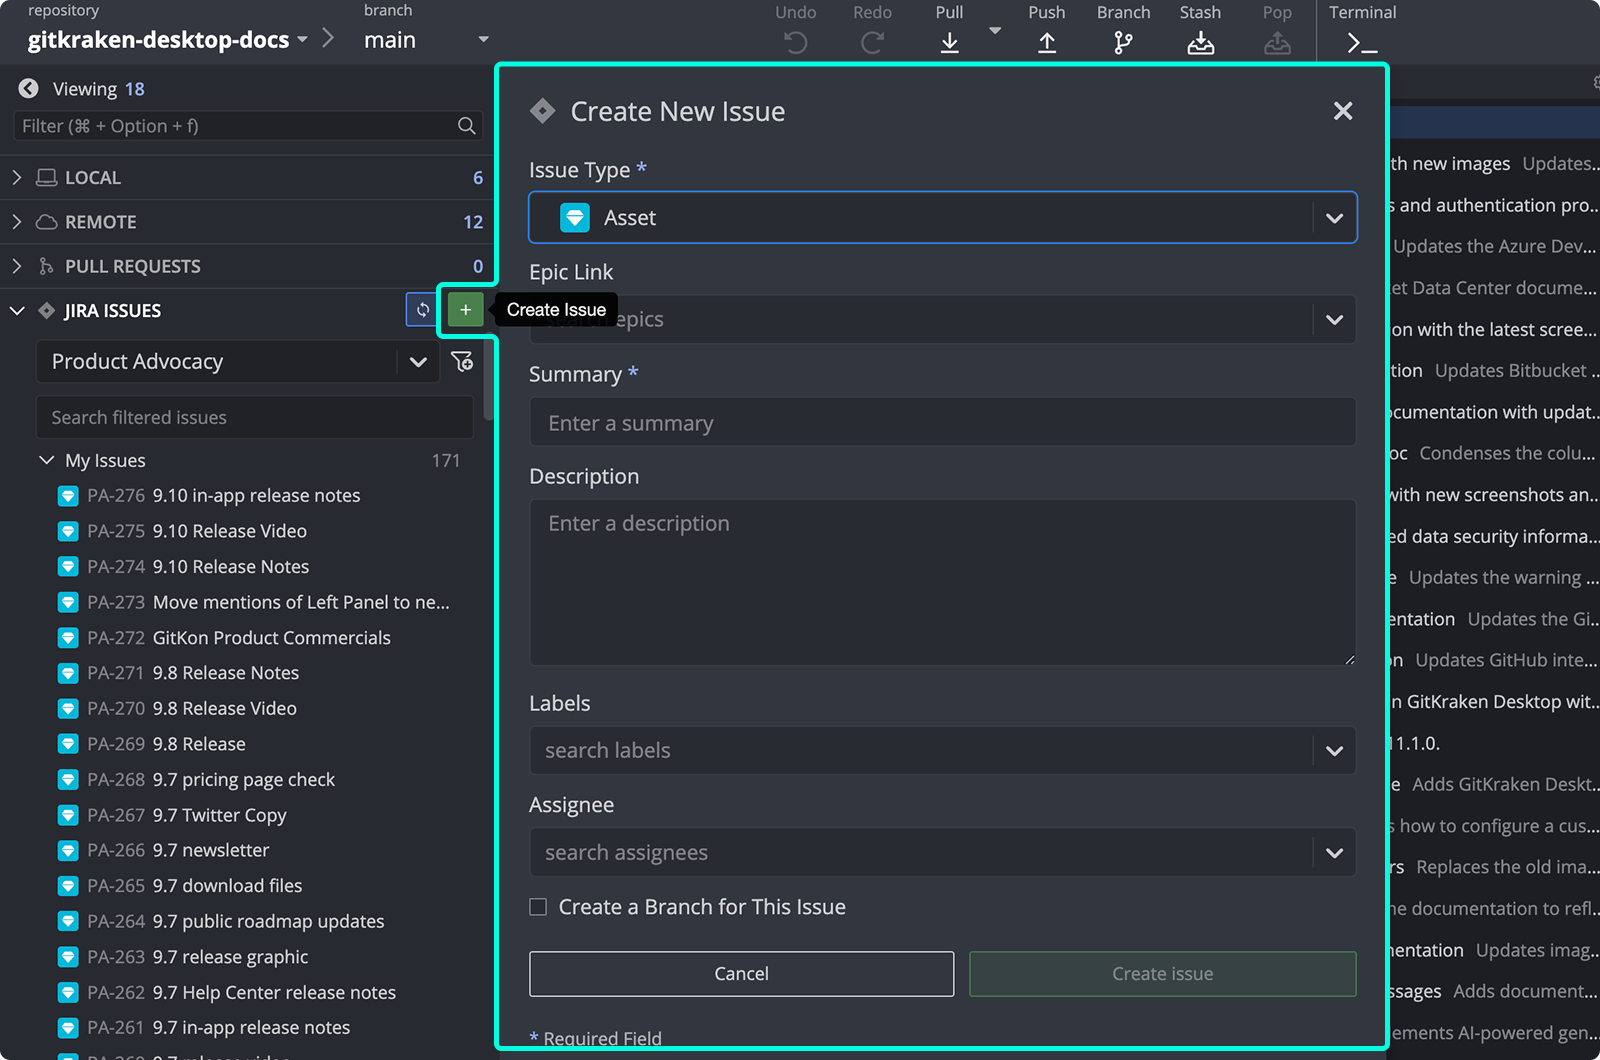
The issue syncs to your connected Jira project.
How to create Jira filters
You can create filters to show specific issues. Filters use Atlassian’s Jira Query Language (JQL), and GitKraken Desktop auto-completes filter fields.
Use JQL filters when: you need focused issue queues by project, sprint, assignee, or status. Do not rely only on the default My Issues view when: your workflow depends on a more specific slice of Jira work.
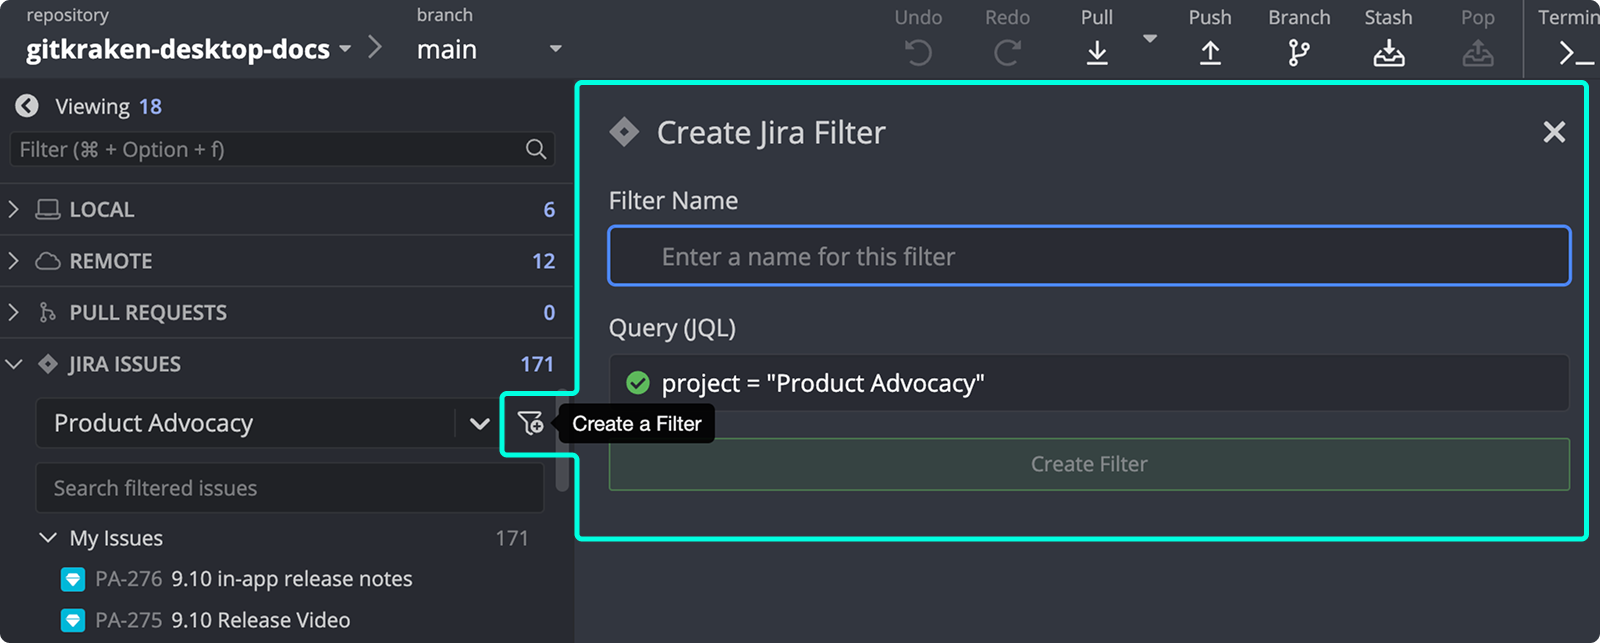
For advanced filtering tips, see Atlassian’s JQL guide.
How to create branches from Jira issues
You can create branches tied to Jira issues directly from the issue detail view.
Use issue-based branch creation when: one branch should map directly to one Jira issue. Do not use it when: the branch spans several tickets or the auto-filled issue-based name is not the branch structure you need.
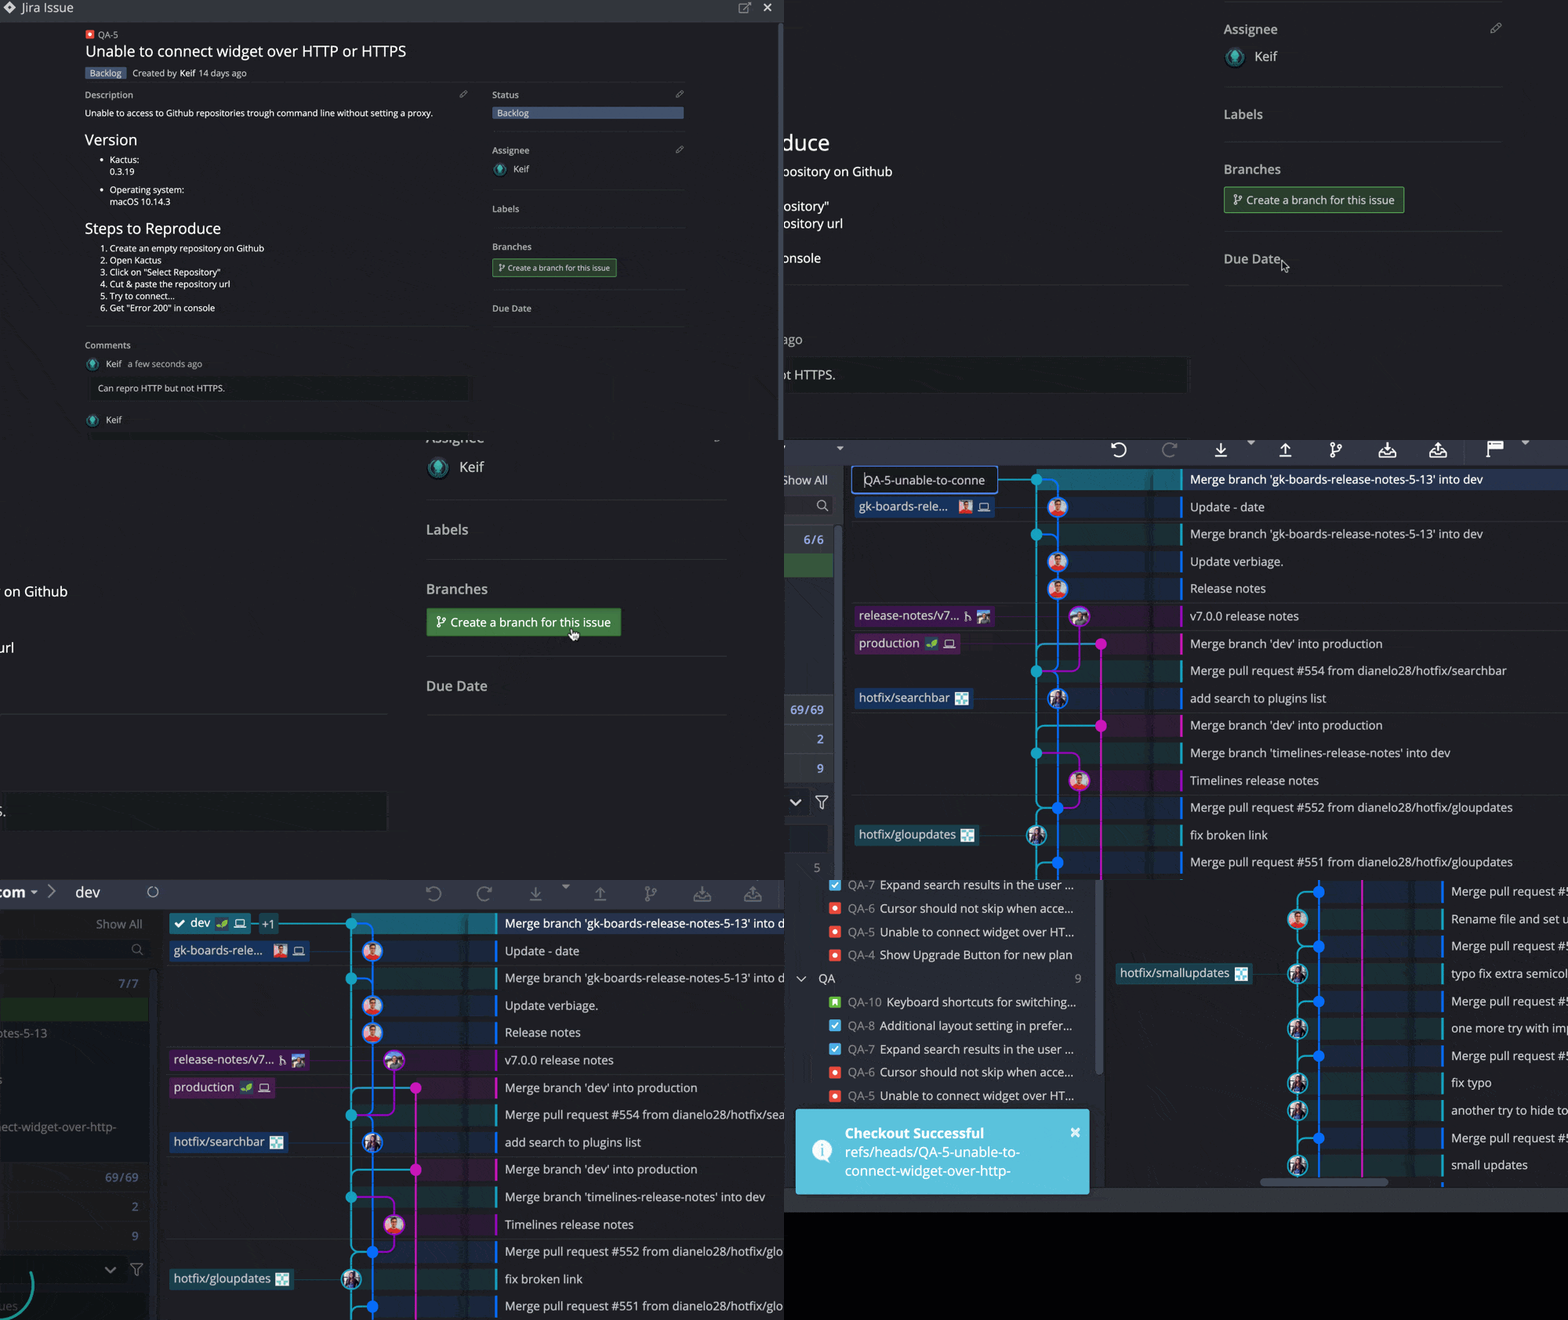
GitKraken Desktop pre-fills the branch name from the issue title. Branches linked to Jira issues show the Jira icon.
How to copy an issue link or open it in Jira
Click the icon on an issue card to copy the issue link or open it directly in Jira.
More Jira integration options
For deeper integration between Git and Jira, see Git Integration for Jira.
