
Last updated: March 2026
Use this page to create, rename, delete, merge, and rebase branches in GitKraken Desktop. It also covers merge conflict resolution, external merge tools, and the difference between merge-based and rebase-based workflows so you can choose the right history strategy for your branch.
Key constraints
- Merge strategy: Use merge to preserve branch history; use rebase to move commits onto a new base and keep history more linear
- Merge conflict editor: The in-app merge conflict output editor requires a paid GitKraken license
- Squash merge behavior: With Squash enabled, GitKraken Desktop stages the merge result but does not create the final commit automatically
- Branch deletion: Deleting a branch is permanent
- External merge tools: Review the supported and unsupported tool lists before relying on a third-party merge tool
| Action | Use when | Preserves branch history | Rewrites history | Notes |
|---|---|---|---|---|
| Branch | You need isolated work for a feature, fix, or experiment | Yes | No | Can be renamed or deleted later |
| Merge | You want to combine branches and keep the branch structure visible | Yes | No | May create a merge commit |
| Rebase | You want a more linear history before sharing or merging | No | Yes | Replays commits onto a new base |
| Squash merge | You want one final commit from a branch’s combined changes | Partial | Yes | Stages the result but does not create the final commit automatically |
Looking for a quick summary? See how GitKraken solves merge conflicts.
Quick Start
To create and check out a branch:
- Right-click any commit in the graph and select Create branch here.
- Enter a branch name and press Enter.
- Double-click the branch label in the graph or Left Panel to check it out.
To merge a branch:
- Check out the branch you want to merge into.
- Right-click the source branch in the Left Panel and select Merge, or drag and drop it onto the target branch.
- If conflicts occur, click a conflicted file in the Commit Panel to open the Merge Tool. Select lines from each side, save the output, and commit.
To rebase:
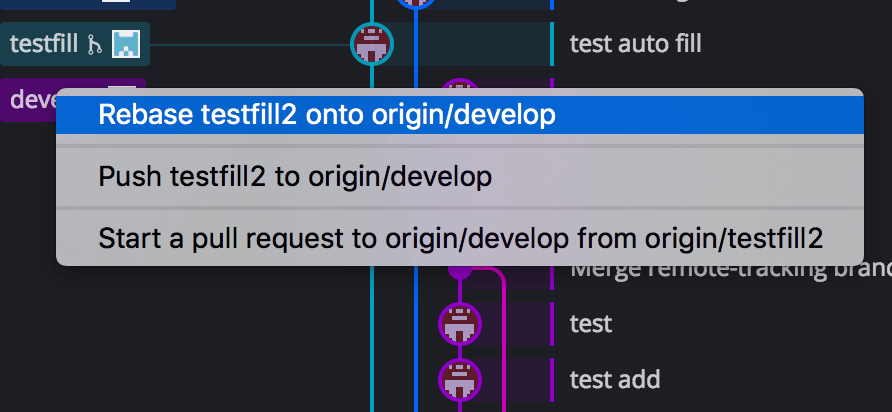
- Drag the source branch onto the target branch and select Rebase.
- Resolve any conflicts if prompted, then confirm.
To delete a branch, first check out a different branch, then right-click the target branch and select Delete. Use Shift or Cmd/Ctrl in the Left Panel to select and delete multiple branches at once.
How to create and manage branches
Create a new branch when working on a feature or fix. Right-click any commit to open the context menu and create a branch.
Use branches when: you want to isolate a feature, fix, or experiment from the main line of development. Don’t keep branches around when: the work is complete and the branch can be merged or deleted to reduce graph clutter.

A branch is a pointer to a specific commit, allowing you to isolate changes from the main codebase. Consider adopting GitFlow for structured branching strategies.
How to check out a branch
Branch checkout updates files in the working directory to reflect the version defined by that branch.
To update your working directory:
- Double-click a branch label from the Commit Graph or the Left Panel
- Right-click a branch from the Commit Graph or the Left Panel and select Checkout
If you’re on the wrong branch, stash your changes, switch branches, and pop the stash.
If you only need a subset of files checked out, see Sparse Checkout.
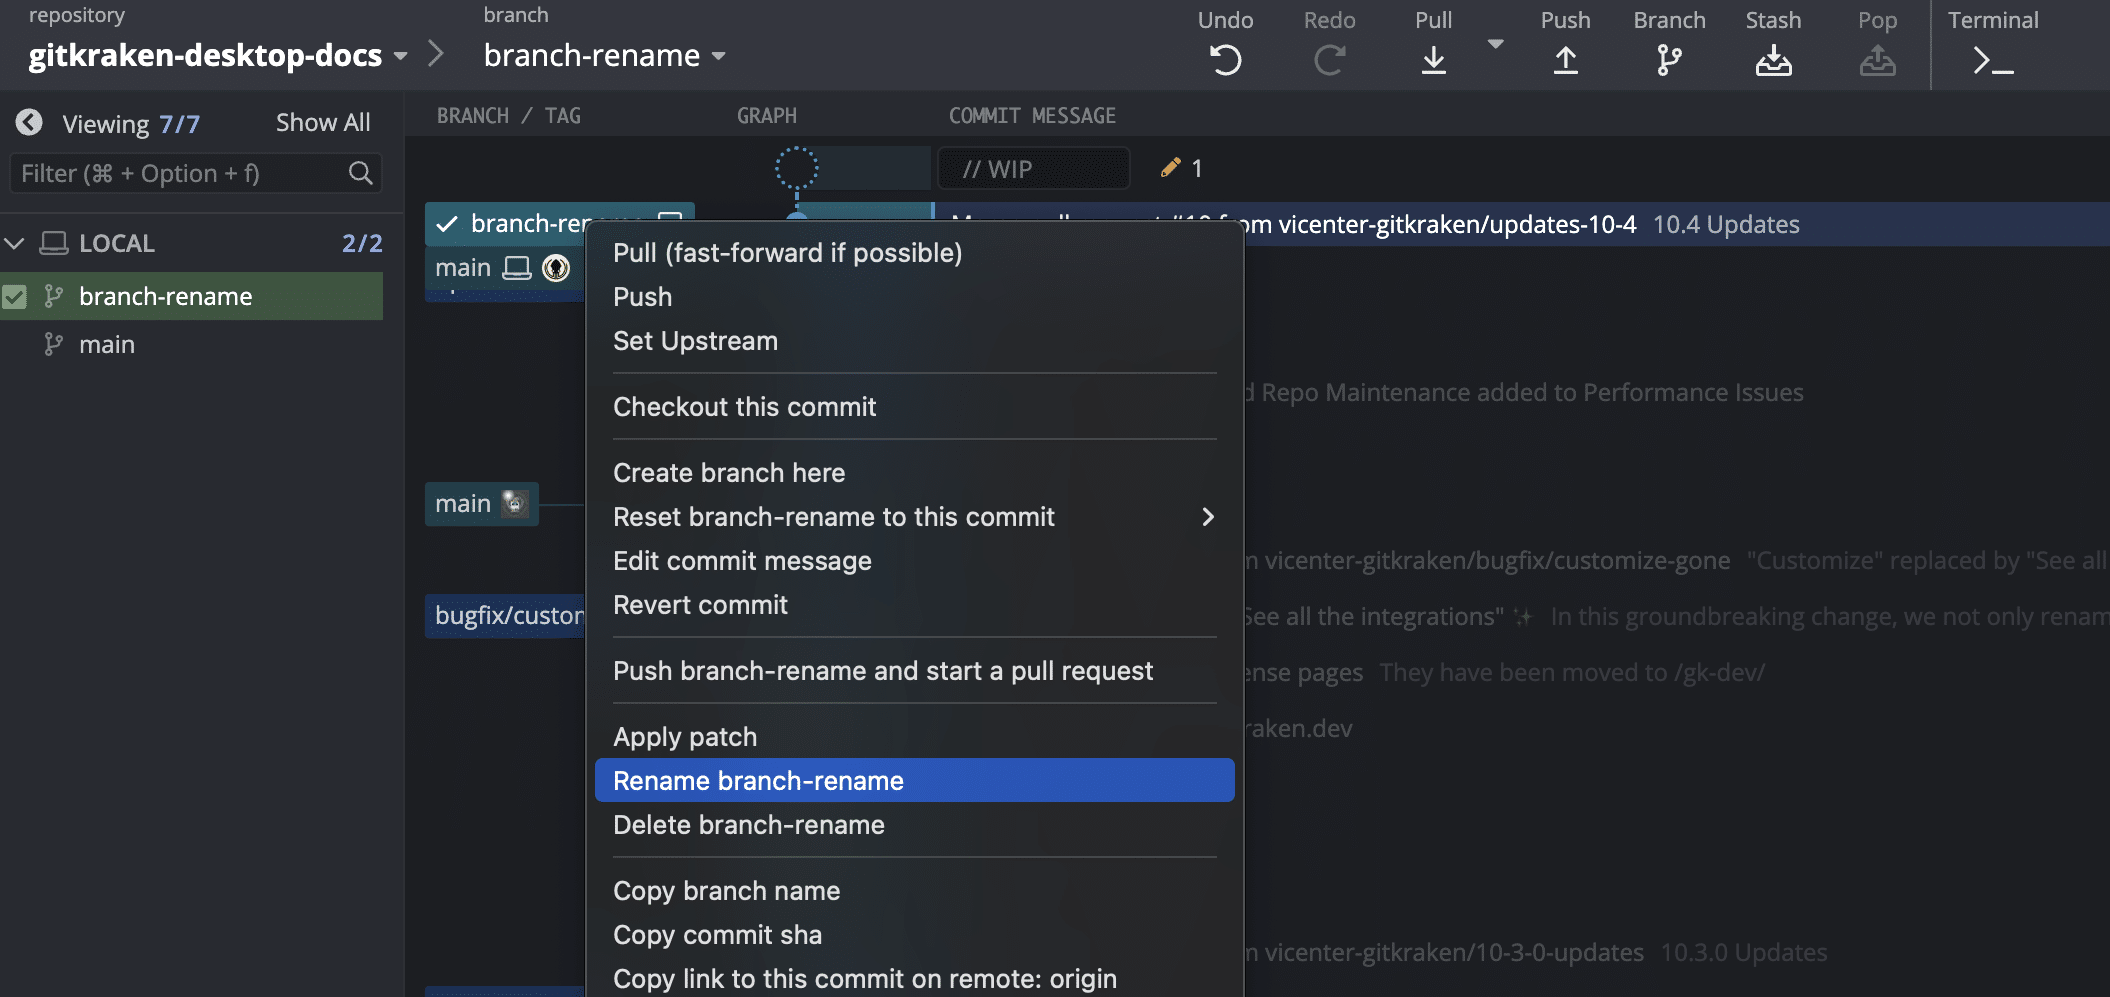
How to rename a branch
Right-click the branch label or use the Left Panel to rename the current branch.
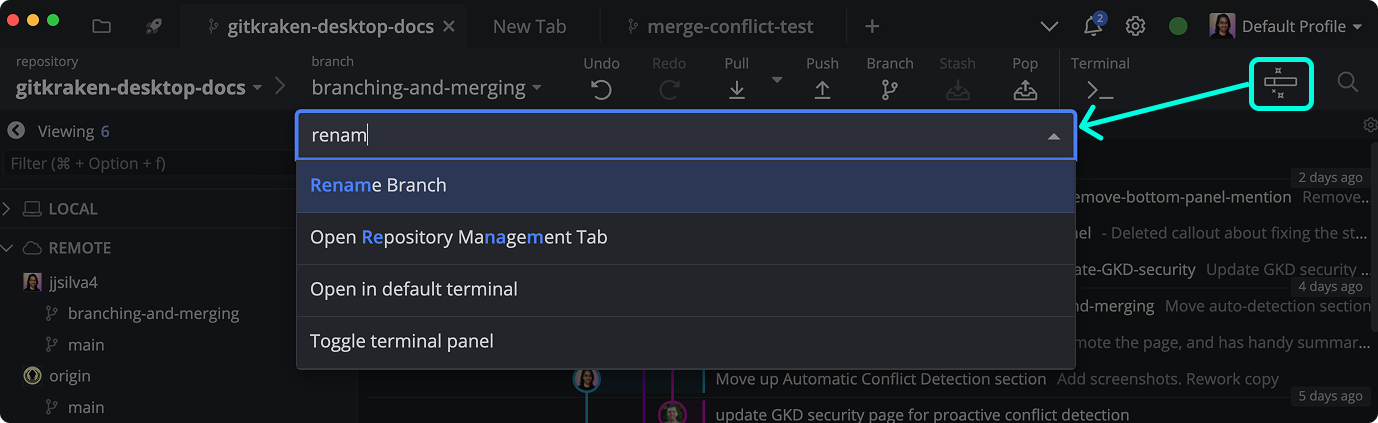
You can also rename using the Command Palette (Cmd+P / Ctrl+P):
How to delete a branch
To delete a branch:
- Switch to another branch
- Right-click the branch you wish to delete
Use multi-select in the Left Panel to delete several branches at once:
- Shift to select a range
- ⌘ / Ctrl to select specific branches
Caution: Deleting a branch is permanent.
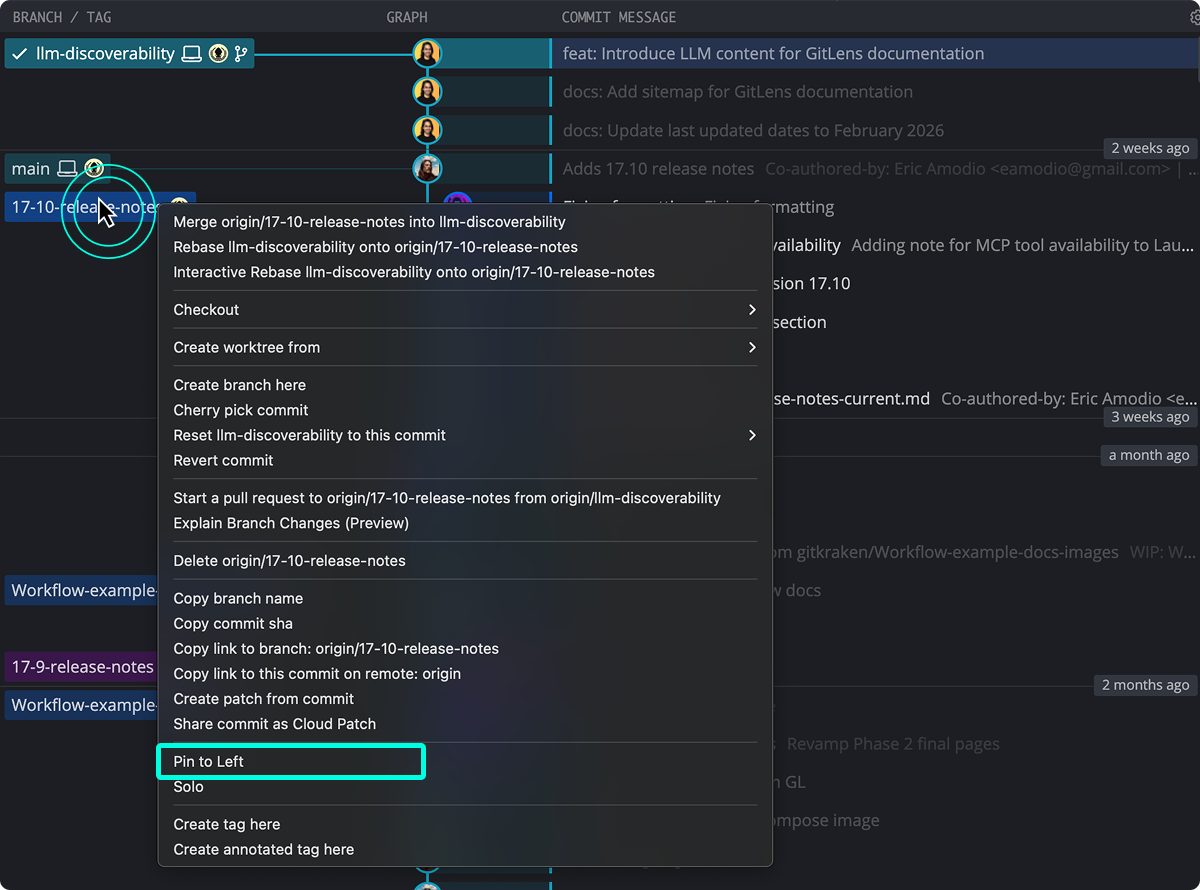
How to pin a branch to the left
Pinning a branch fixes it to the left side of the Commit Graph so that its direct commit history always appears on the left. This is particularly useful for long-lived branches like main or a production branch, where you want a stable reference point to see how other branches merge into it.
To pin a branch:
- Right-click a branch label in the Commit Graph or the Left Panel.
- Select Pin to left.
To unpin a branch, right-click the branch label again and select Unpin from left.
When to use Smart Branch Visibility
Smart Branch Visibility reduces visual noise in the Commit Graph by displaying only the branches most relevant to your current work. When enabled, the graph shows only your checked-out branch, its target branch, and their respective upstream branches — hiding all others.
This is especially useful in repositories with a large number of branches where the full graph can be difficult to navigate.
To enable Smart Branch Visibility:
- Click the gear icon in the top-right corner of the Commit Graph header.
- Select Smart Branch Visibility.
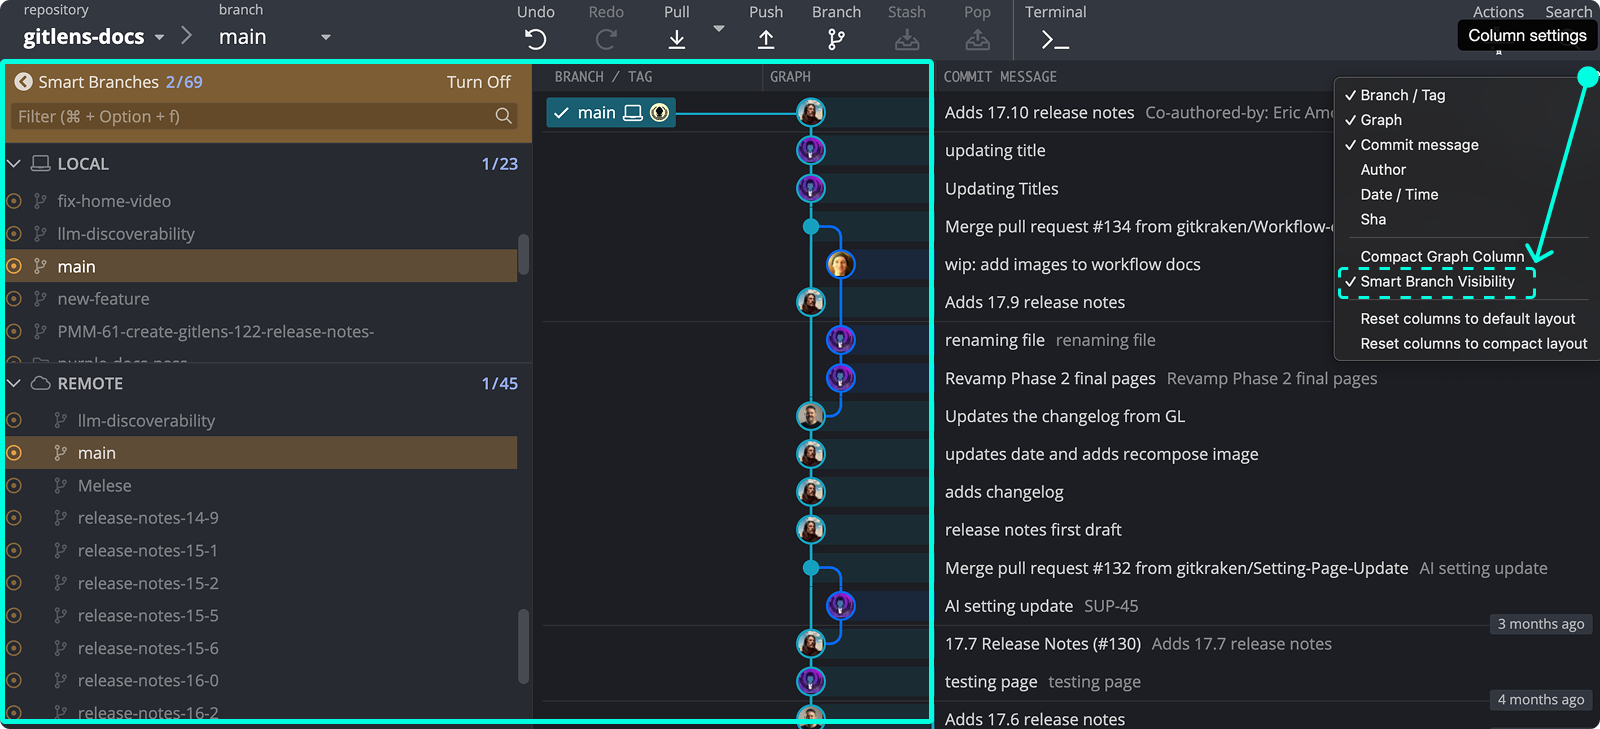
Smart Branch Visibility activates on your currently checked-out branch. To disable it, follow the same steps and deselect Smart Branch Visibility.
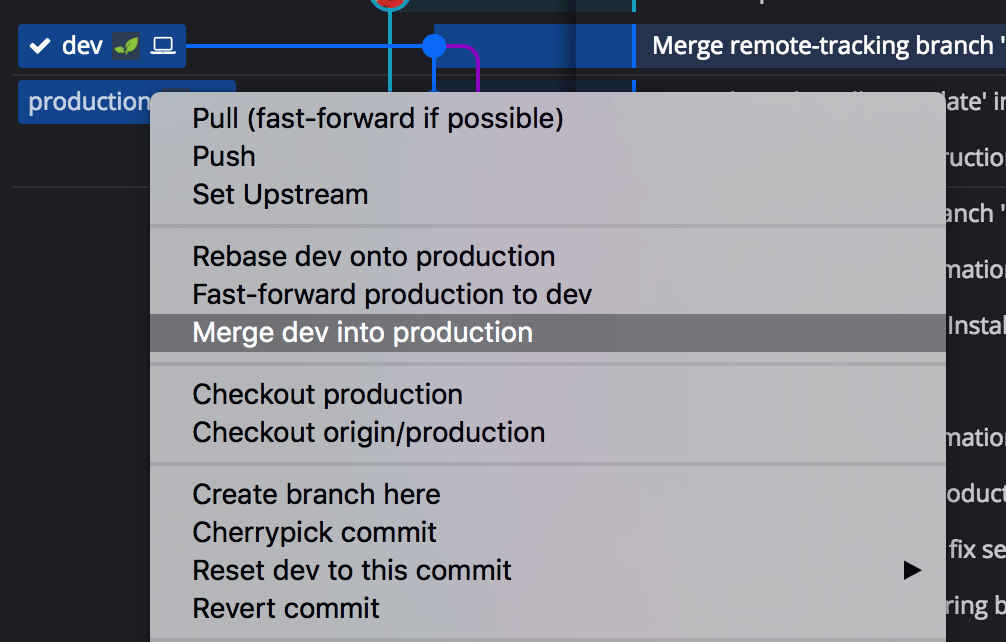
How to merge branches
Merging combines changes from one branch into another. To merge:
- Drag and drop one branch onto your target branch
- Or right-click the source branch and choose Merge
Use merge when: you want to preserve the full branch history. Use rebase when: you want to move commits onto a new base and keep the history more linear before sharing or merging.
Don’t use merge when: your team expects a rebased, linear branch before review or integration. Don’t use rebase when: collaborators are already building on the commits you plan to rewrite.
If no conflicts exist, changes will be merged automatically.
The in-app merge conflict output editor is available with a Paid license.
When to use squash merges
When you enable the Squash setting, GitKraken Desktop stages all changes from the source branch locally without creating a merge commit automatically. You then commit the squashed result manually, which produces a single, clean commit on the target branch.
Use squash merges when: you want one clean commit on the target branch and do not need to preserve each feature-branch commit. Don’t use squash when: the individual commits matter for auditing, review context, or future debugging.
This is useful when you want to maintain a linear history on your main branch without preserving the individual commits from a feature branch.
To enable squash merges:
- Go to Preferences > Commit.
- Enable the Squash toggle.
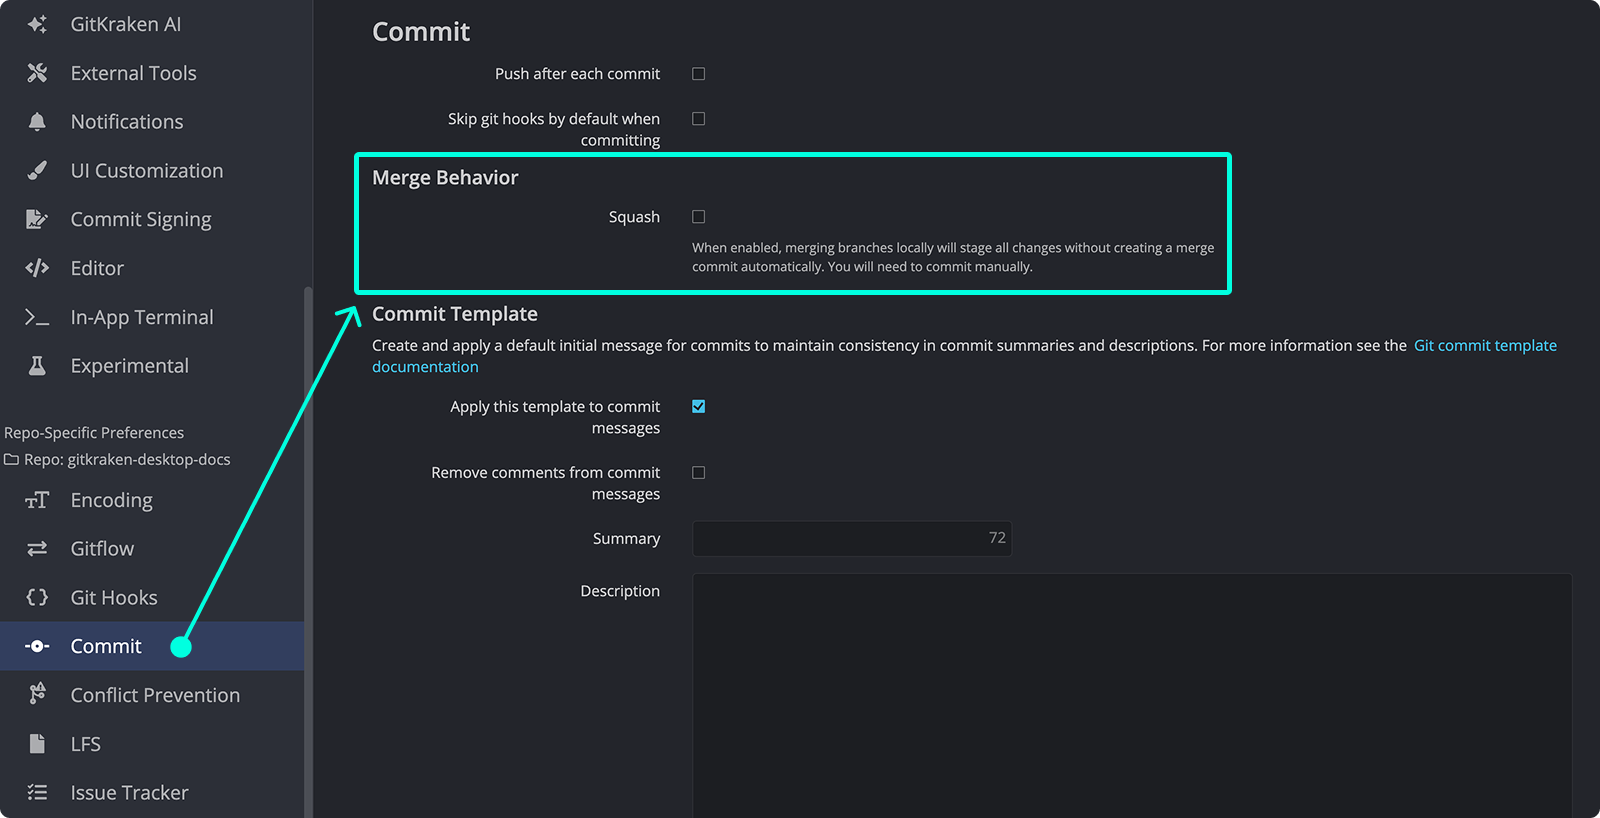
After merging with squash enabled, review the staged changes in the Commit Panel and commit them manually.
Note: With squash enabled, GitKraken Desktop stages all changes but does not create the merge commit for you. You must commit manually to complete the merge.
How to resolve conflicts in the Merge Conflict Editor
When conflicts occur, the Commit Panel shows the conflicted files. Click a file to open the Merge Tool.

The Merge Tool shows:
- Current branch on the left
- Target branch on the right
- Output at the bottom
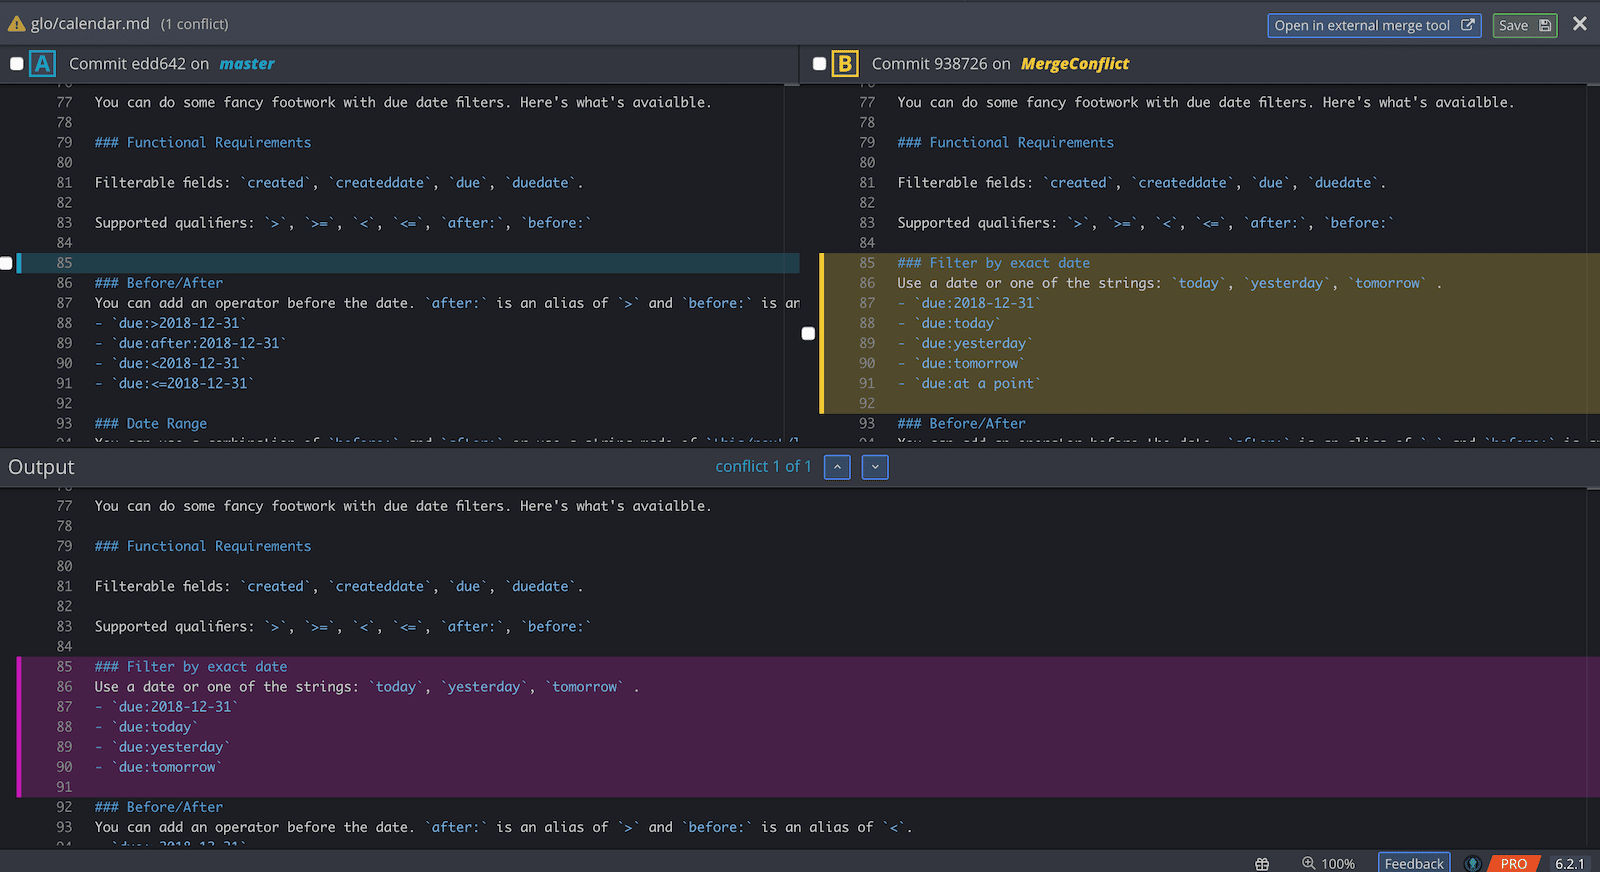
Use checkboxes or click to select lines. Use arrow keys to navigate conflicts.
After resolving, save and commit the output.
Tip: Use Cmd/Ctrl + F to search inside the Merge Tool.
How to use an external merge tool
Set your preferred merge tool under Preferences > General.
Use the built-in merge tool when: you want to stay inside GitKraken Desktop and the supported editor meets your needs. Use an external merge tool when: your team already relies on a supported third-party tool or you need a workflow GitKraken does not provide directly.
Supported tools:
- Beyond Compare
- FileMerge
- Kaleidoscope
- KDiff
- Araxis
- P4Merge

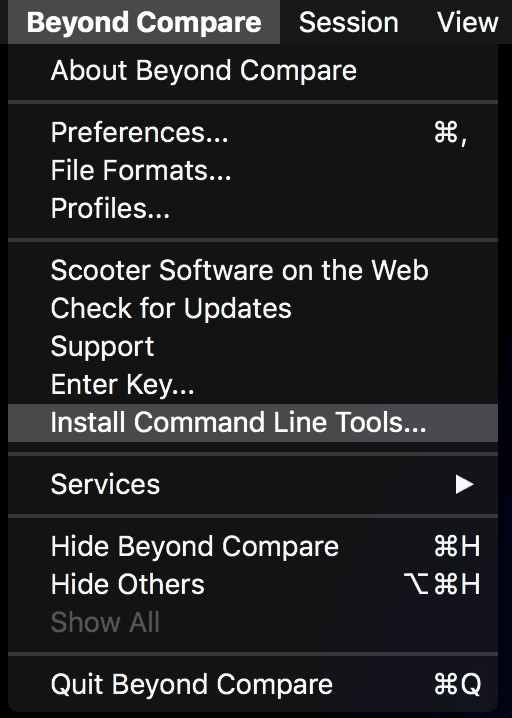
If not appearing, ensure command line tools are installed:
Unsupported tools include:
- Meld
- SemanticMerge
- TortoiseMerge
- WinMerge
For compatibility details, visit Git Config merge tools.
How to resolve conflicts with Take Current or Take Incoming
Right-click a conflicted file and select:
Take current (branch)– Use your current branch’s changesTake incoming (branch)– Use changes from the incoming branch

How Conflict Prevention works
GitKraken Desktop’s Conflict Prevention helps identify potential issues before a merge.
Available to users on the Advanced tier or higher.
How to rebase commits
Rebasing moves commits from one branch onto another for a cleaner history.
To rebase:
- Drag and drop the source branch onto the target branch
- Select Rebase from the menu

Rebasing rewrites history but results in a more linear and readable commit tree.
How to rebase a range of commits onto another branch
You can rebase a specific range of commits onto another branch without performing a full interactive rebase. This is useful when you want to move only a subset of commits from your current branch onto a target branch.
GitKraken Desktop provides two ways to do this:
Option 1: Multi-select a range of commits
- Check out the target branch.
- In the Commit Graph, hold Shift and click to select a range of commits on the source branch.
- Right-click the base branch and select Rebase X commits onto [branch].

Option 2: Select a single pivot commit
- Select one commit in the middle of your current branch. No merge commits should exist between the selected commit and the head of the branch.
- Right-click the target branch.
- Select Rebase N commits onto [branch].
GitKraken Desktop rebases the selected commit and all subsequent commits up to the branch head onto the target branch.
How to rebase onto a specific commit
If a commit in the graph has no branches attached to it, you can rebase the current branch onto that exact commit:
- Right-click the commit in the Commit Graph.
- Select Rebase onto this commit.
GitKraken Desktop replays the commits from the current branch’s HEAD onto the selected commit. This lets you rebase onto a specific point in history without creating a temporary branch.
