GitKraken Desktop Documentation

Tips

Here’s the TLDR of the best features in GitKraken Desktop.


1. Set up Profiles

If you have personal projects you wish to separate from work repos–or if you need to connect to multiple instances of GitHub, GitLab, Bitbucket, etc.–then set up Profiles.

Each profile stores different app preferences and Git config information, which makes it easier to switch context.

Multiple Profiles is a GitKraken Pro only feature.


2. Use the Command Palette

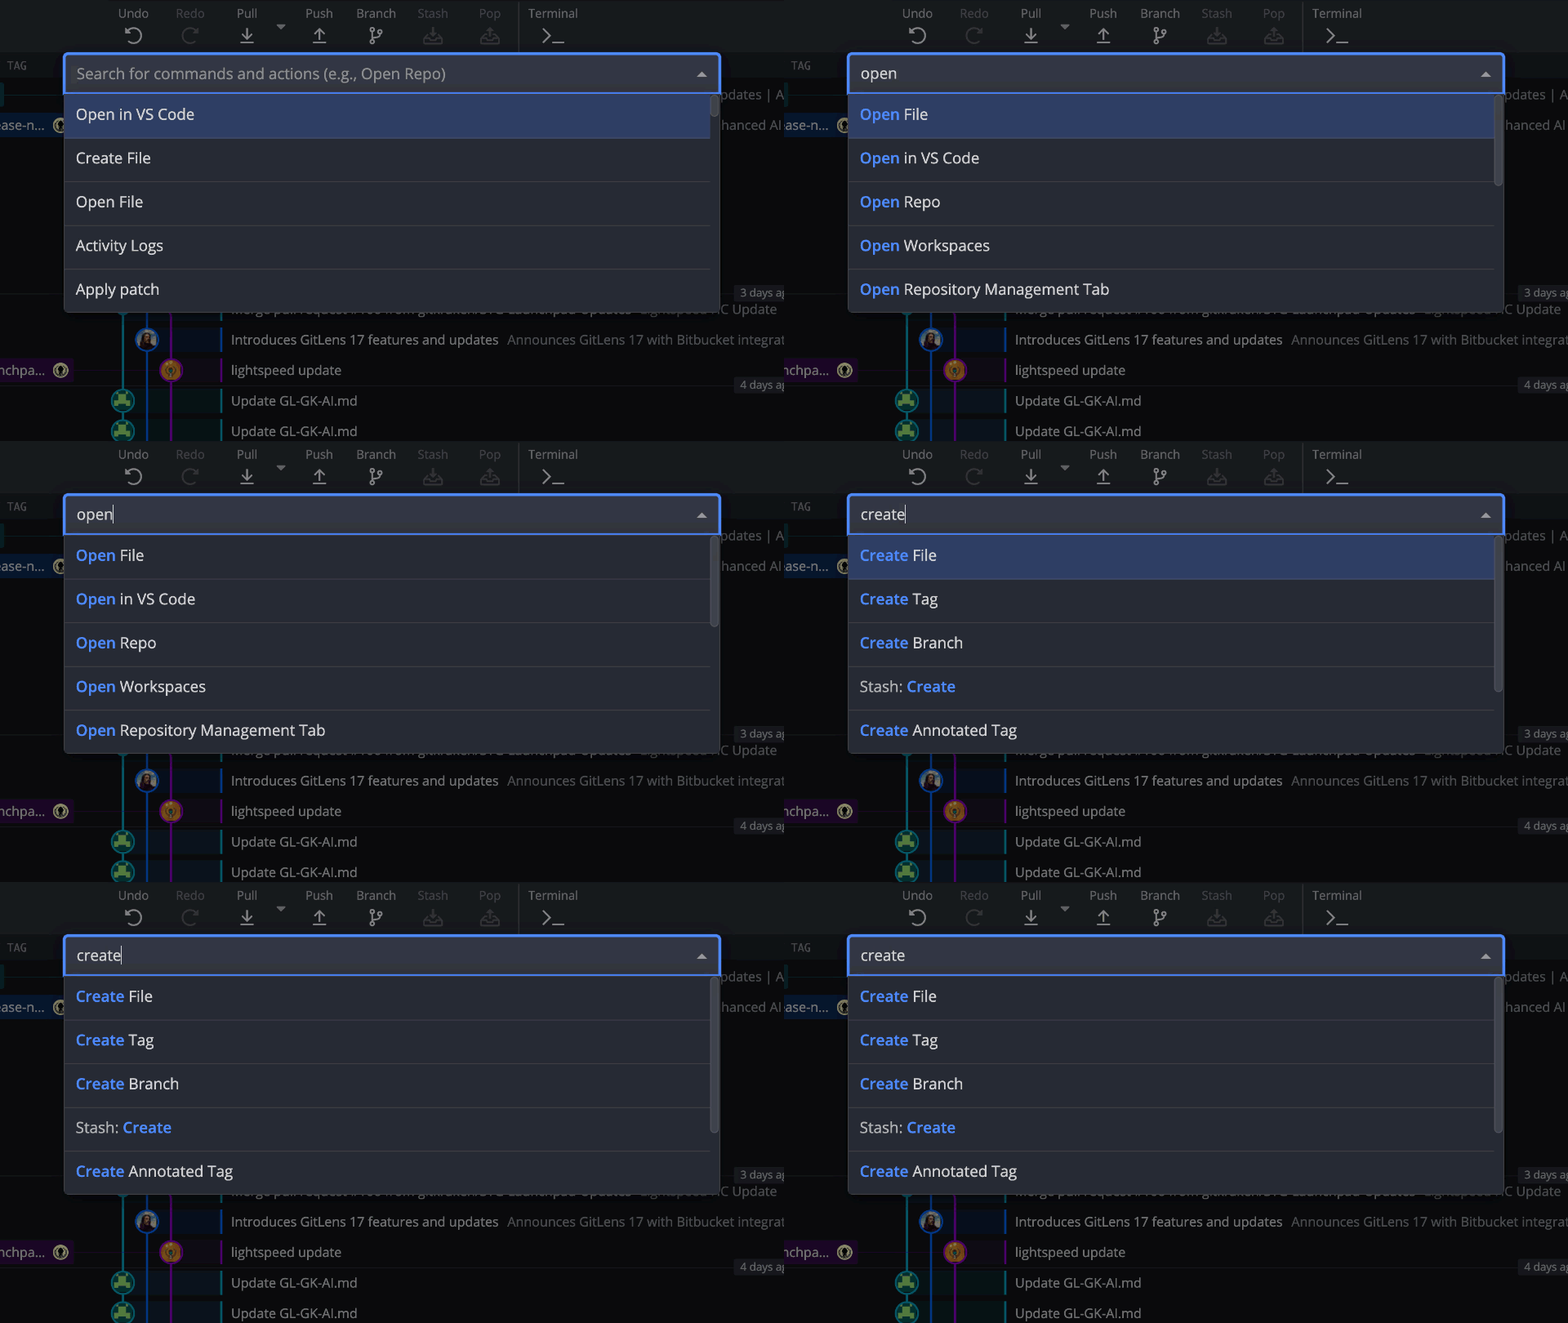
Work like the pros, and use the Command Palette to quickly access GitKraken Desktop actions.

As you type, the Command Palette will find the most relevant commands, allowing you to perform many actions without clicking. Here are a few examples:

Core:

  • Redo
  • Undo

File:

  • Create File + filename
  • Delete File + filename
  • Open File + filename
  • View File + filename
  • Edit File + filename
  • Discard all changes
  • Stage all changes
  • Unstage all changes

3. Keyboard Shortcuts

For fast fingers, check out our keyboard shortcuts. These will help you blitz through the app.

  Mac Windows/Linux
Open keyboard shortcuts / Ctrl/

4. Create, Open and Edit Files in the Built-In Code Editor

To create a file directly in GitKraken Desktop, use the keyboard shortcut Ctrl/Cmd + P to open the Command Palette, type Create File, and then type the name of your file before hitting Enter.

The code editor will automatically open so you can jump right in and start working on your project.

You can also right click the empty space in the Commit Panel and click the Create File context menu option.

To open an existing file to the built-in code editor, select a branch and navigate to the file you’d like to edit in the Commit Panel.

Double click the file to bring it to File View. From File View, you can click to edit a file and make changes directly. You’ll notice syntax highlighting, code hinting, a file minimap, and the ability to search your file.

Learn more about editing files in GitKraken Desktop.

To delete a file, right-click on the file from the Commit Panel to access the delete option.


5. Favorite Repos

Favorite the repos you work on most so they show up at the top of your list.

You can favorite a repository by right-cliking a recently opened repository in the drop down list, or you can click the heart from the repository management window.


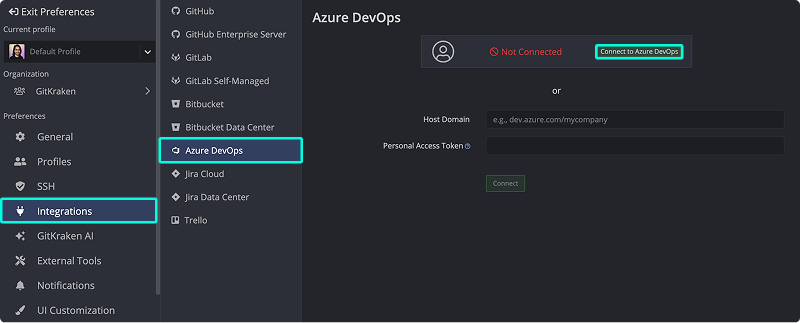
6. Integrate with GitHub, GitLab, Bitbucket, and Azure DevOps

GitKraken Desktop allows you to authenticate with GitHub, GitLab, Bitbucket, and Azure DevOps (previously VSTS), which will help you find repos when cloning or adding your remotes.

Benefits

  • Create repositories on GitHub/GitLab/Bitbucket/Azure DevOps including .gitignore and license
  • Save authentication into profiles
  • Clone from remote repo list
  • Add remotes
  • Create and view pull requests

7. Build Status, Assignees, and Reviewers in PRs

If you are using the GitLab or GitHub integration, you may also add a pull request assignee and label(s) to your pull request. GitKraken Desktop will then pass these values onto GitLab or GitHub when the pull request is created.

If you are using the GitHub integration, you may also add reviewers and multiple assignees to a pull request.

Additionally for GitHub pull requests, this tooltip will show assignees, labels, reviewers, and build status.

Learn more about pull requests.


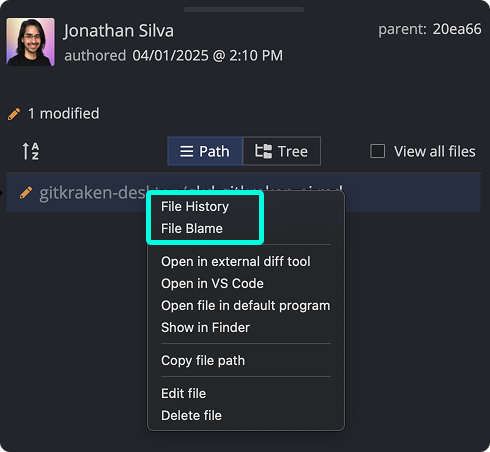
8. File History and File Blame

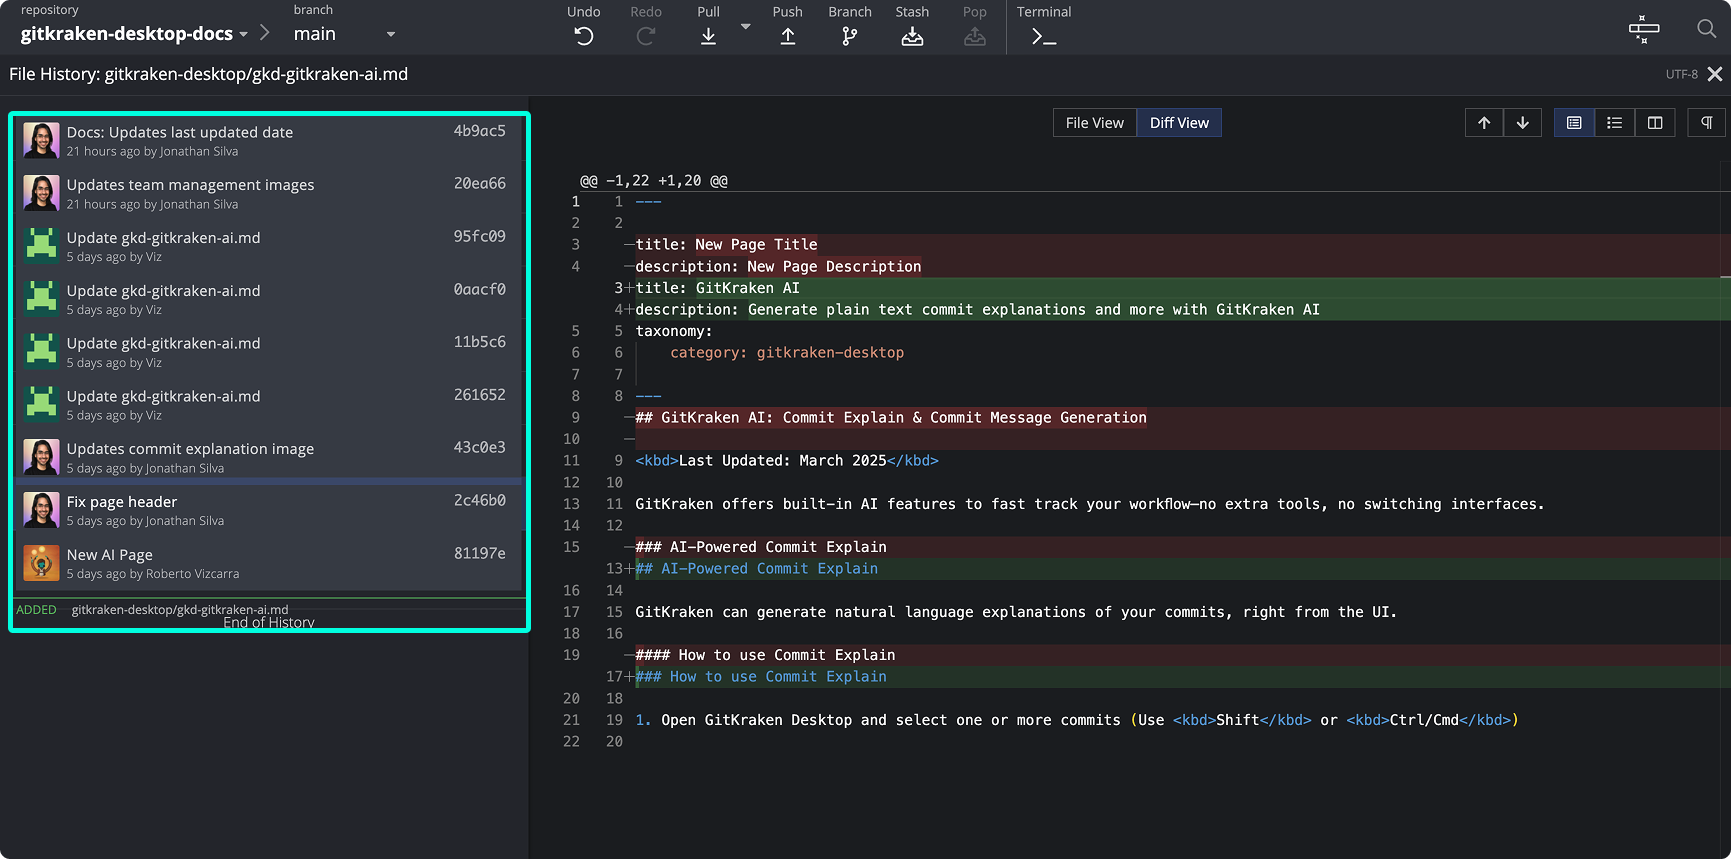
File History and File Blame information display in the same view.

To access either option, first click on a commit in the graph. Then right click a file to access File History or File Blame.

File History shows that file’s commit history on the left.

Use the top toggle button to switch between Diff View, which shows the selected commit’s changes to the file, and the File View, which shows the file’s state at that commit, including the blame info.


9. Open Terminal

You can open the terminal or CLI from GitKraken Desktop!

To open the current repo folder in terminal, go to File Open Terminal or use the keyboard shortcuts opt + T (Mac) / alt + T (Windows + Linux).

You can set your default terminal from Preferences General.


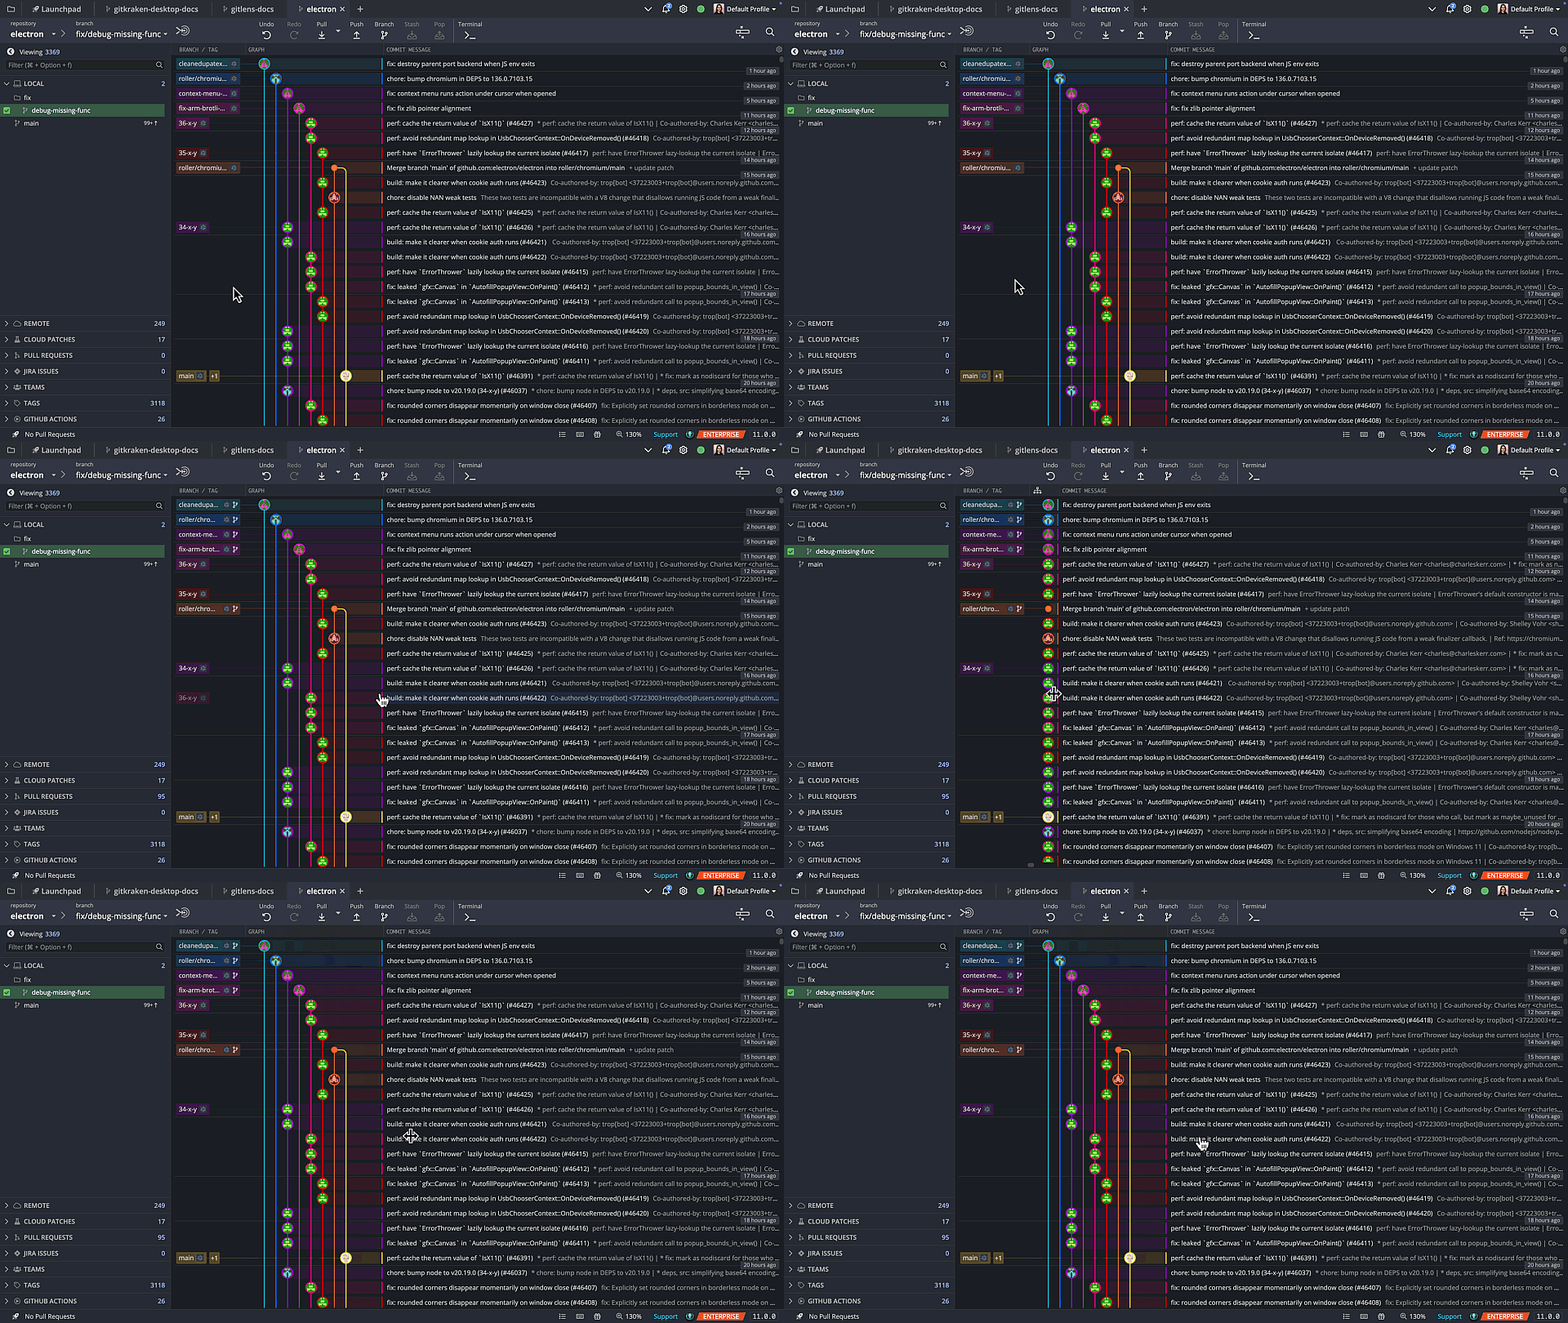
10. Resize the Graph

It’s simple, but easy to miss. Hover over any of the colored lines to drag and drop the graph.

Resize and marvel at the colors of the rainbow.

Have feedback about this article? Did we miss something? Let us know!
On this page