
Last updated: March 2026
Use this page to run Git CLI commands from the GitKraken Desktop terminal while staying in the context of the open repository and commit graph. It covers how to open the terminal, how command and flag auto-complete works, and where to change shell and terminal appearance settings.
Requirements and limits
- Scope: In-app terminal for the currently open repository context
- Repository context: Commands run in the active repository working directory automatically
- Supported shell note: macOS and Linux use the OS default shell; Windows supports PowerShell and Bash via Preferences
- Auto-complete limitation: Conflicting third-party auto-complete tools can disable GitKraken suggestions
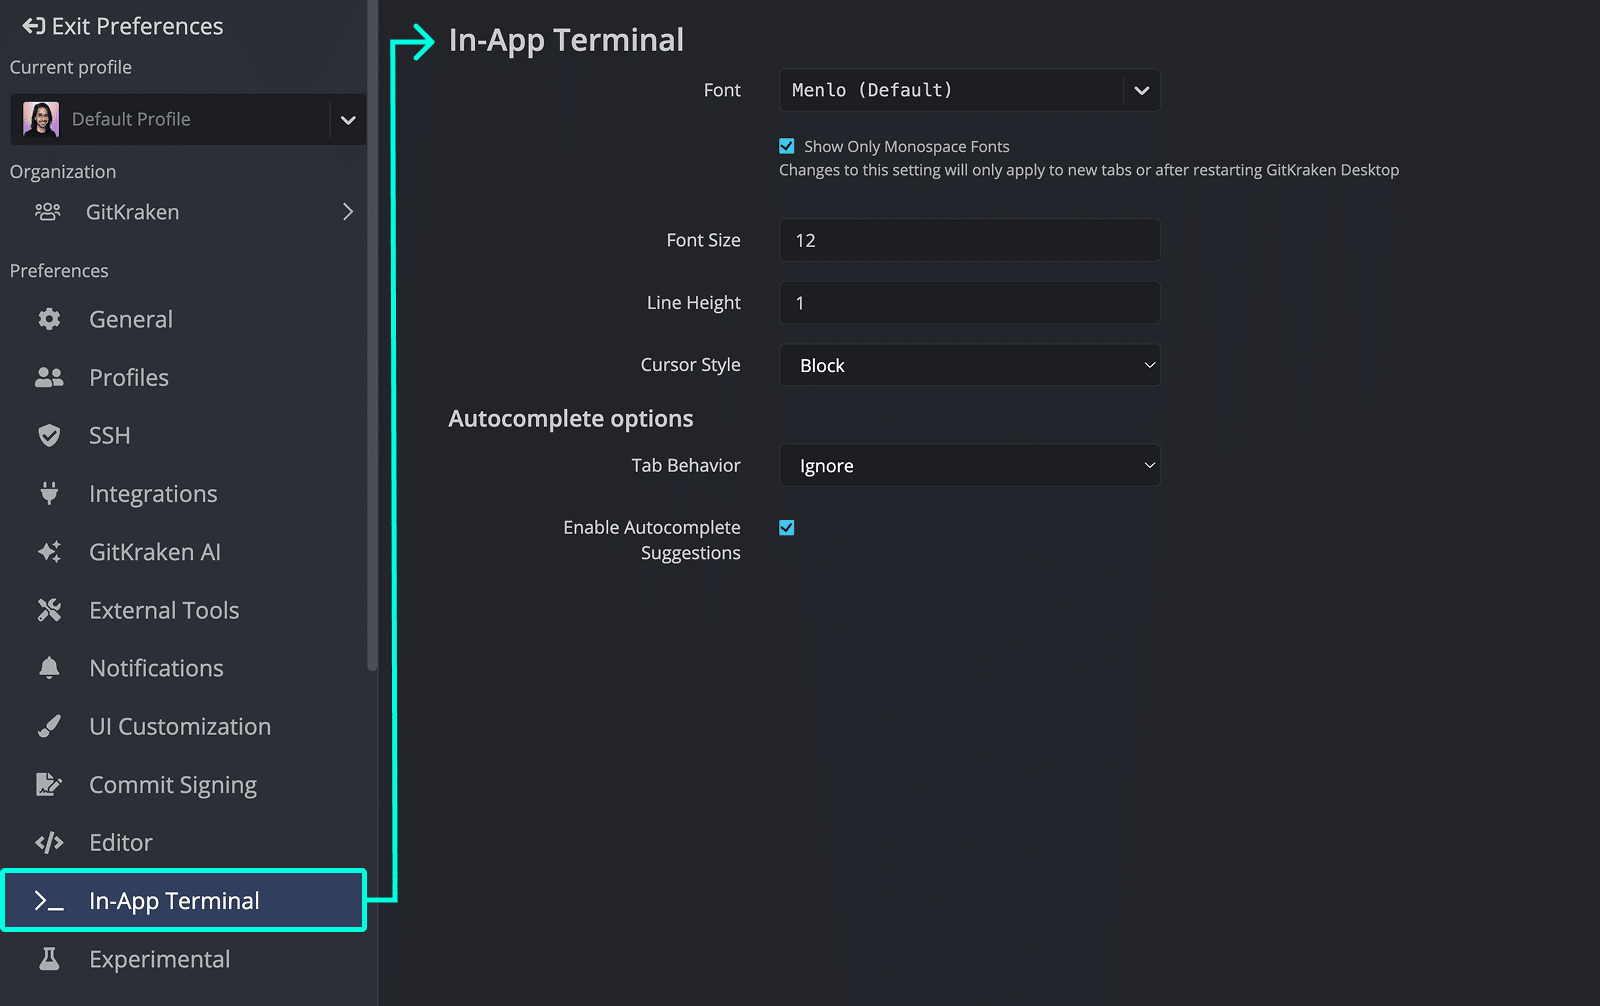
- Settings location: Preferences > In-App Terminal for appearance and autocomplete behavior
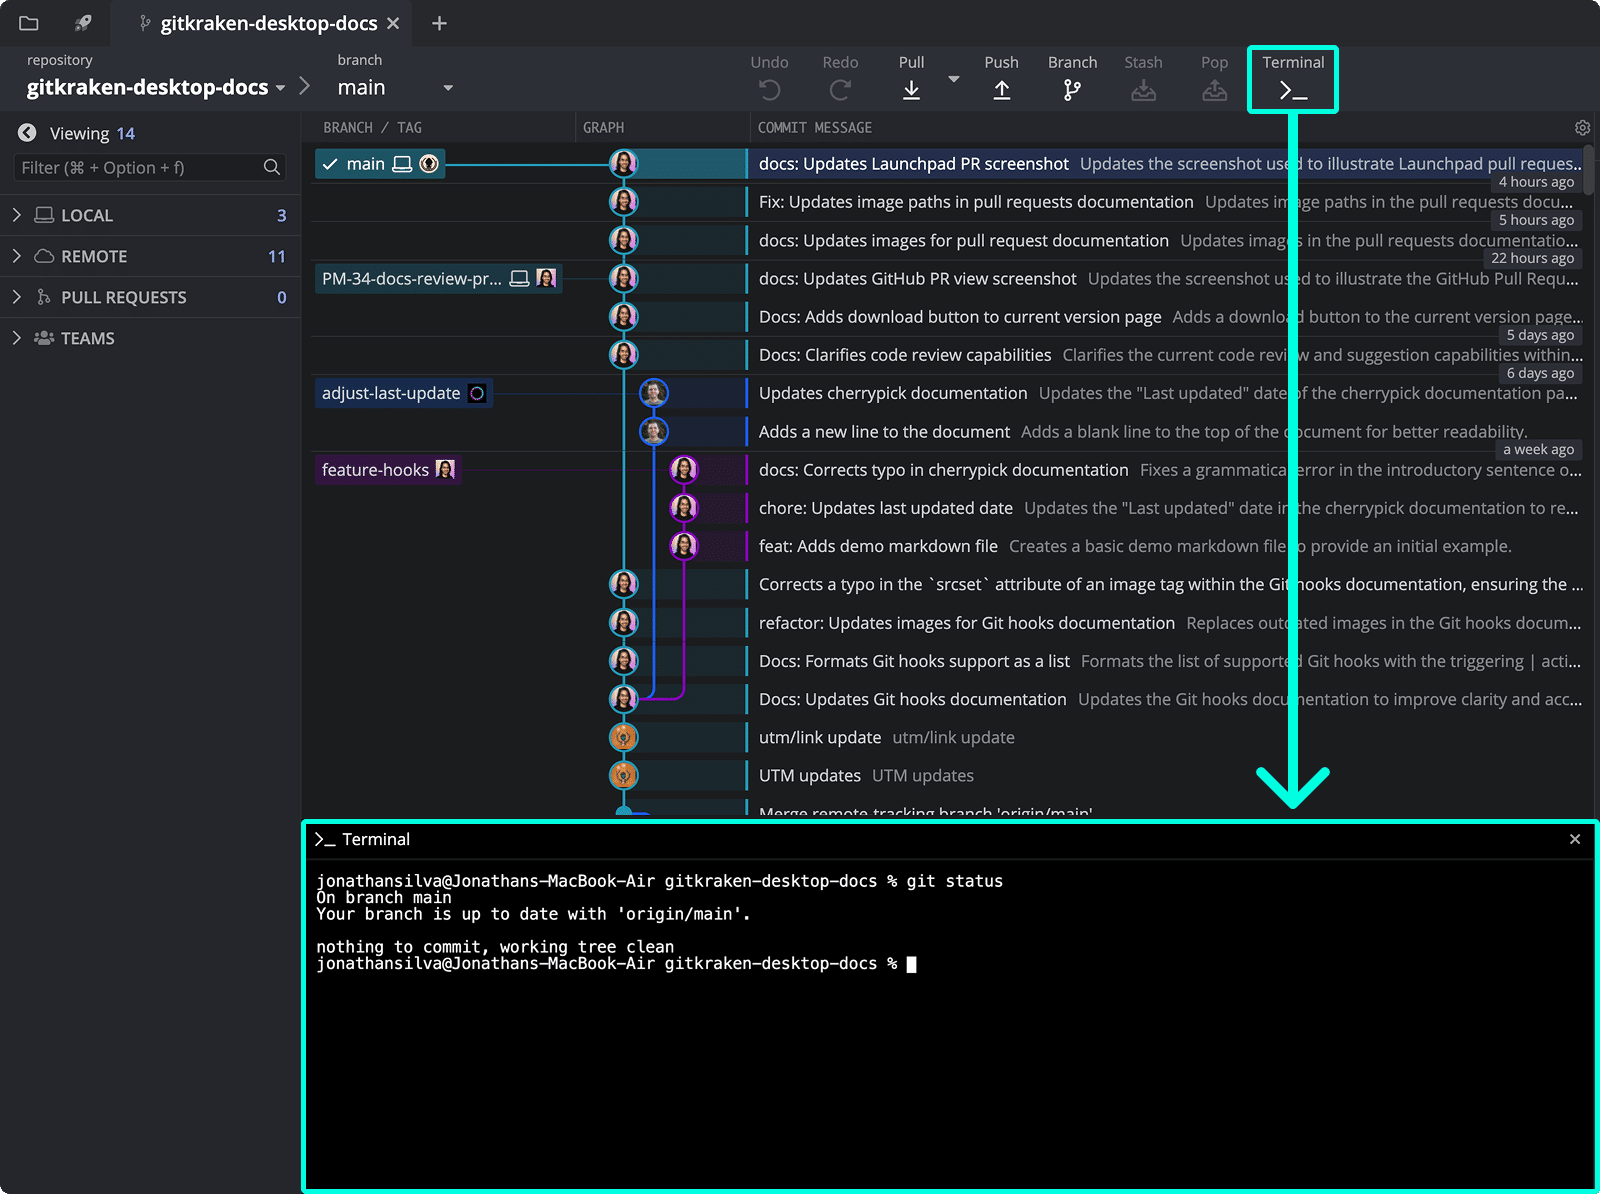
To get started, open a repository and click the Terminal button in the toolbar, or search for “terminal” using the Command Palette.
Quick Start
To open the terminal: Click the Terminal icon in the toolbar or search for “terminal” in the Command Palette.
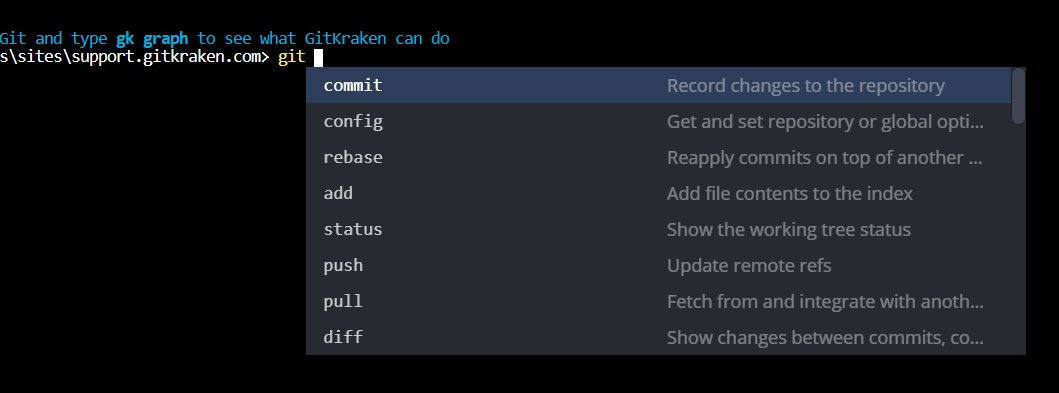
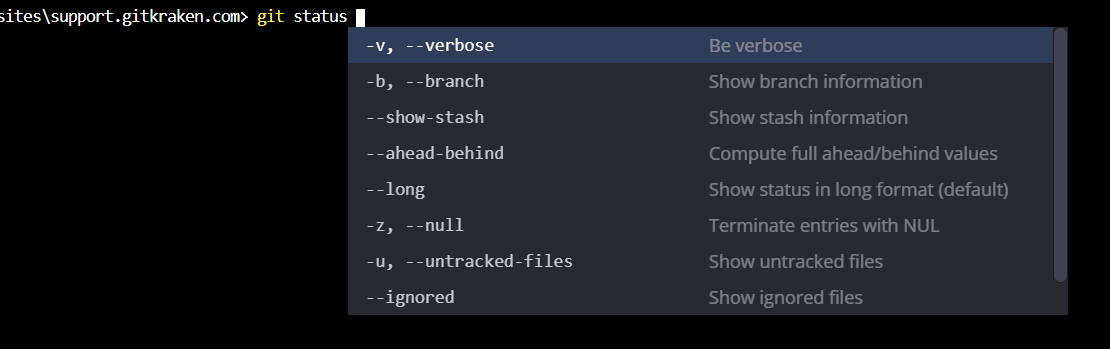
To run commands: Type any Git command such as git status, git commit -m "message", or git log --oneline. Auto-complete suggestions appear as you type, including flag suggestions for each command.
To customize terminal appearance: Go to Preferences > In-App Terminal to change font, size, line height, cursor style, and autocomplete behavior.
To set your default shell:
- macOS/Linux: Set ZSH or Bash as the default shell in your OS settings and restart your machine.
- Windows: Open Preferences > Terminal and select PowerShell or Bash.
The terminal shares context with the open repository, so commands run against the correct working directory automatically.
How Git commands and auto-complete work
The GitKraken Terminal supports most Git commands. Start typing git to see command suggestions via auto-complete.
Flag suggestions are also supported:
Note: Conflicting auto-complete programs may disable suggestions. You may need to uninstall or disable such programs for GitKraken’s suggestions to work correctly.
How to customize terminal preferences
Visit Preferences > In-app Terminal to modify your terminal settings.
How the default terminal works on macOS and Linux
GitKraken supports ZSH and Bash. To switch shells:
- Set the preferred shell as default in your OS settings.
- Restart your machine to apply changes.
How the default terminal works on Windows
PowerShell and Bash are currently supported. To change the shell:
- Open Preferences > Terminal.
- Set the Default Terminal to your desired shell.
Common Git commands to try
Use the terminal to quickly execute common Git operations:
git status– View working directory and staging statusgit commit -m "message"– Commit changes with a messagegit log --oneline– View a condensed commit history
These commands complement GitKraken’s visual graph for a comprehensive Git experience.
