

Last updated: November 2026
Kepler by GitKraken starts a coding agent from a Jira or GitHub issue, with the ticket already attached, and takes the work to a pull request. You connect your tracker once, then click the Action button on the issue’s row in Todo. For a GitHub or GitLab issue, Kepler creates a task, sets up a worktree by default, and starts Claude Code, Codex, or your default agent with the issue’s details in place, so you never paste the ticket into a chat. For a Jira issue, you add the repository in the issue’s panel first, then start.
Requirements and limits
- Scope: Going from an issue in a connected tracker to an agent’s pull request, inside 1 Kepler task
- Prerequisite: A GitKraken account signed in to Kepler, and a connected issue tracker. See Issue Tracker Integrations.
- Limits: Kepler reads issues from Jira, Jira Server / Data Center, Linear, Trello, Asana, GitHub, GitHub Enterprise, GitLab, GitLab Self-Hosted, Azure DevOps, and Azure DevOps Server.
- Limits: Kepler has no button that creates a pull request. The agent opens it, or you open it yourself. Kepler then attaches it to the task.
Quick Start
- Go to Settings → Integrations, find your tracker, such as Jira or GitHub, under Issues and pull requests, and click Connect.
- Open Todo and find the issue.
- Click the issue’s Action button. The default for an issue is Plan. To start coding straight away, pick Implement from the chevron.
- For a GitHub or GitLab issue, Kepler creates the task, attaches the repository and the issue, sets up a worktree by default, and starts the agent. For a Jira, Trello, Asana, or Azure DevOps issue, the issue’s panel opens: add the repository, then send.
- Review the agent’s changes and commit them.
- Have the agent open the pull request with an Action you create from the Open a pull request example, or open it yourself. Kepler attaches the pull request to the task.
How to connect your issue tracker
You connect a tracker once, and its issues appear in Todo from then on.
- Open Settings → Integrations.
- Under Issues and pull requests, find the provider and click Connect.
- Authorize Kepler on GitKraken’s website, which opens in your browser.
- Return to Kepler, where the provider shows a Connected badge.
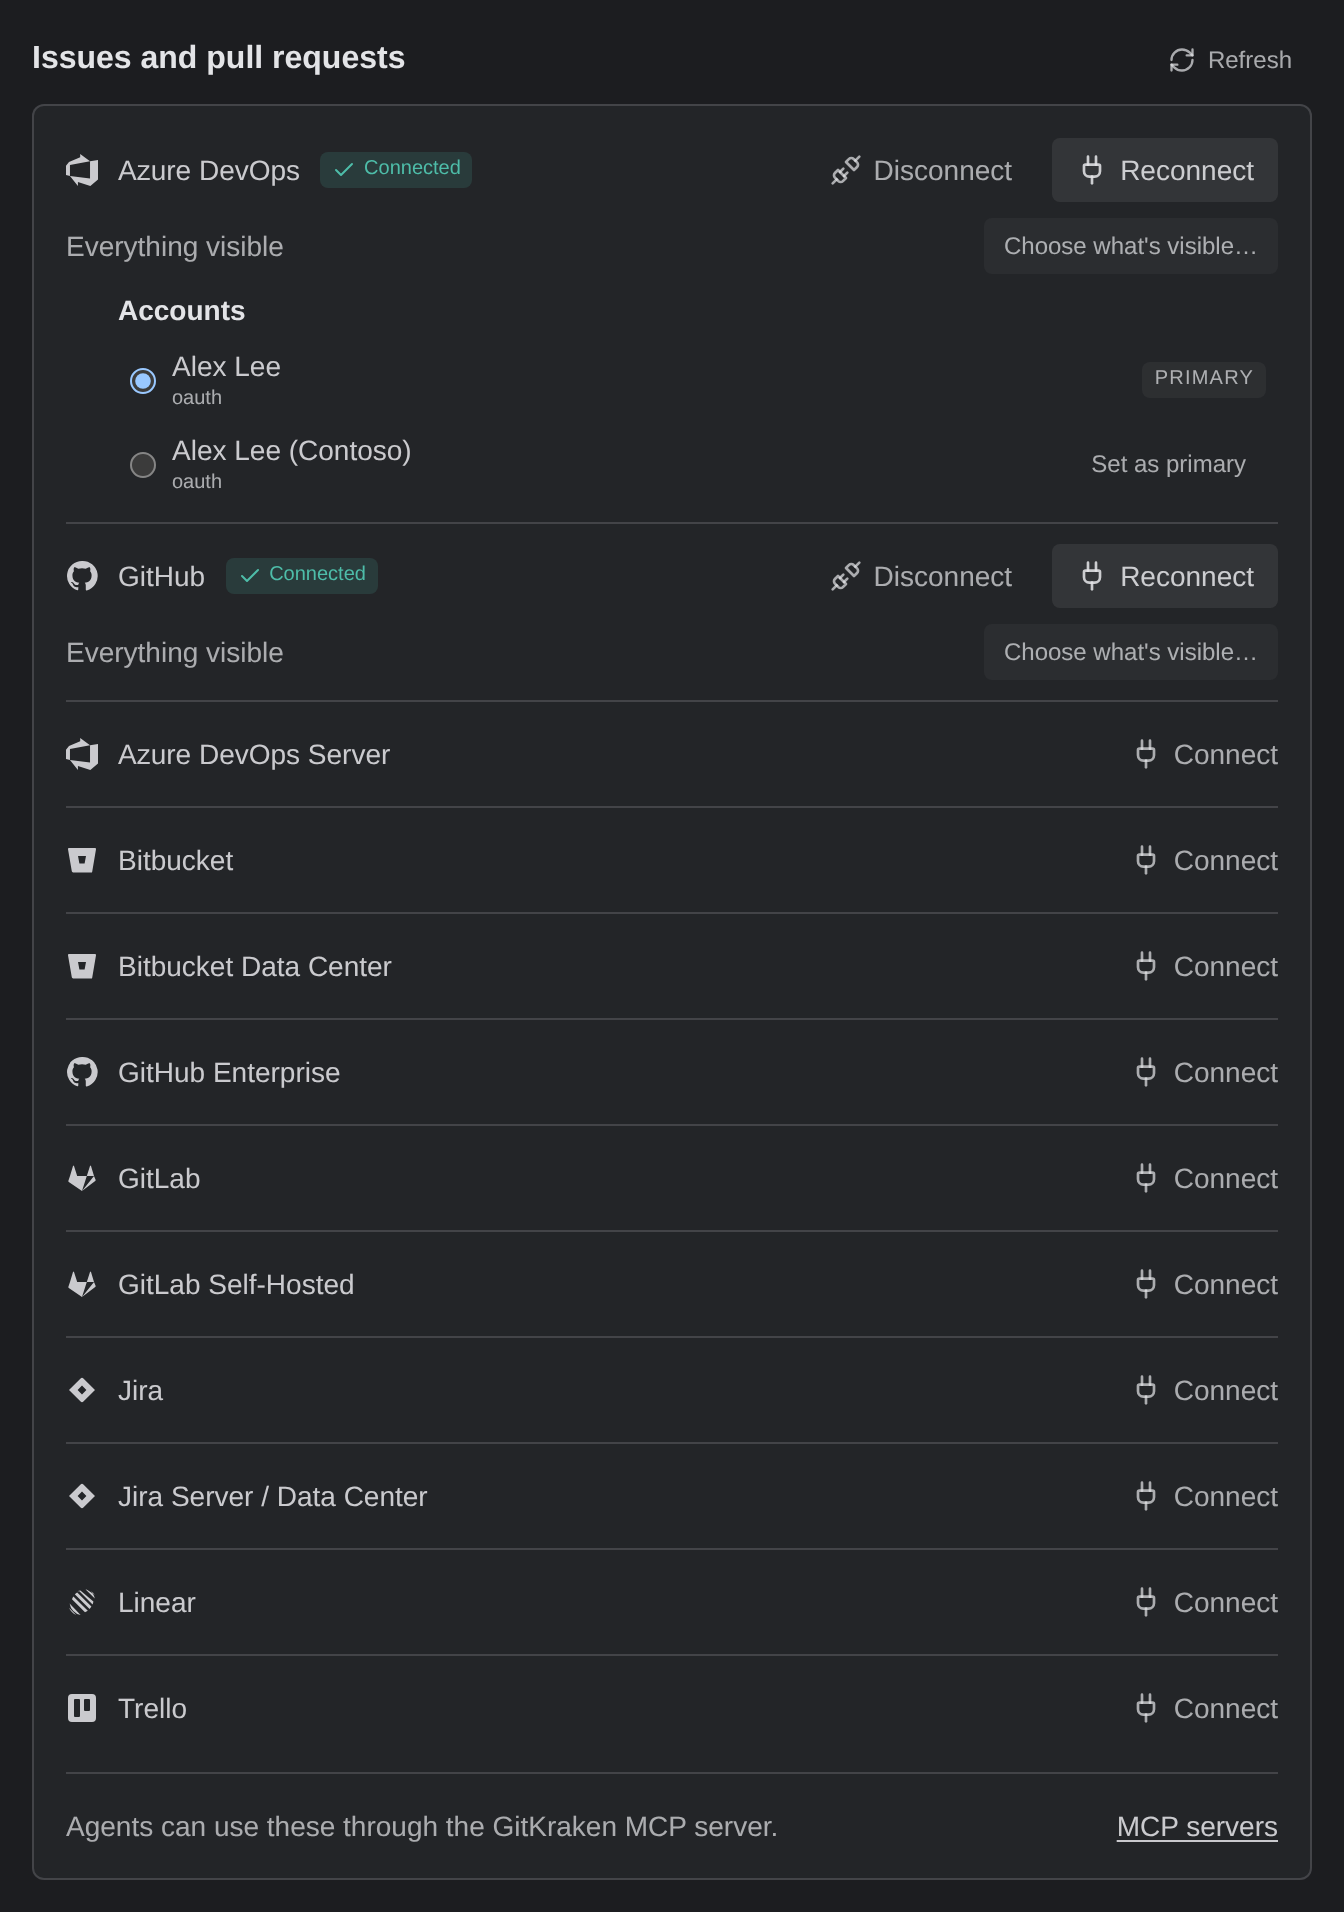
For a self-hosted tracker, such as Jira Server / Data Center or GitHub Enterprise, you connect with its address and a personal access token. See Connect a self-hosted tracker.
How to start the agent from the issue
- Open Todo. It lists your issues from every connected tracker.
- Find the issue’s row, and click its Action button.

The left half of the button runs the issue’s suggested Action. For an issue, that is Plan, which has the agent research the code and propose an approach, then wait for your confirmation before it changes anything. The chevron lists the Actions available on issues, such as Plan and Implement, which has the agent make the changes directly.
For a GitHub or GitLab issue, Kepler uses your local copy of the repository, or clones it, and then does the following:
- Creates the task.
- Attaches the repository and the issue.
- Sets up a worktree by default, so the agent works on its own branch.
- Starts an agent with the issue’s description attached as context.
A Jira issue names no repository, so Kepler cannot pick the code to work on. The same applies to Trello, Asana, and Azure DevOps issues. When you click Action, the issue’s panel opens, ready to start a new task, and Kepler shows Add a repository to start. Add the repository in the panel, then send. If you started work from the same tracker project before, the panel can fill in that repository for you. A Linear issue gets its repository from the GitHub issue it is synced with.
Kepler also saves the issue’s description as a note on the task, titled with the issue’s key and title. Long descriptions are shortened, with a link to the issue.
From the issue’s row, the agent is your default agent, or the agent the Action names. To use another agent, choose the Action in the New task window and change the agent before you send. See Setting an Action’s agent.
How to take the work to a pull request
Review and commit
When the agent finishes, open the task’s worktree and read its changes in the Changes overlay. Send fixes back as review comments, then click Commit… to stage and commit. See Review an AI-Written Pull Request Before Your Teammates Do and Review Changes.
Open the pull request
Kepler does not ship a “create pull request” Action. To have the agent open the pull request, create an Action once from the example on the Actions page:
- Go to Settings → Actions and click New Action.
- For Title, type
Open a pull request. - For Prompt, paste the prompt from Example: Open a pull request. It tells the agent to push the branch, open a pull request against its base branch, write the title and description, and stop if the worktree has uncommitted changes.
- Under Available on, tick Tasks.
- Click Save.
Then open the task and pick Open a pull request from the chevron on the composer’s send button. The agent opens the pull request with the tools it has, such as your Git host’s command-line tool.
You can also push the branch and open the pull request yourself, on your Git host’s website or from the worktree’s terminal.
Kepler attaches the pull request
When the agent publishes the pull request on one of the worktree’s remotes, Kepler attaches it to the task. The task then holds the issue and its pull request together. A pull request you opened yourself can be attached from Manage resources at the bottom of the task’s context panel. See Opening a pull request.
With the pull request attached, the Address Feedback Action is available on the task. When your teammates leave review comments, run it to have the agent work through each one.
How to start agents on new issues automatically
To have Kepler start the agent for you, set up an automation. An automation runs an Action on a schedule, or when new GitHub or Jira activity matches its query.
Common questions
Can I start a coding agent straight from a Jira issue?
Yes. Connect Jira in Settings → Integrations, then click Action on the issue’s row in Todo, add the repository in the issue’s panel, then send. Kepler starts the agent with the issue’s description attached as context.
Which issue trackers does Kepler support?
Jira, Jira Server / Data Center, Linear, Trello, Asana, GitHub, GitHub Enterprise, GitLab, GitLab Self-Hosted, Azure DevOps, and Azure DevOps Server. See Issue Tracker Integrations.
Do I have to copy the ticket into the chat?
No. Starting from the issue’s row in Todo attaches the issue’s description as context, and Kepler saves it as a note on the task.
Can the agent open the pull request by itself?
Yes. Create an Action from the Open a pull request example on the Actions page and run it on the task. Kepler attaches the pull request when the agent publishes it.
Which agent does the work?
Your default agent, such as Claude Code or Codex, unless the Action names another agent. To use another agent, choose the Action in the New task window and change the agent before you send.
