
Last updated: November 2026
By default, Git Integration for Jira Cloud shows every repository in an integration to every Jira user who can view development information (per Jira’s View Development Tools permission).
Enforce Git Service Permissions changes the model. When it’s on, each Jira user sees only the repositories they can already read in the connected Git service. Permissions are read from the Git service itself, using each user’s own personal access token.
What it gives you
- Least privilege by default. A user who can’t read a repository in GitHub, GitLab, Azure DevOps or Bitbucket can’t see its commits, branches or pull requests in Jira.
- No manual mapping. Repository visibility follows your Git service’s existing access model. When someone’s access changes there, it changes in Jira too.
- Parity with Data Center. Teams migrating from Git Integration for Jira Data Center keep the equivalent of its Enforce Git Service Permissions behaviour.
- Automation keeps working. Smart commits, Automation for Jira triggers and workflow triggers continue to fire.
How it works
Permissions come from each user’s token. Every user stores a personal access token for each integration. The app uses that token to ask the Git service which repositories the token can read, and remembers the answer for that user.
What a user sees is the overlap of two sets: the repositories your integration indexes, and the repositories their token can read. Anything outside that overlap is invisible to them.
Where it applies. Every user-facing surface: the Git Commits and Git Roll Up issue tabs, the issue activity glance, the project commits page, the repository browser, repository and branch pickers, search, and write actions such as creating a branch or pull request. Administrators and integration managers are exempt – they keep full visibility of every integration across pages and views.
When permissions refresh. Each user’s repository list is refreshed automatically about every 24 hours. It also refreshes immediately when a user saves or replaces their token. Because of that cycle, a change made on the Git side can take up to a day to appear in Jira. Re-saving the token forces an immediate refresh.
No token means no access. This is deliberate. A user with no stored token, or with an expired or revoked one, sees no repository data rather than falling back to seeing everything. There’s also a brief delay after saving a first token while the initial lookup runs.
Jira’s native Development panel is a special case. Jira renders that panel itself from development information the app pushes to it, and the Jira platform has no way to filter it per user. No app can restrict it repository by repository. The app therefore keeps sending development information, which is what keeps automation triggers working, and hiding the native panel is left to Jira’s own permission model. See the administrator steps below.
Integrations that can’t be filtered. Enforcement relies on being able to query a provider for a user’s readable repositories. Where that isn’t possible, those integrations are hidden from non-administrators/non-integration managers by default. A setting lets you show them unfiltered instead if your team needs them.
Setting it up (administrators)
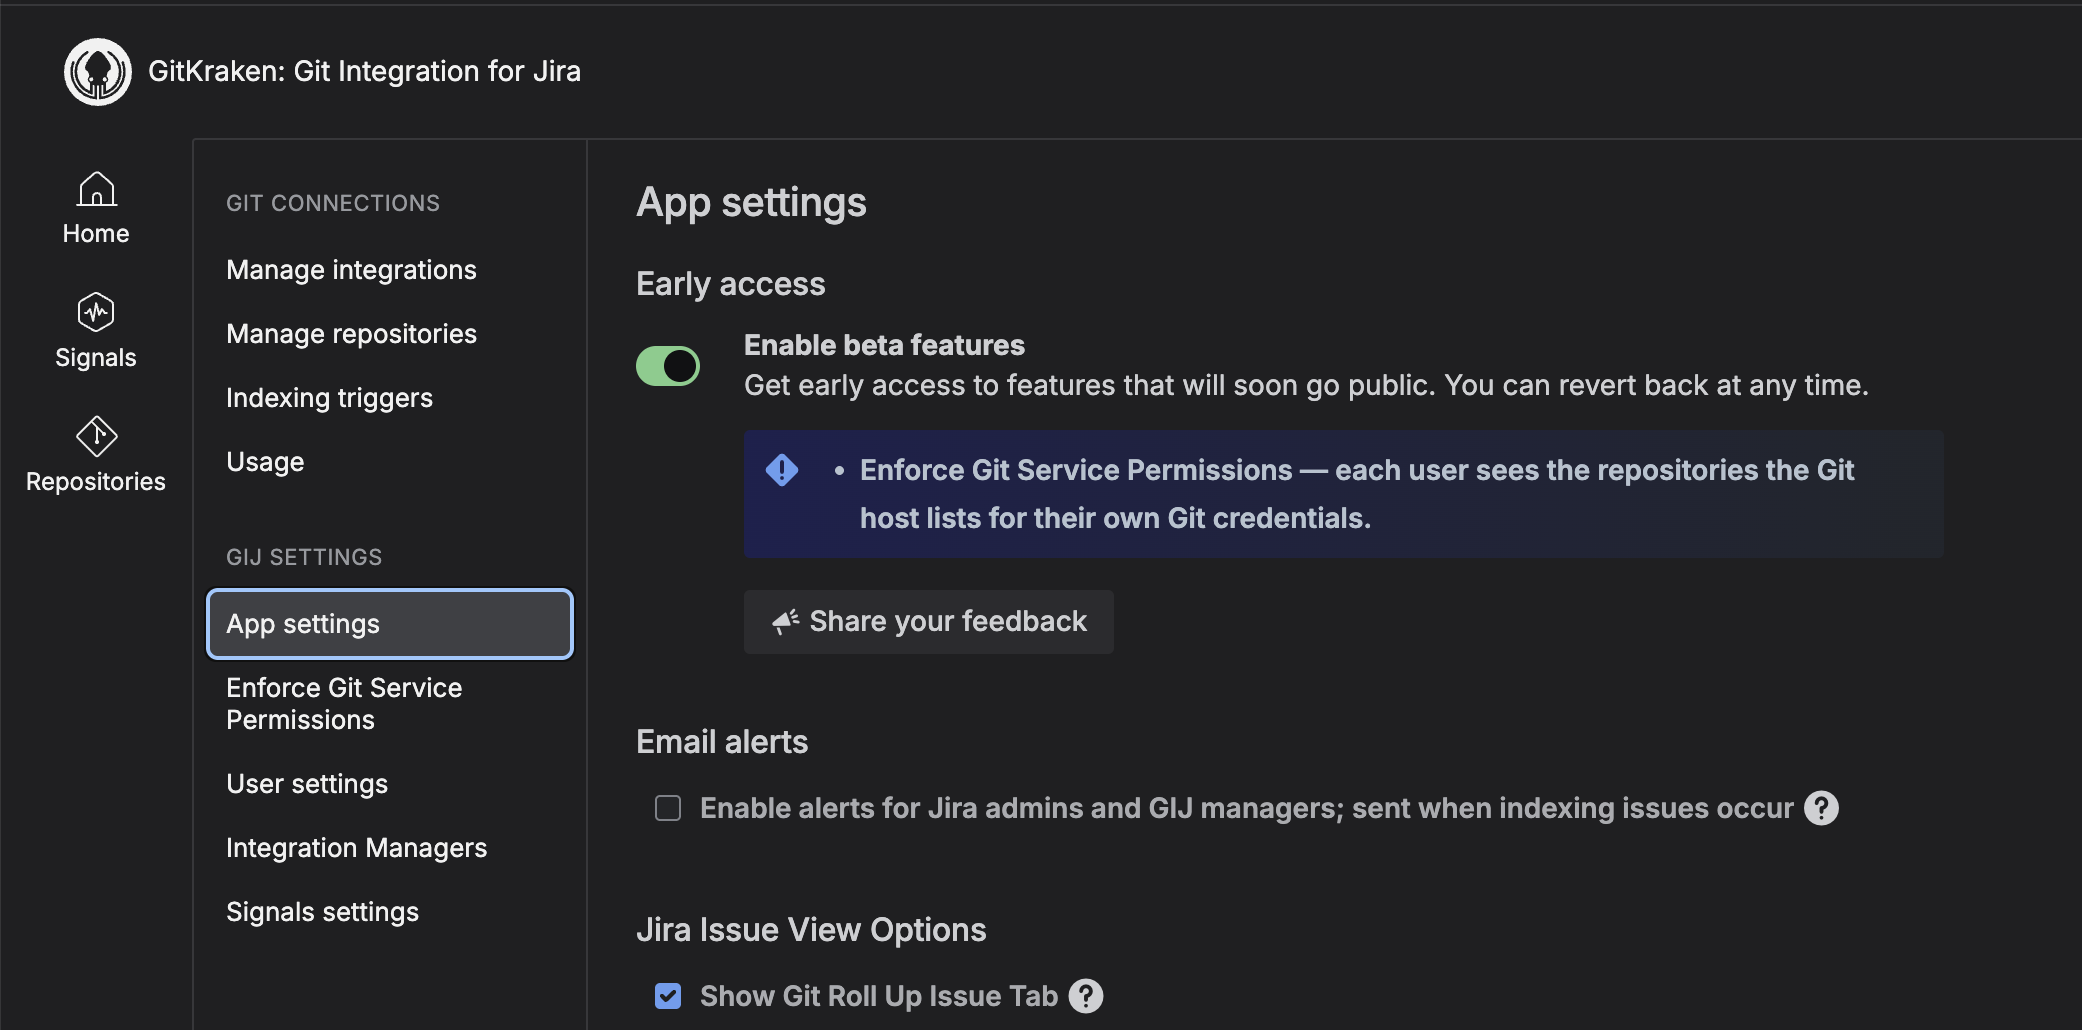
1. Enable Beta Features
In the GIJ Settings: App settings page, ensure the Enable Beta Features flag is enabled.
2. Turn on Enforce Git Service Permissions
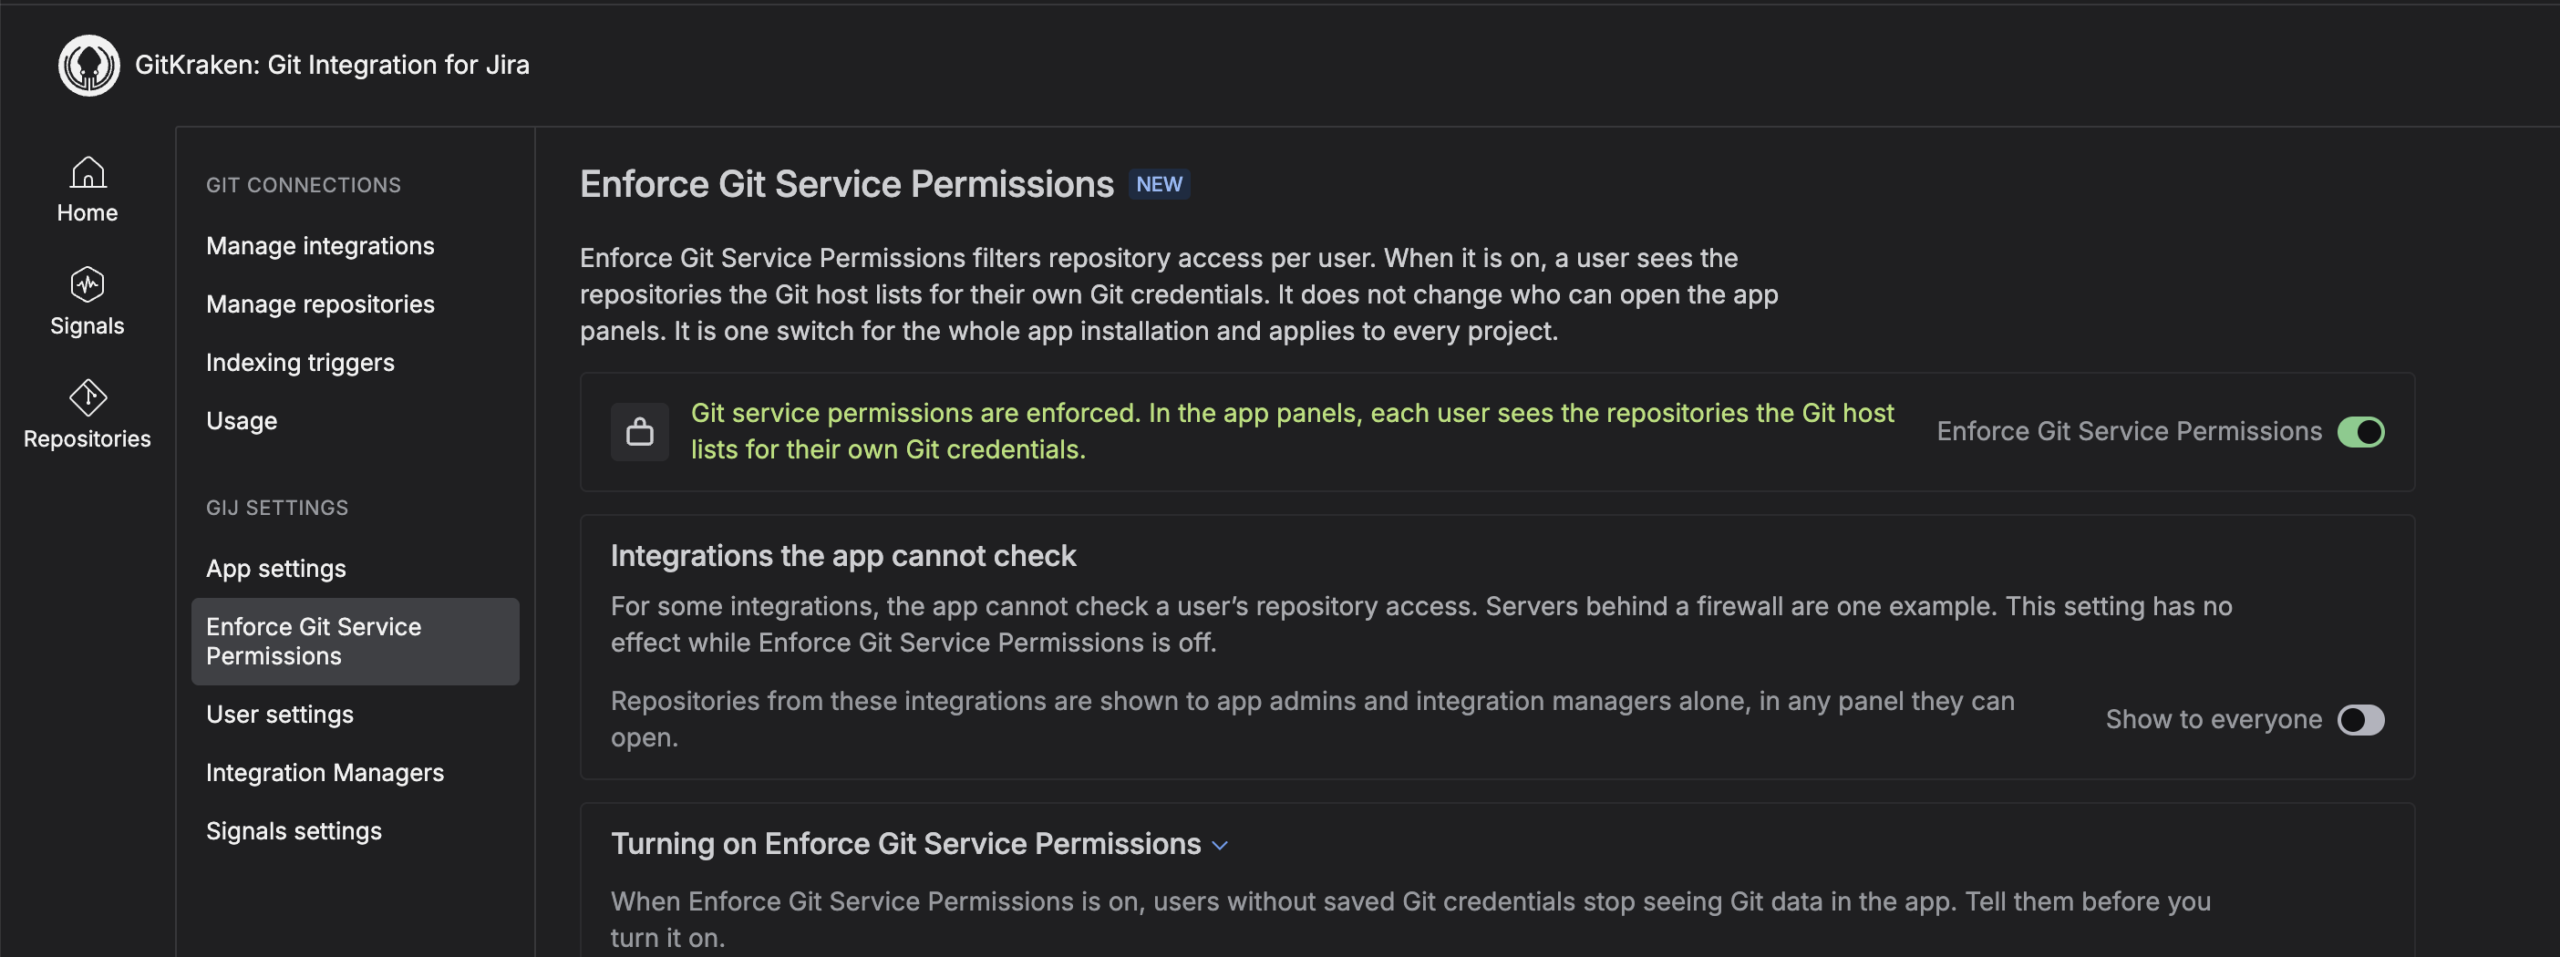
In GIJ Settings: Enforce Git Service Permissions. It’s off by default and applies to the whole app installation, covering every integration at once.
3. Decide what happens to integrations that can’t be filtered
The setting “Integrations the app cannot check – Show to everyone” is off by default, meaning those integrations are hidden from ordinary users. One example is servers behind a firewall. Turn it on only if you accept that their data is visible unfiltered.

4. Grant the app’s Jira permission to your users
Enforce Git Service Permissions introduces a project permission, View Development Tools in Git Integration for Jira by GitKraken, that the app declares. Add it to the permission scheme of each project whose users need the app, granting it to the appropriate roles or groups. This permission is what admits users to the app’s own screens, in place of Jira’s View Development Tools.
Two limits to plan around: existing installations only receive the new permission after the app is upgraded, and team-managed projects have no permission scheme, so the permission can’t be granted there. You must be using company-managed projects.

5. Remove View Development Tools permission from ordinary users
This is the step that hides Jira’s native Development panel. The app’s own tabs and panels no longer require it, so users keep working through them. Remove View Development Tools from all users in the space settings. If you do not remove this permission, users will be able to see development information in Jira’s Development panel.
Be aware of what else that permission controls. Removing it also removes native development JQL searches, the development icons on boards, and the Code and Deployments views. Automation for Jira triggers are unaffected, because they run in the rule’s context rather than the user’s.
6. Optionally clear existing development information
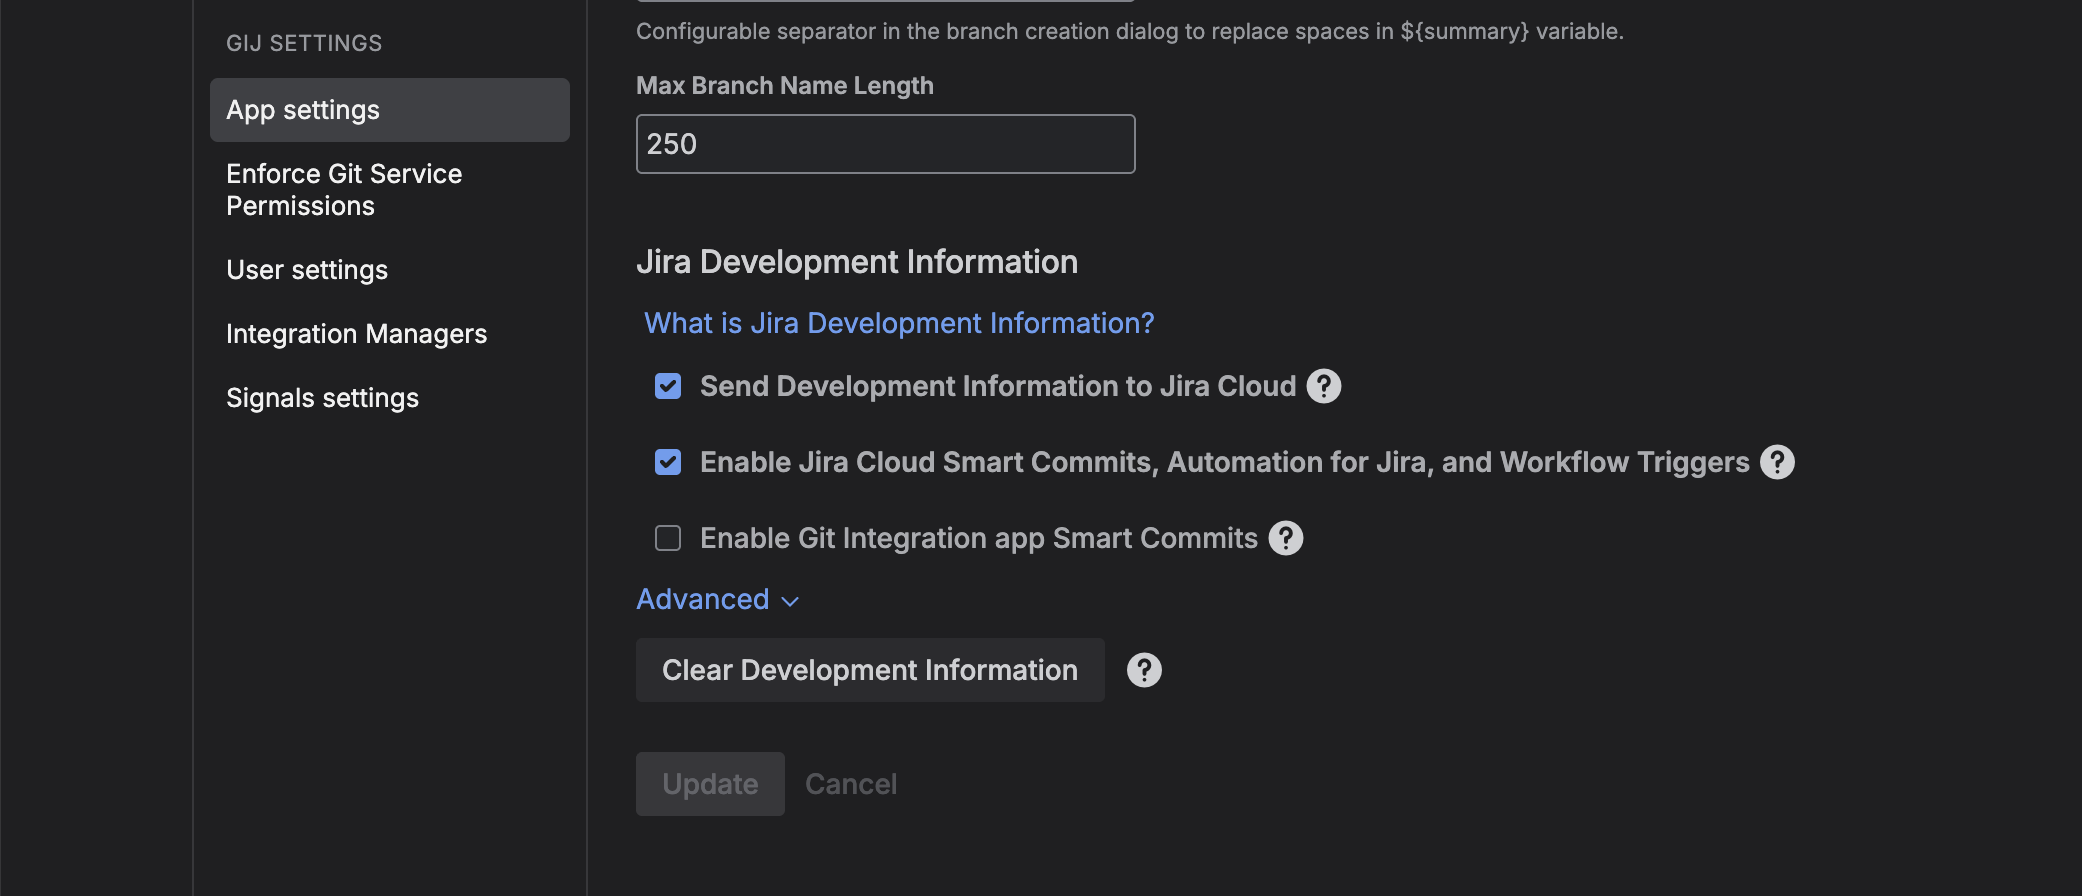
Development information already pushed to Jira stays there. If you don’t want historical data reachable by anyone who still holds View Development Tools, clear it from the app’s advanced settings by clicking Clear Development Information. Optionally, you can stop sending that data by unchecking “Send Development Information to Jira Cloud”.
Note: These choices will also impact JQL searches, Automation Rules, etc. as mentioned in step 5.
7. Tell your users to add Personal Access Token(s) or other Git credentials
Nobody sees repository data until they do. Sending this note before you enable enforcement avoids a wave of support requests.
Turning the setting back off restores the previous behaviour immediately. Nothing needs to be reconfigured, and nothing is deleted while it’s on.
What developers need to do
Add a personal access token or Git credentials for each integration.
Open the Git Integration for Jira app and navigate to Settings: User settings. Find the Personal access tokens section and add a token for each integration you work with. Use a token with read access to the repositories you need. Your visibility in Jira matches what that token can read, so a narrowly scoped token means a narrower view.
Note: Some providers like Gerrit and AWS CodeCommit will require additional authentication information.
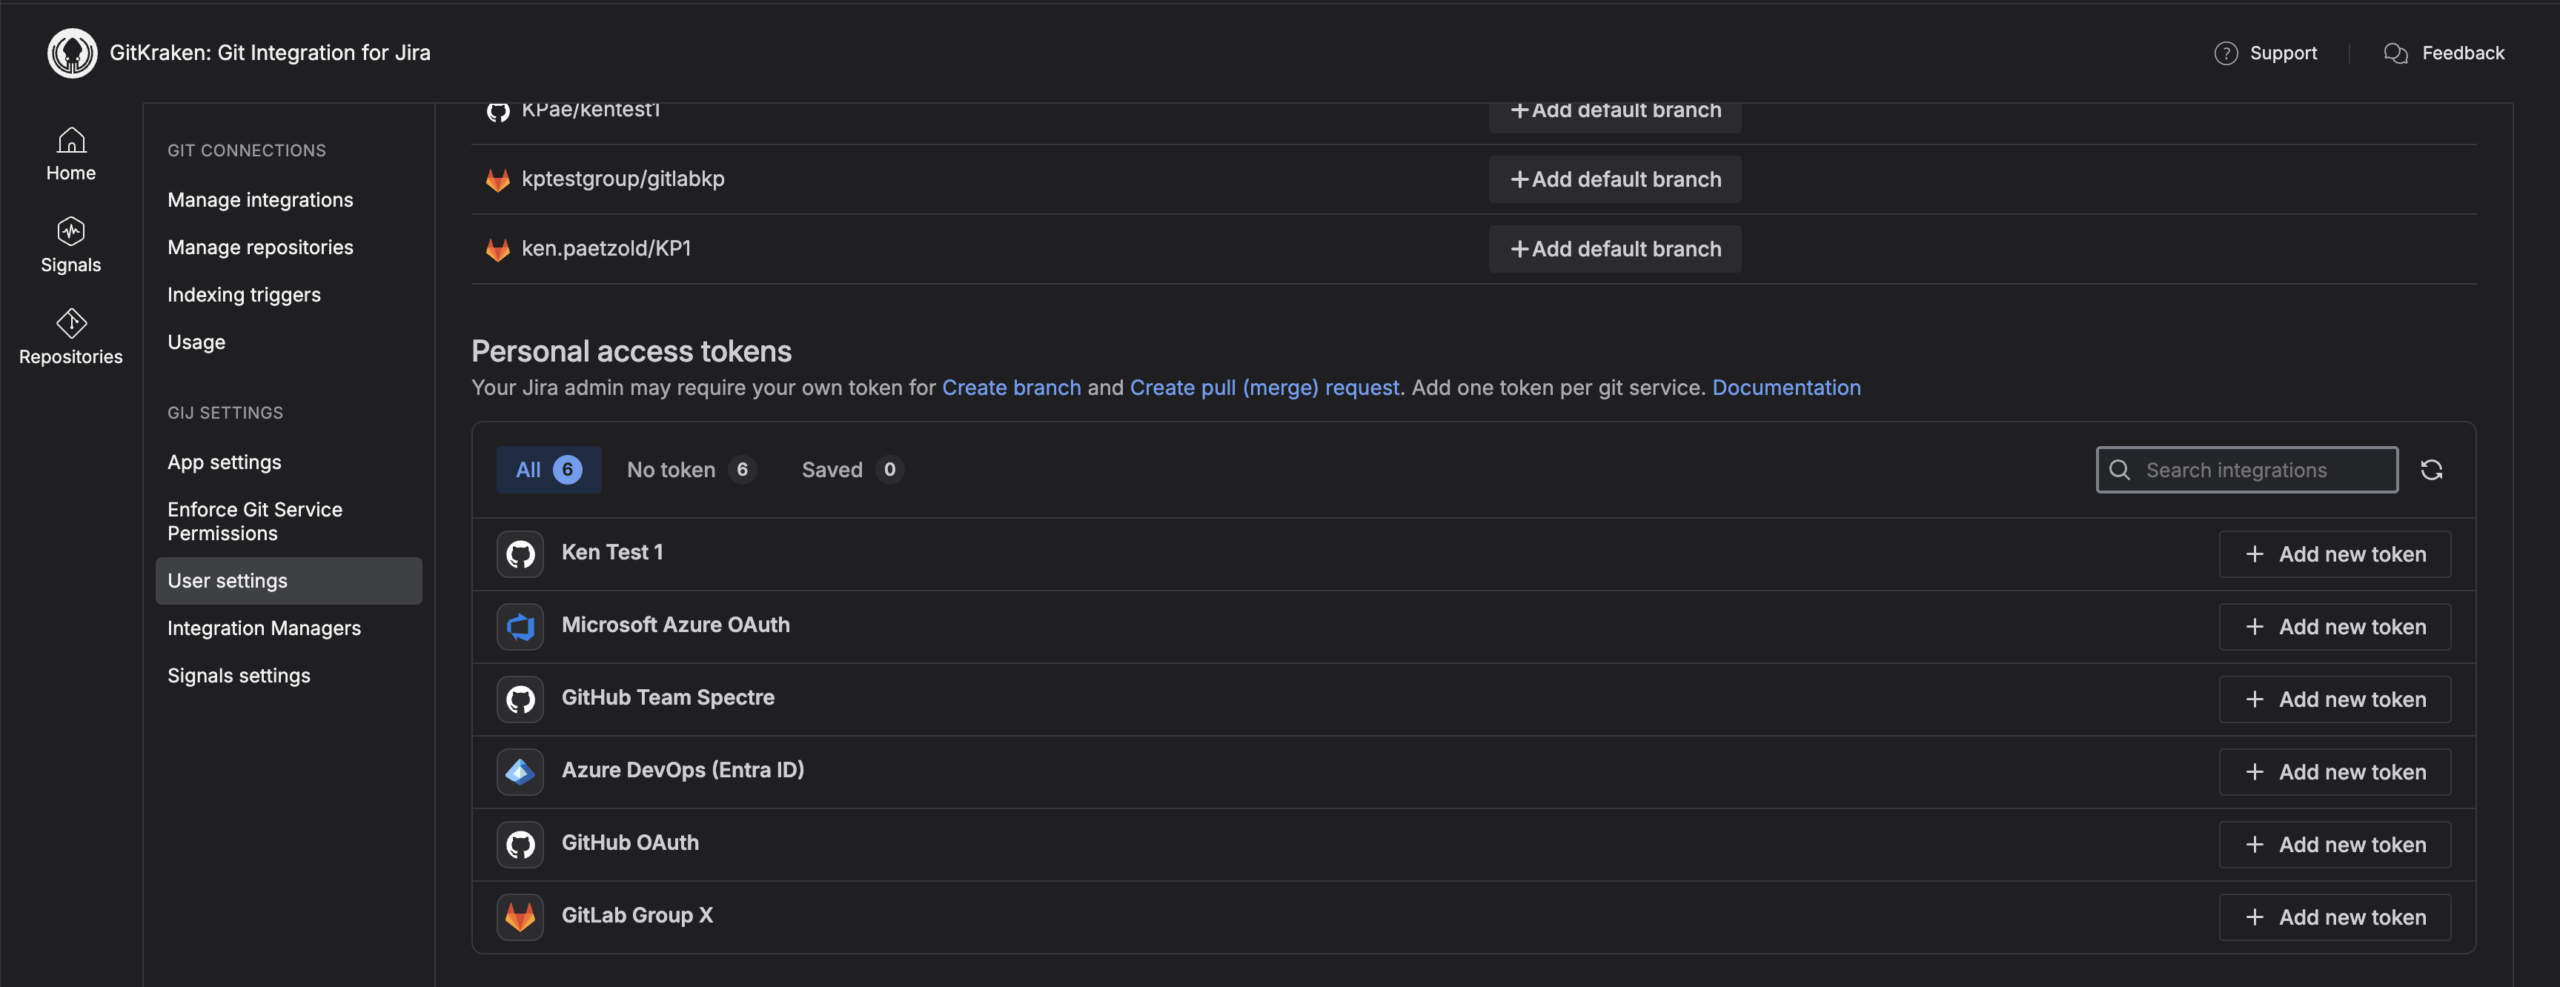
There’s a short delay after saving before your repositories appear.
If a repository you expect is missing
- Check that your token actually grants read access to it.
- Check that the token hasn’t expired or been revoked. A revoked token removes your access on the next check.
- If your access changed on the Git side recently, it can take up to 24 hours to appear. Re-saving your token refreshes it immediately.
- If the repository belongs to a provider the app can’t filter, your administrator controls whether it’s shown at all.
If you see a notice about hidden data, it means enforcement is on and you have no stored token for at least one integration. Add a token to clear it. The notice is advisory and can be dismissed.
For all providers, tokens that can read more than 5,000 repositories are truncated. If you’re affected, scope your token more narrowly to the organisations or repositories you actually work with.
Since your organization is using the enhanced security model, Jira’s native Development panel will no longer be visible. In the Jira issue view, use the Git Commits and Git Roll Up tabs plus the Issue Activity by GitKraken panel to view commits, branches, pull requests, tags, and deployment information.
