
Link your git commits to Jira issues by including the issue key in the commit message.
On this page:
- Understand commit linking
- Follow best practices for linking
- Associate commits manually
- Link branches to a Jira issue
- Link pull or merge requests to a Jira issue
Understand Commit Linking
Git Integration for Jira selects commits by issue key. Include issue keys in your commit messages every time you commit.
Follow Best Practices for Linking
When working with sub-tasks, include both the parent and sub-task issue keys in your commit message. This approach:
- Displays the commit in both places
- Prevents sub-task commits from getting lost among parent issue commits
Support for Renamed Projects
Git Integration for Jira supports commits that use the old Jira key after a project rename (for example, TEST-16 to PROJ-16).
Two scenarios apply after a rename or move:
- The Jira project key was renamed and the commit message contains the old key (from before you installed Git Integration for Jira)
- A Jira issue was moved to another project and the message contains the old key (from before you installed Git Integration for Jira)
Associate Commits Manually
Access the Change commit issues feature from two locations:
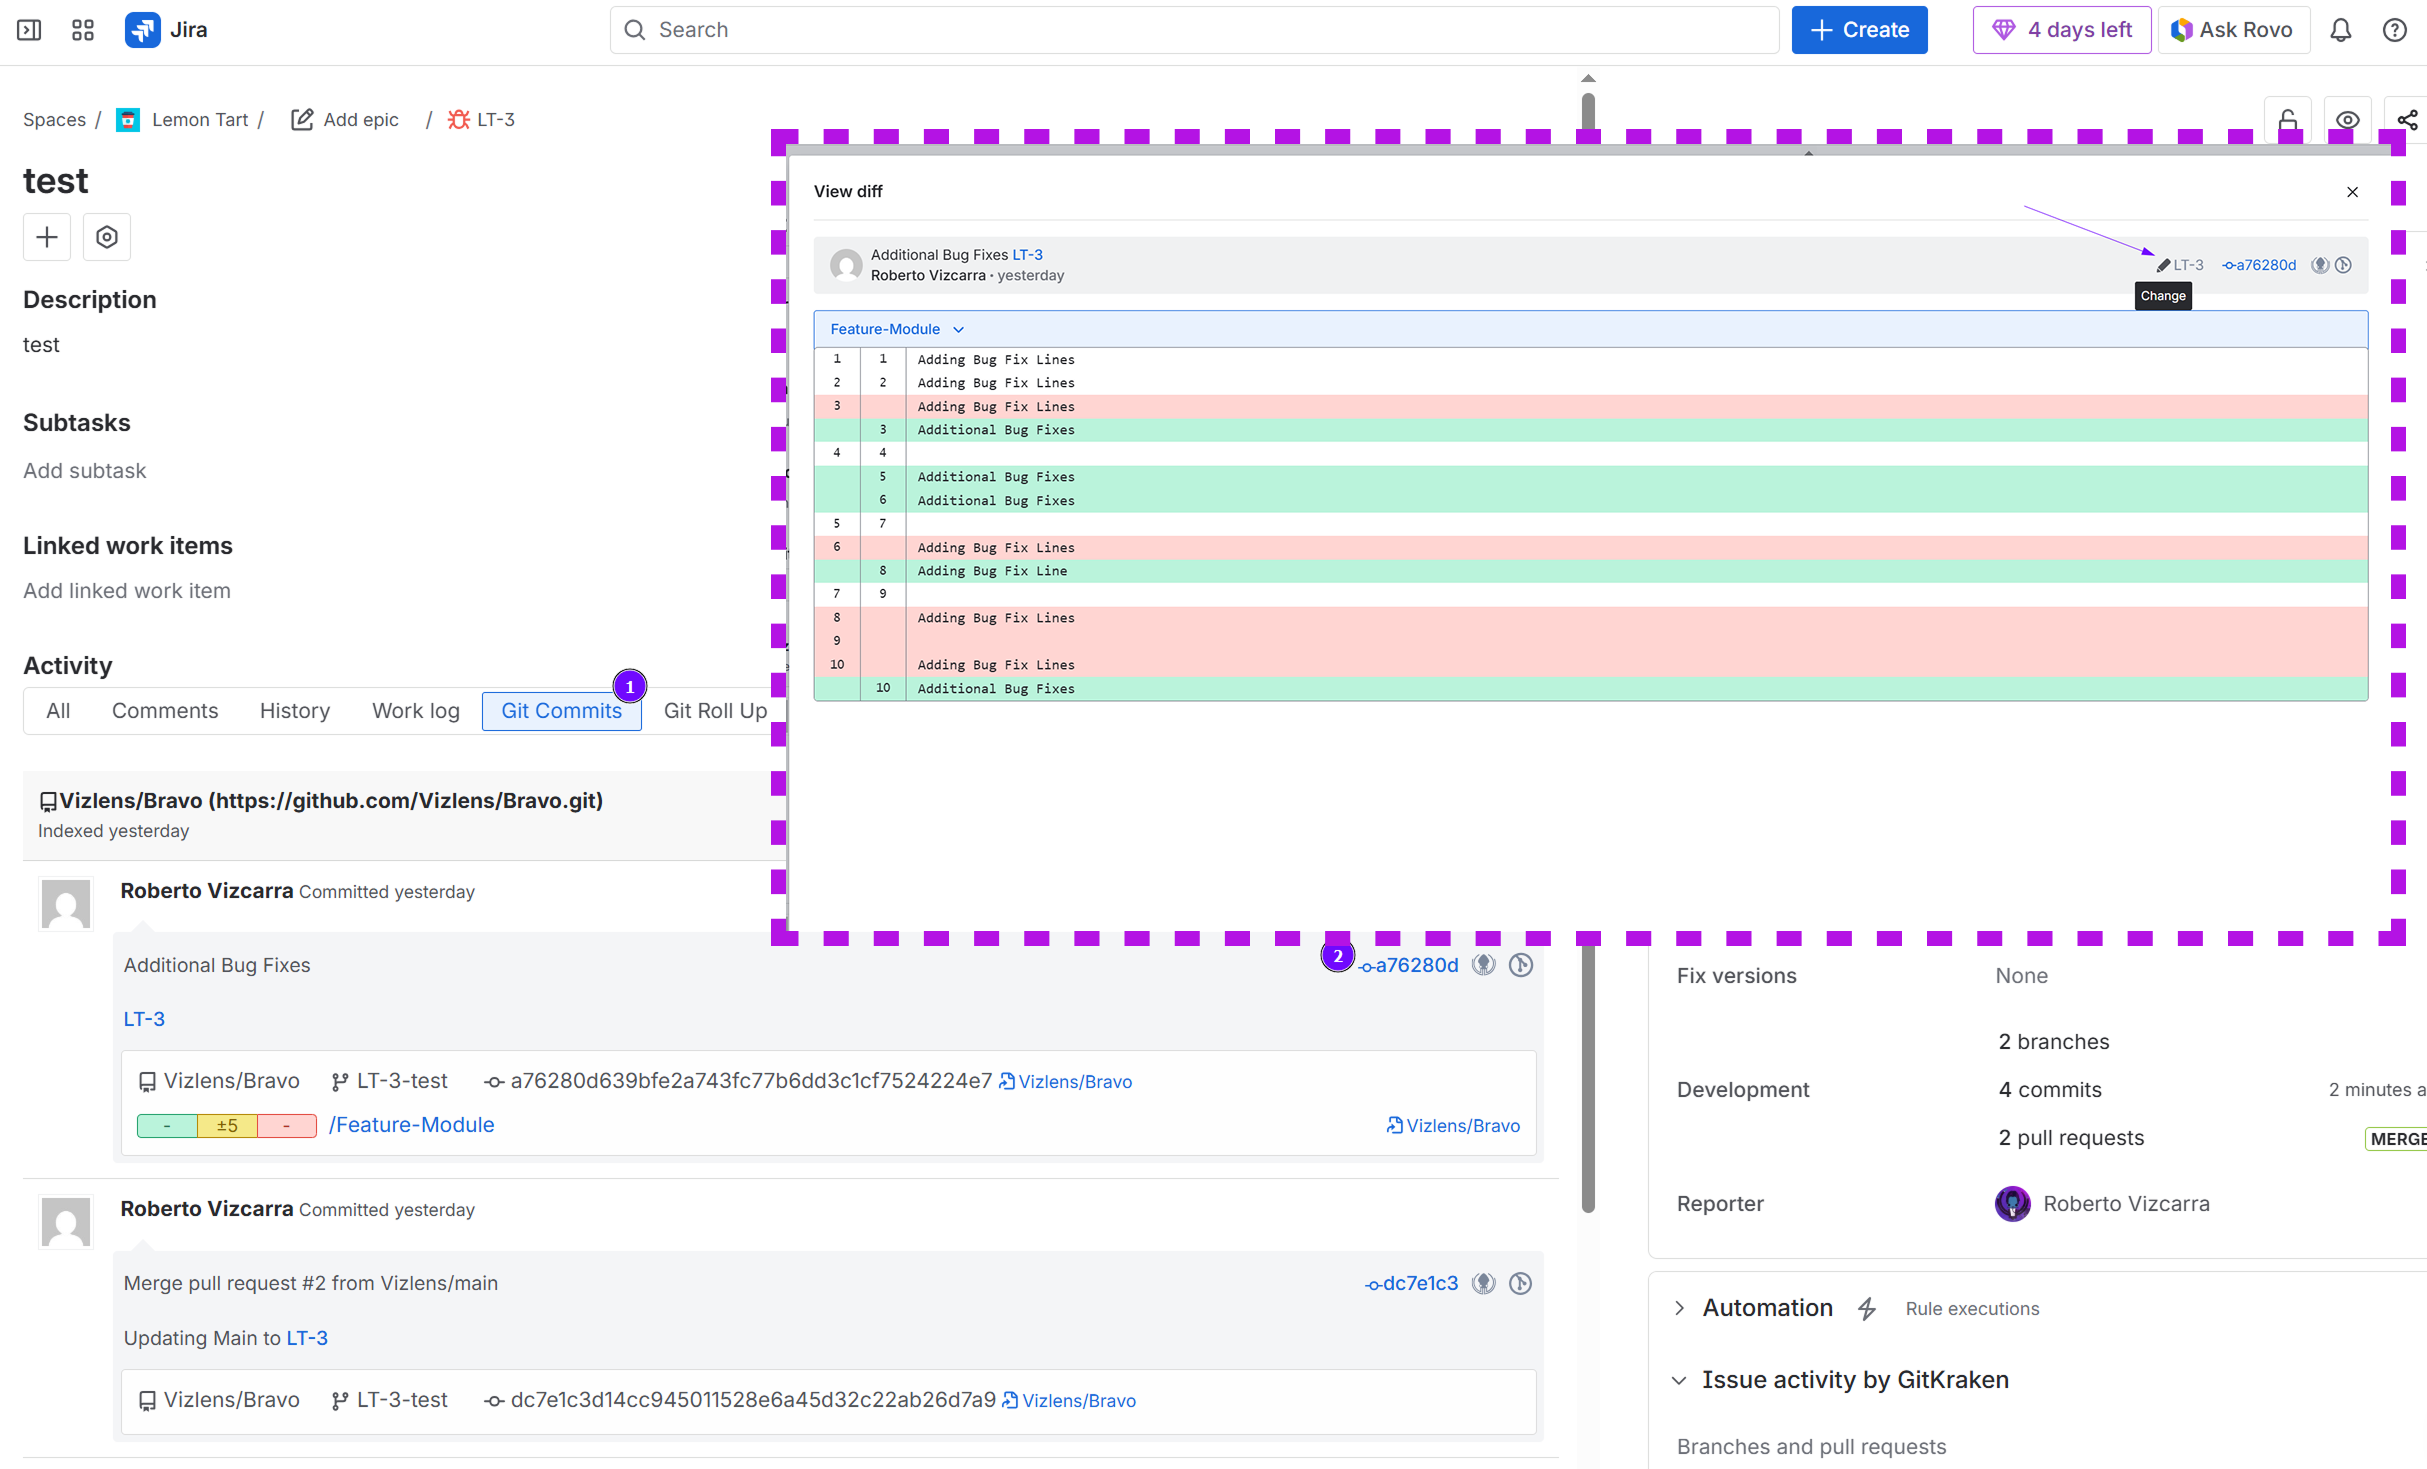
From the Issue Page:
- Open the issue page.
- Go to the Git Commits tab.
- Click View Full Commit.
- Click the
 icon to modify associations.
From the Repository Browser:
- Go to Apps ➜ Git Integration: Repository browser.
- Click a repository that contains commits.
- Click the icon on the commit you want to modify.
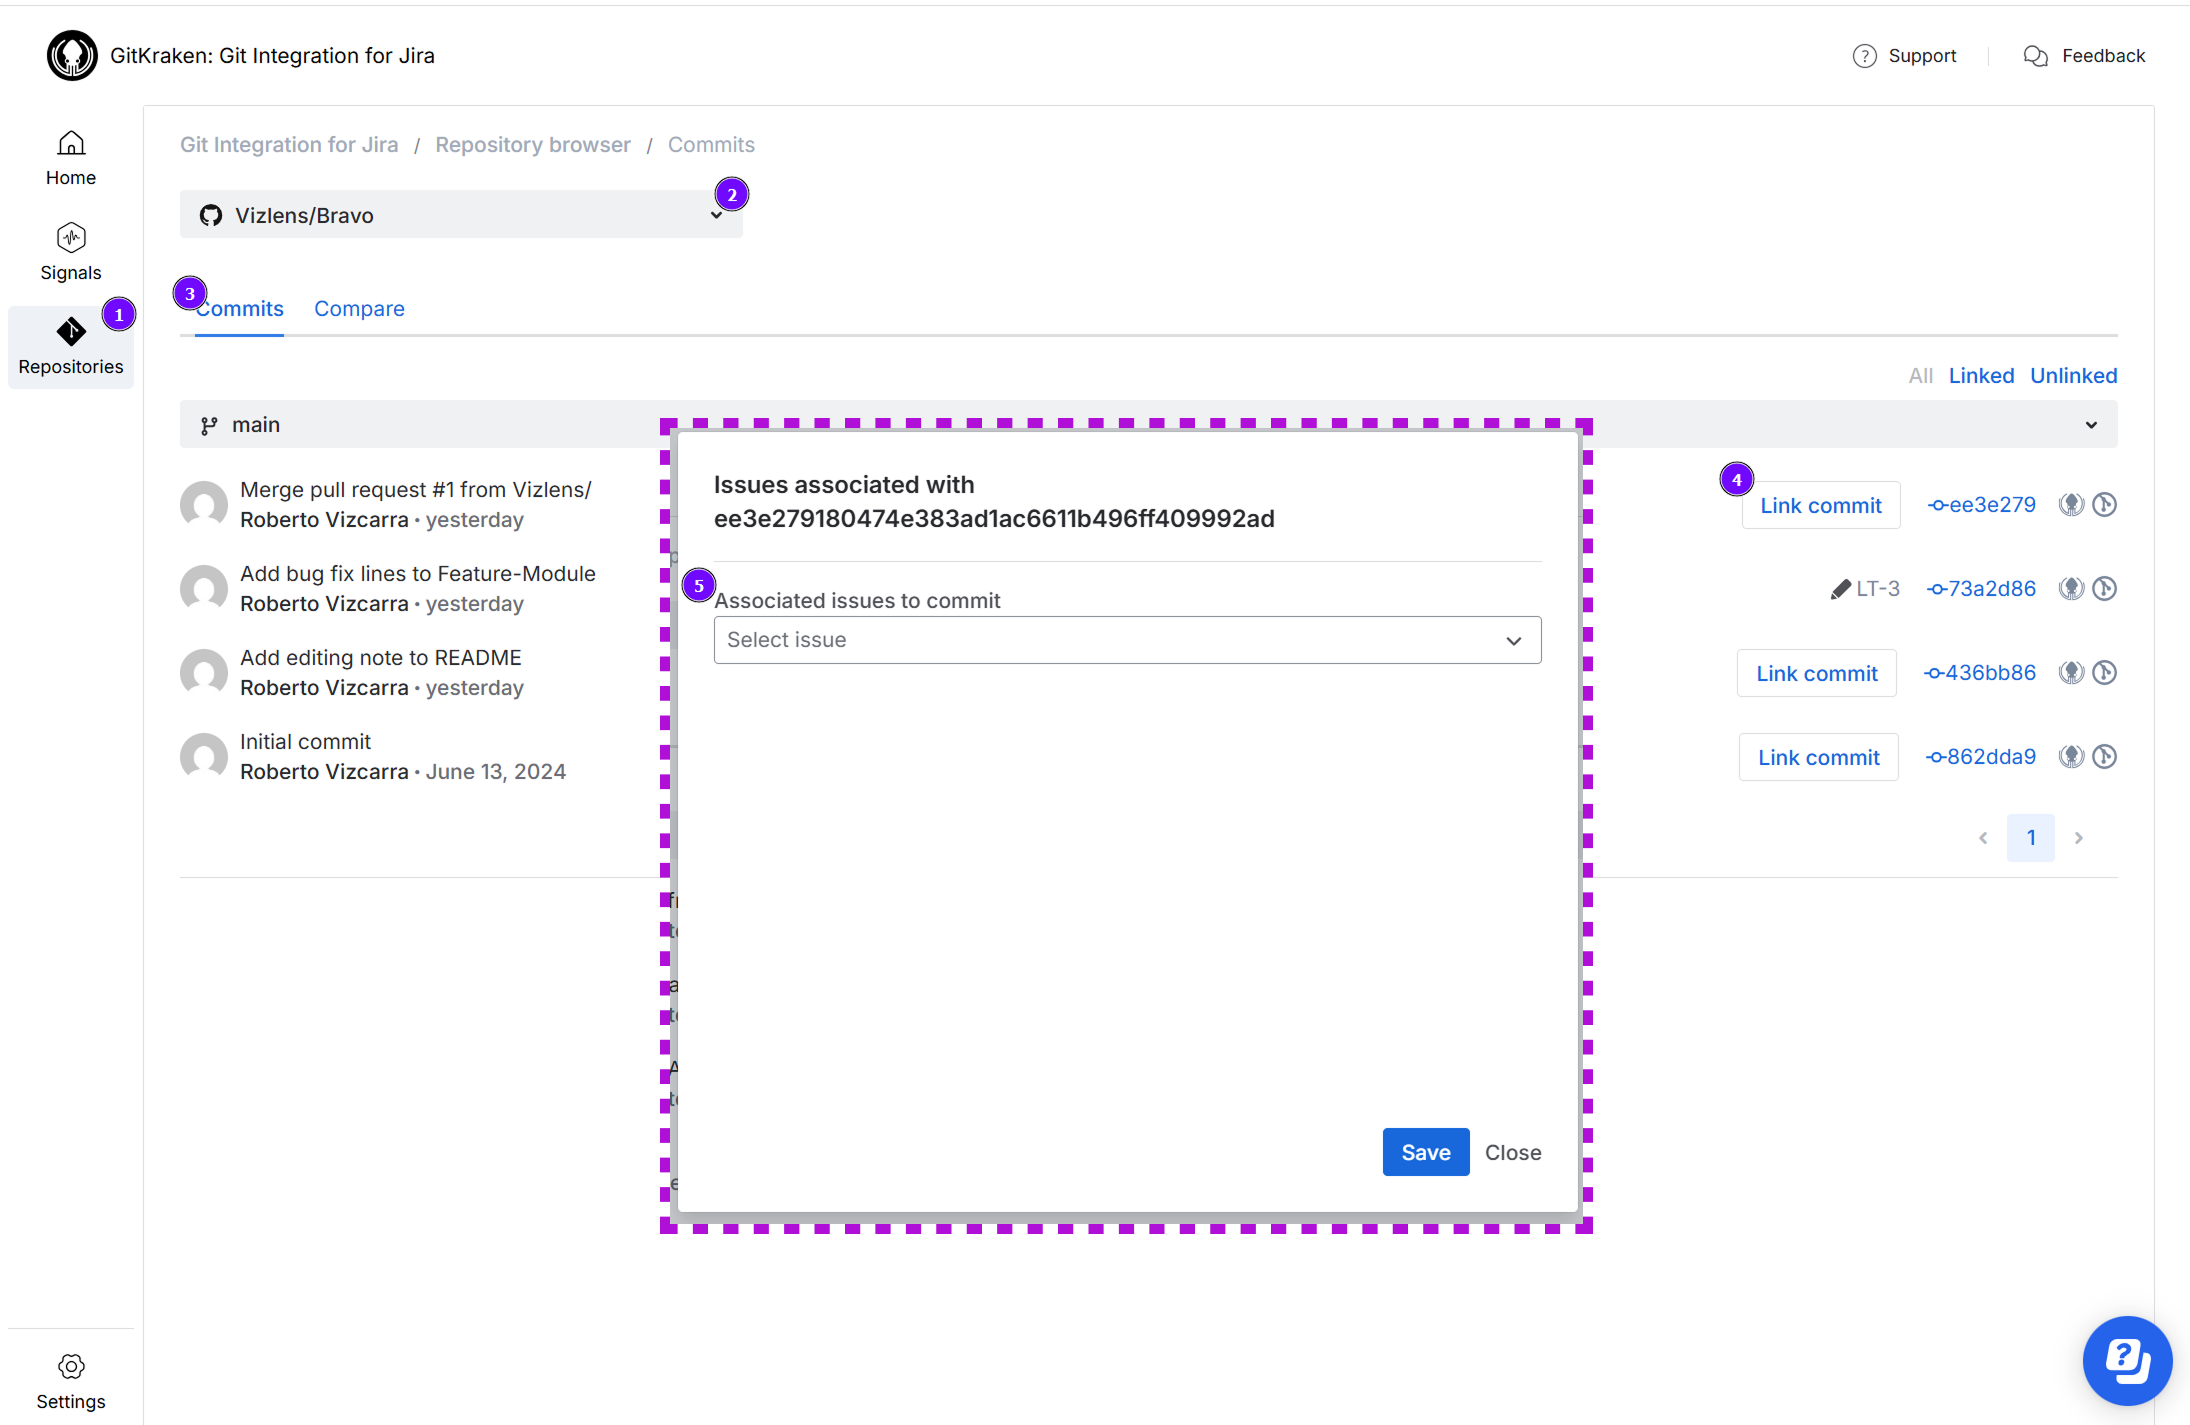
Method 1: Use the Dropdown
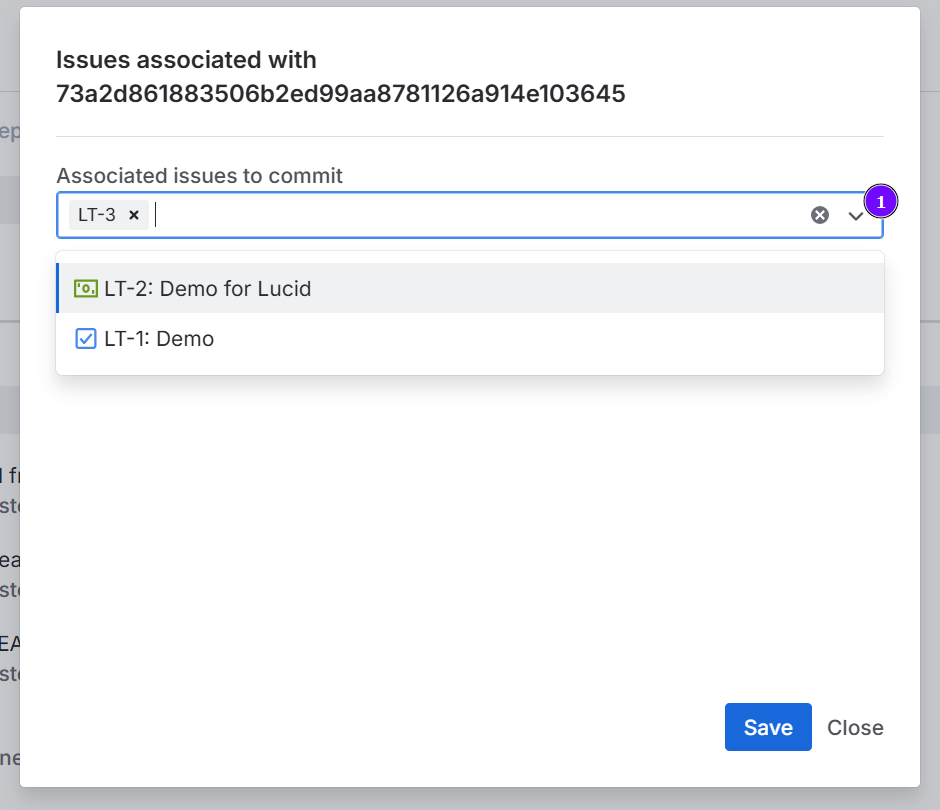
- Click the dropdown arrow in the Associated issues to commit field.
- Select a Jira issue from the list.
- Repeat to associate additional issues.
- Click X next to an issue to remove that association.
- Click Save to apply changes.
Method 2: Type to Search
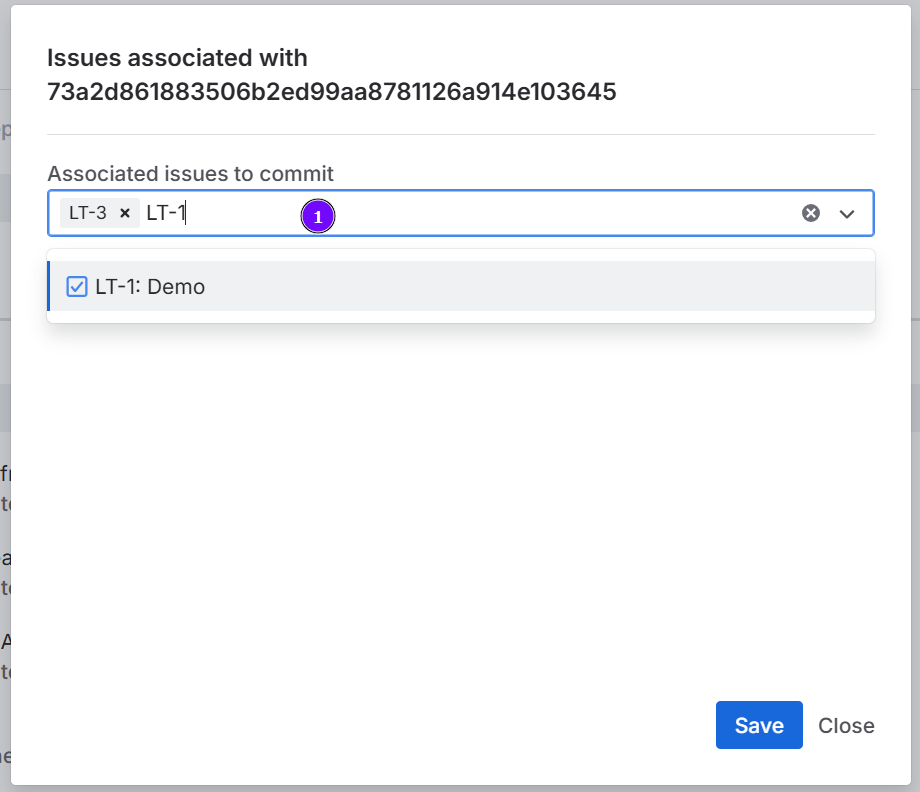
- Type a Jira issue key or a word from an issue summary.
- Select a matching issue from the results.
- Repeat to associate additional issues.
- Click X next to an issue to remove that association.
- Click Save to apply changes.
Association Permissions
Multiple Associations
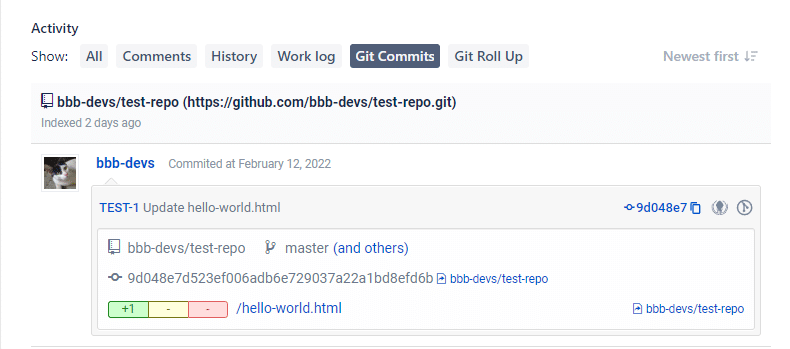
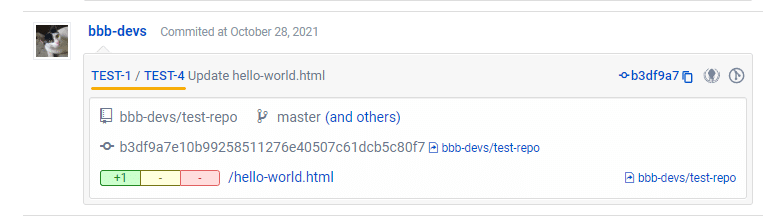
If a commit is associated with multiple Jira issues, you see all linked issues in the dialog:
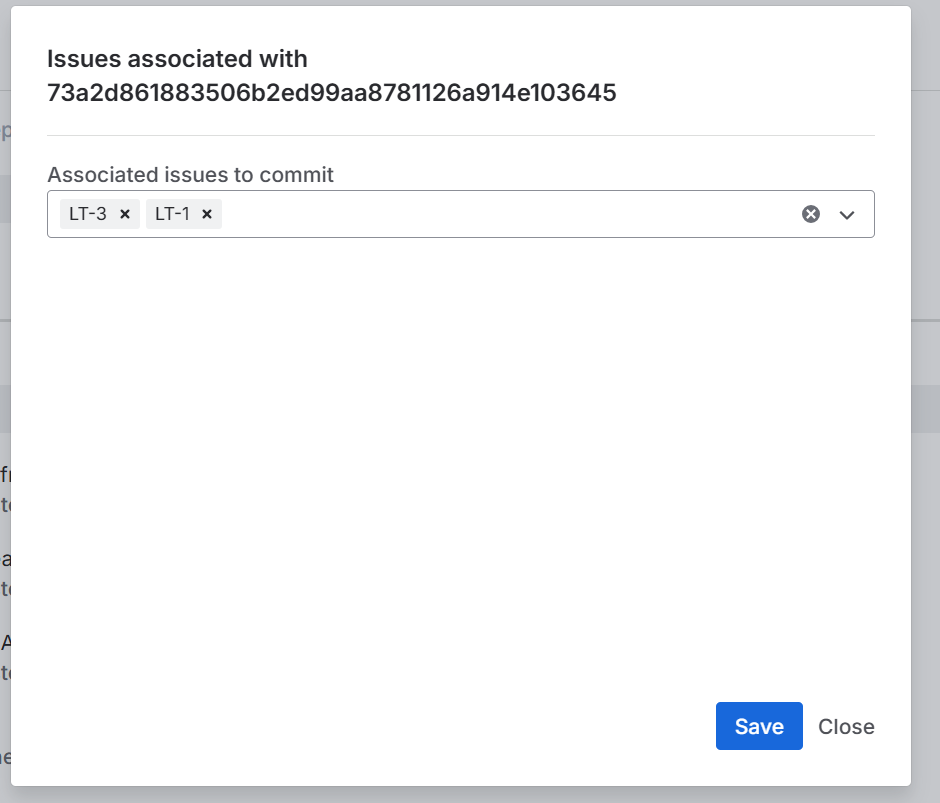
In this example, the commit is associated with issues TEST-1 and TEST-4.
Link Branches to a Jira Issue
Include the Jira issue key in the branch name when you create a new branch.
Create a Branch in Your Git Service (GitHub Example)
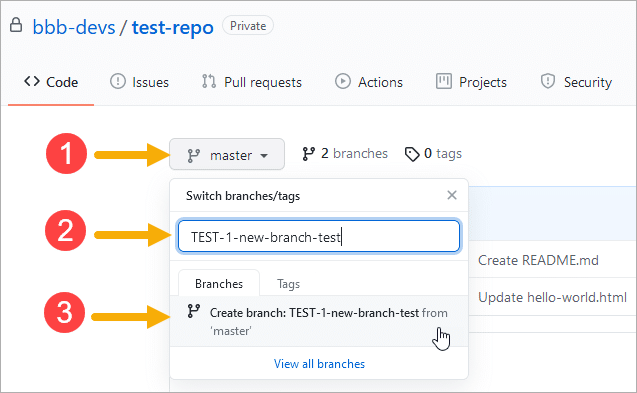
- Click the branch dropdown (showing master or your current branch).
- Enter a new branch name that includes the Jira issue key.
- Click the result to create the branch.
Create a Branch from Jira
- Open a Jira issue.
- Click Git Integration in the right sidebar.
- Click Create branch.
- Select a repository.
- Select the source branch to use as a base.
- Edit the proposed branch name if needed, but keep the Jira issue key.
- Click Create branch.
Link Pull or Merge Requests to a Jira Issue
Include the Jira issue key in the pull request title or description when you create a new PR/MR.
Create a Pull Request in Your Git Service
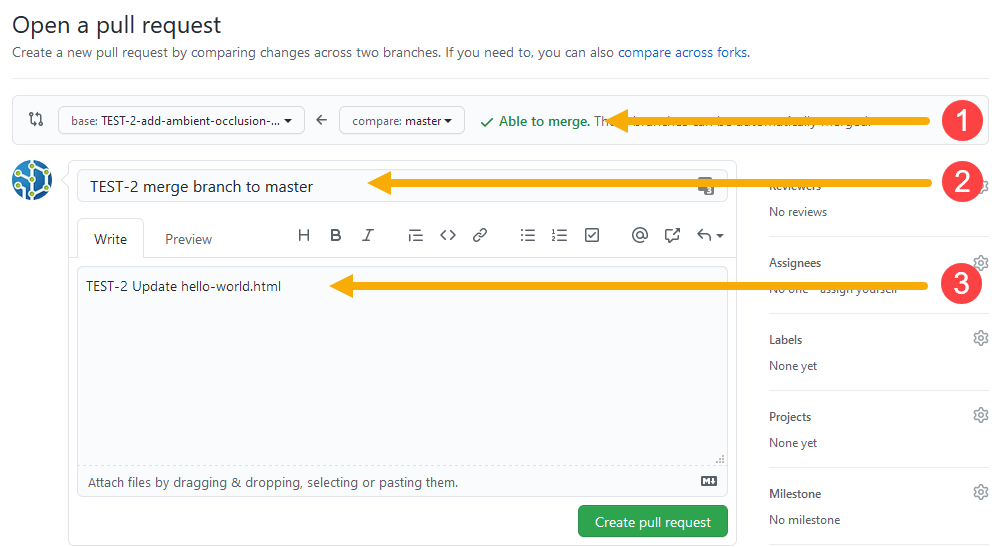
- Set the base and compare branches (for example, feature branch to master).
- Enter a title that includes the Jira issue key.
- Optionally, include the Jira issue key in the description for additional linking.
- Submit the pull request.
Create a Pull Request from Jira
- Open a Jira issue.
- Click Git Integration in the right sidebar.
- Click Create pull request (or Create merge request for GitLab).
- Select a repository.
- Select the source branch.
- Select the target branch.
- Edit the proposed name if needed, but keep the Jira issue key.
- Submit the request.
Last updated: December 2025
