
Last updated: March 2026
SSH keys provide a secure connection with the remote git host. Git Integration for Jira uses one set of keys for accessing all configured repositories.
Follow this guide if you want to use SSH to securely connect to your git repositories.
On this page:
- Getting started
- Generating SSH keys on Windows
- Generating SSH keys on Linux/MacOS
- Git host specific SSH key instructions
- Connecting SSH Git Repositories
- Adding a public SSH key to your Git server
- Updating a private SSH key
Getting Started
Before connecting repositories via SSH, generate SSH keys for use with the remote git host (public key) and for Git Integration for Jira (private key).
Generated SSH keys always come in pairs. (Example: id_rsa.pub and id_rsa)
To establish a secure connection with SSH, upload a public key to the SSH server and set the private key on the SSH client.
In this case, the SSH server is the Git server and the SSH client is the Jira server:
- Git server — public key
- Jira server — private key
- Must not use the OpenSSH format
- Must be the private key
- Must use the supported certificate format: RSA
- Must use the supported storage format: OpenSSL PEM
For more information, see known issue SSH key format is invalid.
Generating SSH Keys on Windows
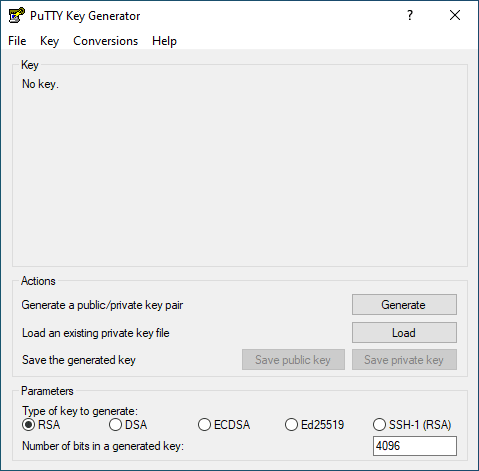
For Windows, we recommend using PuTTY and PuTTYgen to generate public and private SSH keys.
-
Launch PuTTYgen and refer to the above image for the rest of the steps.
-
Set Type of key to generate to RSA.
-
Set Number of bits in a generated key to 4096.
-
Click Generate.
-
Follow screen instructions such as moving your mouse pointer to random locations on the blank area of the PuTTYgen dialog. Continue until the progress bar fills completely and the SSH key pair is generated.
-
Entering a Passphrase for the generated key is optional but ensures a more secure connection.
-
Save your generated public and private key to a file by clicking the respective options.
-
Copy the generated key. This is the public key you will use on the SSH configuration page of your git host.
-
For the private key, see the notes below.
Generating SSH Keys on Linux/MacOS
On Linux and MacOS, run the following command to generate an SSH key in RSA format:
ssh-keygen -t rsa -b 4096 -m pem -C "[email protected]"MacOS often incorrectly creates an OpenSSH format certificate. For more details, see information on this common problem.
Git Host Specific SSH Key Instructions
Configure and generate SSH keys for the following git hosting systems by following the reference links in each sub-section:
Beanstalk
- For MacOS, see Working with Git on MacOS.
- For Windows, see Working with Git on Windows.
- For Linux, see Working with Git on Linux.
Bitbucket
- For MacOS/Linux, see Setting up SSH for Git on MacOS/Linux.
- For Windows, see Set up SSH for Git on Windows.
GitHub
Check for existing SSH keys before generating new keys.
See GitHub supported platforms for generating SSH keys in this article.
GitLab
- See reference, Installing Git for MacOS/Windows/Linux.
- For creating SSH keys, see Generating SSH Public Key. Also see the video demonstration here.
GitLab CE/EE
Follow the GitLab references above for GitLab CE/EE. Then verify that your GitLab server has the following SSH settings:
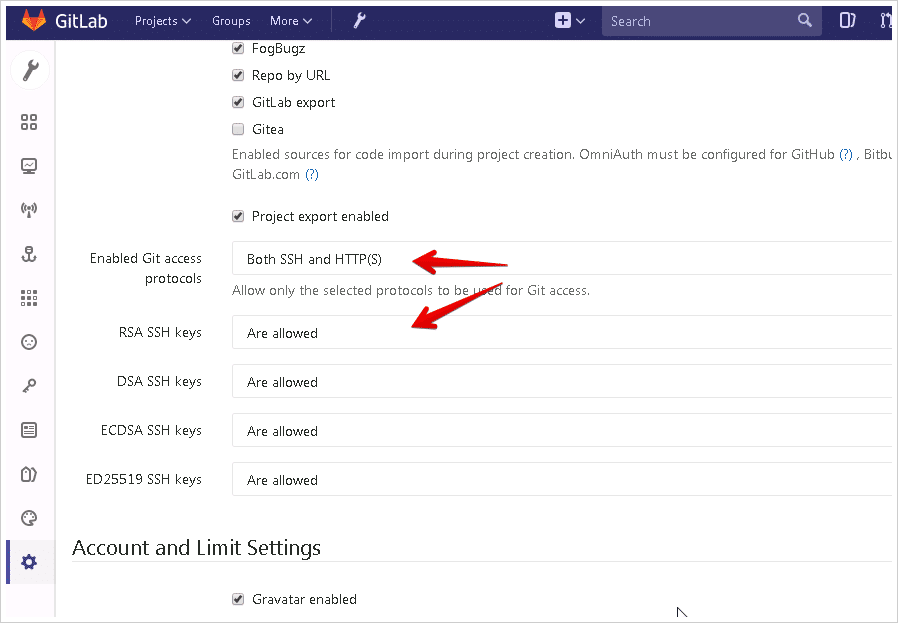
- Enabled Git access protocols — Both SSH and HTTP(s)
- RSA SSH keys — Are allowed
Other SSH key formats may be supported by Git Integration for Jira, but use RSA format for your SSH git connections.
VSTS, TFS, Azure DevOps, and Azure Repos
SSH support starts with TFS 2013 and later versions.
- For information about TFS/Azure DevOps Server, see MS Team Foundation Server.
- For general reference and terms, see Git Experience Futures.
Gerrit
Git Integration for Jira supports Gerrit web linking.
- For information about Gerrit software, see Gerrit Software Wiki and Gerrit at Code Review.
- For general reference and installation, see Gerrit documentation. Ubuntu installation and fixing registration error.
- For information on SSH on Gerrit, see SSH and Gerrit.
- For details on User Change-IDs, see Change-IDs in Gerrit.
GitBlit
- For information about Gitblit, see GitBlit official website.
- For general reference and installation, see GitBlit Configuration, Using HTTP/HTTPS Transport, and Built-in Authentication.
- For information on SSH on GitBlit, see GitBlit: Using the SSH Transport.
- For GitBlit related FAQ, see GitBlit Frequently Asked Questions.
Gitolite
- For full reference and installation, see All About Gitolite.
- For information on SSH on Gitolite, see SSH and Gitolite.
- For details on user key management, see Managing User Keys in Gitolite.
Git-scm
- See reference, Installing Git for MacOS/Windows/Linux.
- For creating SSH keys, see Connecting to GitHub with SSH.
Connecting SSH Git Repositories
SSH git repositories can be integrated with Jira Cloud via Git Integration for Jira.
We recommend generating a 4096-bit key using the instructions above.
To connect an SSH repository:
-
On your Jira dashboard menu, go to Apps ➜ Git Integration: Manage integrations.
-
On the Manage integrations page, click Add integration.
-
On the following screen, in the Quick start integration section:
- Click the SSH tab.
- Enter the git clone URL in the provided box.
-
Click Connect to complete this process.
- If prompted, enter login credentials for this repository integration. If 2FA is enabled for this account, enter the personal access token (PAT) as the password instead.
- Enable/disable SSL Verify for this repository integration.
The repository is now connected for use with Jira.
Adding a Public SSH Key to Your Git Server
Add a public SSH key to your remote git host to prepare its repositories for connection with Git Integration for Jira.
To set up SSH for your remote git host:
-
Log in to your remote git host service.
-
Go to the SSH configuration page, if supported.
See examples: Adding SSH key in GitHub or Adding SSH key in GitLab.
-
Paste the public key in the provided box (GitLab) or upload the public key file and complete the setup (GitHub).
-
Verify your SSH connection to the git host server.
Updating a Private SSH Key
If a new SSH key pair is generated for the configured repository, follow these steps:
-
On the Manage integrations page list, click
 Actions ➜ Edit integration for the SSH-connected git repository.
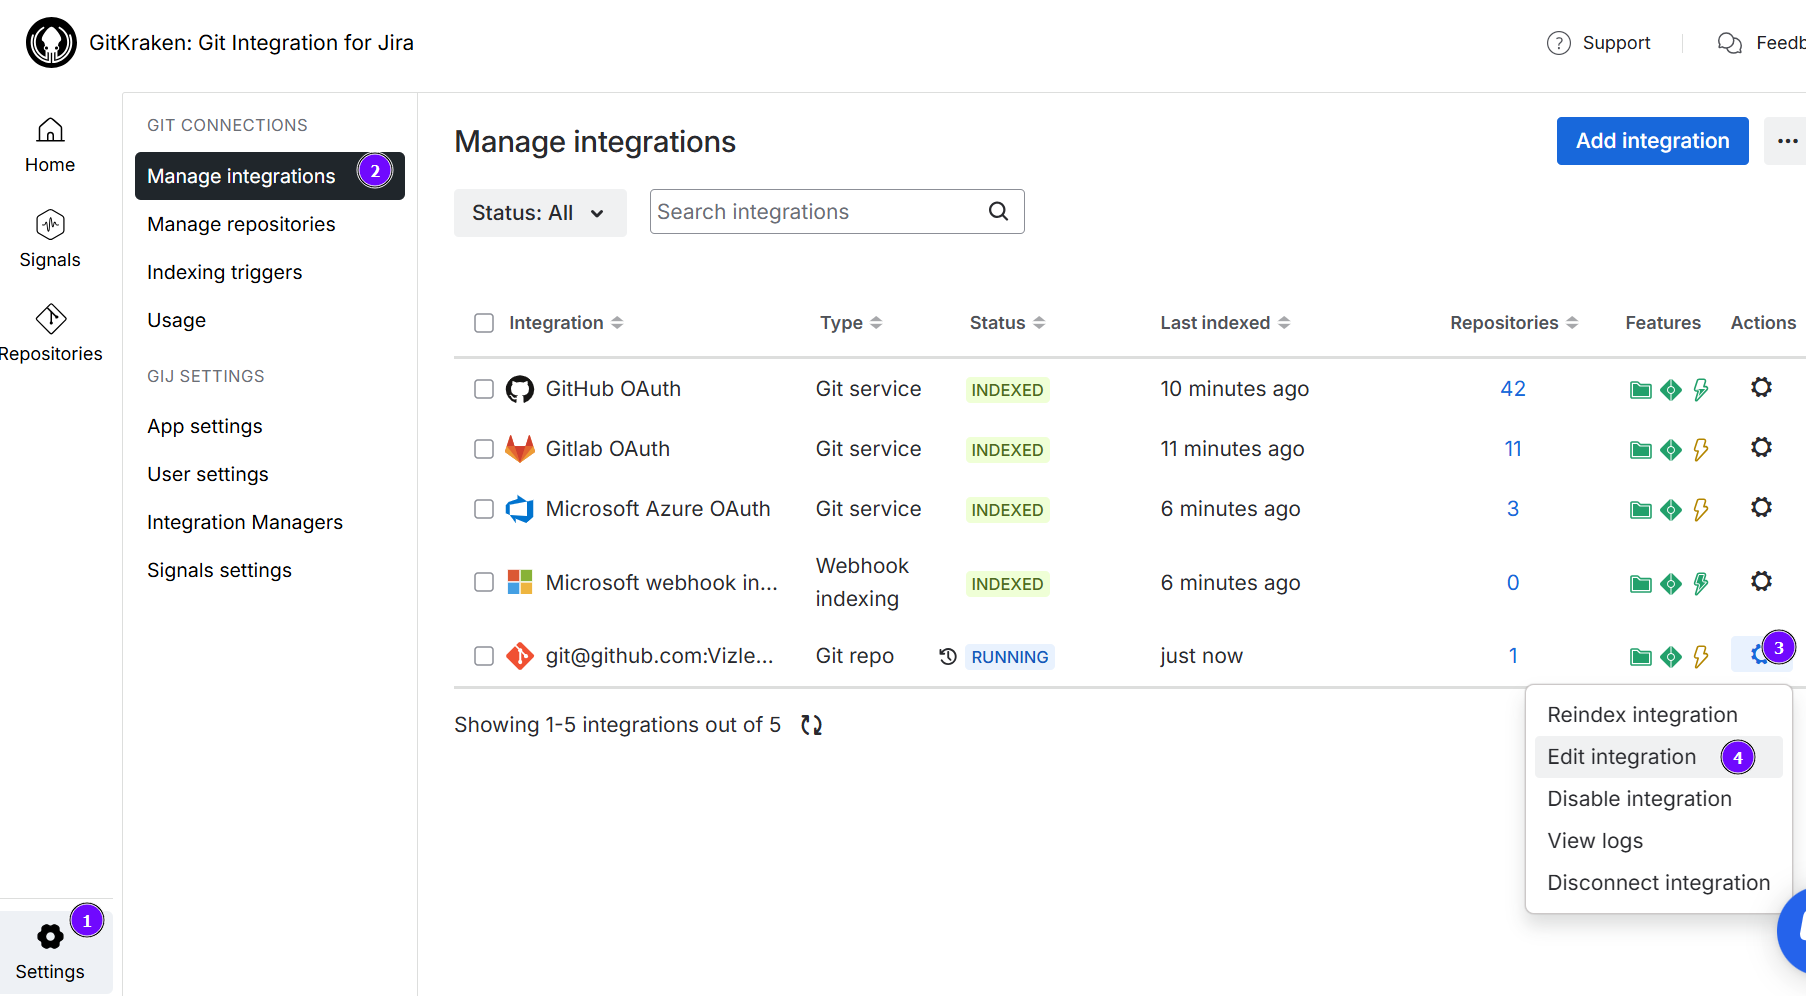
-
Update the Private SSH key field (highlighted below) by pasting the updated value or uploading the Private SSH key file.

If a passphrase is present, enter it in the provided box.
-
Click Save to save the settings.
