
Last updated: March 2026
Personal access tokens (PATs) provide secure authentication for connecting git services to Git Integration for Jira Cloud. This page provides step-by-step instructions for creating PATs on each supported git host.
On this page:
- GitHub and GitHub Enterprise PAT
- Create a GitLab PAT
- Create an Azure DevOps or VSTS PAT
- Create a TFS 2017+ PAT
- Create an Azure DevOps Server PAT
- Create AWS CodeCommit credentials
GitHub and GitHub Enterprise PAT
GitHub supports two types of personal access tokens: Classic and Fine-grained. Use the appropriate section below based on the token type you want to create.
Classic personal access token
If you enable two-factor authentication for your GitHub account, you must create a PAT to access your git repositories. We recommend enabling two-factor authentication for increased security.
-
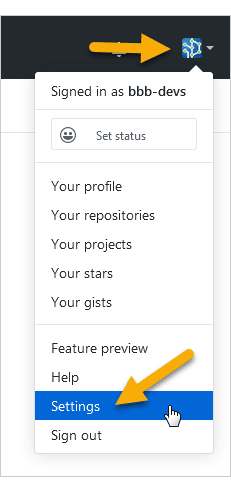
Log in to GitHub and go to your profile settings.
-
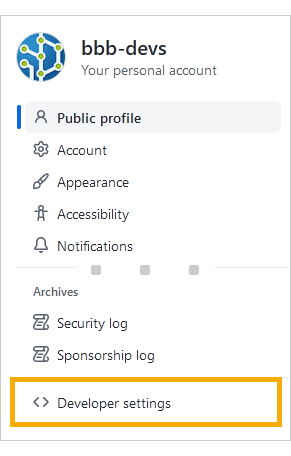
Click Developer settings in the sidebar.
-
Click Personal access tokens in the sidebar.
-
Click Generate new token.
-
Configure your token:
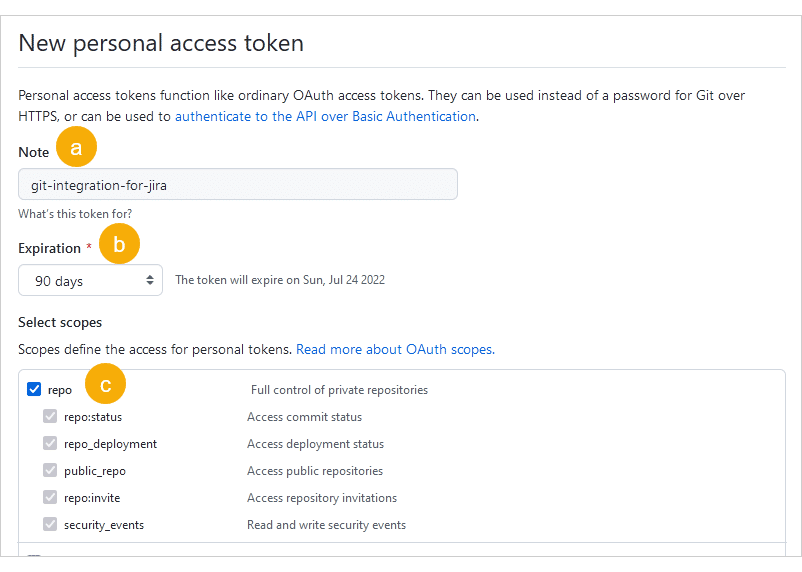
a. Enter a descriptive name in the Note field (for example,
git-integration-for-jira).b. Set the Expiration according to your organization’s policies.
c. Under Select scopes, select the repo scope (this automatically includes all sub-scopes).
-
Click Generate token.
-
Copy the token immediately. This is the only time GitHub displays it.
Fine-grained personal access token
Fine-grained tokens provide more granular control over which repositories and actions the token can access.
Minimum required scopes for a read-only integration:
| Scope | Permission | Purpose |
|---|---|---|
| Metadata | Read-only | Required by GitHub on all fine-grained tokens |
| Contents | Read-only | Repo listing, commits, branches, cloning |
| Pull requests | Read-only | View pull request data |
| Issues | Read-only | GitHub treats PRs as a subtype of issues |
| Actions | Read-only | Workflow/CI data |
| Deployments | Read-only | Deployment data |
| Administration | Read-only | Enumerate org repositories |
Additional scopes for write features (branch/PR creation, branch management):
| Scope | Permission | Purpose |
|---|---|---|
| Pull requests | Read and write | Create and manage pull requests from Jira |
| Contents | Read and write | Create and manage branches from Jira |
Create a GitLab PAT
GitLab uses personal access tokens (PATs) for authentication starting with version 8.8. If you enable two-factor authentication, you must create a PAT to access your repositories.
-
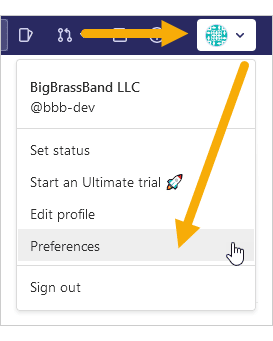
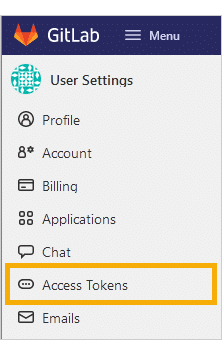
Log in to GitLab and go to your profile settings (Profile icon ➜ Preferences).
-
Click Access Tokens in the sidebar.
-
Configure your token:
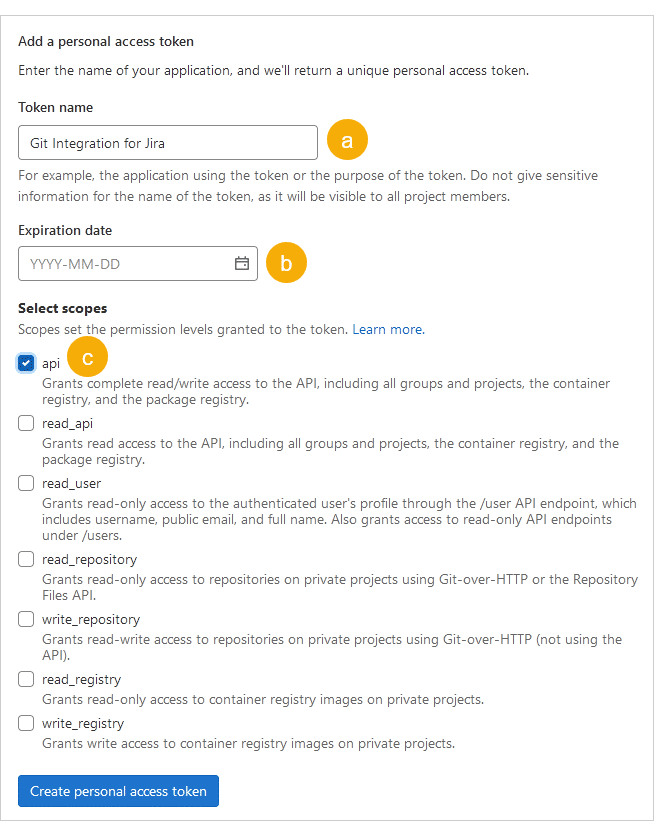
a. Enter a descriptive Name (for example,
Git Integration for Jira).b. Set the Expiration date according to your organization’s policies, or leave blank for no expiration.
c. Select the api scope.
-
Click Create personal access token.
-
Copy the token immediately. This is the only time GitLab displays it.
Create an Azure DevOps or VSTS PAT
PATs let you access Azure Repos without using your username or password directly.
-
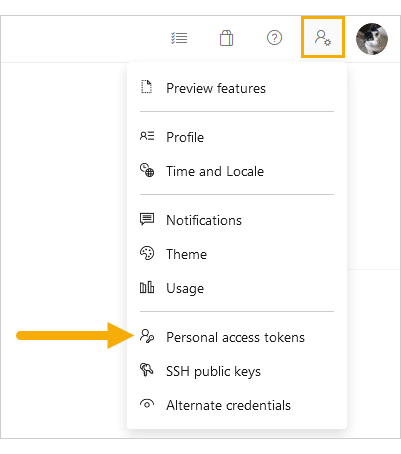
In the Azure DevOps portal, click the user settings icon in the top-right corner.
-
Click Personal access tokens.
-
Click
 New Token.
 -
Configure your token:
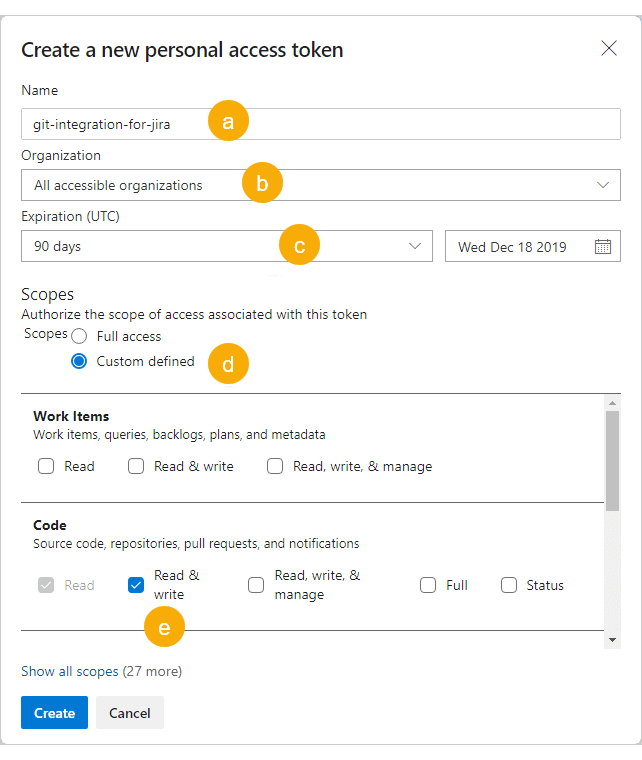
a. Enter a descriptive name (for example,
git-integration-for-jira).b. Set Organization to All accessible organizations. This setting is required.
c. Set the lifespan according to your organization’s policies. Select Custom defined for longer expiration dates.
d. Set Scopes to Custom defined.
e. Set Code to Read & write.
-
Click Create.
-
Copy the token immediately. Use this token as your password.
Code (read)— View commits, smart commits, and browse repositoriesCode (read and write)— All read permissions plus create branches and pull requests from Jira
Create a TFS 2017+ PAT
TFS 2017 and later versions support PATs for on-premises installations.
-
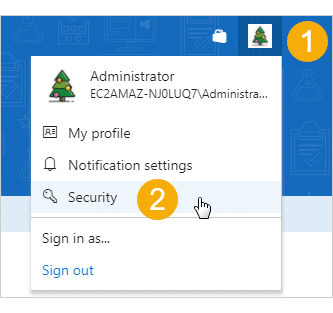
In the TFS portal, click the user settings icon in the top-right corner, then click Security.
-
On the Personal Access Token page, click Add.
-
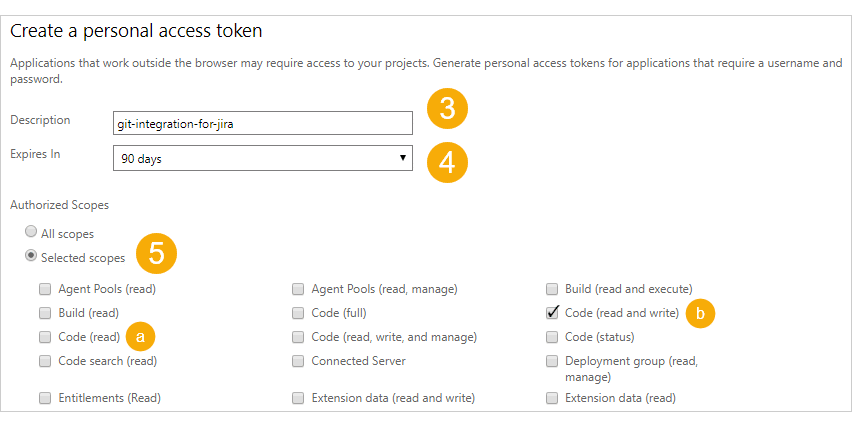
Enter a descriptive name in Description.
-
Set the token lifespan according to your organization’s policies.
-
Set Authorized Scopes to Selected scopes, then choose:
- Code (read) — For viewing commits, smart commits, and browsing repositories
- Code (read and write) — For the above plus creating branches and pull requests from Jira
-
Click Create token.
-
Copy the token immediately. Use this token as your password.
Create an Azure DevOps Server PAT
Azure DevOps Server (formerly Visual Studio Team Foundation Server) supports PATs for on-premises installations.
-
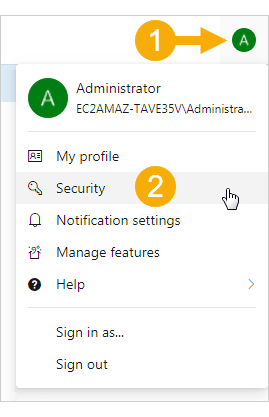
In the Azure DevOps Server portal, click your profile icon in the top-right corner, then click Security.
-
On the Personal Access Token page, click
Add.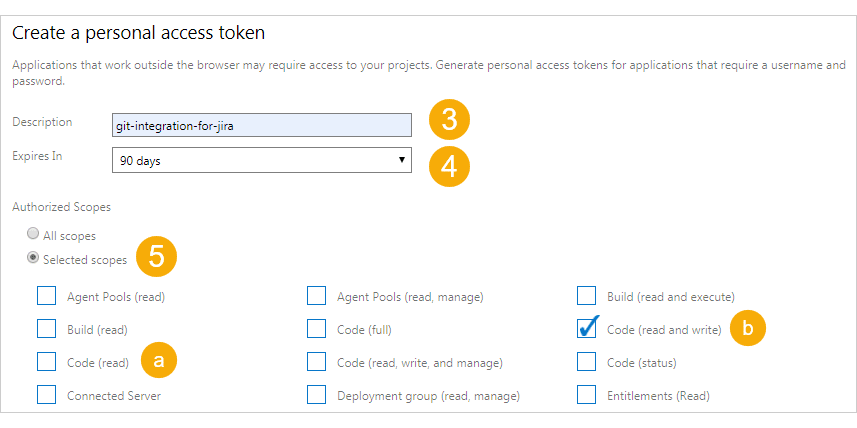
-
Enter a descriptive name in Description.
-
Set the token lifespan according to your organization’s policies.
-
Set Authorized Scopes to Selected scopes, then choose:
- Code (read) — For viewing commits, smart commits, and browsing repositories
- Code (read and write) — For the above plus creating branches and pull requests from Jira
-
Click Create token.
-
Copy the token immediately. Use this token as your password.
Create AWS CodeCommit Credentials
AWS CodeCommit uses IAM Access Keys instead of personal access tokens. An Access Key ID and Secret Access Key serve the same purpose as a PAT.
Required IAM Permissions
Grant these AWS CodeCommit IAM Policy actions to enable branch and pull request creation from Jira:
CodeCommit:Write:CreateBranchCodeCommit:Write:CreatePullRequest
Create an Access Key
-
In AWS IAM, go to Users ➜ select your user ➜ Security credentials.
-
Click Create access key.
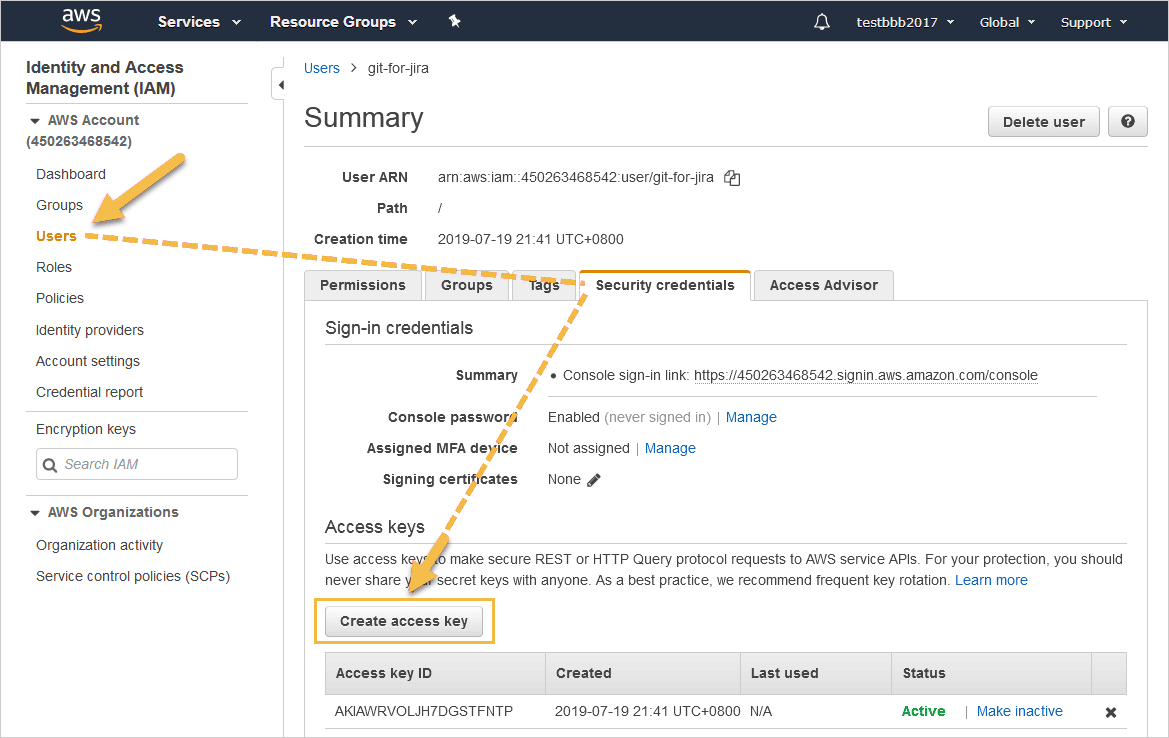
-
Copy both the Access Key ID and Secret Access Key immediately.
