
To manually link a git commit to a Jira issue, access the Change commit issues feature from the following locations:
-
Projects (sidebar) ➜ Git Commits ➜ click View Full Commit. Click the
 icon to modify commit associations.
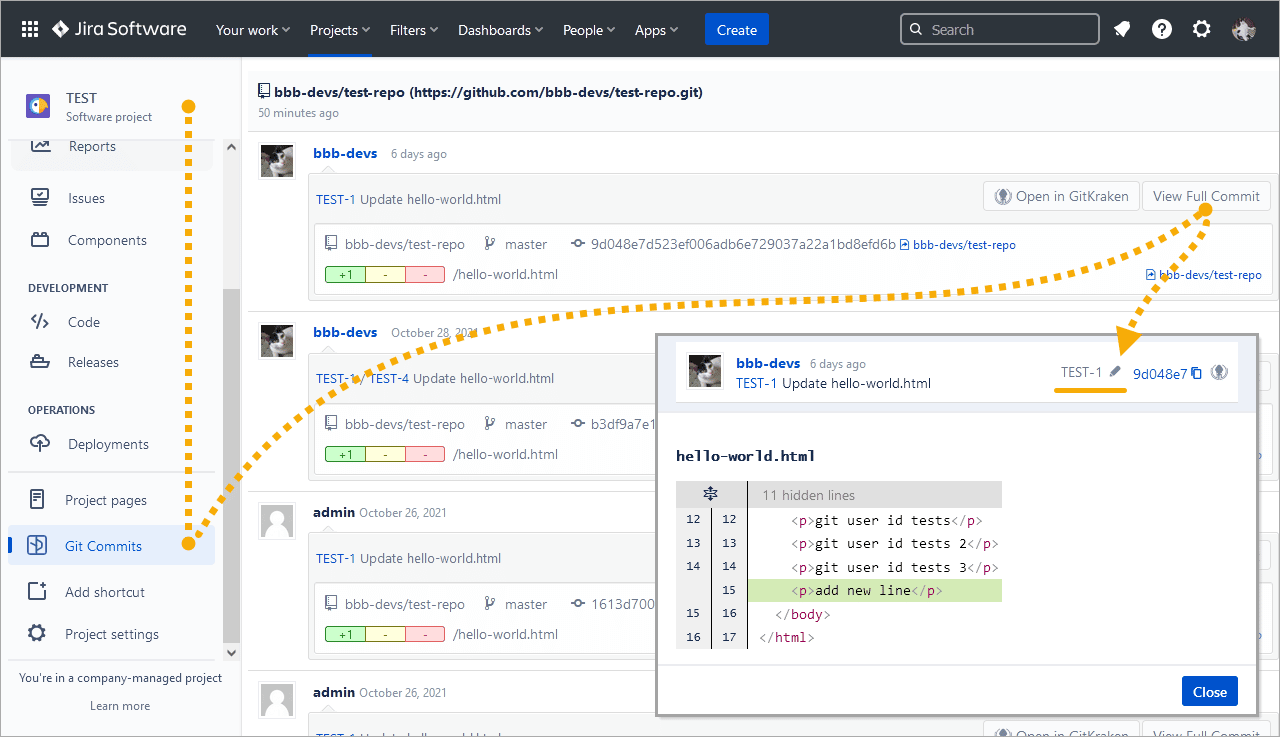
-
Issue page ➜ Git Commits tab ➜ click View Full Commit. Click the
icon to modify commit associations.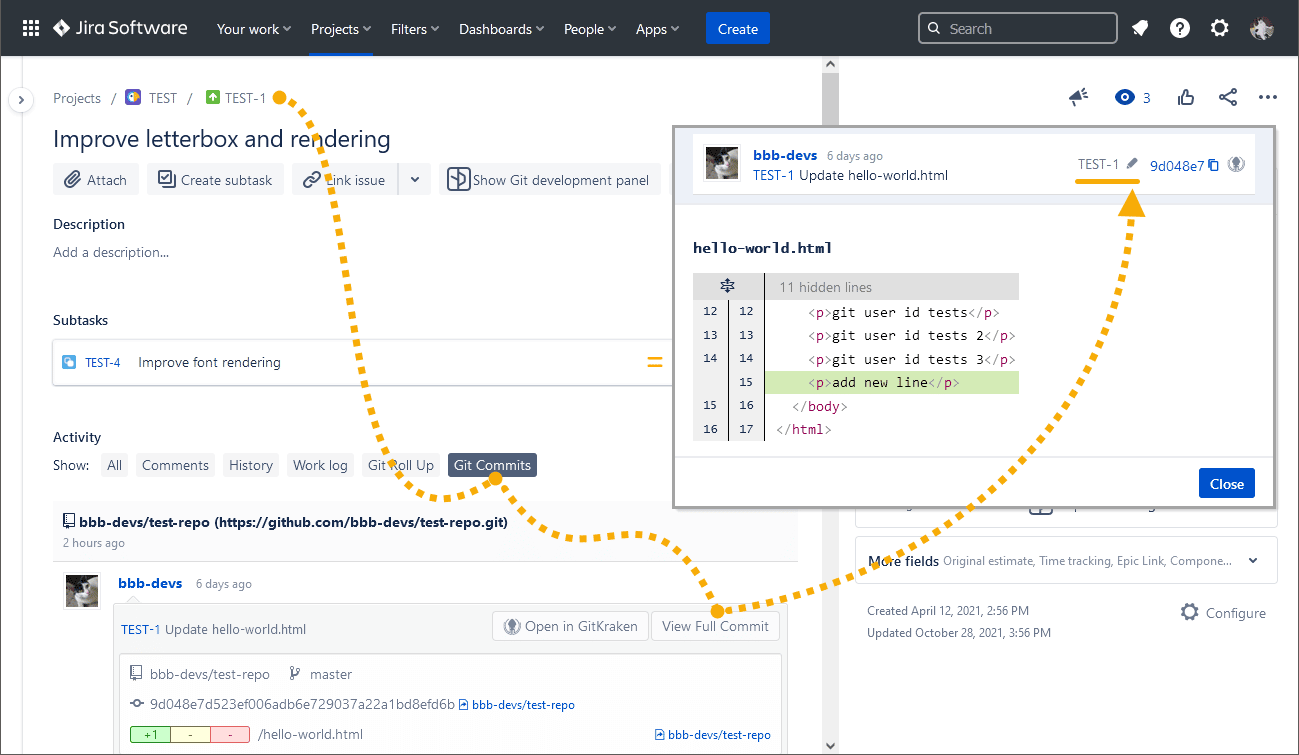
-
Jira dashboard menu Apps ➜ Git Integration: Repository browser ➜ click a repository with git commits. Click the
icon on the commit in the repository view.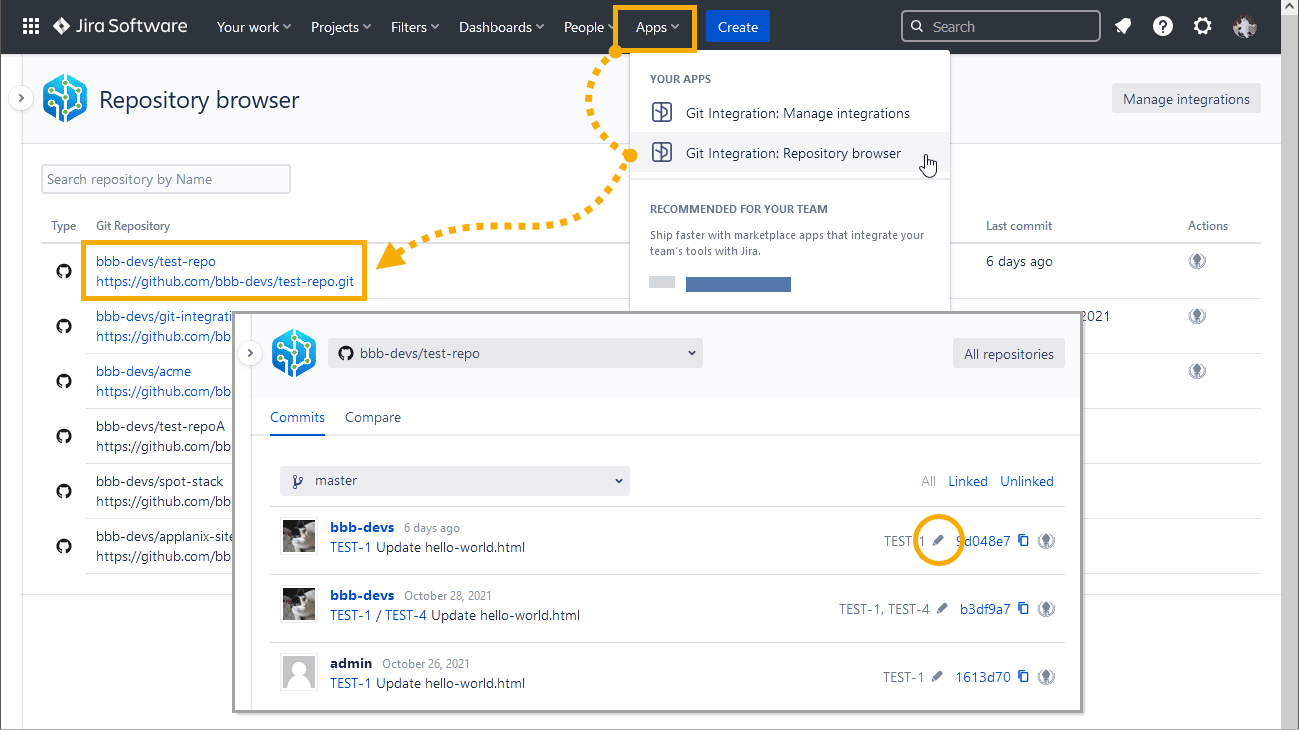
The following dialog is displayed.
Method 1

Add, edit or delete linked Jira issue keys in the Associated issues to commit field:
- Click the dropdown arrow and select a Jira issue from the list.
- The selected Jira issue is associated to the currently configured commit.
- Repeat the same process to associate one or more Jira issues.
- Click X to remove selected commit association(s).
Method 2
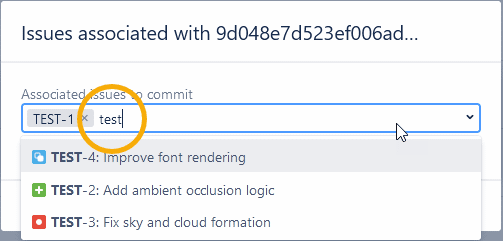
- Type a Jira issue key or a word from a Jira issue summary and the list will try to display them.
- Click a Jira issue from the list to associate it to the currently configure commit.
- Repeat the same process to associate one or more Jira issues.
- Click X to remove selected commit association(s).
Click Save to save the changes.
If the commit is associated with multiple Jira issues, you will see the following:
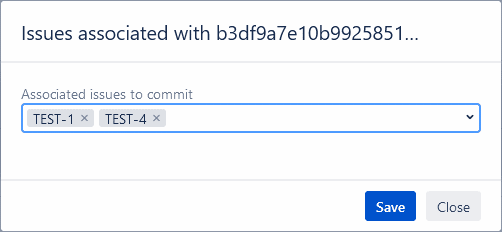
In the above example, the selected commit is associated with Jira issues TEST-1 and TEST-4.
