Introduction to GIJ
Thank you for using Git Integration for Jira! This guide explains how Git information displays in Jira through our application.
Jira Issue View
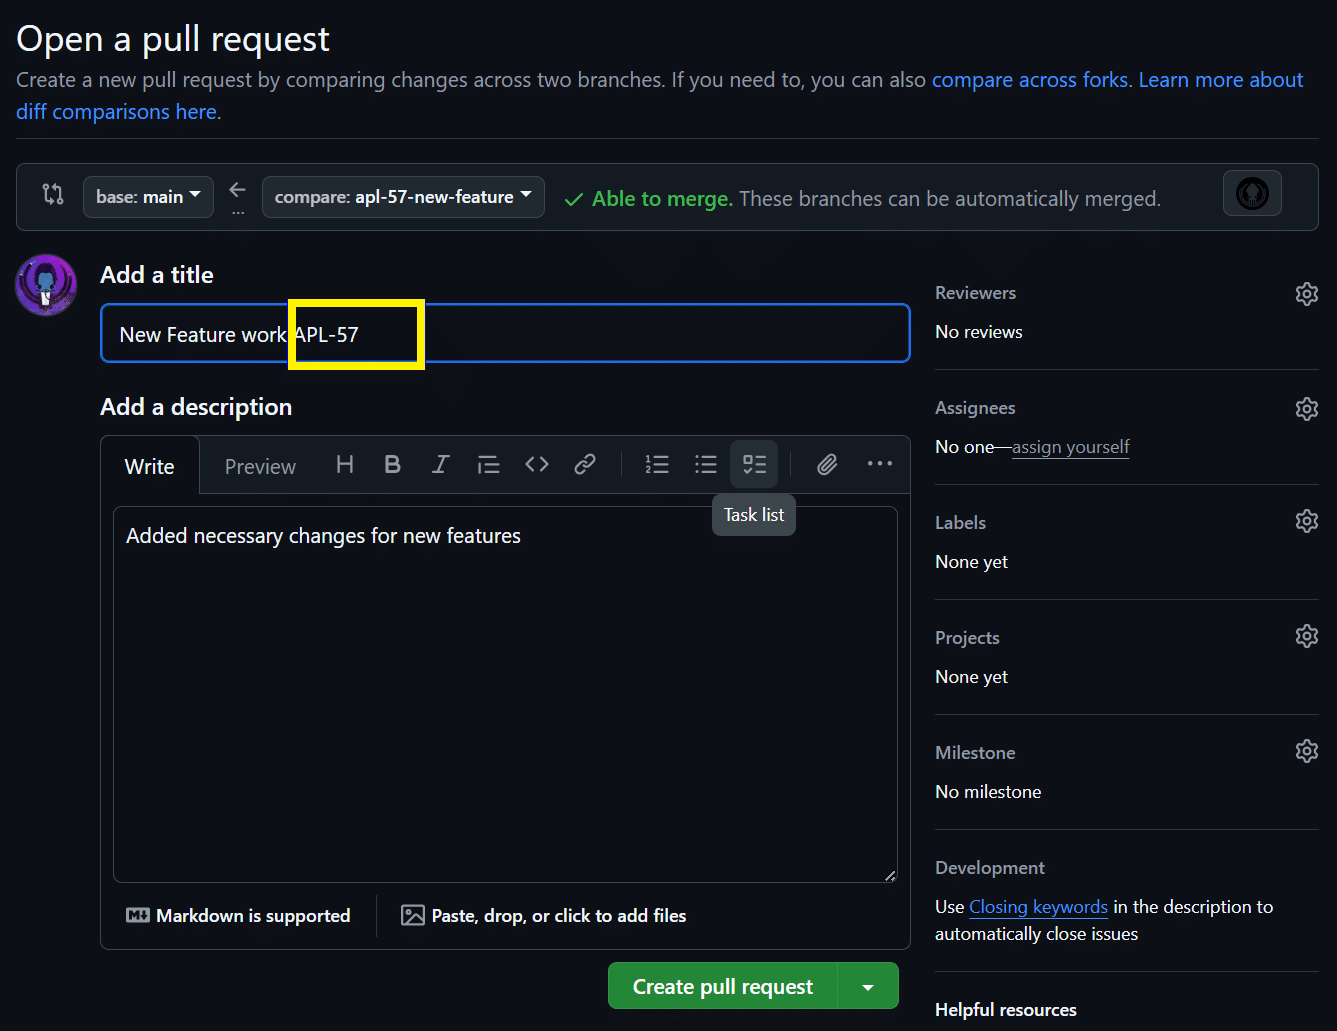
GIJ displays commits, branches, and pull/merge requests associated with a specific Jira issue. To link items to a Jira issue, include the Jira issue key in the commit message, branch name, or pull/merge request title.
See Linking Git Commits for more details.
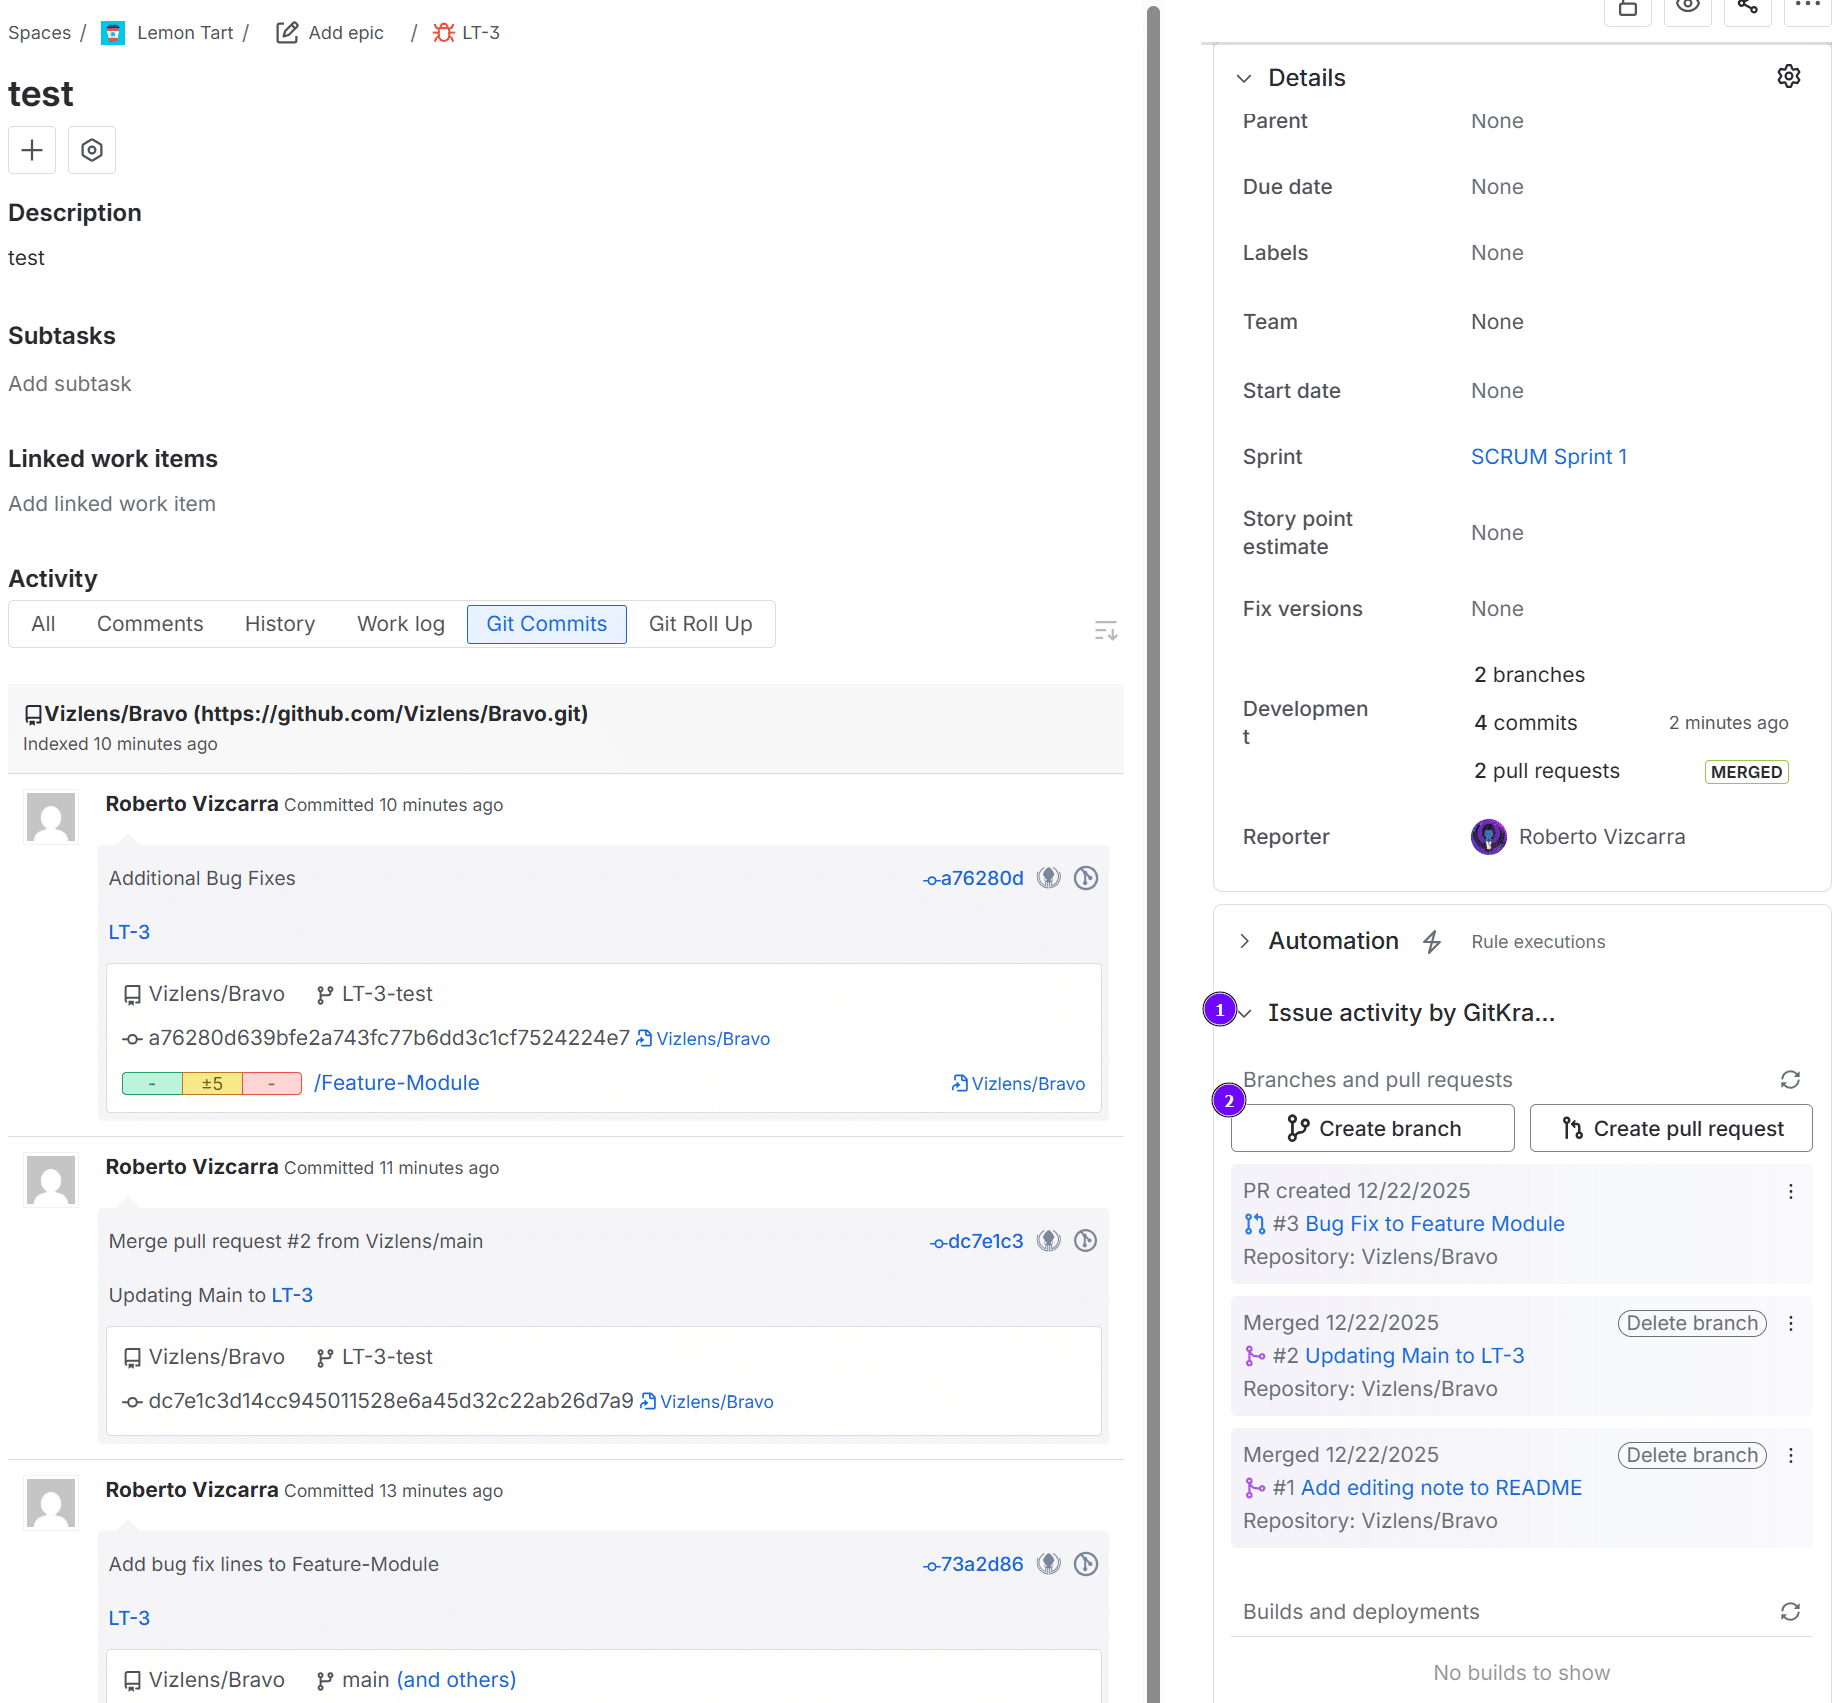
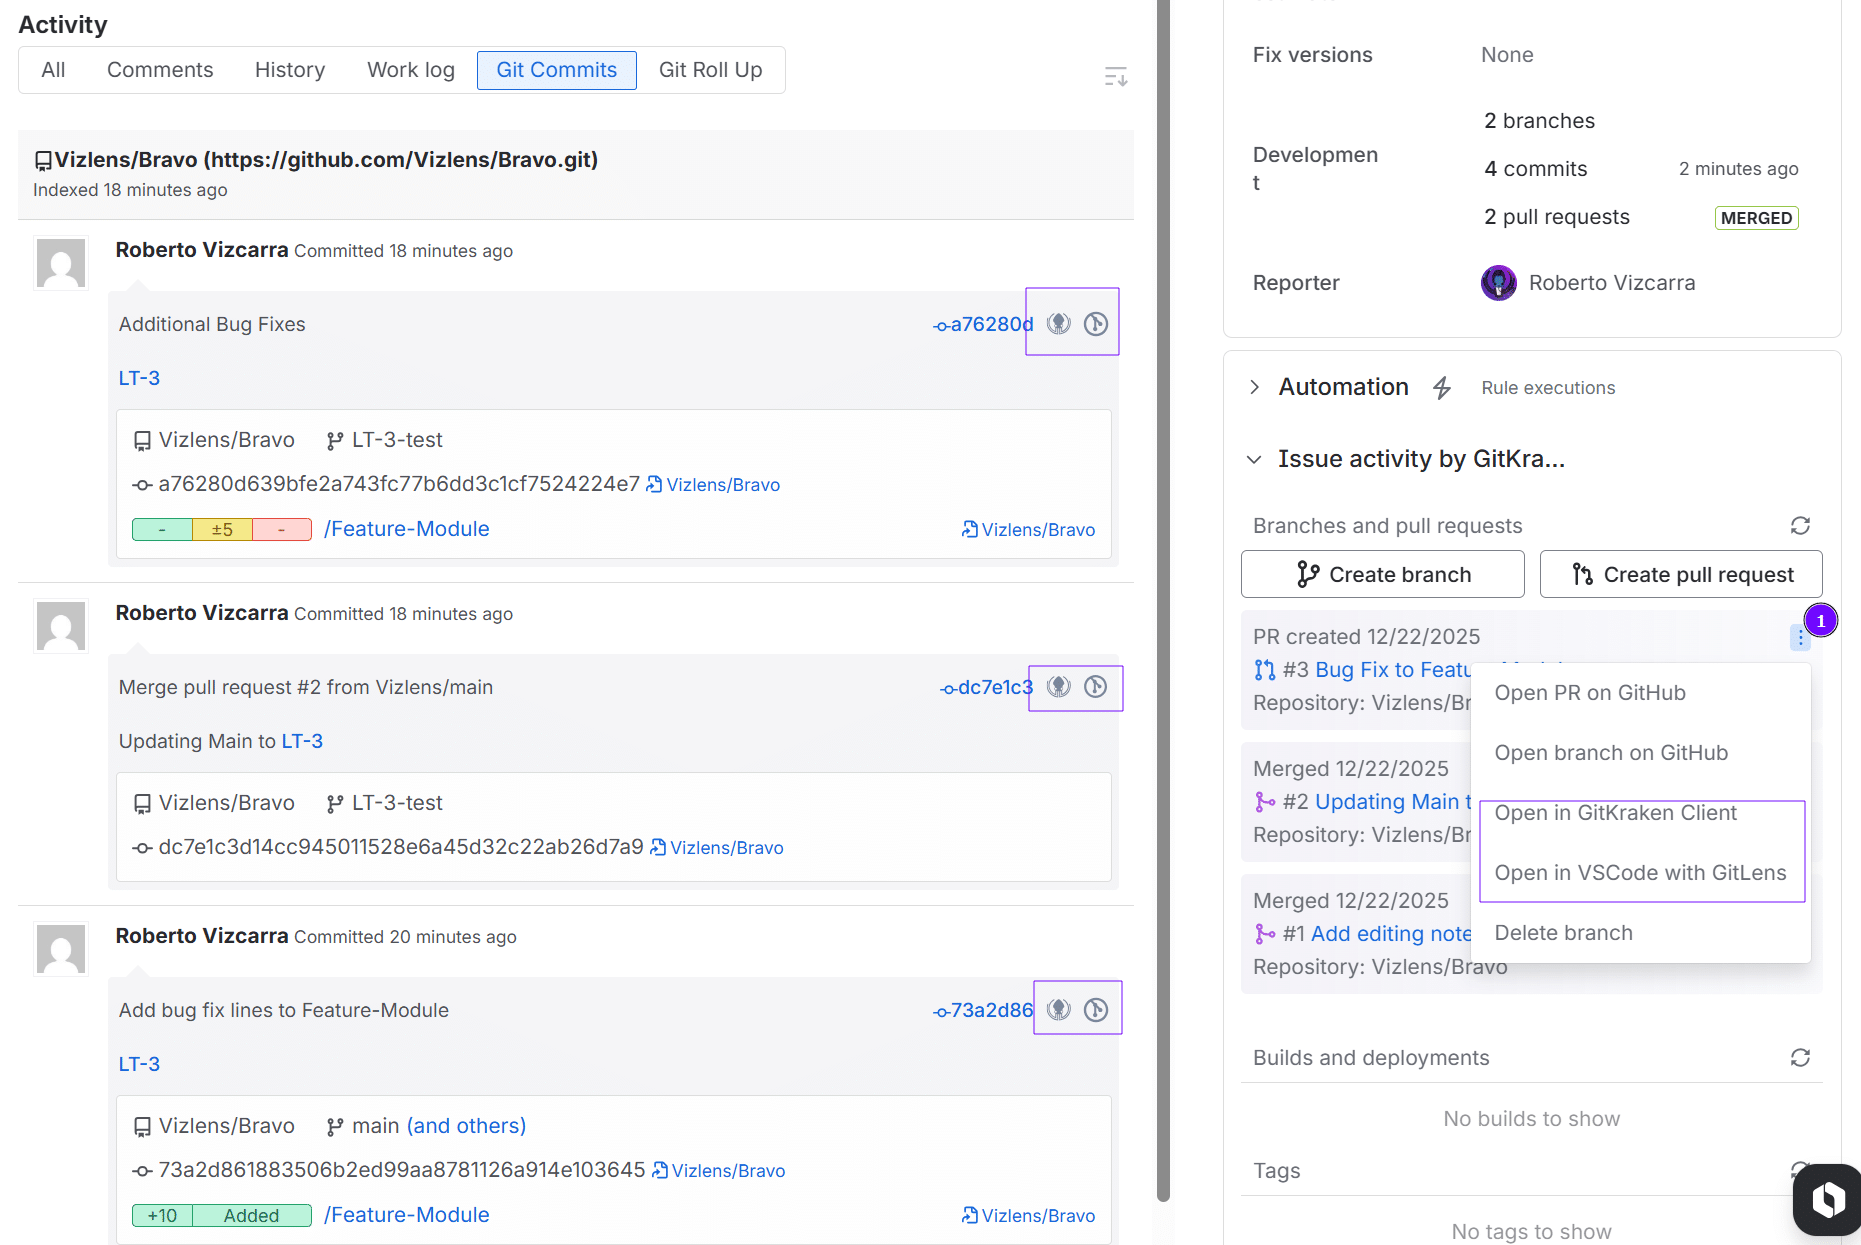
Breakdown of information provided by GIJ in Jira issues:
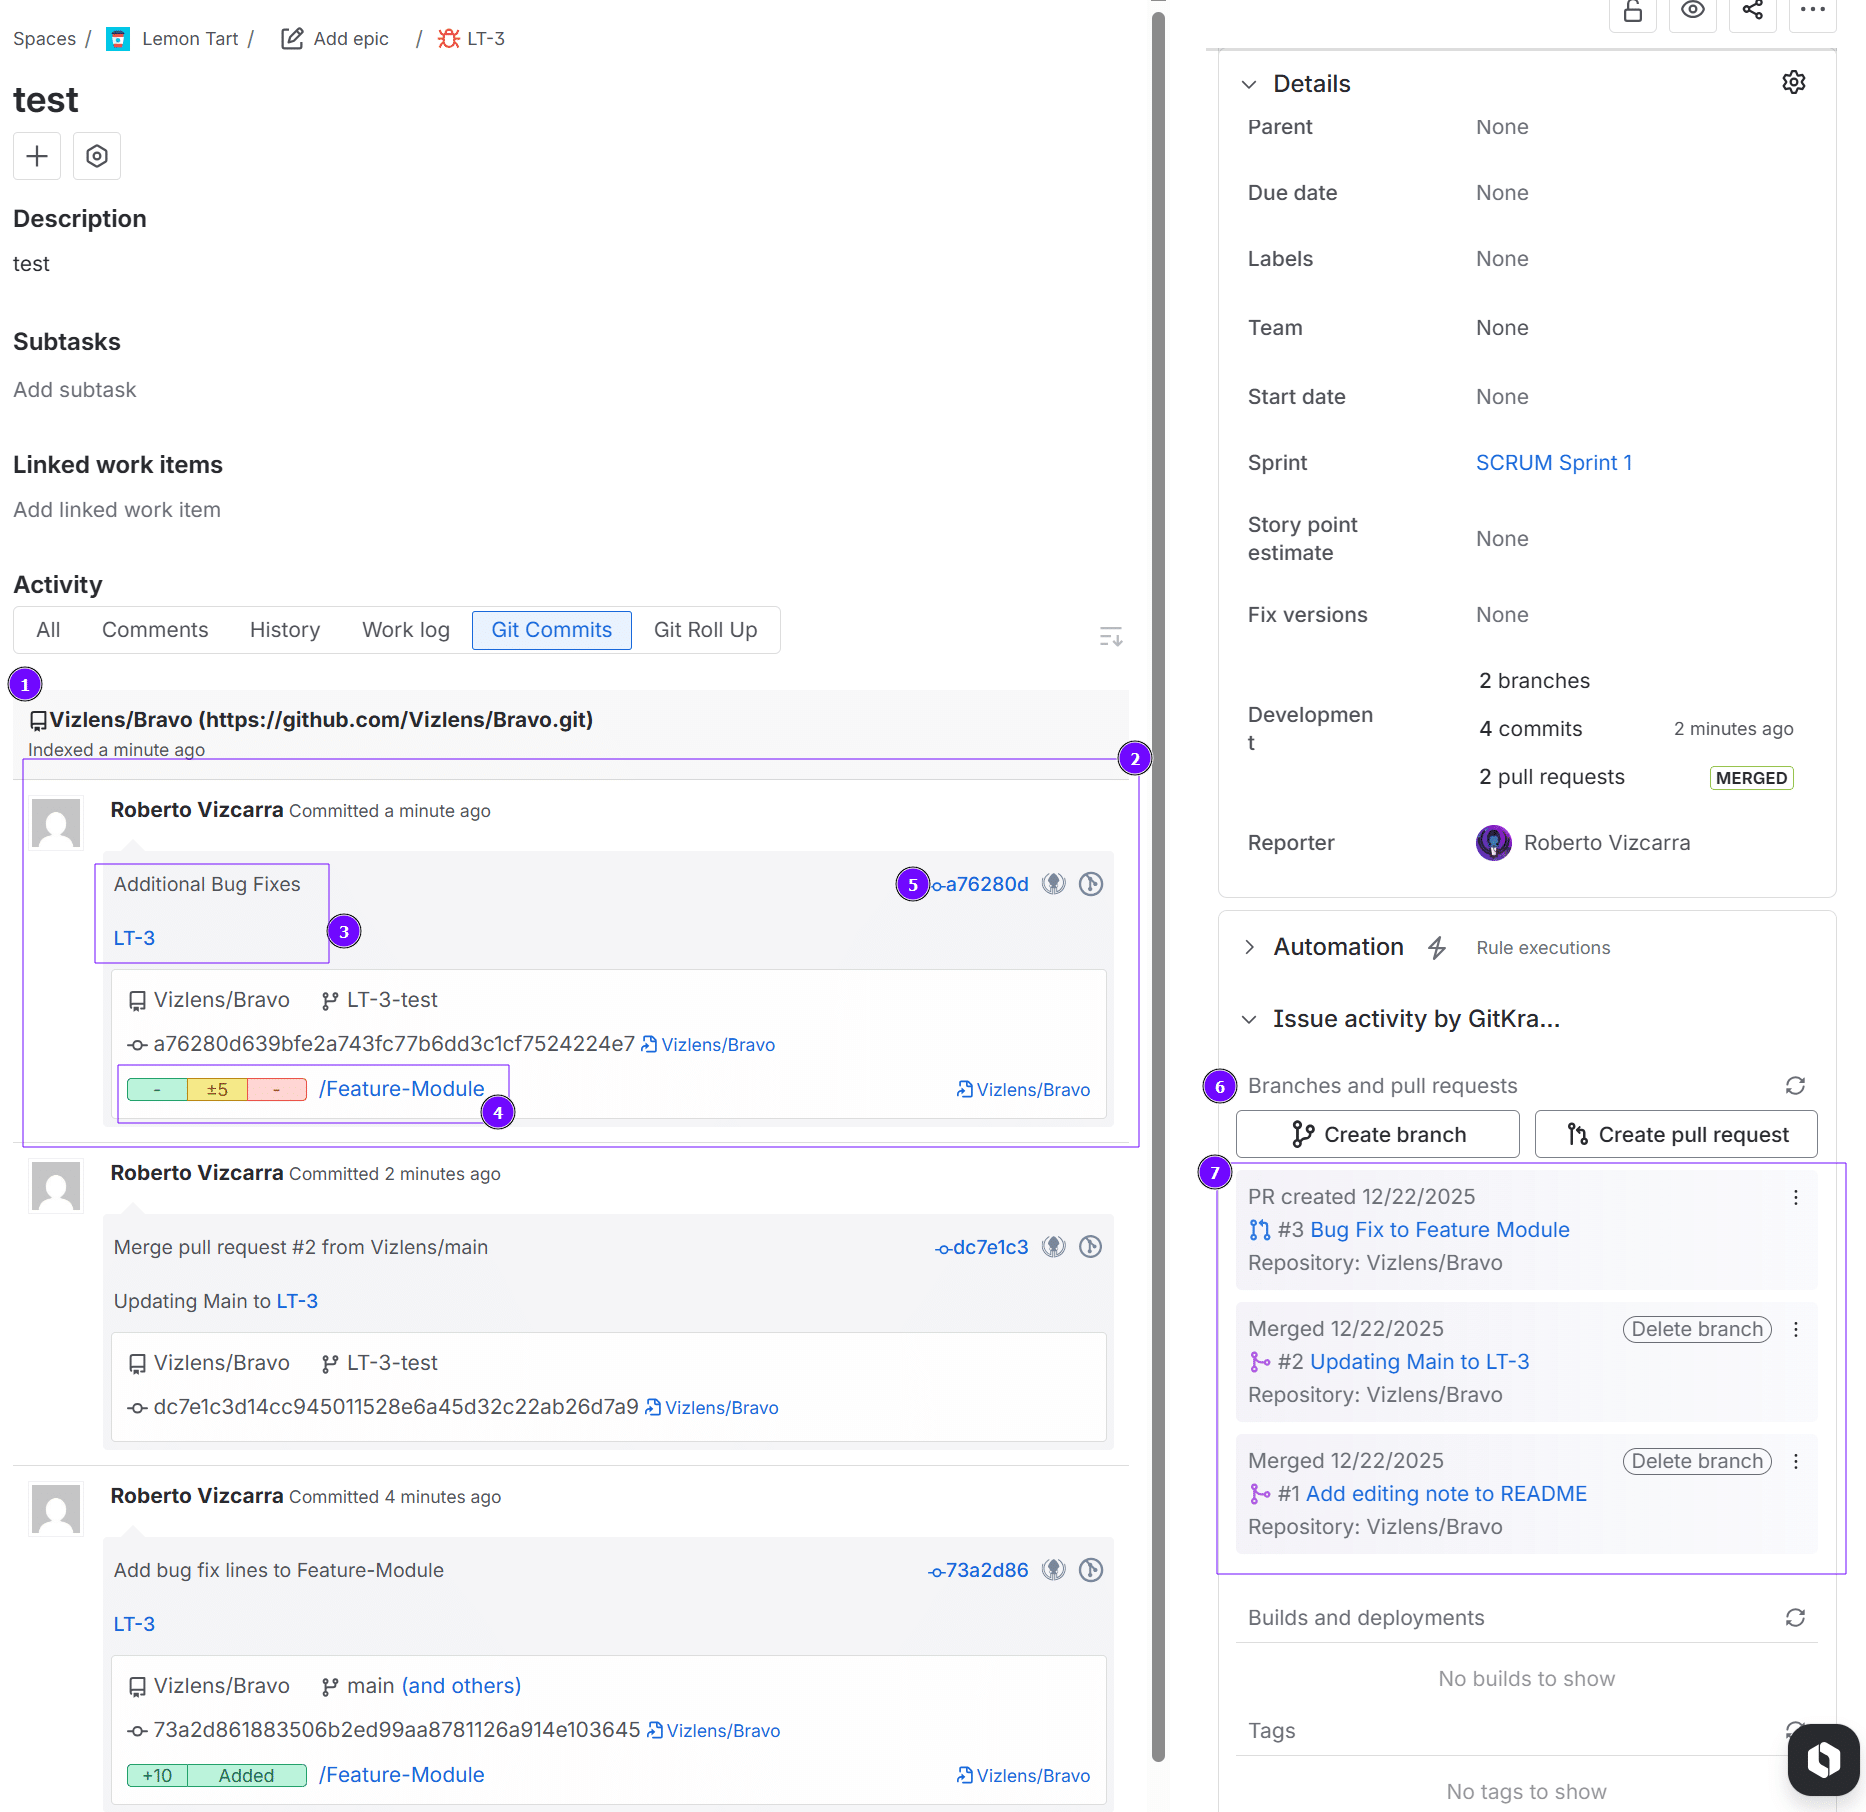
Activity Stream – Git Commits
- Git Commits tab in the activity stream, organized by repository
- Individual commit with the developer who made it
- Commit message
- Commit line change summary by file
- Link to view code diff in Jira
Git Integration Panel
- Options to create a branch or pull request directly from a Jira issue
- Associated branches and pull requests with status icons
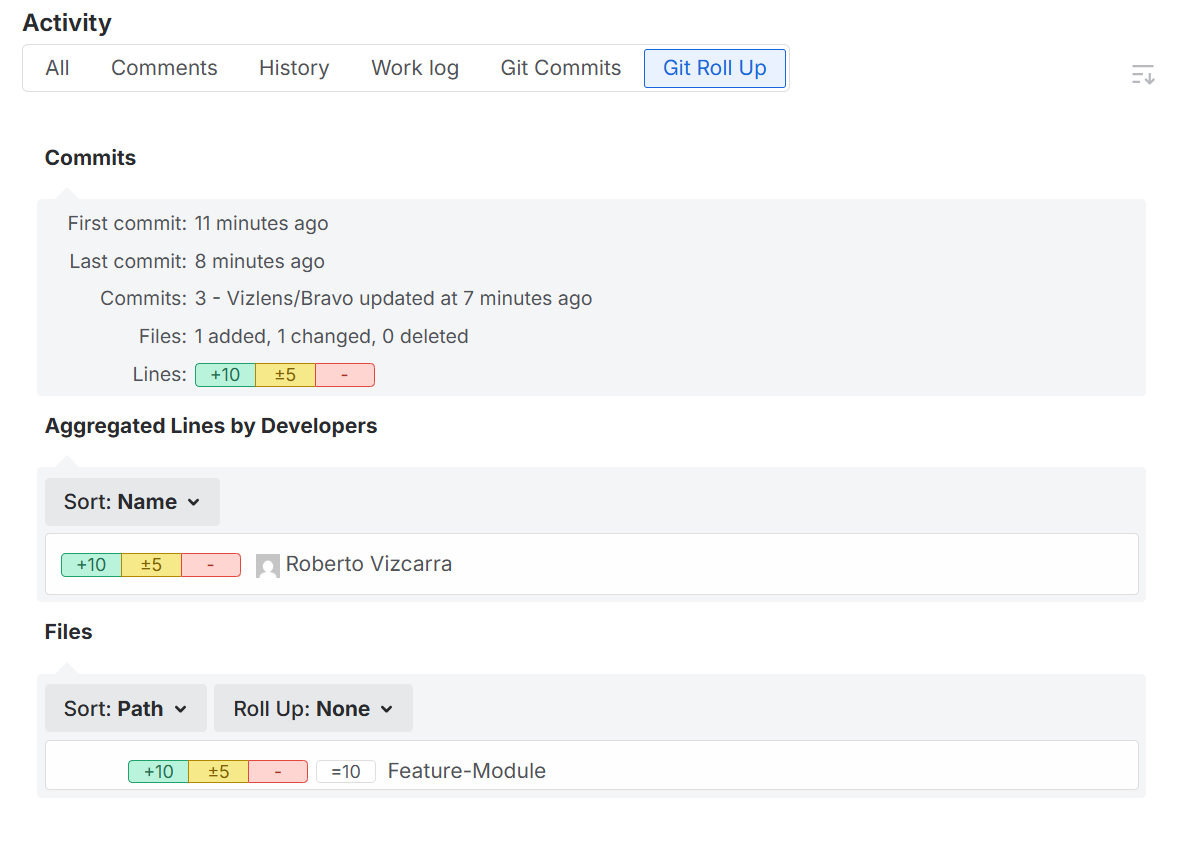
The Git Rollup Tab shows a summary of files, lines changed, and the developers who made changes associated with the Jira issue.
Linking Behavior
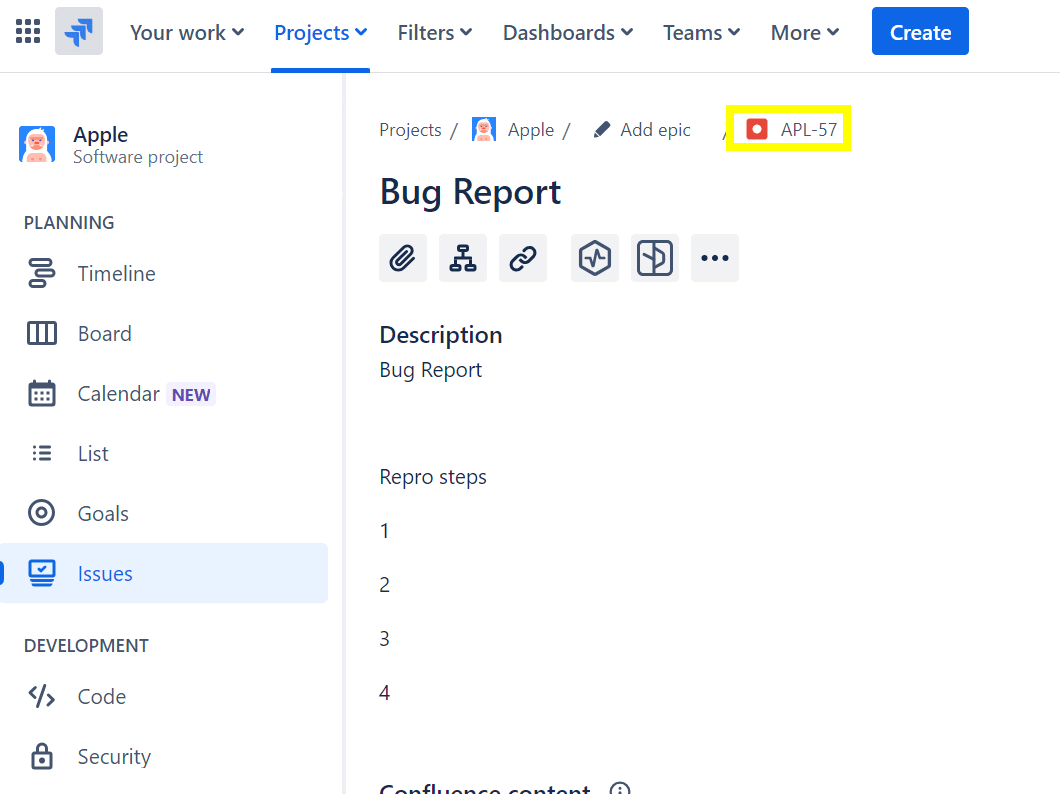
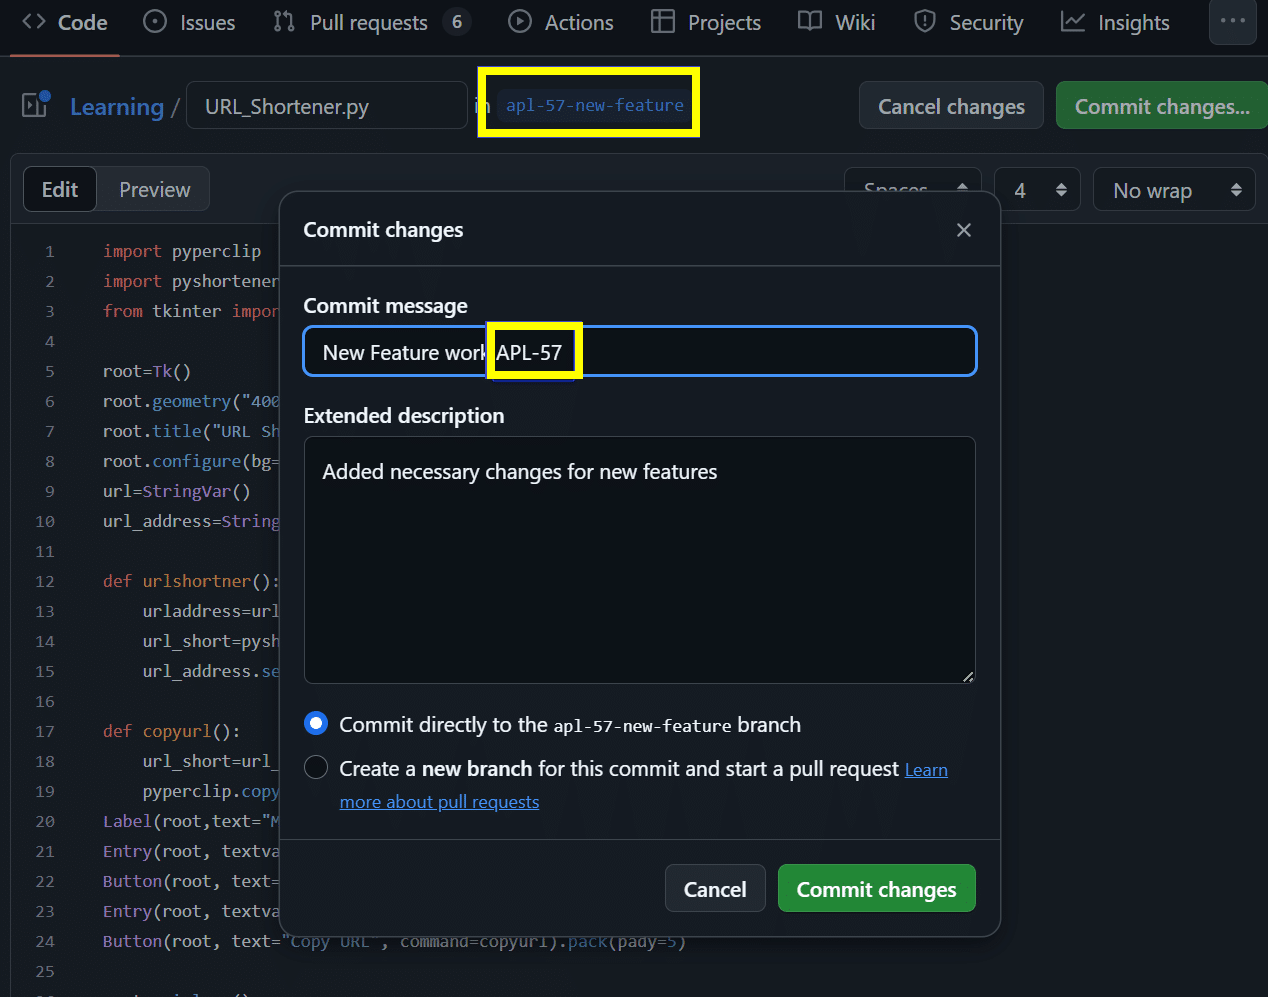
GIJ uses the Jira issue key to determine whether repository activity (commits, branches, pull/merge requests) links to any Jira items. Include the Jira issue key in the commit message, branch name, or pull request title. The key can appear anywhere in the message or name.
See Linking Git Commits to Jira Issues for more details.
Creating Branches
You can create branches directly from a Jira issue using GIJ.
To create a branch:
- Open the Git Integration panel from the right side of the Jira issue.
- Click Create branch.
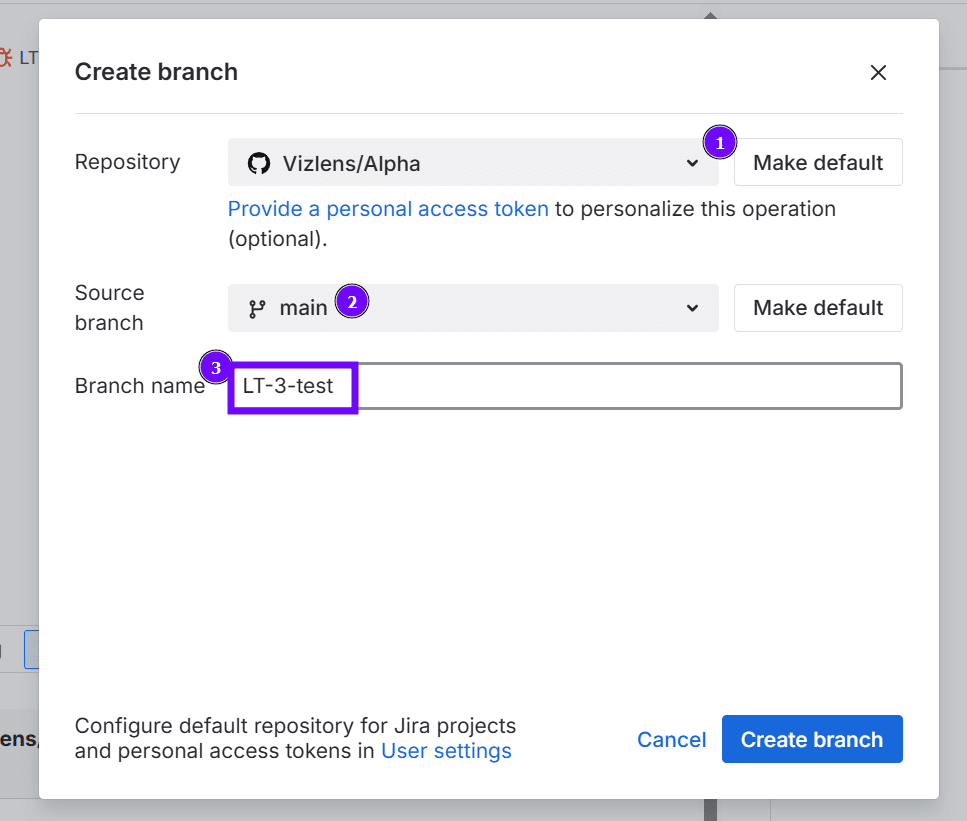
- Select the repository to create the branch in.
- Select the source branch.
- Enter the branch name. Make sure the Jira issue key is included.
- Click Create branch.
A confirmation popup appears after the branch is created. Click the link to open the newly created branch directly.
Creating Pull/Merge Requests
You can create pull/merge requests directly from Jira using GIJ.
To create a pull/merge request:
- Open the Git Integration panel from the right side of the Jira issue.
- Click Create Pull Request or Create Merge Request.
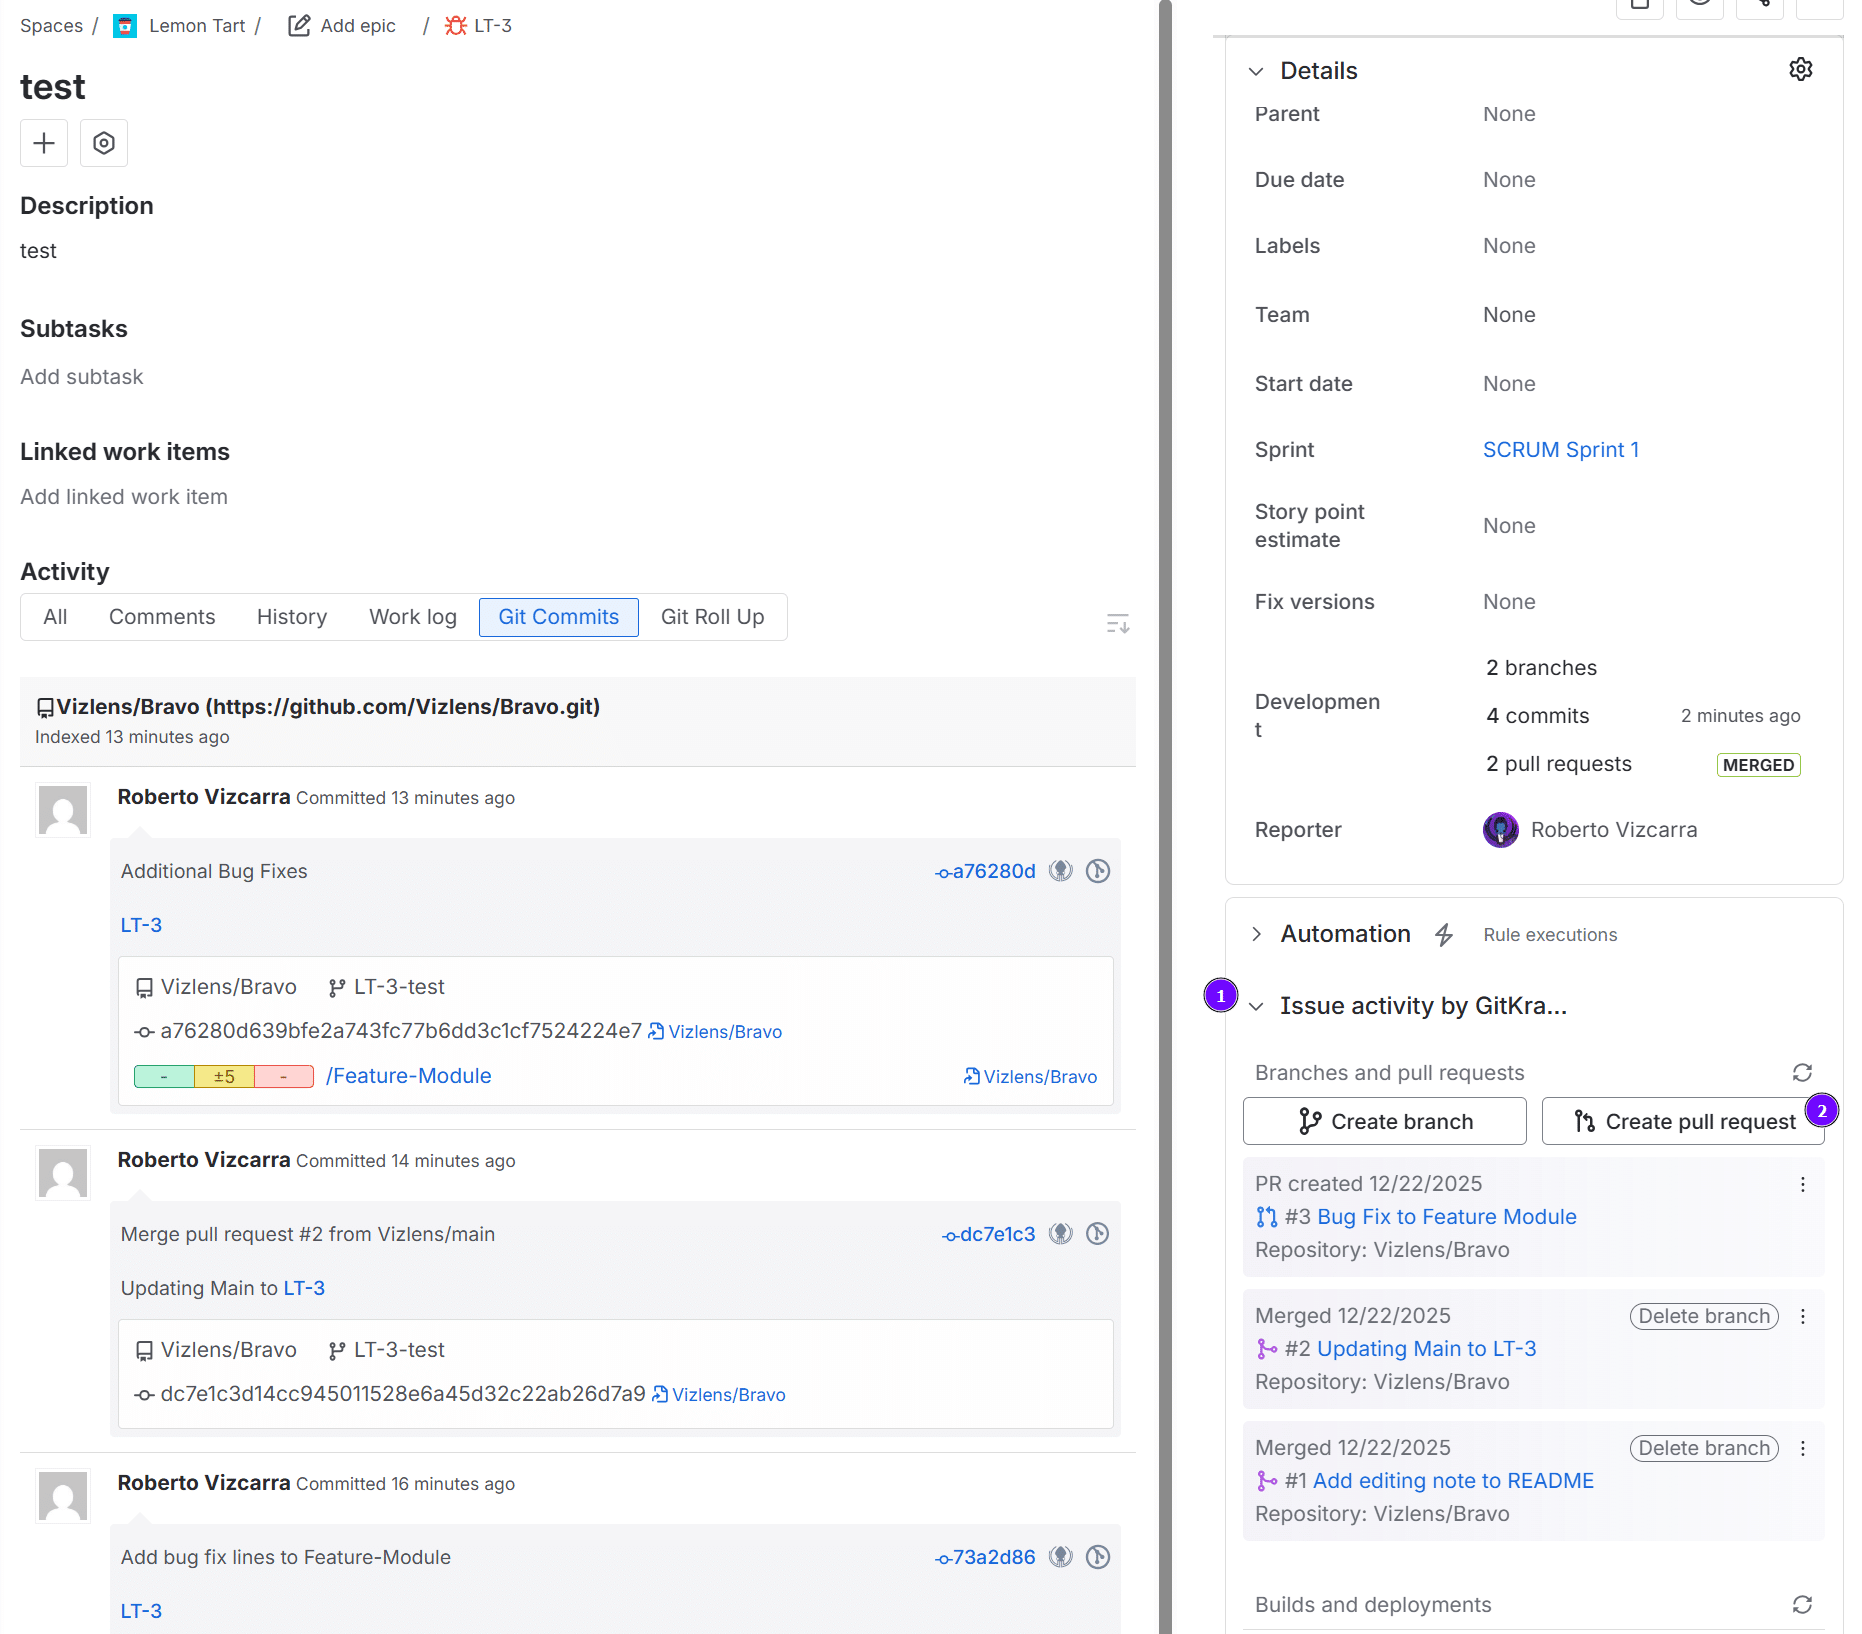
- Select the repository.
- Select the source and target branches.
- Verify the title contains the Jira issue key.
- Click Create pull/merge request.
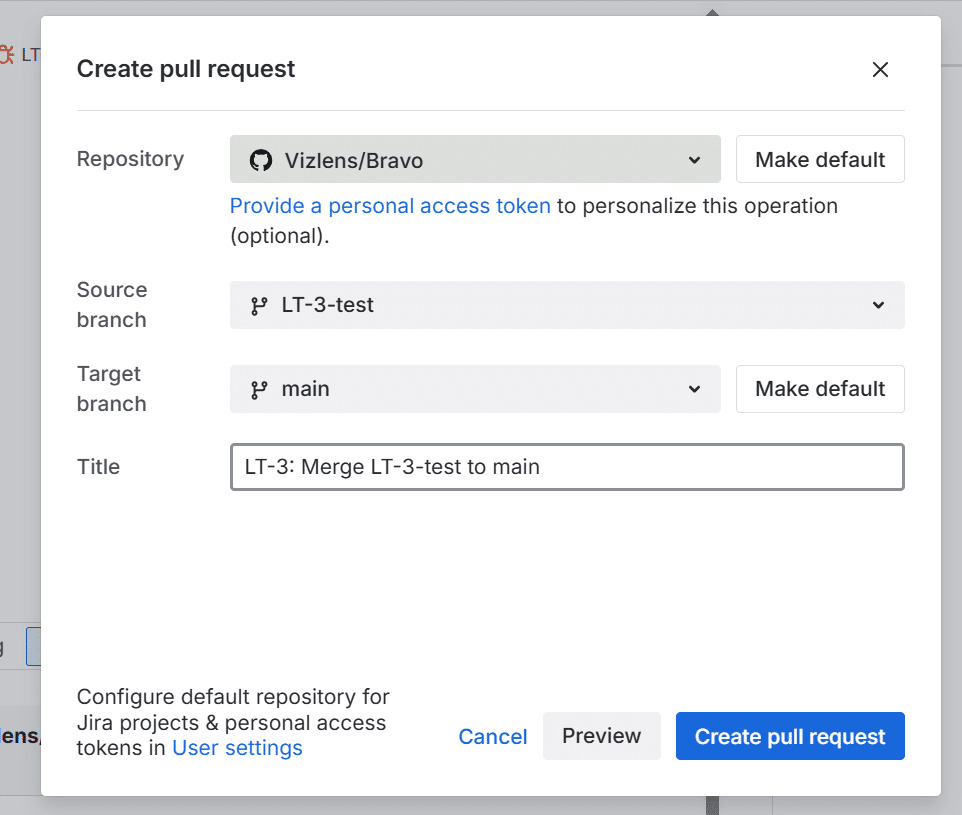
A confirmation popup appears after the pull/merge request is created. Click the link to open it directly.
GIJ User Settings
GIJ lets you manage your connected apps, default repository, default branch, and personal access tokens through the GIJ User Settings page.
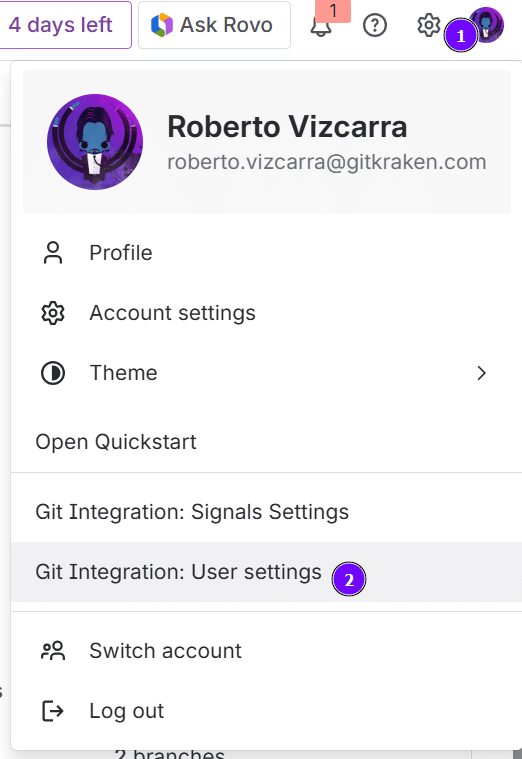
To access User Settings:
- Click your Jira profile picture icon.
- Select Git Integration: User Settings.
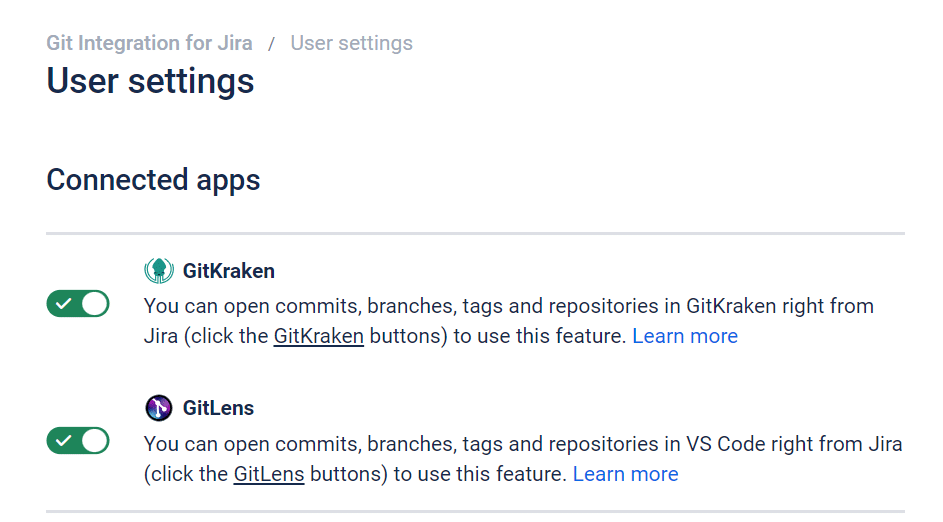
Connected Apps
Enable or disable the visibility of GitKraken and GitLens icons in Jira issues. These icons let you open specific Git items in the respective application directly from the issue.
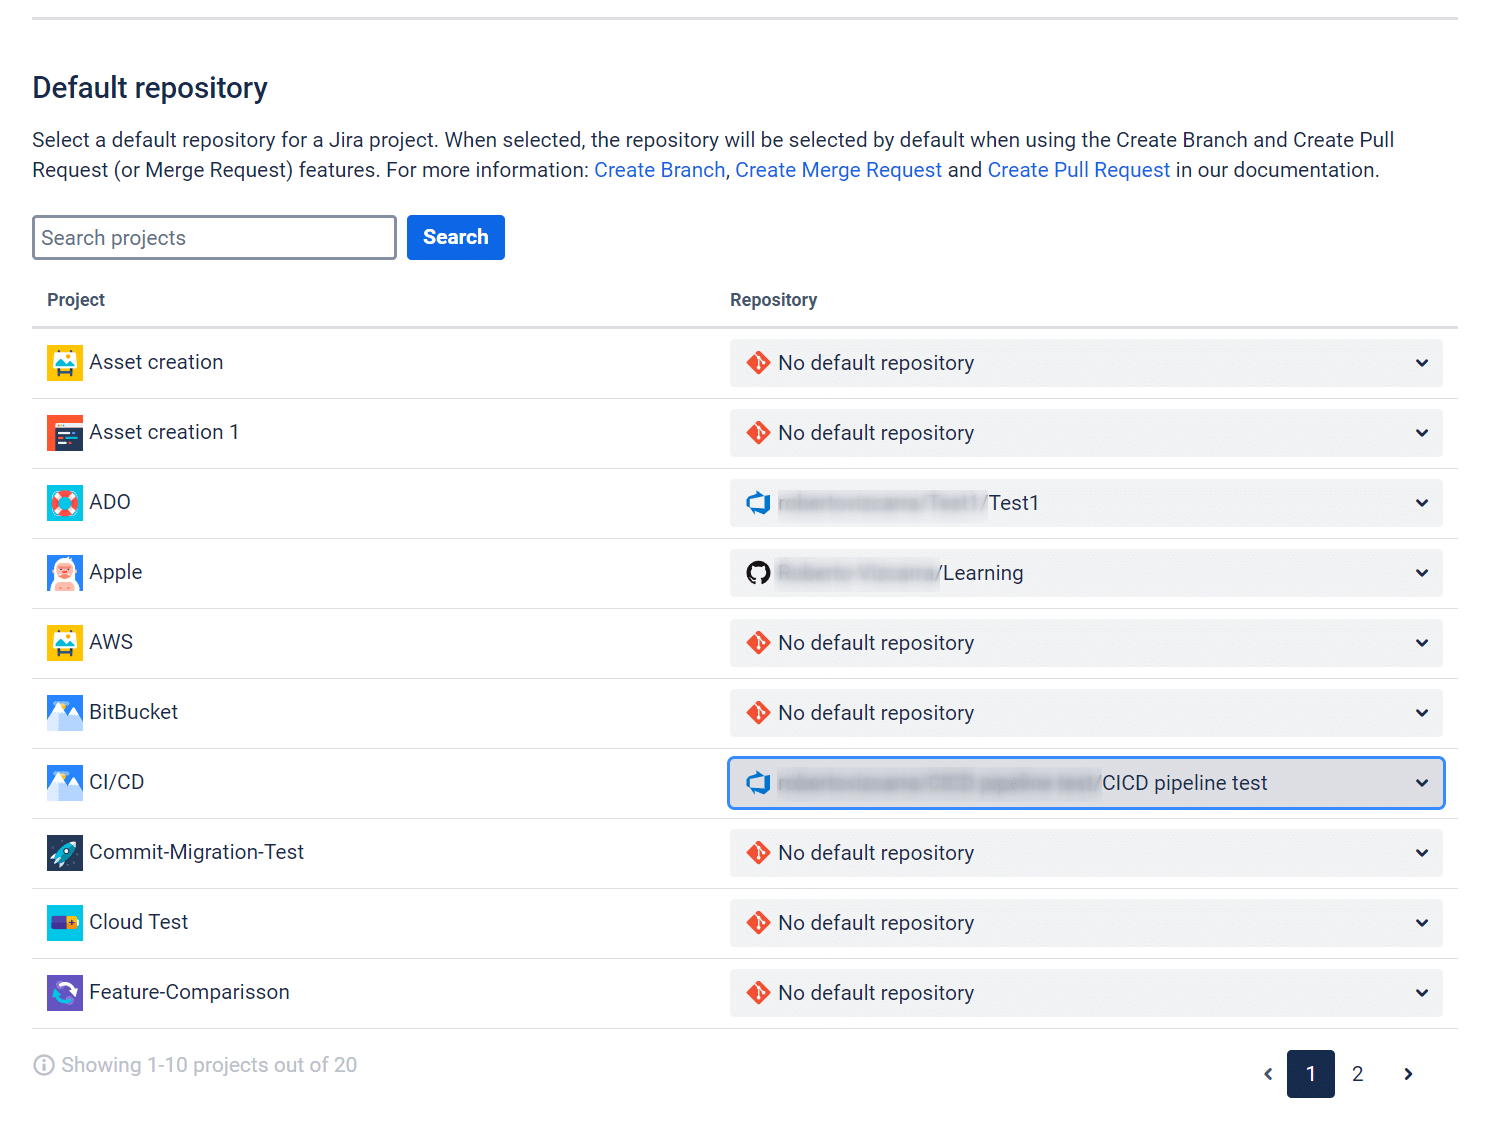
Default Repository
Set a default repository on a per-project basis.
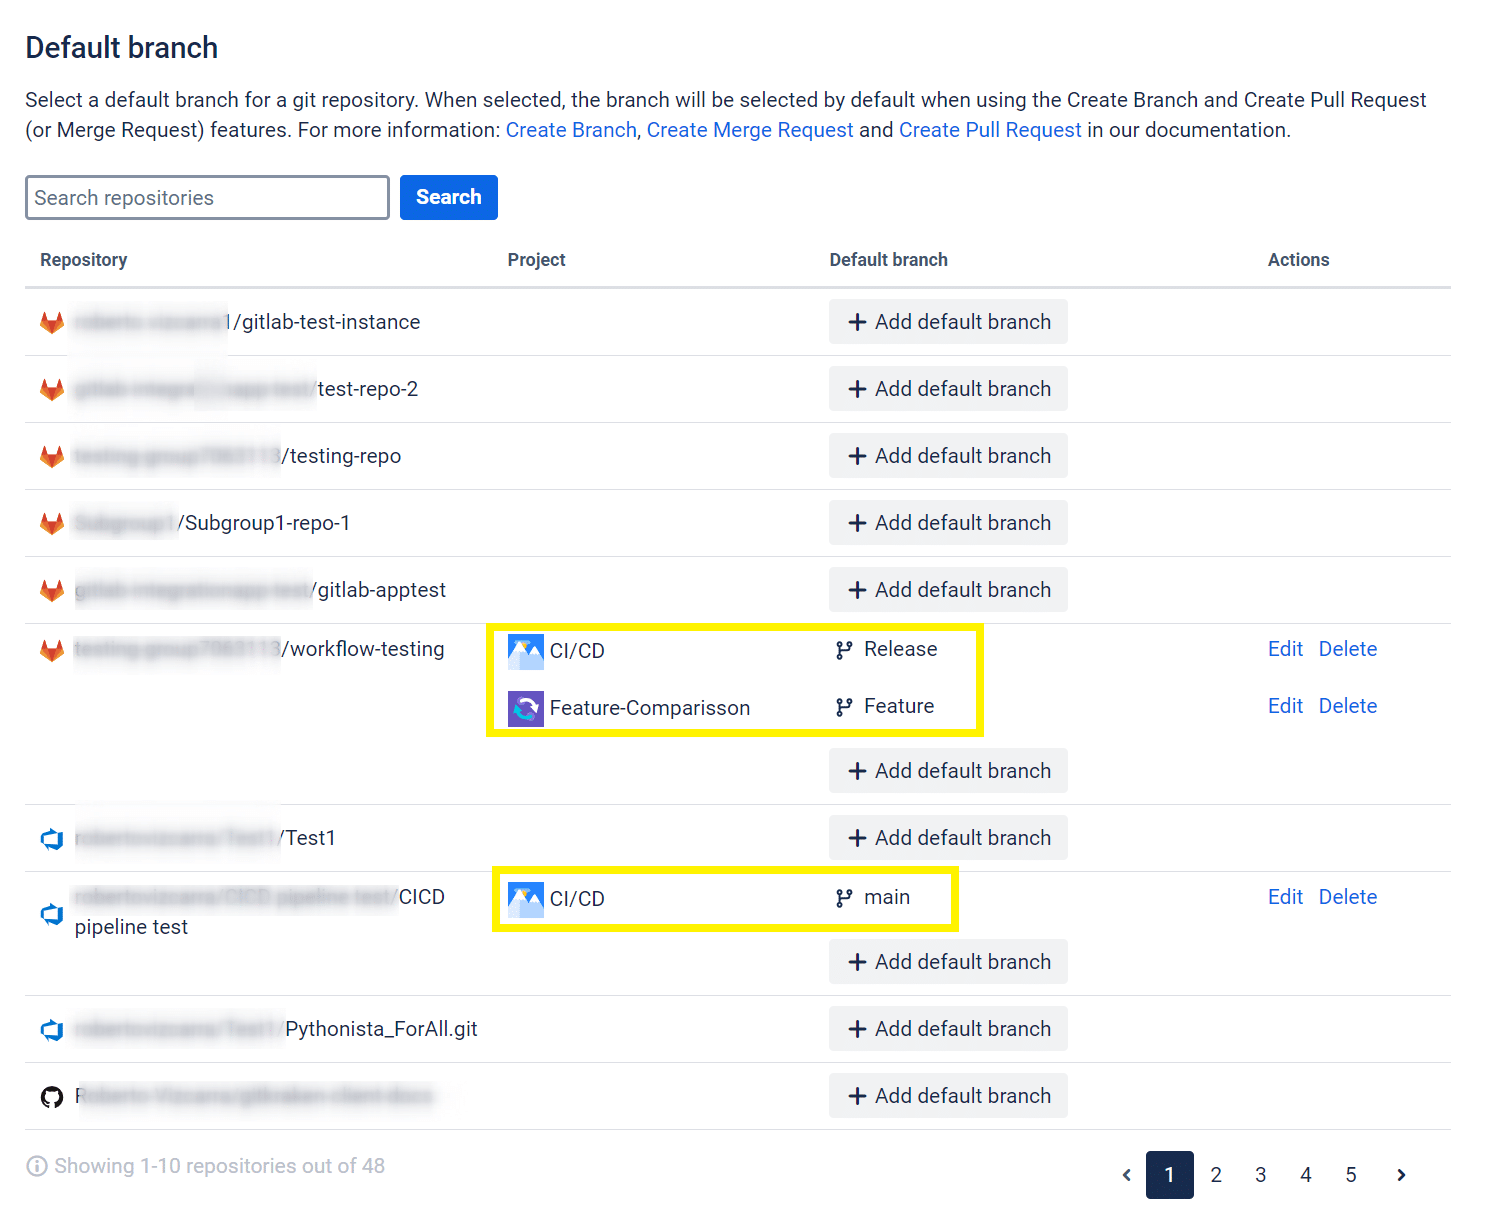
Default Branch
Set a default branch for a specific repository, configured by Jira project.
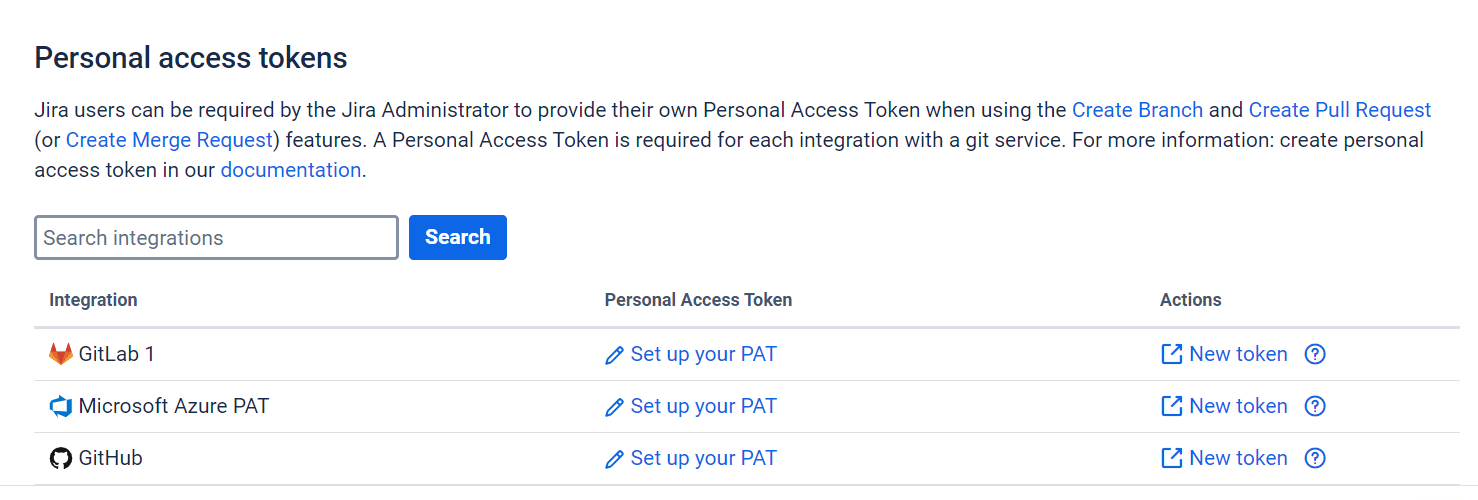
Personal Access Tokens
Manage the personal access tokens used to authenticate your requests to create branches and pull requests directly from Jira. You need to provide a token for each integration.
You can enter an existing personal access token or click the link to create a new token. The link takes you directly to the token creation page for that Git service.
See Creating Personal Access Tokens for detailed instructions.
Last updated: December 2025
