
Last updated: March 2026
On this page:
- Understand indexing triggers
- Enable indexing triggers
- Find the webhook URL
- Choose a webhook URL level
Understand Indexing Triggers
Indexing triggers (webhooks) activate immediate reindexing of your repositories from remote systems. Your git server sends near real-time data to Jira when git data changes, providing much faster updates than the default 5-minute polling interval.
Common trigger events
Configure webhooks to execute when:
- A new commit is pushed
- A pull request is opened
- A branch is merged
You can create indexing triggers for individual repositories, and most git providers support account-level or organization-level webhooks.
Why use indexing triggers?
Without indexing triggers, Jira relies on default polling (usually 5 minutes). Users must wait for the next interval to see new commits or pull requests. With indexing triggers, Jira receives updates immediately.
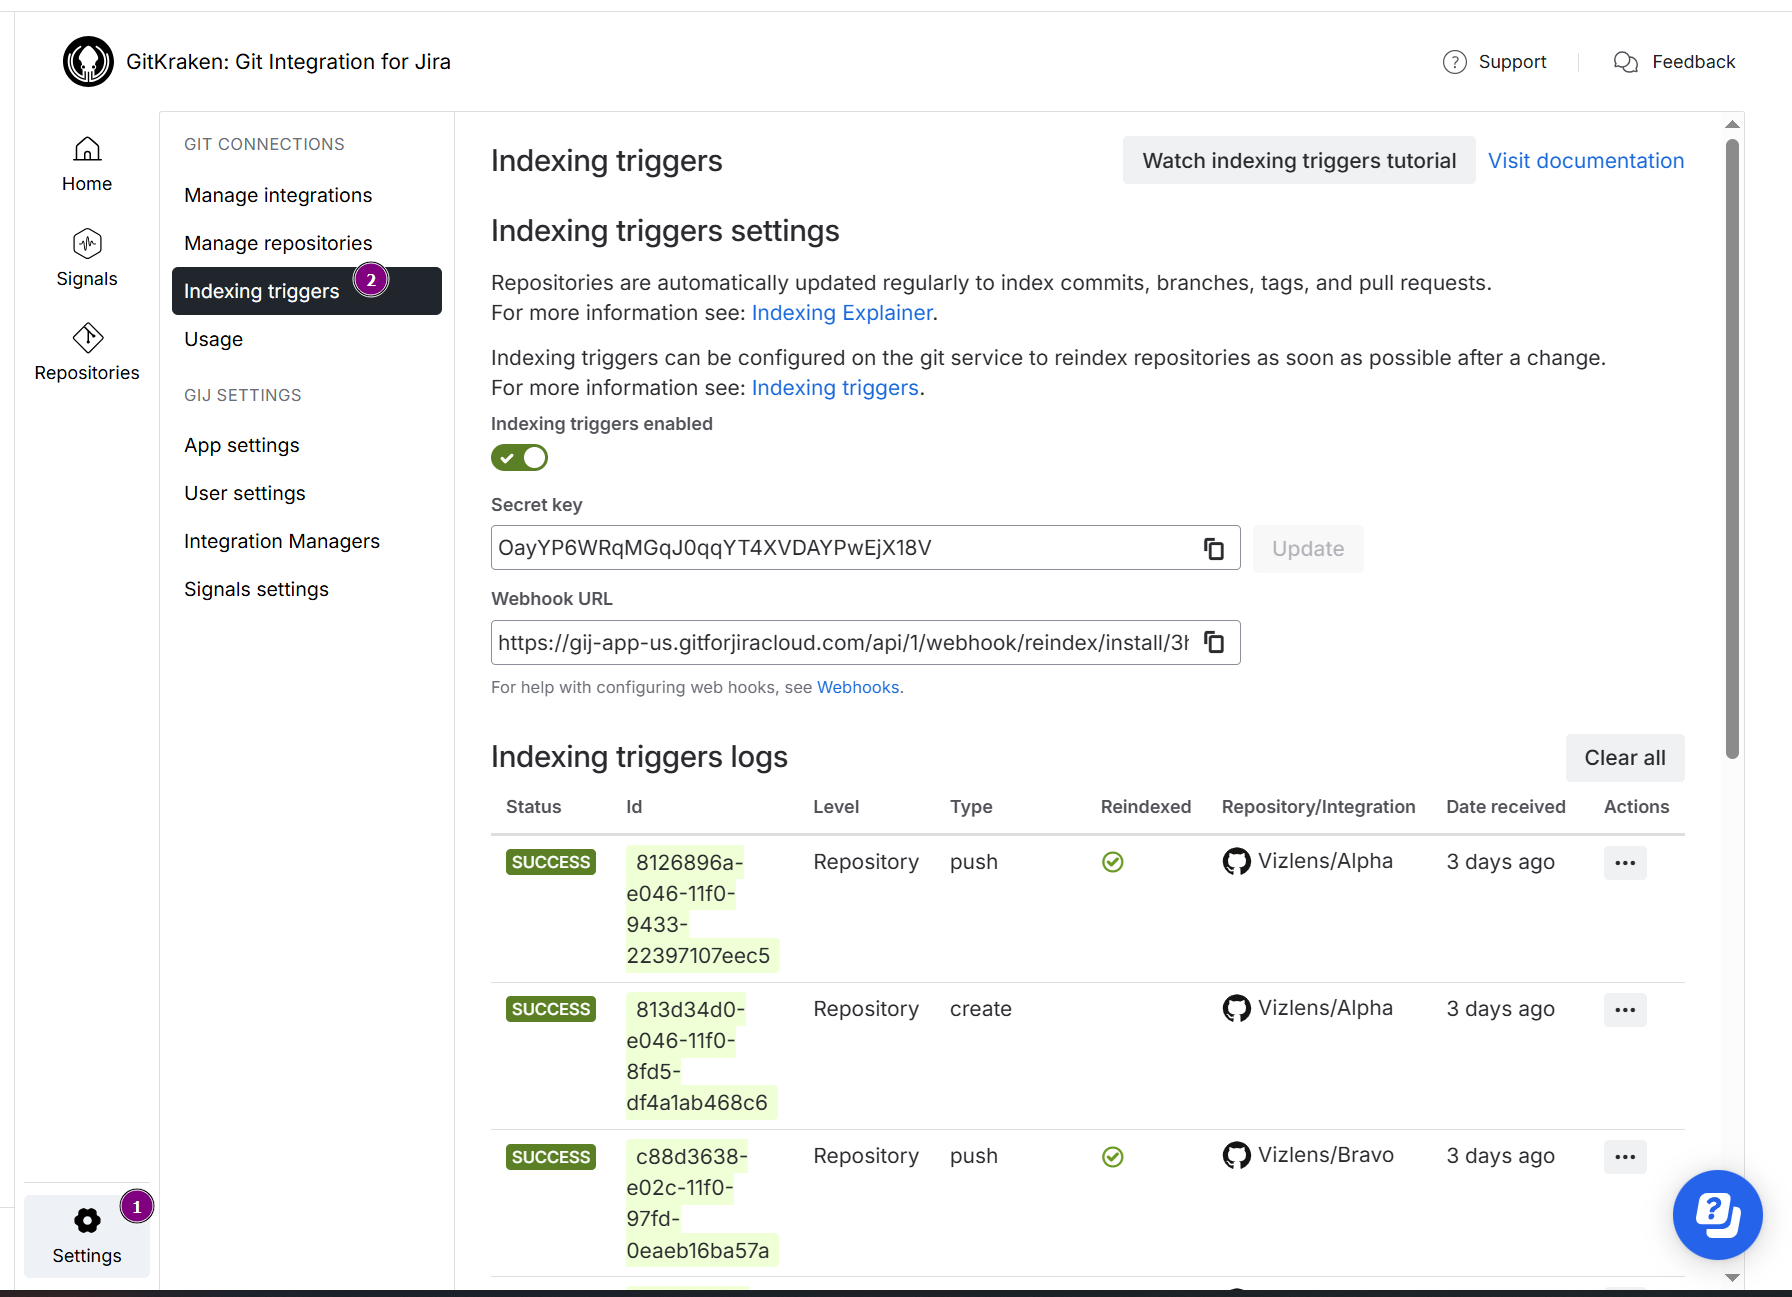
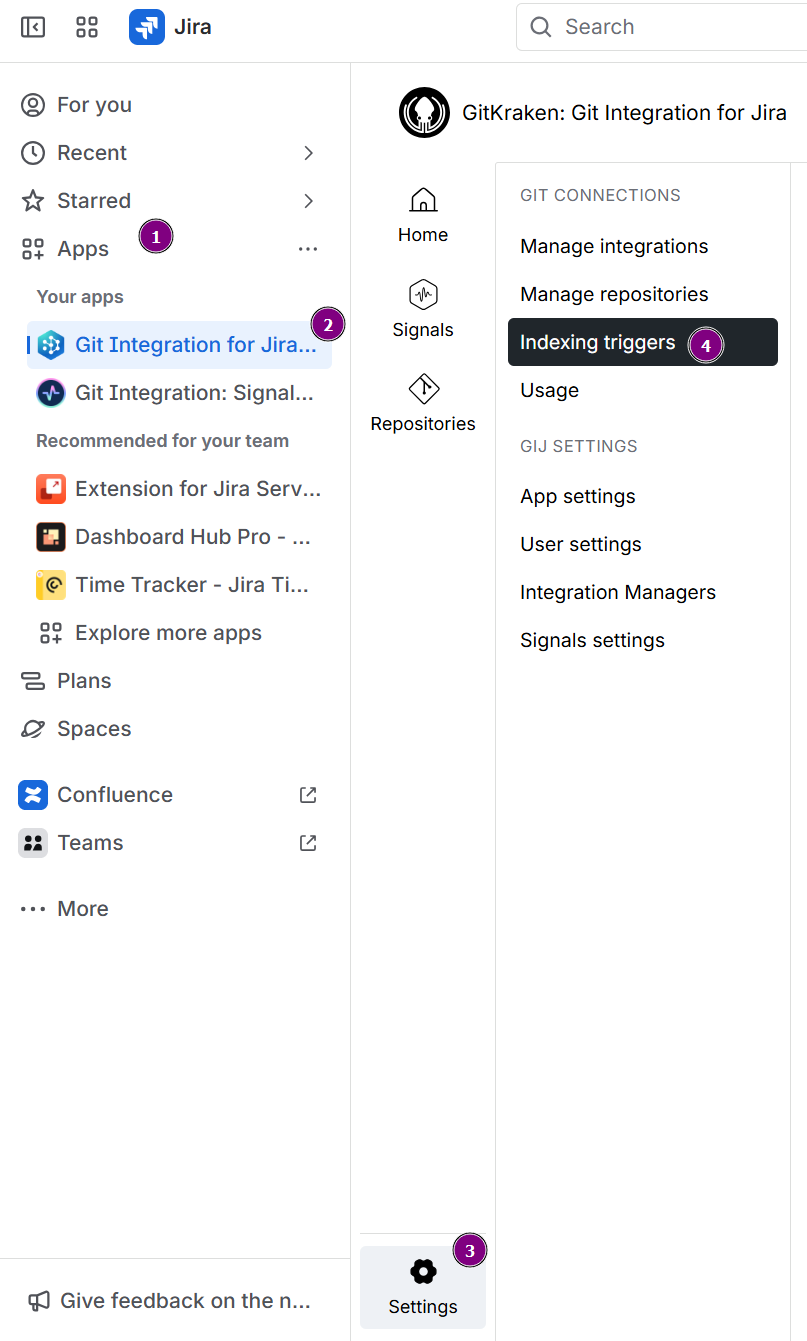
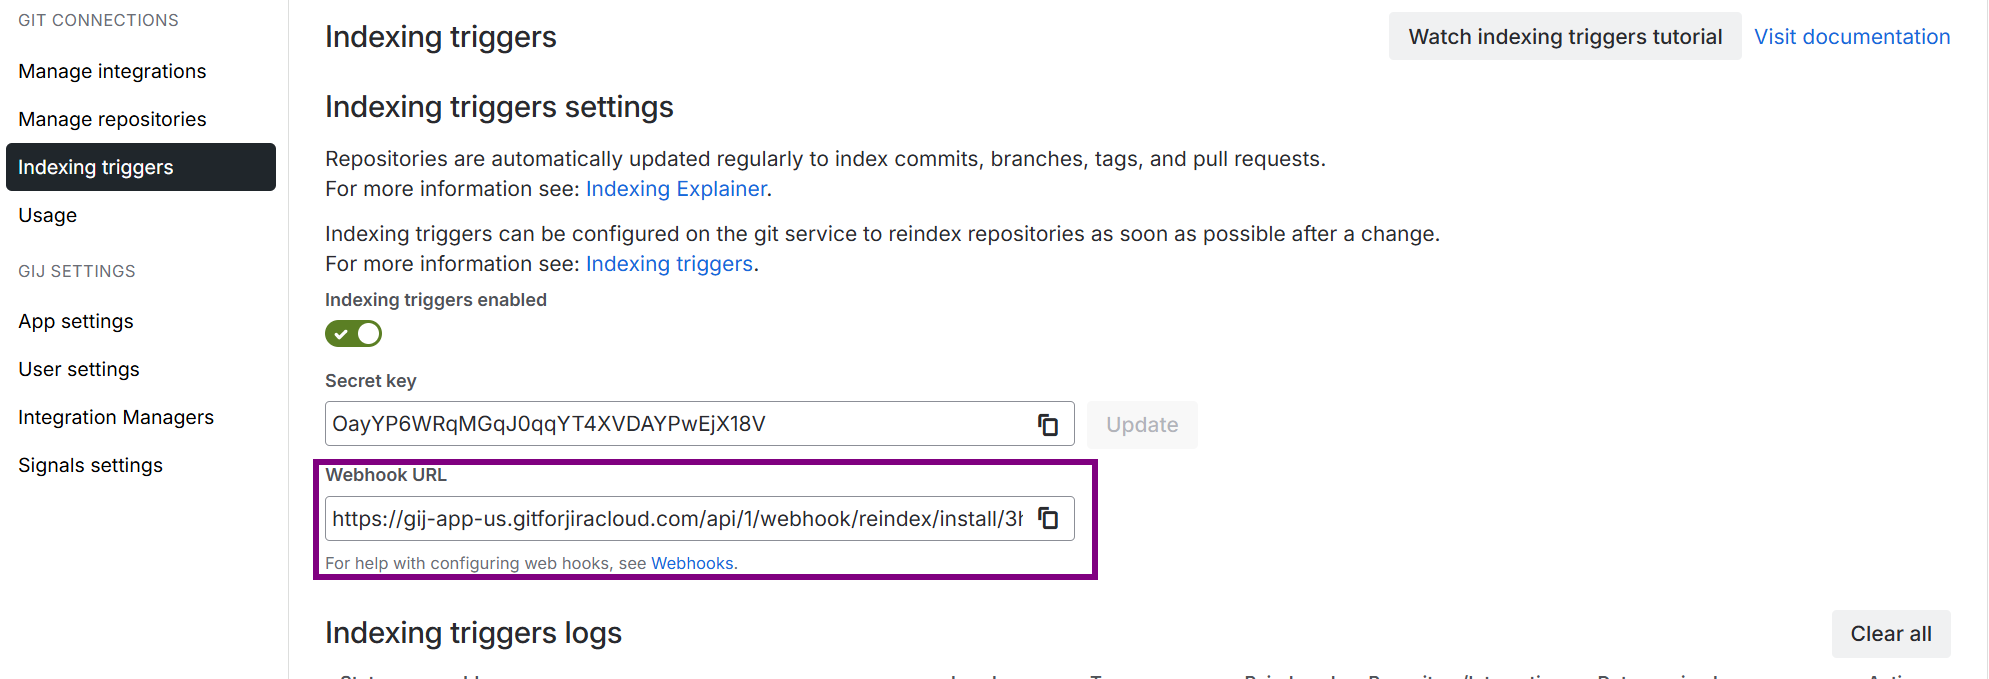
Enable Indexing Triggers
-
From your Jira Cloud dashboard, go to Apps ➜ Git Integration: Repository browser.
-
Click Indexing triggers in the sidebar.
-
Click the Indexing triggers enabled toggle to enable or disable the feature.
Find the Webhook URL
Access the webhook URL from these locations:
From the Indexing Triggers Page
Go to Apps ➜ Git Integration for Jira ➜ Settings ➜ Indexing triggers.
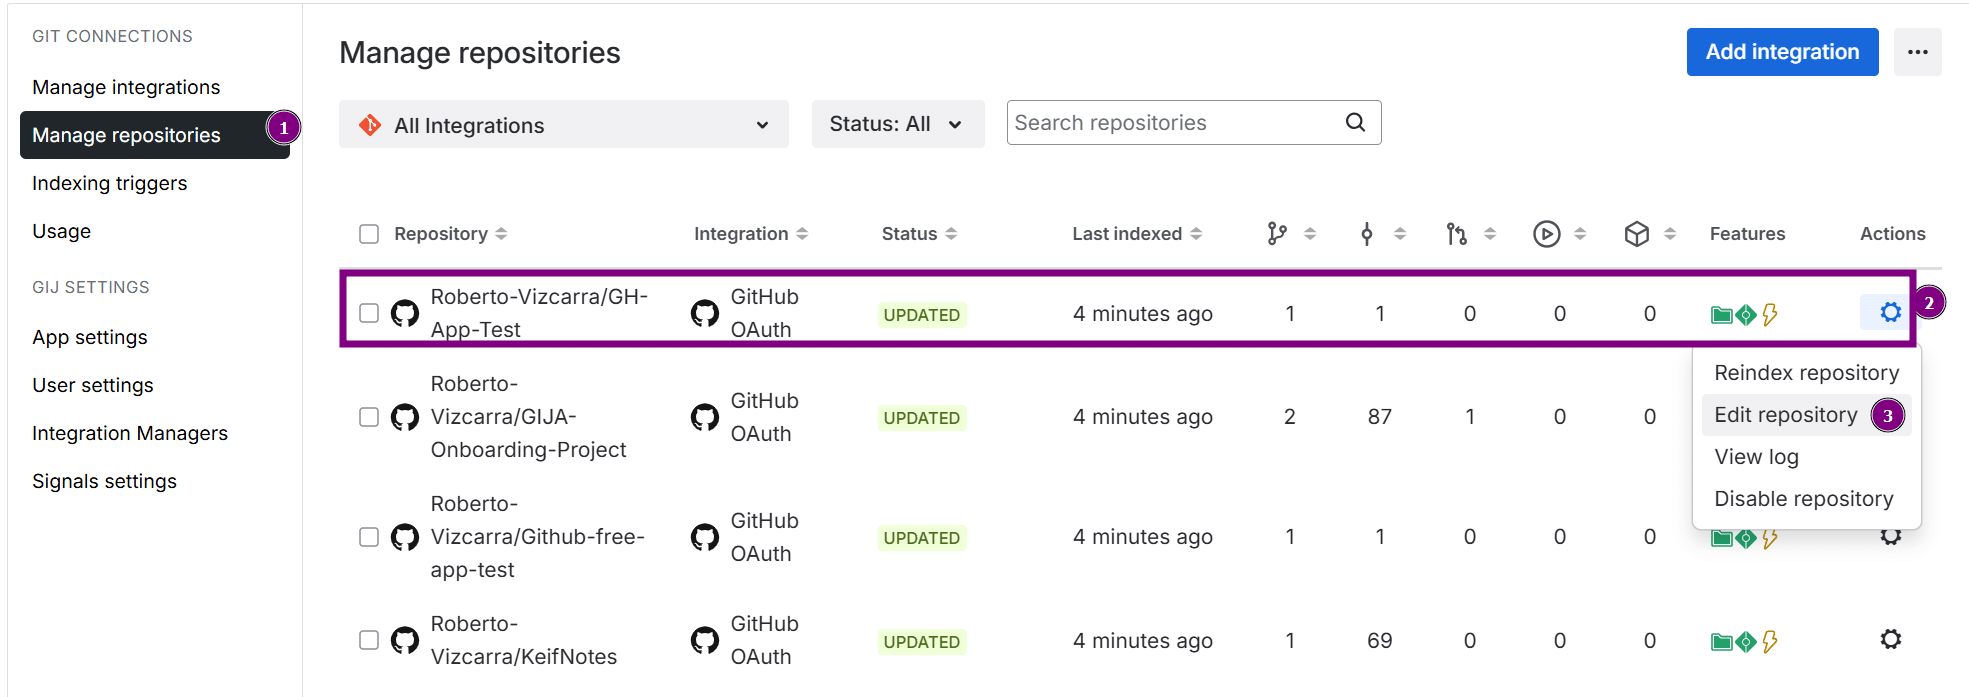
From the Repository List
- Go to the Manage repository page.
- Click a repository or integration.
- Find the Webhook URL field.
From Repository Settings
- Go to the git configuration page.
- Click
 Actions ➜ Show integration repositories.
URL format
https://[your-cloud-domain-url]/api/1/webhook/reindex/install/<INSTANCE_ID>/<SECRET_KEY>Example:
https://gitforjiracloud.bigbrassband.com/api/1/webhook/reindex/install/x5chdqpqln0j04xcgv02zy7h9/vfTmXtqIFyqeCYYS3WjLIn2RRz5rHSDOGET, POST, PUTNot supported:
DELETE, HEAD
Choose a Webhook URL Level
Three webhook URL levels are available:
| Level | Scope | Use Case |
|---|---|---|
| Install level | All configured repositories | Simplest setup; recommended for most users |
| Integration level | Repositories within one integration | When you need separate triggers per integration |
| Repository level | Single repository only | Granular control for specific repositories |
Install Level (Recommended)
This default webhook URL triggers events for all configured repositories. It’s the easiest to configure.
Access location: Git Integration sidebar ➜ Indexing triggers
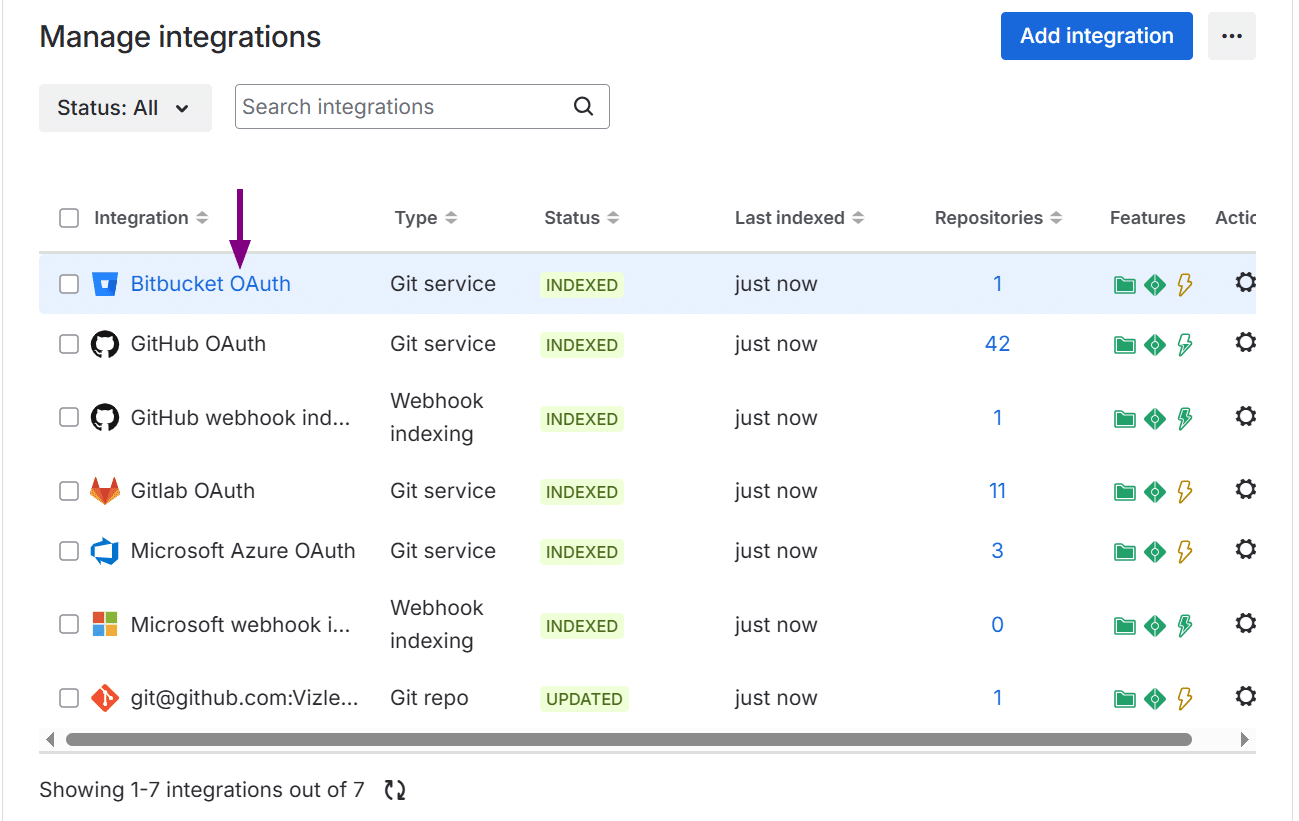
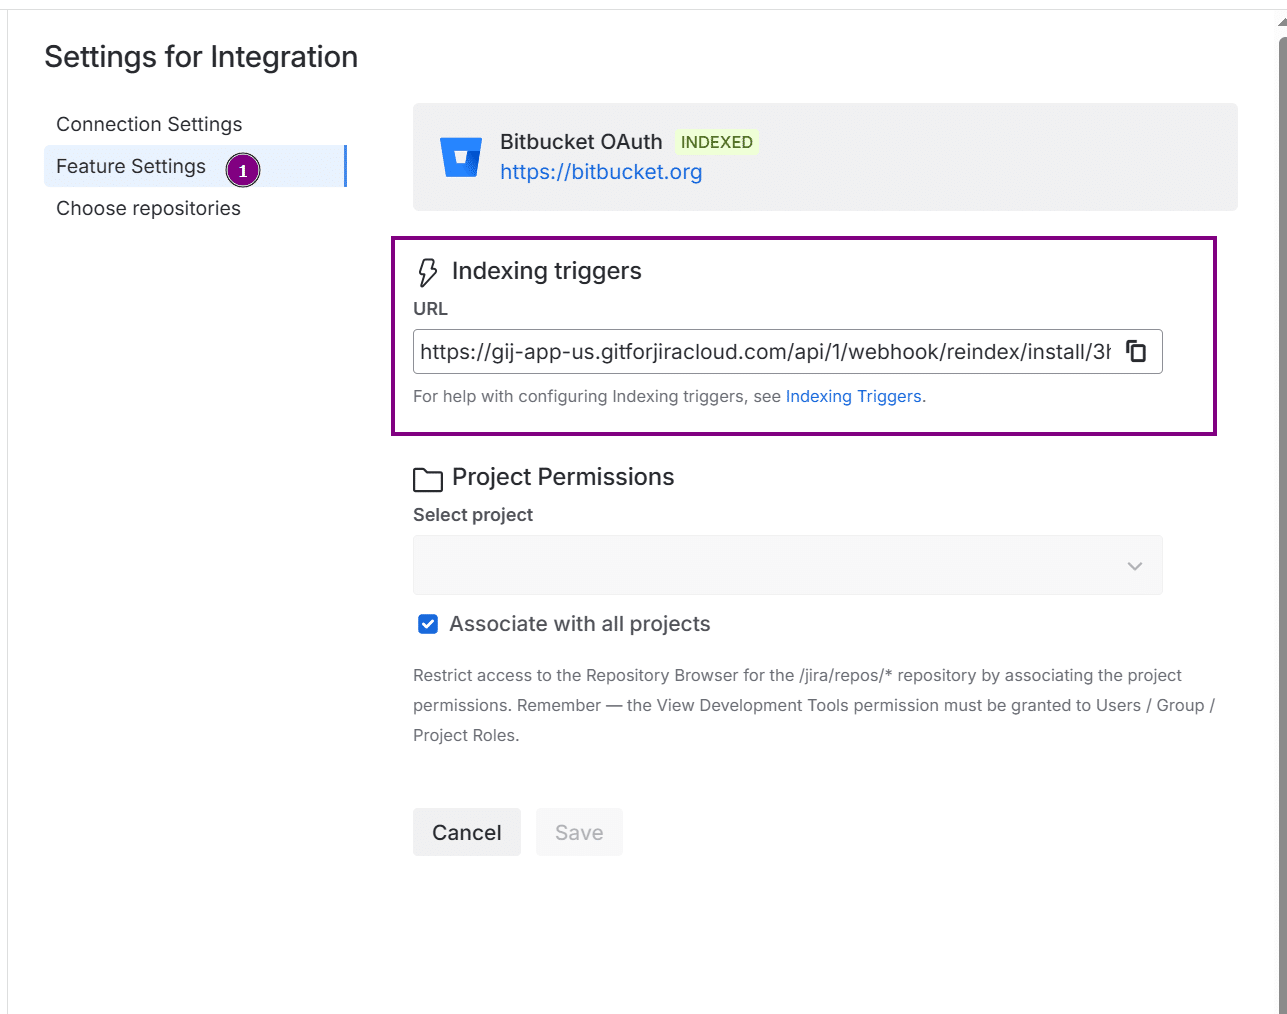
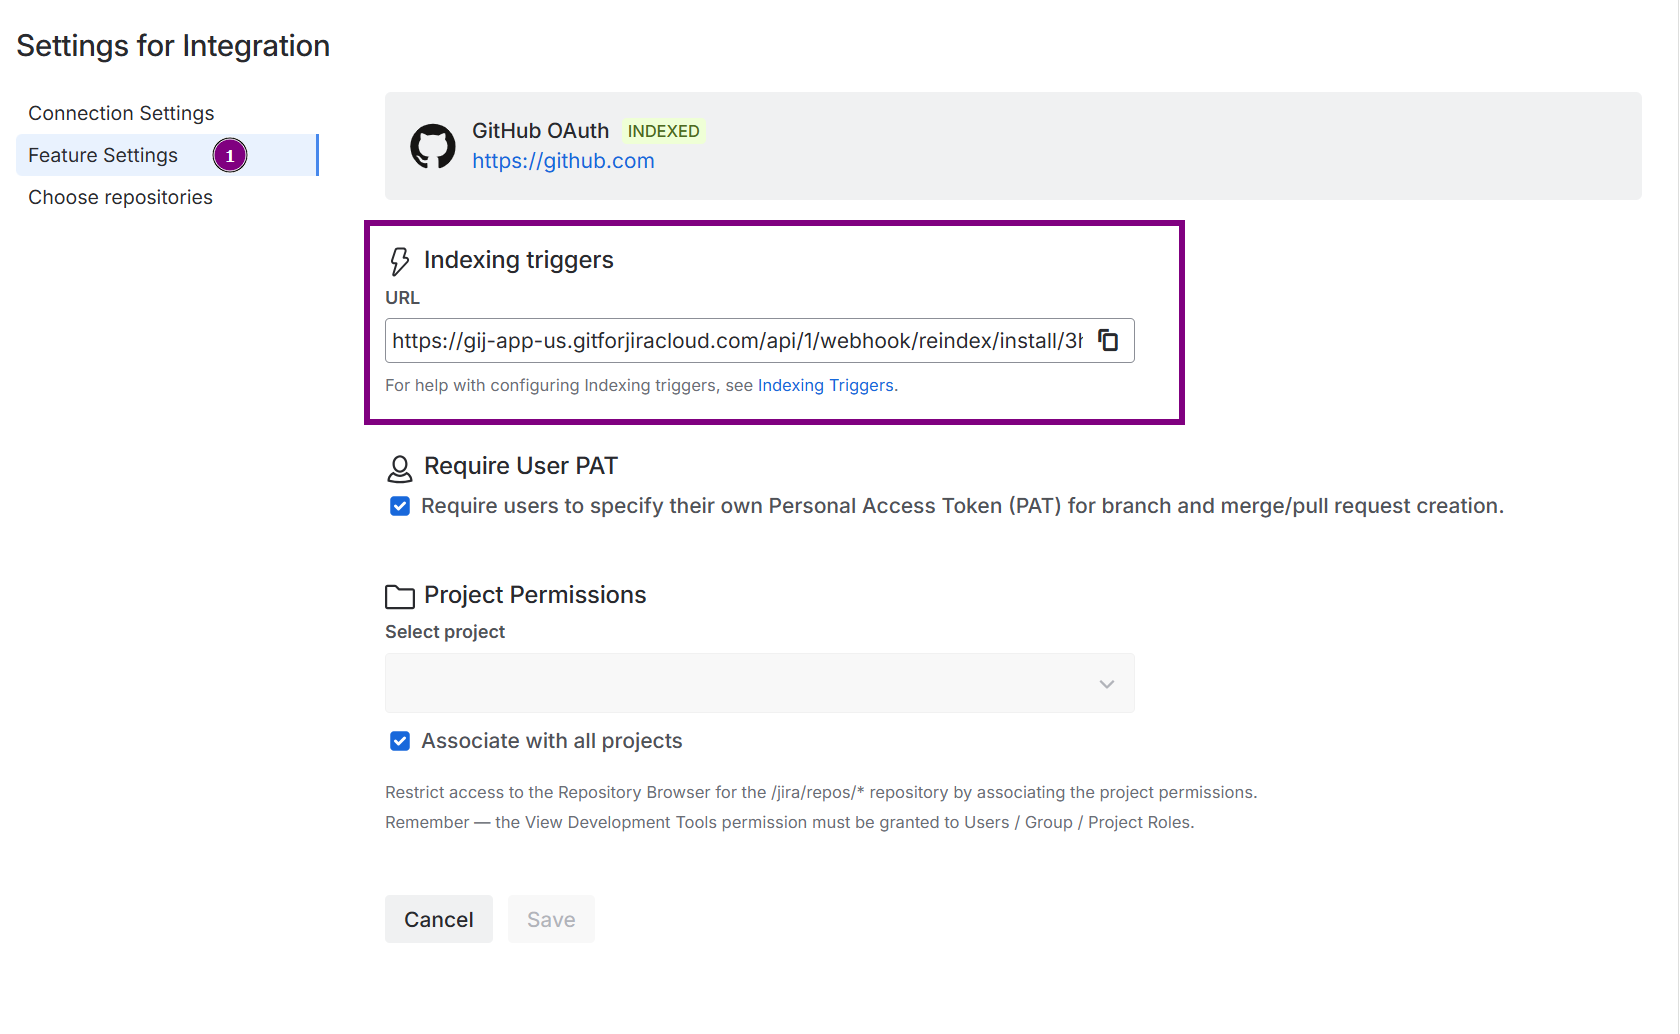
Integration Level
This webhook URL triggers events only for repositories within a specific integration.
Access location: Manage integrations page ➜ ![]() Actions ➜ Edit integration ➜ Feature Settings
Actions ➜ Edit integration ➜ Feature Settings
Or: Manage integrations page ➜ click an integration ➜ Feature Settings
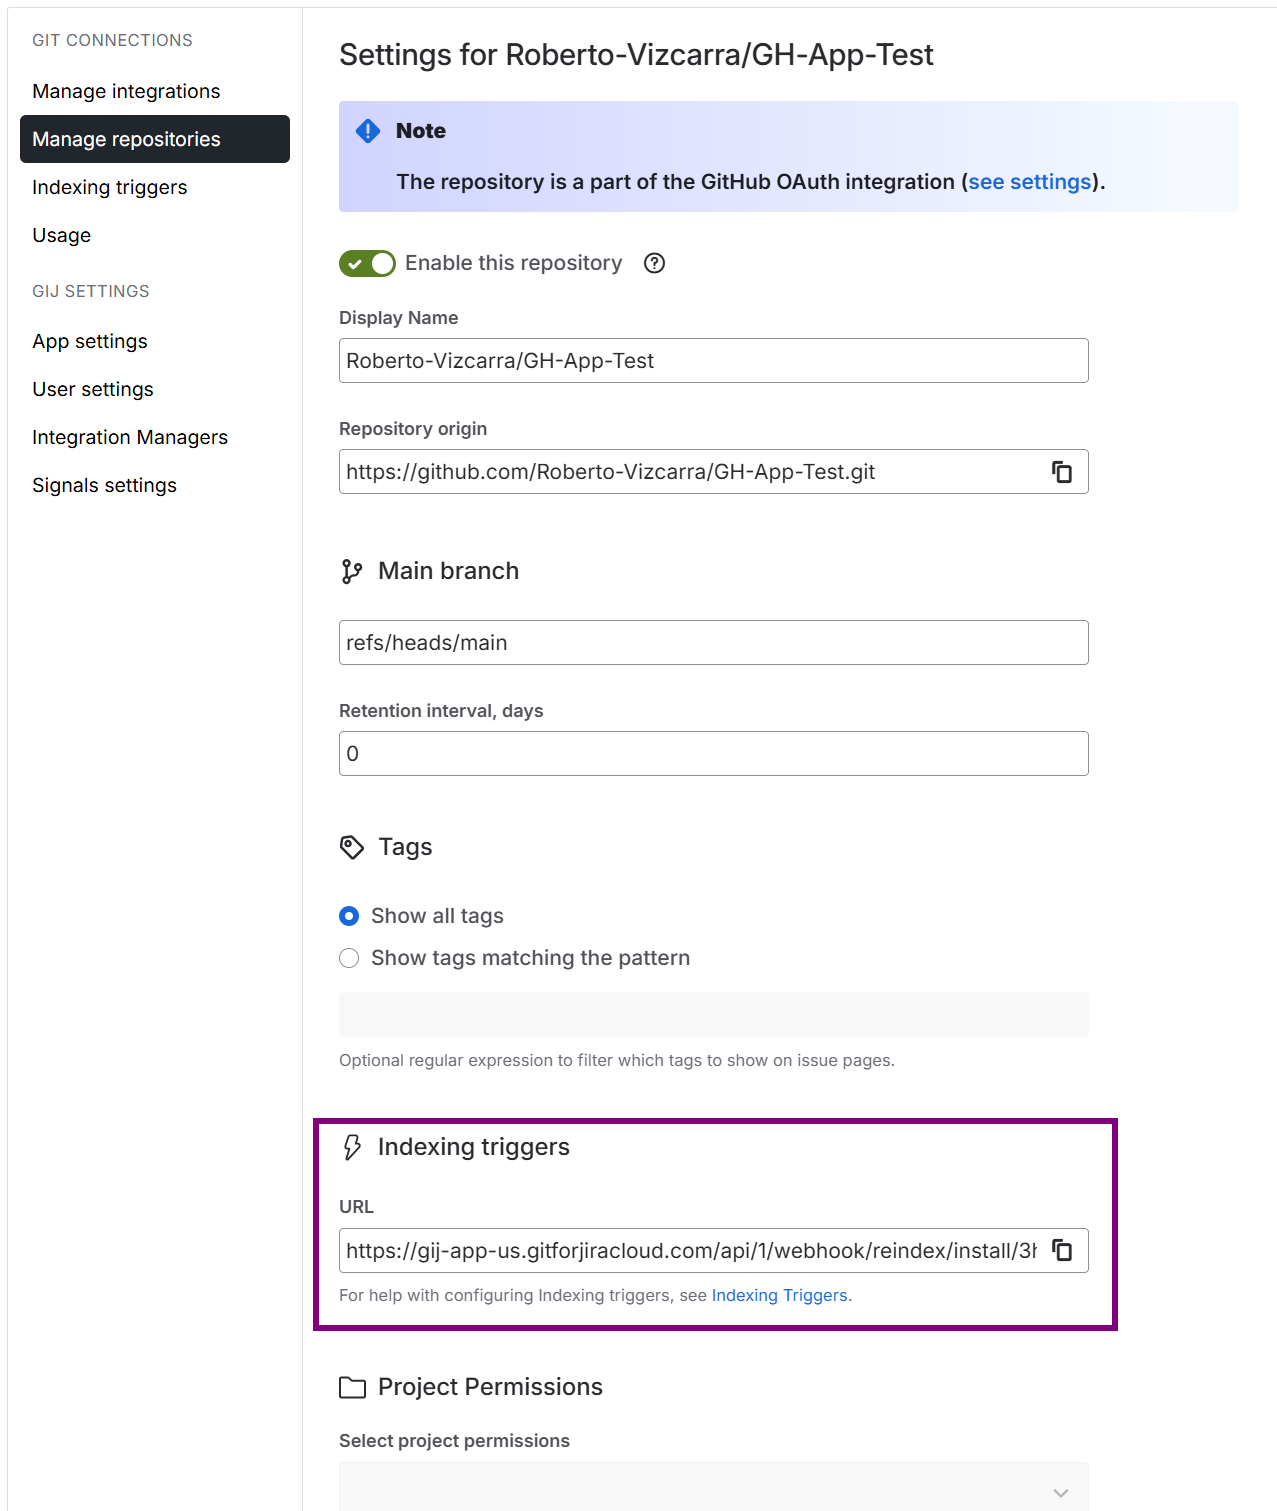
Repository Level
This webhook URL triggers events only for a single repository.
Access location: Manage repository page ➜ click a repository ➜ Webhook URL field
