
The Backlog View is a great tool for tracking work progress and figuring out what needs attention.
Introduction
The objective of the Backlog View is to help team/project managers identify work risks before deadlines are missed. This feature is specifically designed to accomplish that goal. It organizes your view into sprints and effectively shows the corresponding issues below those sprints.
So, basically, the Backlog View lets users:
- See Git repository activity in your Sprint planning view
- Easily spot issues at risk and adjust plans accordingly
- Run quicker and more effective standups
Getting started
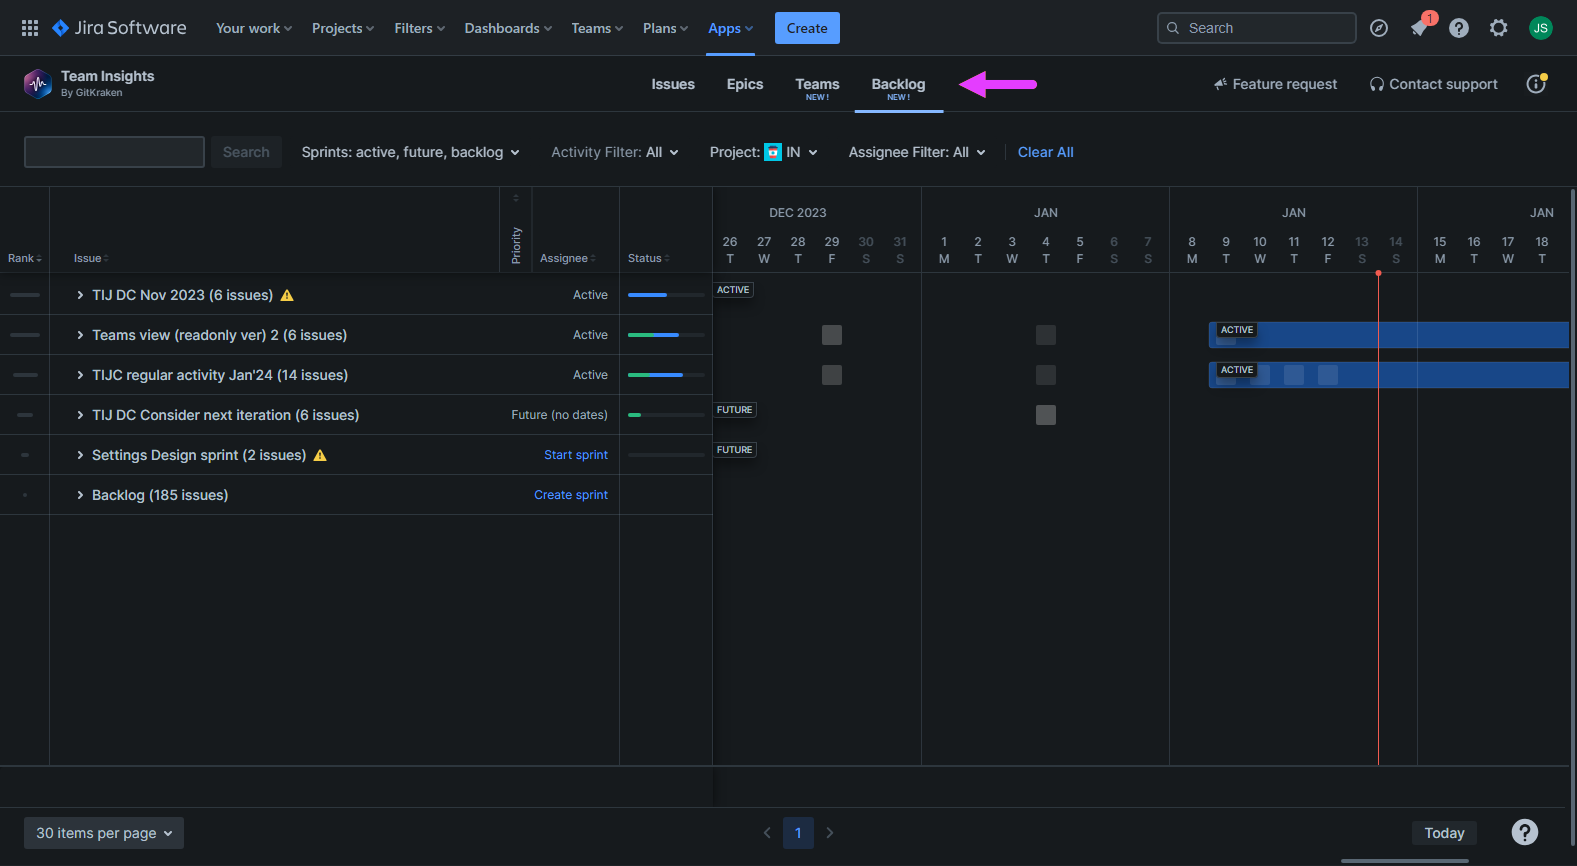
On the middle top part of Team Insights for Jira page, click on the Backlog View tab.
The Backlog View organizes issues into sprints, similar to how Epics mode in General View group issues. This allows you to easily manage your backlog based on the Project filter. Sprints are automatically sorted by rank when the Backlog View is loaded.
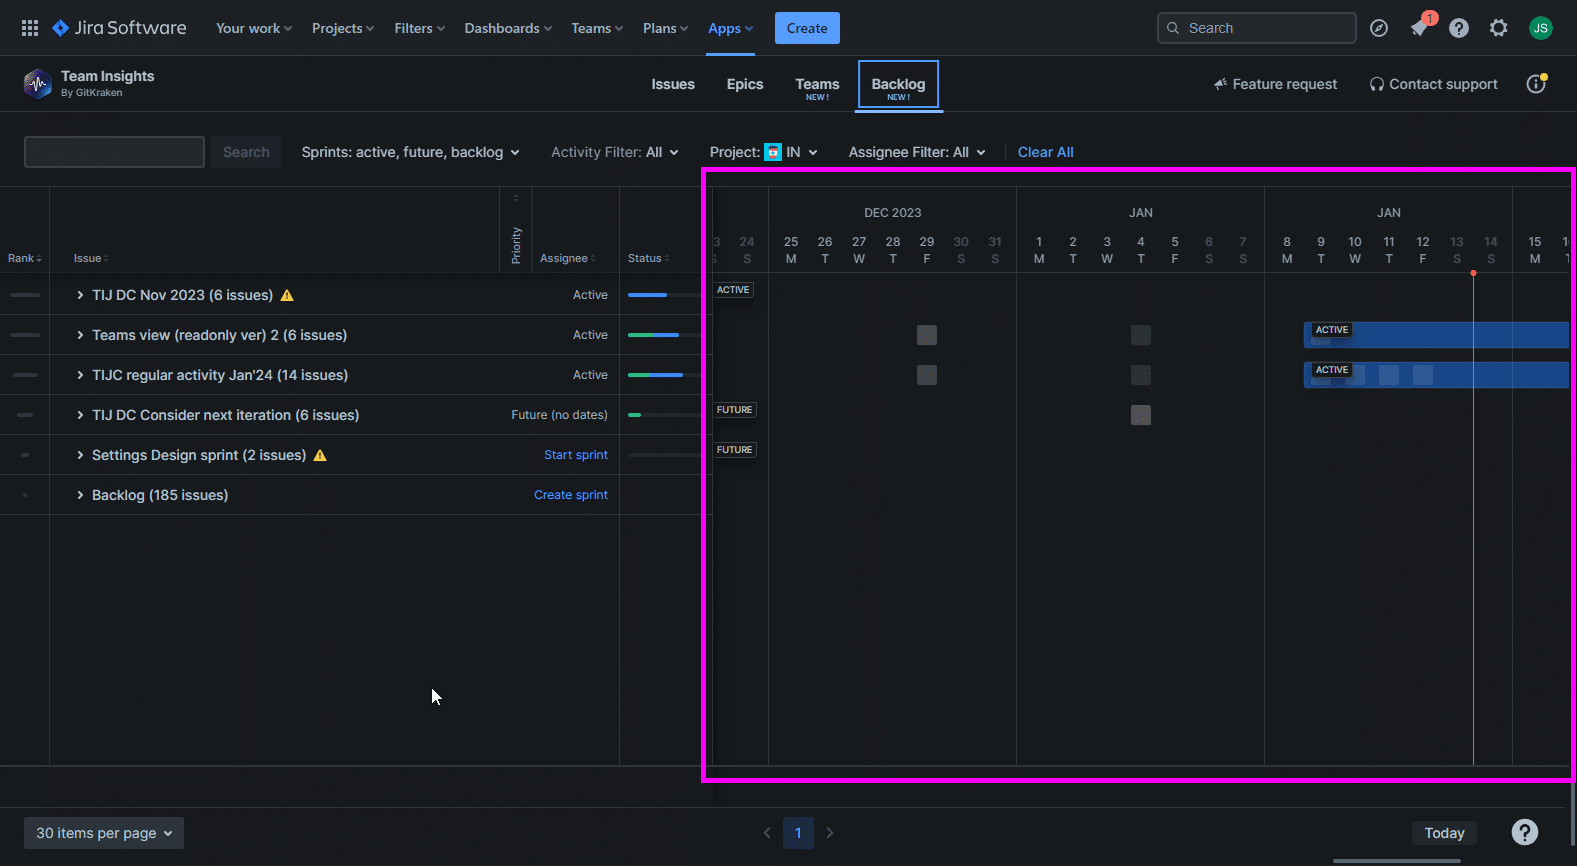
Activity timeline
On the Activity timeline, you will see the sprint duration representing user activity on a Jira issue spanning in a specific period of days. For example, if you have a two-week sprint, you will see a two weeks worth of work. If you have longer sprints, it will be represented in this section as well.
Audit issue activity
In the timeline, you can hover over the activity boxes to view a popup that shows the changes made to the sprint. This feature allows you to keep track of any additions or removals of issues from the sprint, as well as monitor any changes in the status or state of the sprint itself. It serves as an audit window for tracking the progress and modifications within each sprint.
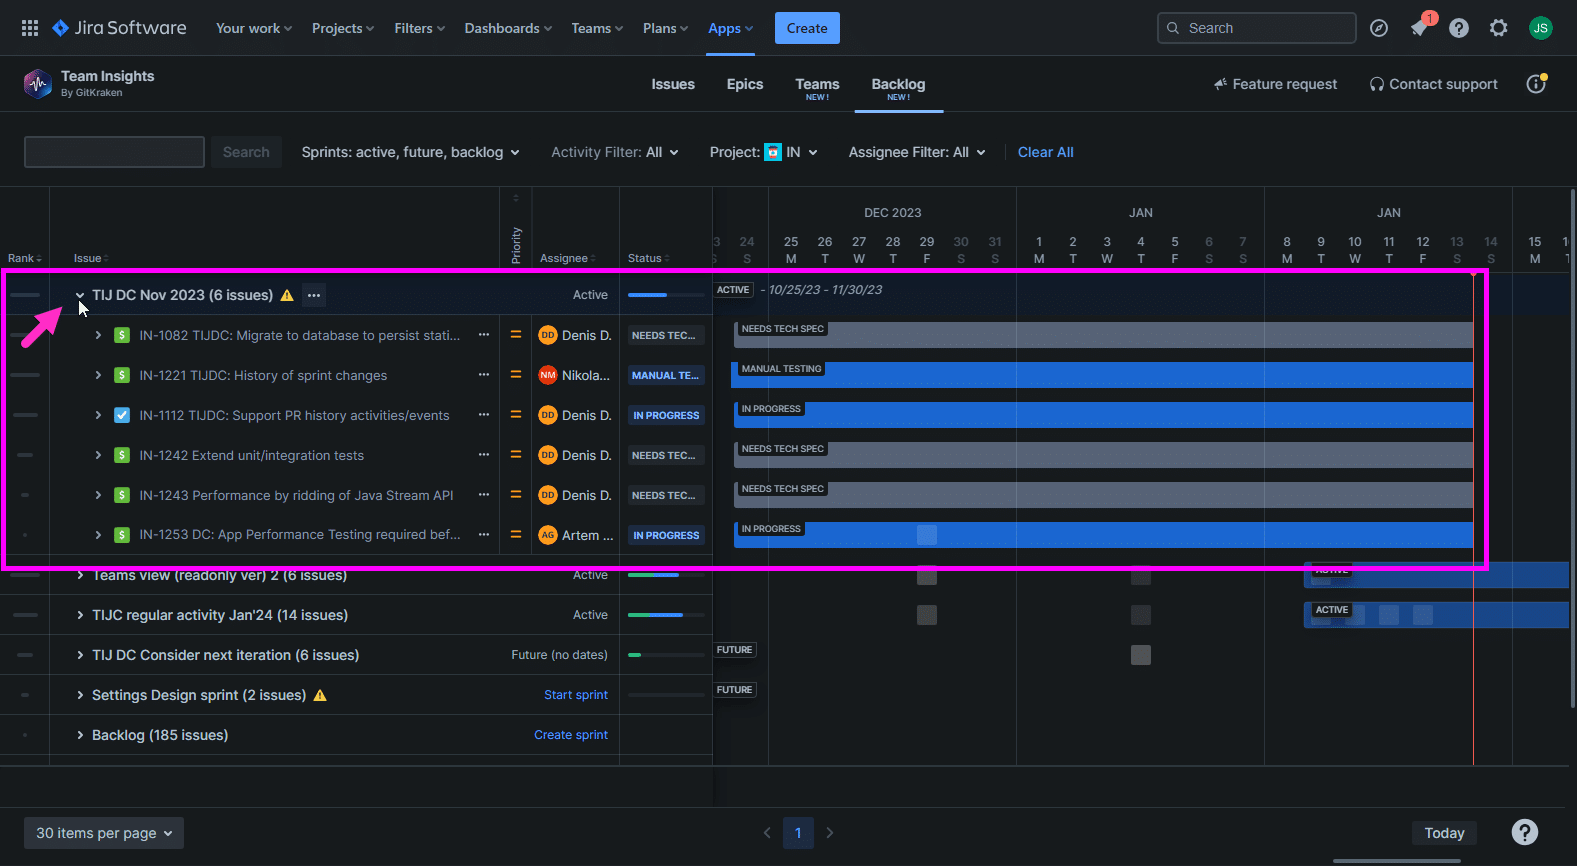
Issue section
On the Issue section, you can expand into the sprint by clicking on the “>” twisty symbol on the left hand side. The activity view for the issues will be displayed, providing insights into both the user activity and the issues themselves.
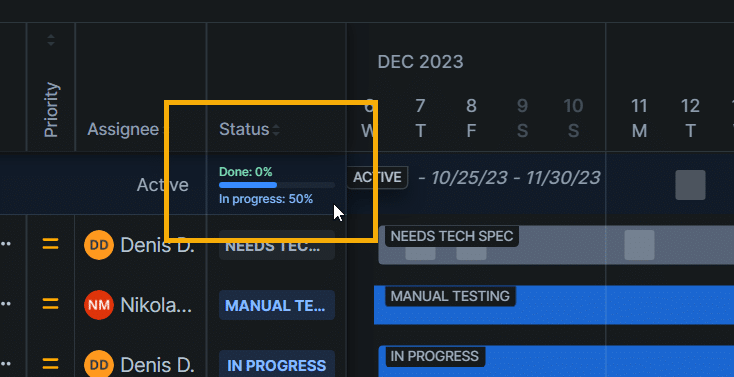
Status column
Mouse over to display the progress status of the activity here. You will see how much percentage of the work is done.
Alert symbols
By hovering over these  alert icons, you can view the calculated progress compared to the expected progress of the chosen issue. This feature let’s you analyze the remaining time in your sprint and the number of issues that have been completed or marked as done.
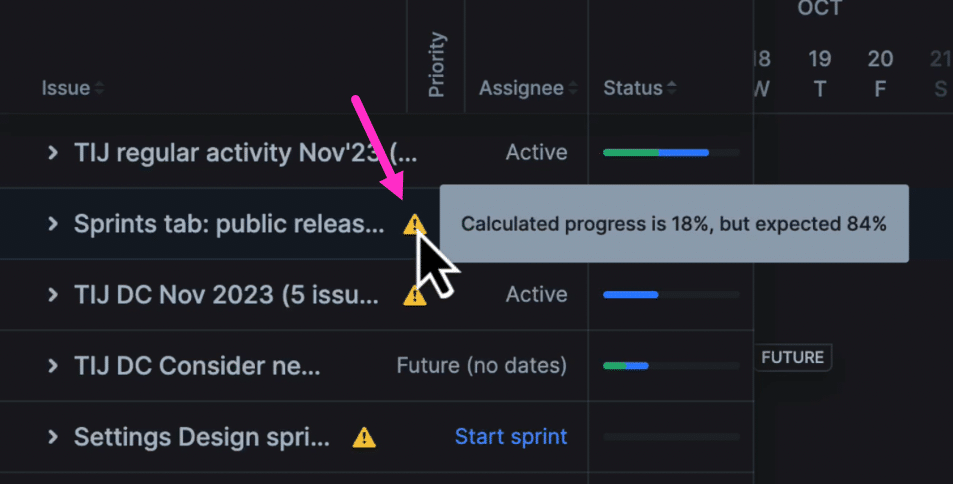
Using the example above, you will see it only has two days left on the sprint. But the calculated progress says it’s 18%. This means a low percentage of the issues that were supposed to be completed in this sprint are actually in that percentage of completed or done status.
On a higher level, this gives team/project managers the ability to scan and tell whether if the sprint is on track or have a lot of issues coming to the wire or not gonna make it in time for the sprint.
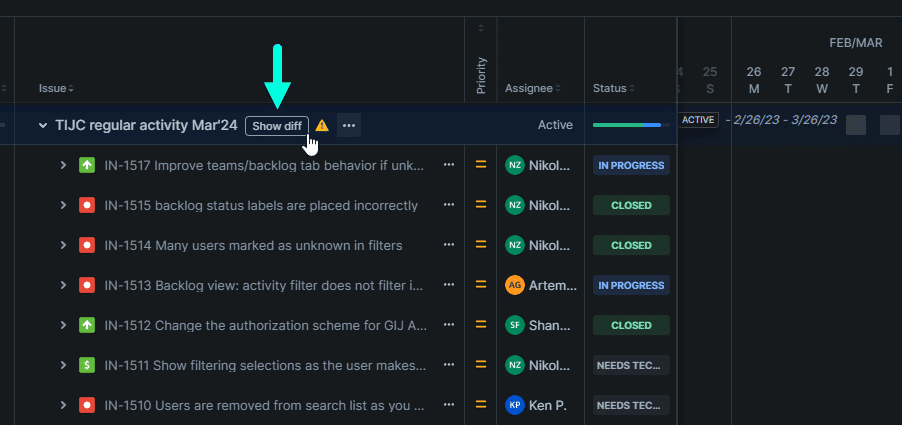
Showing diff
Click on the Show diff label on the Issue row to also show Jira issues that contains a code diff. Click Hide diff to switch off this mode.
Actions menu
If you do not have the Jira write permissions, you won’t be able to make changes to these features.
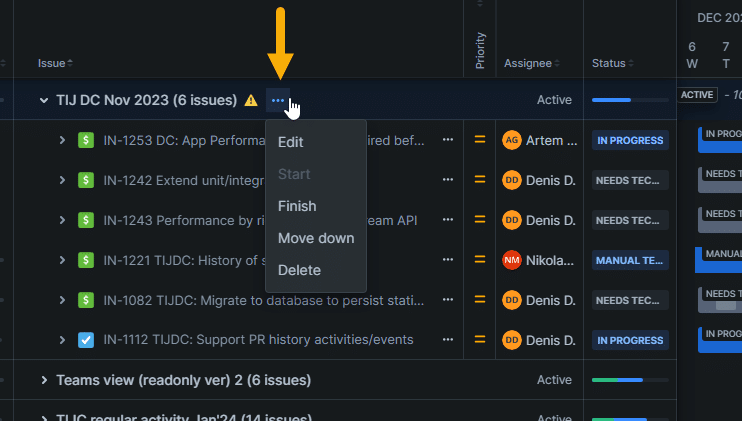
Click on the […] Actions menu to see options for managing the Sprints in the list.
| Action | Description |
|---|---|
| Edit | Allows team/project managers to edit the sprint. |
| Start | Allows team/project managers to start the progress of the sprint. Set the status to IN PROGRESS. |
| Finish | Allows to team/project managers to mark the progress of the sprint as complete. Set the status to DONE. |
| Move up | Moves the sprint up in the Issue list. Move sprints up to assume it in a higher priority. |
| Move down | Moves the sprint down in the Issue list. Move sprints down to assume it in a lower priority. |
| Delete | Remove the sprint from the Issue list. |
Editing sprints
Click […] Actions ➜ Edit for the selected sprint. The following dialog is displayed.
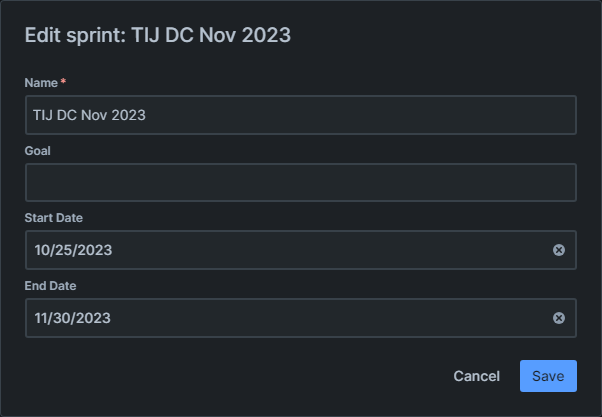
Utilize the following fields to modify the sprint properties:
| Field | Description |
|---|---|
| Name | Enter or change the name of the sprint. |
| Goal | By setting a goal for completion, team members can better plan their work and ensure that all tasks are completed within the allocated timeframe. |
| Start Date | Assign or change the start date of the sprint. This ensures a smooth and organized workflow for all the work and tasks that will be undertaken during the sprint. By setting a clear start date, teams can effectively plan and allocate their resources accordingly. |
| End Date | Assign or change the end date of the sprint. In order to effectively manage a sprint, it is important to establish clear deadlines. The expected deadline for this particular sprint should be determined in advance. This allows for greater accountability and helps to keep the project on track. |
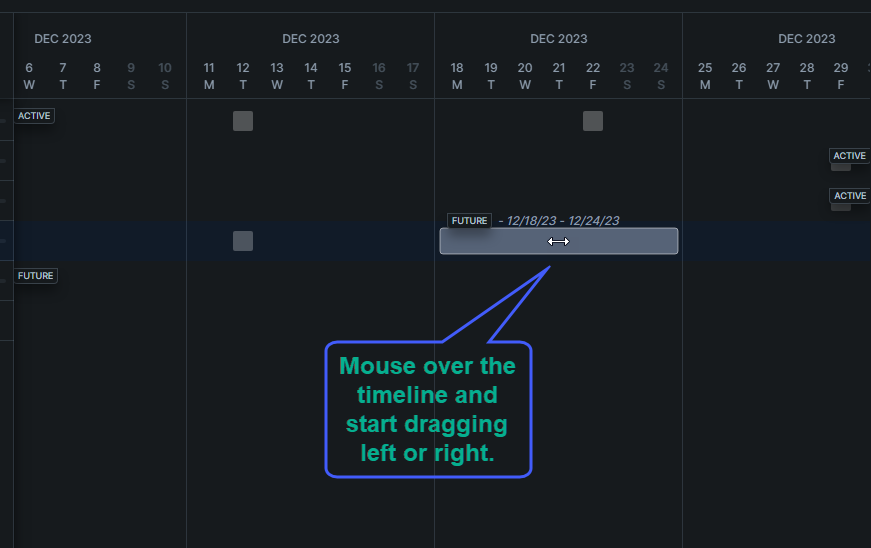
| Editing the timeline | On the timeline view, drag the slider for the selected sprint to adjust the time period assigned to it. The timeline can be adjusted by dragging it from any point, but do note that only the end date is changed. |
Editing the Timeline
On the timeline view, drag the slider for the selected sprint to adjust the time period assigned to it. The timeline can be adjusted by dragging it from any point, but do note that only the end date is changed.
Sorting in the Backlog View
Use the search and sort filters on the top part of the page to show only the data based on the selected criteria.

Enter a text or word in the search box to find relevant issues and display it in the list view.
Utilize the search filters to narrow down what data to display in the list.
Sprints, active, future, backlog filter

Click on this filter to choose which type of issue to display. One or multiple types can be selected.
Utilize the Find sprint search box to identify which type the criteria belongs to. The counter will display how many hits are found for each type.
Click Apply selection to confirm and apply the selected types for search. Click Clear if you want to clear and reset the selection to default.
Activity filter

Click on this filter to choose interval on activity dates. Default filter is All.
Click on the choose interval dropdown to display available options. Choose Custom to set a specific date for the activity that you wanted to show.
Click Clear if you want to reset this filter to default.
Project filter

Click on this filter and select the specific project you want to search in. Use the search box to narrow down your project list if you have multiple projects.
Assignee filter
For this filter, select one or more users to show only Jira issues that were assigned to the selected user(s). Default filter is All.
Clear All
Click this function to reset all search filter settings to default.
When you are finished setting up the filters, click Search to start the search.
Sorting using the column headers
Click on the following column headers to toggle ascending or descending sorting of the list view by:
-
Rank — This column displays the ranking of items in the list view.
-
Issue Name — This column shows the name or title of each Jira issue.
-
Priority — This column indicates the priority level assigned to each Jira issue.
-
Assignee Name — In this column, you can find the name of the person assigned to work on each Jira issue.
-
Status — The status column represents the current state or progress of each Jira issue.
More on Team Insights for Jira features
Backlog View (this page)
