
Last updated: March 2026
Connect specific single git repositories using Git Integration for Jira.
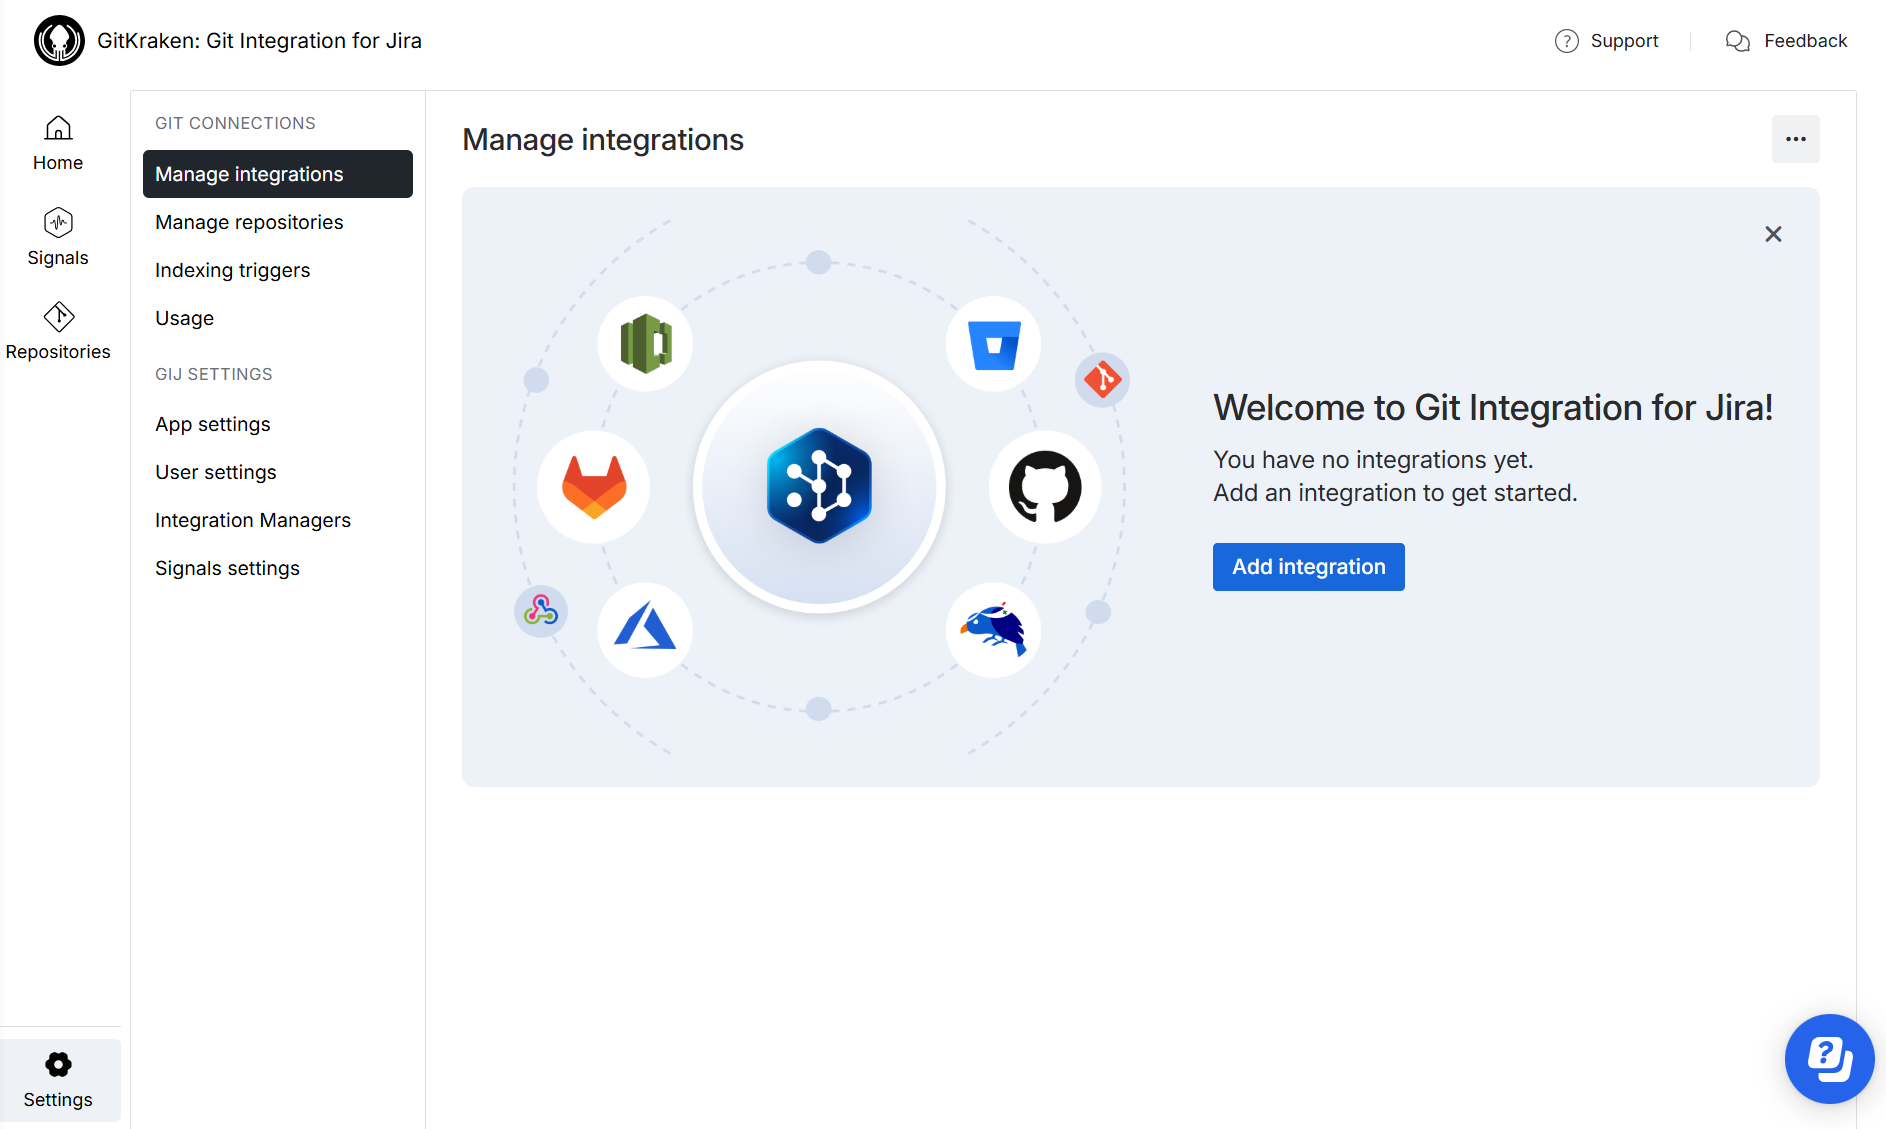
Step 1
On the Manage integrations page, click Add integration.
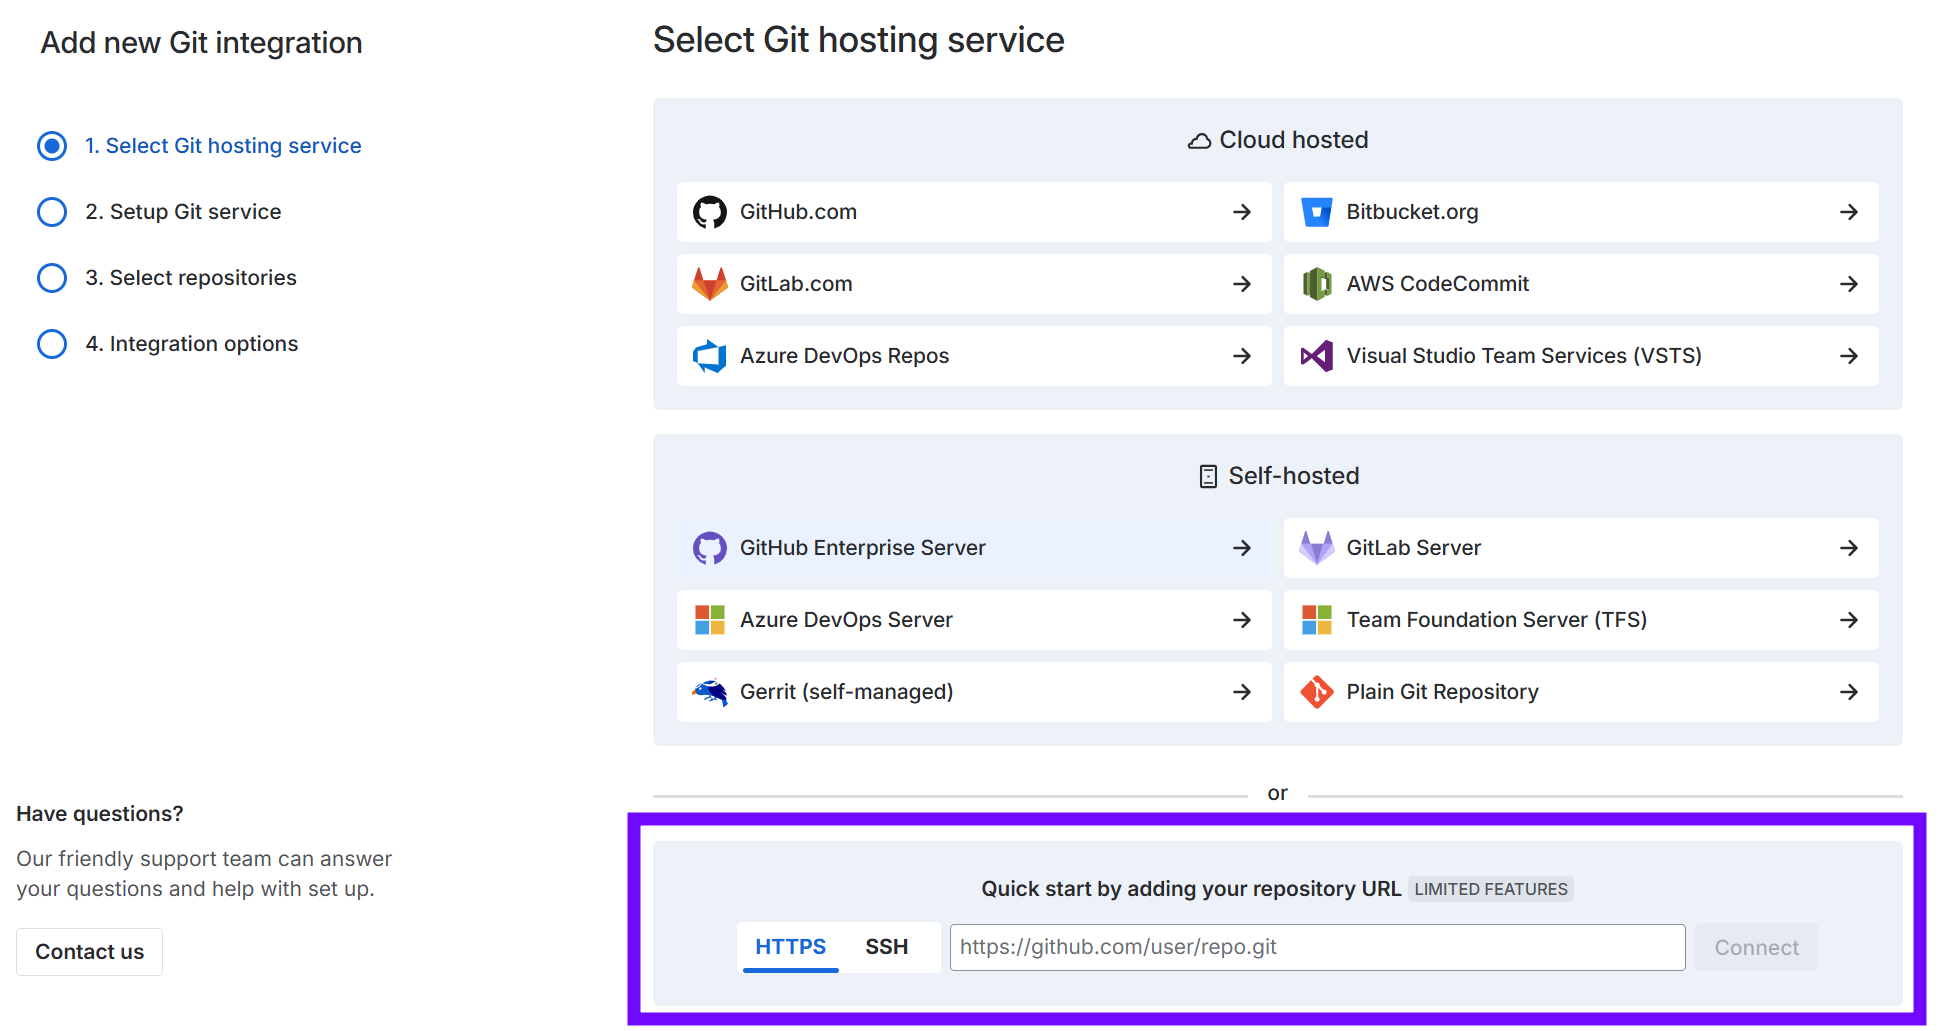
Step 2
On the Git hosting service selection screen, use the Quick start section by pasting the git clone URL in the provided box (HTTPS or SSH), then click Connect to proceed.
You can also click Plain Git Repository to connect single git repositories.
Step 3
Set up the integration depending on the type of git clone URL you are using. Enter the git clone URL into the Host URL field. The login form automatically adjusts to the type of URL provided.
3a. HTTPS Authentication

Provide login credentials as required, then click Add integration to complete this setup.
3b. SSH Authentication
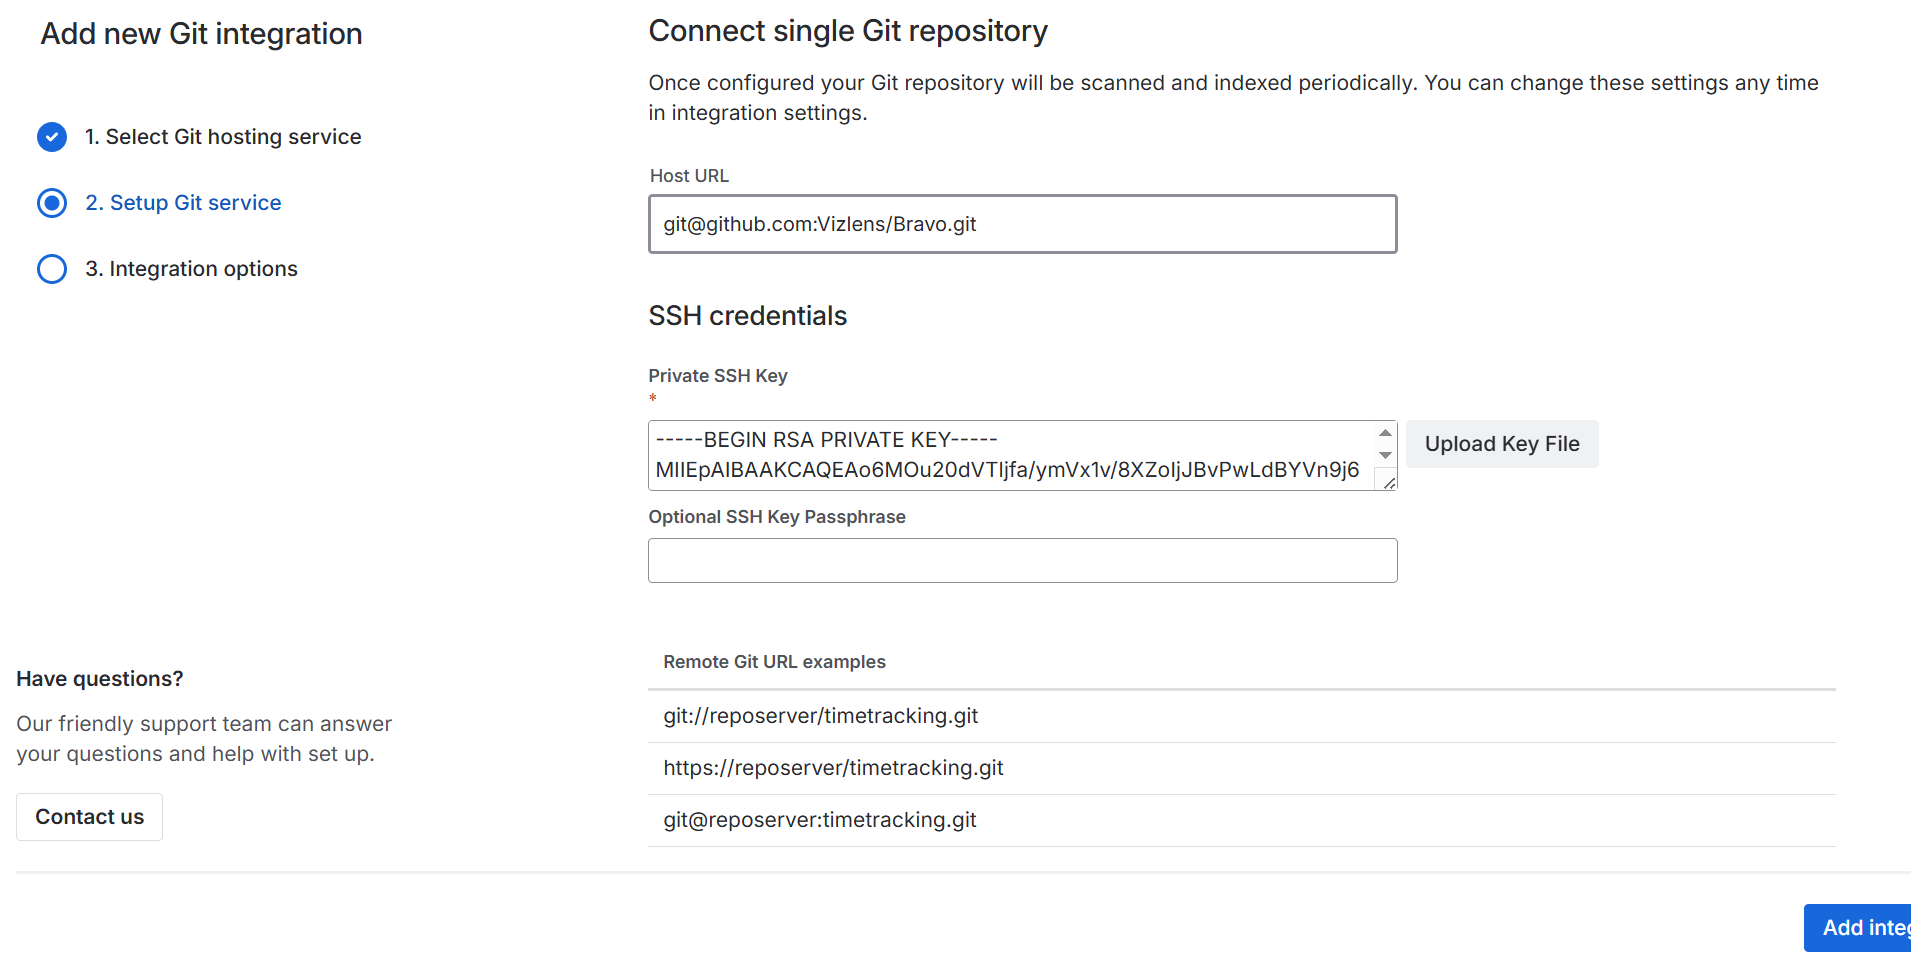
Provide SSH credentials as required, then click Add integration to complete this setup.
If the generated SSH key pair has a passphrase, enter the Passphrase for your private key.
When setting up repositories with Git Integration for Jira, you need the necessary access permissions on the private key in the Git server to proceed.
Setup Complete
After completing the setup, the wizard indexes the git repository to build change history. This completes the setup, and the newly added repository appears in the integration list on the Manage integrations page.
Prev: Using the Git service integration wizard
Next: Self-signed HTTPS integration
