- Pushes
- Pull requests
Configure GitHub Webhooks
-
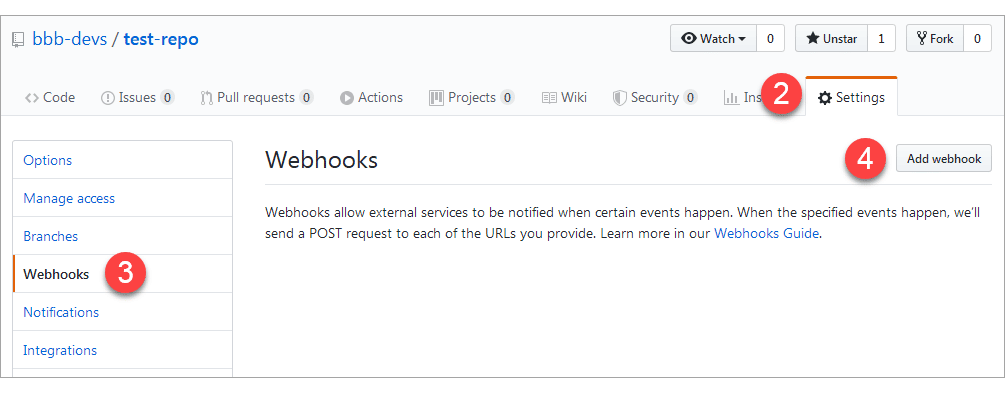
Log in to your GitHub account and select a repository.

-
Go to Settings ➜ Webhooks (sidebar).
-
Click Add webhook.

-
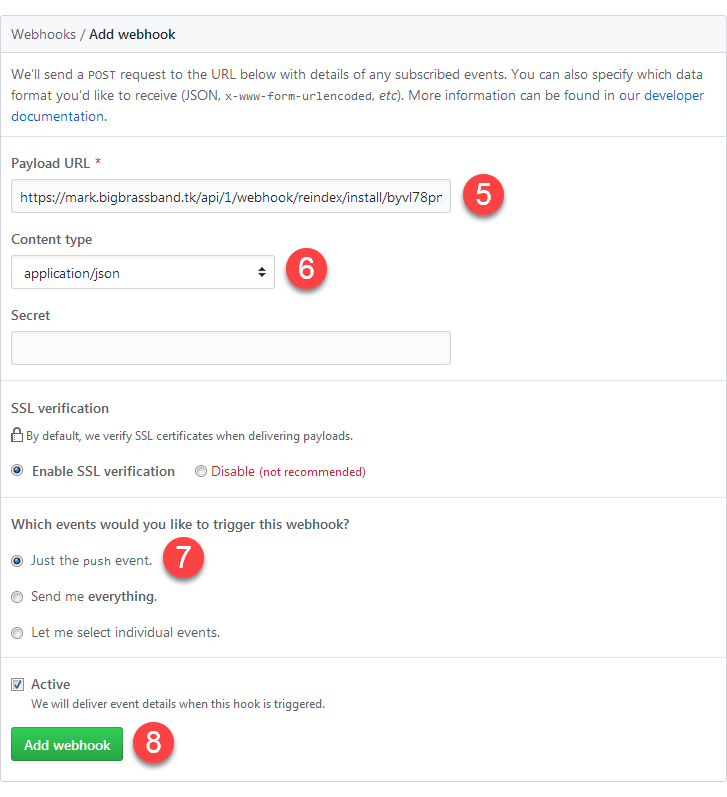
Configure the webhook:
-
Payload URL: Paste the Secret URL from Git Integration for Jira ➜ Indexing triggers page

-
Content type: Select application/json
-
Secret: Enter the Secret key from the Indexing triggers page
-
-
Under Which events would you like to trigger this webhook?, select Just the push event for commits only.
-
Leave Active enabled.
-
Click Add webhook.
Enable Pull Request Webhooks
To receive both commit and pull request events:
-
Go to your repository’s Settings ➜ Webhooks.
-
Edit your existing webhook or create a new one.
-
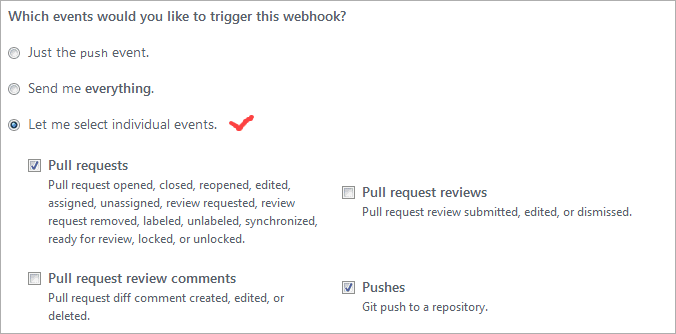
Under Which events would you like to trigger this webhook?, select Let me select individual events.
-
Enable both Pushes and Pull requests.

-
Click Update webhook or Add webhook.
Event Trigger Options
| Option | Behavior | Recommended |
|---|---|---|
| Just the push event | Commits only | For basic indexing |
| Send me everything | All events (very verbose) | Not recommended |
| Let me select individual events | Choose Pushes + Pull requests | Recommended for full functionality |
Automatic Webhook Registration
Indexing triggers are automatically registered for each GitHub repository connected to Jira Cloud. For automatic registration to work, the connecting GitHub user must be:
- The Organization Owner, OR
- Have repository ADMIN rights
Last updated: December 2025
