
This page contains steps for creating personal access tokens (PATs) for specific git hosts. Use the table of contents to navigate to the selected git host.
What’s on this page:
- GitHub and GitHub Enterprise
- GitLab, GitLab CE and GitLab EE
- Azure DevOps and Visual Studio Team Services (VSTS)
- Team Foundation Server (TFS) 2017 and newer
- Azure DevOps Server
- AWS CodeCommit
GitHub and GitHub Enterprise
If two-factor authentication is enabled for your GitHub account, you will need to create a Personal Access Token (PAT) to access your git repositories. Enable two-factor authentication in your GitHub account for increased security.
While instructions from GitHub works just fine, here are some specific instructions to get you up and running:
-
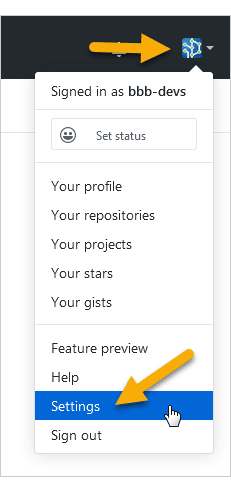
Login to your GitHub account then go to your profile settings.
-
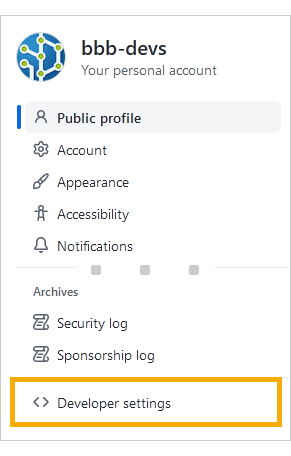
On your sidebar, click Developer settings.
-
On the following screen, click Personal access tokens on the sidebar.
-
Generate a new personal access token (PAT) by clicking Generate new token.
-
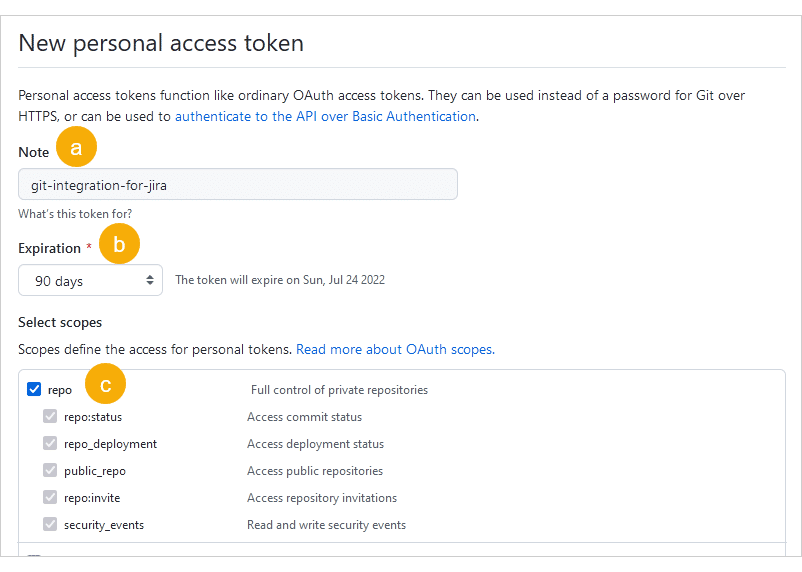
The following screen is displayed.
-
On the Note field, enter a descriptive name for this PAT. For example,
git-integration-for-jira. -
For Expiration (required), set for how long the token will expire or set it according to your organization’s rules and policies.
-
For Select scopes, tick the repo scope (this also automatically selects all the scopes under it – keep this setting).
-
-
Click Generate token to complete this setup.
-
Copy the token (write it down or save it somewhere safe – this is the ONLY time you’ll see the token).
GitLab, GitLab CE and GitLab EE
GitLab introduced personal access tokens (PAT) since version 8.8 and now (v10+) prefers this type of authentication for accessing the git repositories. Service users are strongly advised to switch from using username/password to using Personal Access Tokens (PAT) for GitLab.
If two-factor authentication is enabled for your GitLab account, you will need to create a PAT to access your git repositories. Enable two-factor authentication in your GitLab account for increased security.
While instructions from GitLab works just fine, here are some specific instructions to get you up and running:
-
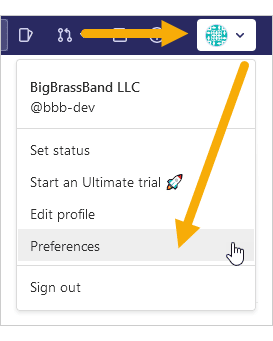
Login to your GitLab account then go to your profile settings (menu Profile ➜ Preferences).
-
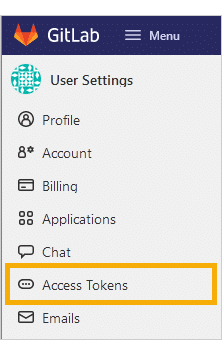
On the sidebar, click Access Tokens.
-
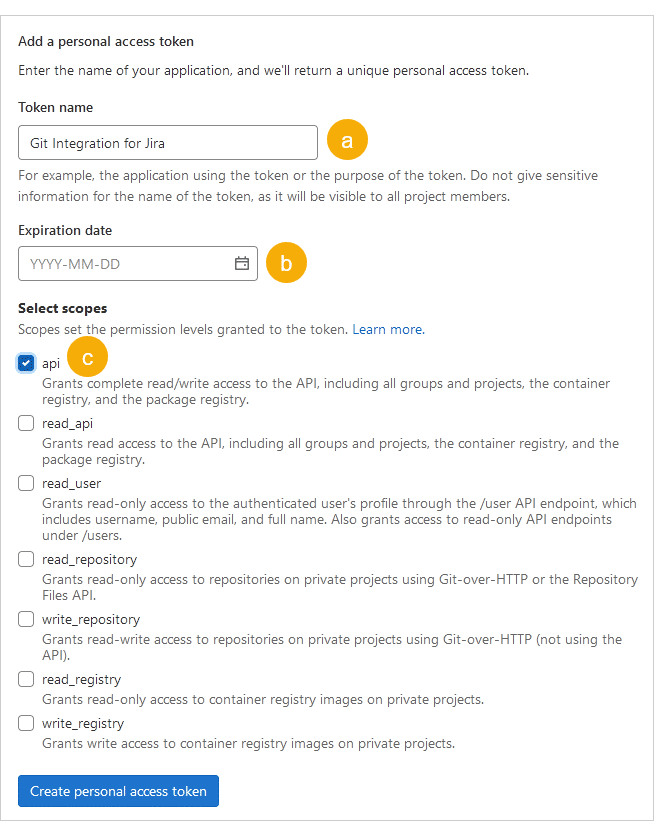
The following screen is displayed.
-
Give the token a descriptive Name. (For example, “Git Integration for Jira”)
-
Leave the Expiration date field blank or set the expiration date according to your organization’s rules and policies.
-
Select the api scope.
-
-
Click Create personal access token to complete this setup.
-
Copy the token – (Write it down or be sure to save it. This is the ONLY time you’ll see the token)
Azure DevOps and Visual Studio Team Services (VSTS)
Creating a personal access token will allow control on how a service user accesses specific resources from your git repositories. PATs can give you access to Azure Repos without using your username or password directly.
If you have not yet generated a personal access token (PAT):
-
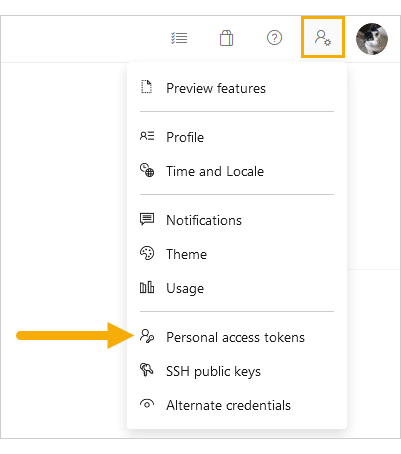
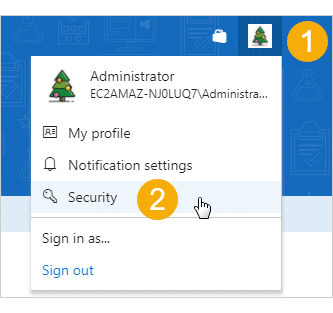
On the VSTS/Azure portal dashboard, click the user settings icon on the top right corner of the page.
-
Click Personal access tokens. You will be taken to the Personal Access Tokens configuration page.
-
Click
 New Token. The following dialog is displayed.
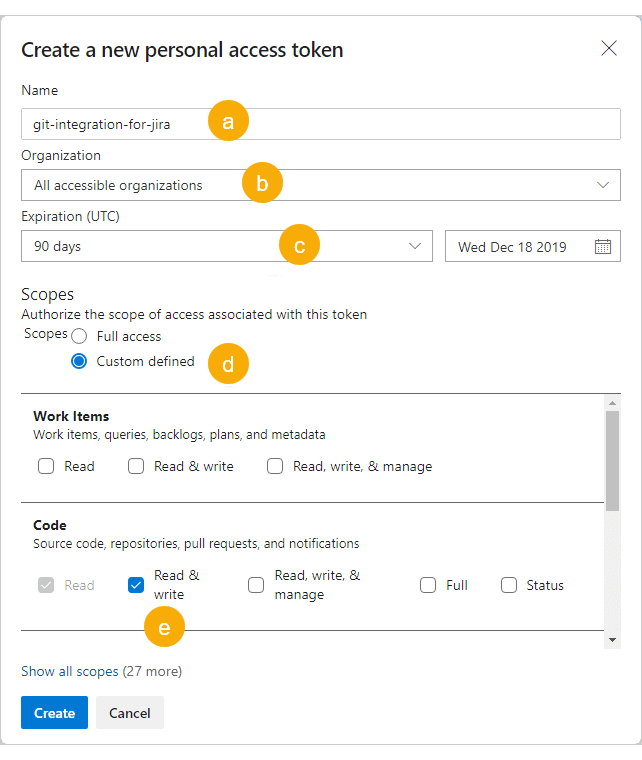
-
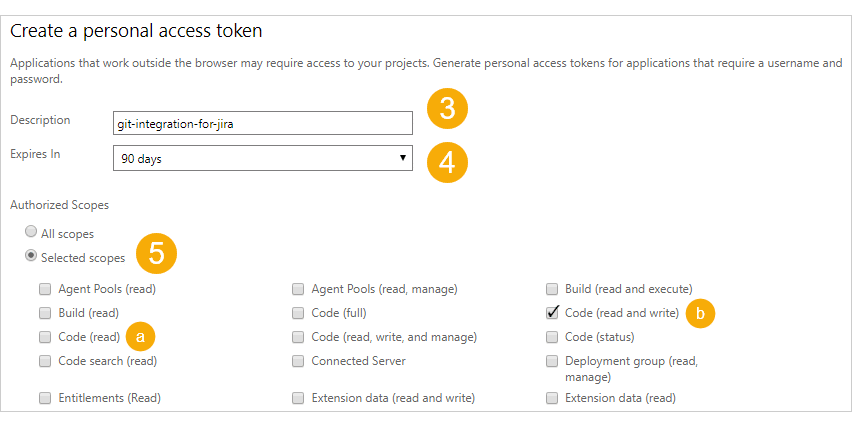
Enter a descriptive name for your PAT. Since this is a connection to Jira, you can name it, for example,
git-integration-for-jira. -

-
Set the desired lifespan of your token. Set it to Custom defined if you want to choose a longer expiration date.
-
On the Scopes section, set it to Custom defined.
-
Set the Code section to Read & write.
-
-
Click Create to finish creating your PAT.
When you’re done, make sure to copy and save the token. This token can be used as your password.
Code (read)– This scope allows only to view commits and smart commits, and browse repositories (if enabled) of connected VSTS/Azure repositories inside Jira. This is the recommended scope for regular users.Code (read and write)– This scope has the `Code (read)` functions plus the ability to create branches and pull requests to specified VSTS/Azure repositories via developer panel of a Jira issue. This is the recommended scope for developers and contributors.
Team Foundation Server (TFS) 2017 and newer
TFS 2017 and newer can use personal access token for on-premises TFS installations. This will allow control on how a service user accesses specific resources from your git repositories. PATs can give you access to Azure Repos without using your username or password directly.
Follow the steps below, if you have not yet generated a personal access token (PAT) for your user account:
-
On the TFS portal dashboard, clicking the user settings icon on the top right corner of the page then click Security.
-
Click Add on the Personal Access Token page to see the following screen.
Enter a meaningful name as Description.
-
Set the lifespan of your token as desired.
-
On the Authorized Scopes section, set it to Selected scopes then enable one of the settings that will be assigned to this service user:
-
For viewing commits, smart commits and browse repositories inside Jira, the recommended scope is code (read).
-
For having the above access privilege plus branch and pull request creation via developer panel of a Jira issue, the recommended scope is code (read and write).
-
-
Click Create token to create this PAT with the specified scope.
When you’re done, make sure to copy and save the token. This token can be used as your password.
Azure DevOps Server
TFS 2017 and newer can use personal access token for on-premises Azure DevOps Server installations. This will allow control on how a service user accesses specific resources from your git repositories. PATs can give you access to Azure Repos without using your username or password directly.
Follow the steps below, if you have not yet generated a personal access token (PAT) for your user account:
-
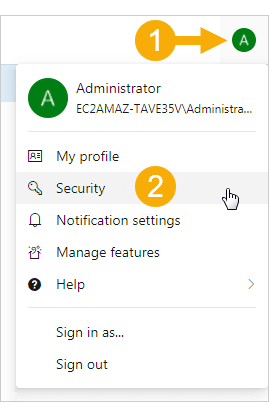
On the Azure DevOps Server portal dashboard, open the account settings by clicking the user profile icon on the top right corner of the page then click Security.
-
On the Personal Access Token page, click
Add to see the following screen.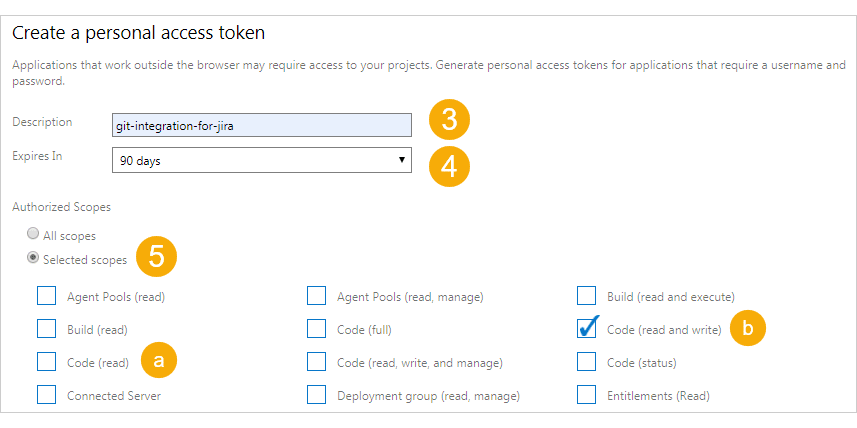
-
Enter a meaningful name in the Description field.
-
Set the lifespan of the PAT as desired.
-
On the Authorized Scopes section, set it to Selected scopes then enable one of the settings that will be assigned to this service user:
-
For viewing commits, smart commits and browse repositories inside Jira, the recommended scope is code (read).
-
For having the above access privilege plus branch and pull request creation via developer panel of a Jira issue, the recommended scope is code (read and write).
-
-
Click Create token to create this PAT with the specified scope.
When you’re done, make sure to copy and save the token. This token can be used as your password.
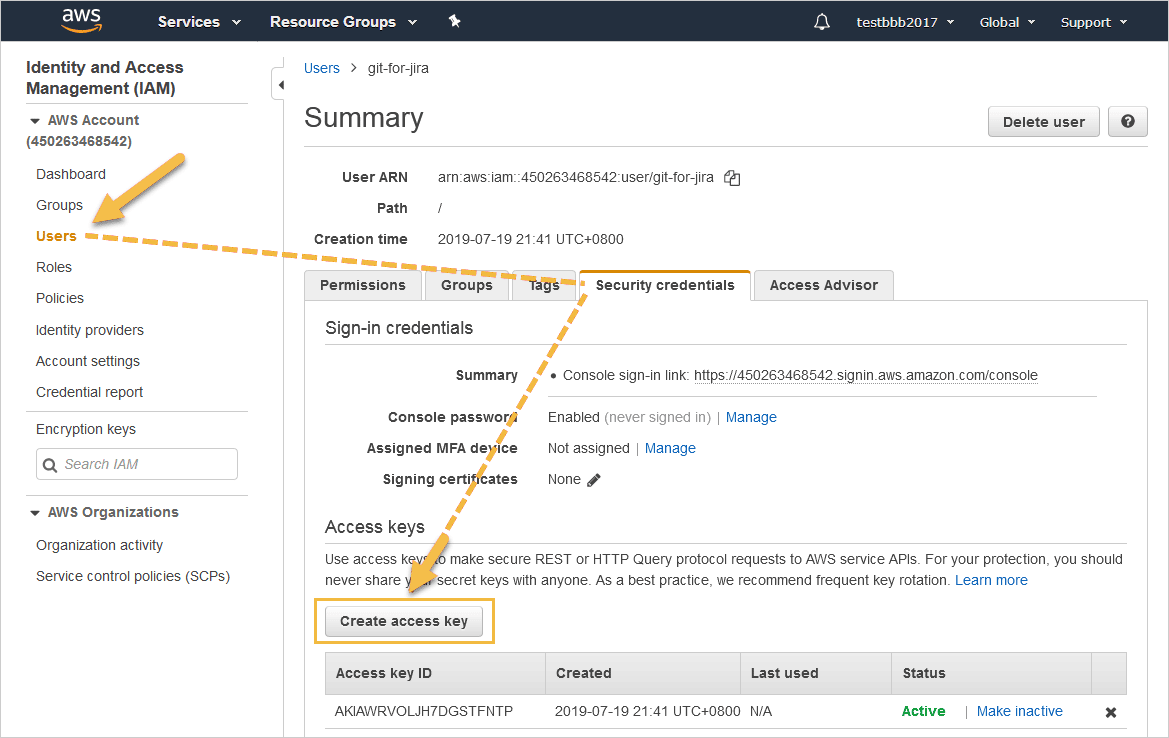
AWS CodeCommit
While AWS CodeCommit does offer not personal access tokens for authentication, an IAM Access Key ID and Secret Access Key can be used in place of a personal access token.
The following AWS CodeCommit IAM Policy actions must be granted to an IAM user to create branches and/or pull requests in the Git Integration for Jira app:
`CodeCommit:Write:CreateBranch`

`CodeCommit:Write:CreatePullRequest`
To create a new Access Key ID and Secret Access Key, go to IAM ➜ Users ➜ Security credentials ➜ Create access key.
How do I update the personal access token (PAT) for an integration or repository connection?
INTEGRATION
-
On your Jira dashboard, navigate to the Git menu then click Manage repositories. The Manage git repositories page is displayed.
-
On your selected integration, click on the
 Actions dropdown then click Edit integration connection settings.
 -
Paste the token into the Personal Access Token field.
-
Click Update to save the settings.
The PAT is now updated for the selected integration/repository.
REPOSTORY
-
On your Jira dashboard, navigate to the Git menu then click Manage repositories. The Manage git repositories page is displayed.
-
On your selected integration, click on the
Actions dropdown then click Edit repository settings. -
Under Repository settings group, paste the token into the Password/PAT field
-
Click Update to save the settings.
