
The Branches section lists the branches names, linking the selected branch to view via the Repository Browser.
The branch is displayed on the developer panel and is also associated to the mentioned Jira issue by fulfilling one of the following conditions:
-
The branch name contains the issue key. For example,
TEST-1-fix-binaries. -
The branch has associated unmerged commits with the issue key in the comments. For example,
TEST-1 fixed-binaries.
The branch panel will show a summary of all the unmerged branches (regardless of the number of commits and the number of repositories) — that either contain the name of the issue or have unmerged commits that reference the issue. This also gives users a view into the behind/ ahead status and provide links to the Repository Browser for those branch names.
TST-1-new-branch branch will be visible on the developer panel of the TST-1 issue page even if the TST-1-new-branch branch has just been forked from master and does not have any new commit.
Create branch
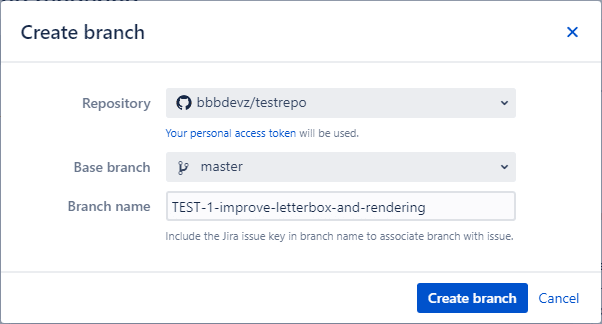
Click Create branch to create a branch for the selected repository. The following dialog is displayed:
-
Select a Repository.
GITHUB If there are several repositories with the same name, the listed GitHub repositories will have their names attached with a GitHub organization name. For example,
BigBrassBand/second-webhook-test-repo.GITLAB If there are several repositories with the same name, the listed GitLab repositories will have their names attached with a GitLab owner name. For example,
johnsmith/second-webhook-test-repo. -
Set Base branch and Branch name.
-
The Git Integration for Jira app will populate the Branch name field according to the Branch Name Template declared in the Git integration settings via General Settings. Enter a descriptive name or leave it as is (recommended).
Create branch (Require user PAT enabled)
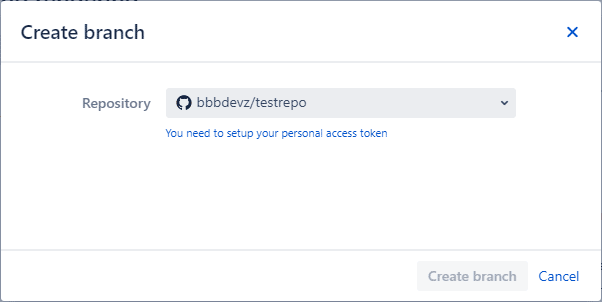
If the Require User PAT option is enabled in the Integration Settings and a user PAT isn’t configured yet for the selected repository via Repository Browser, the following dialog is displayed instead:
-
Click the link label to setup the PAT. This will immediately open the Setup personal access dialog and the user should enter a valid PAT to continue creating branches.
-
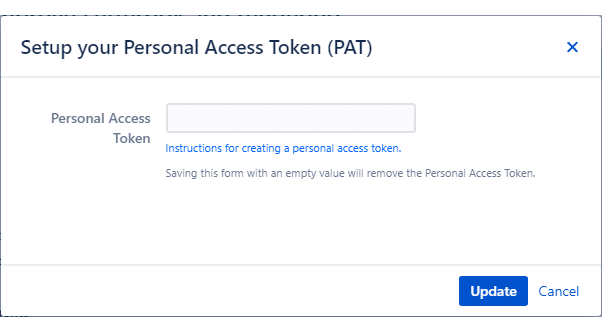
Paste a valid PAT of the current user to proceed. Invalid PATs will fail the branch creation process.
-
Click Update to use this PAT and save it to the current user profile. Otherwise, click Cancel to discard setting up PAT for this repository.
-
After the above steps have been taken, the users will be able to proceed with branch creation.
-
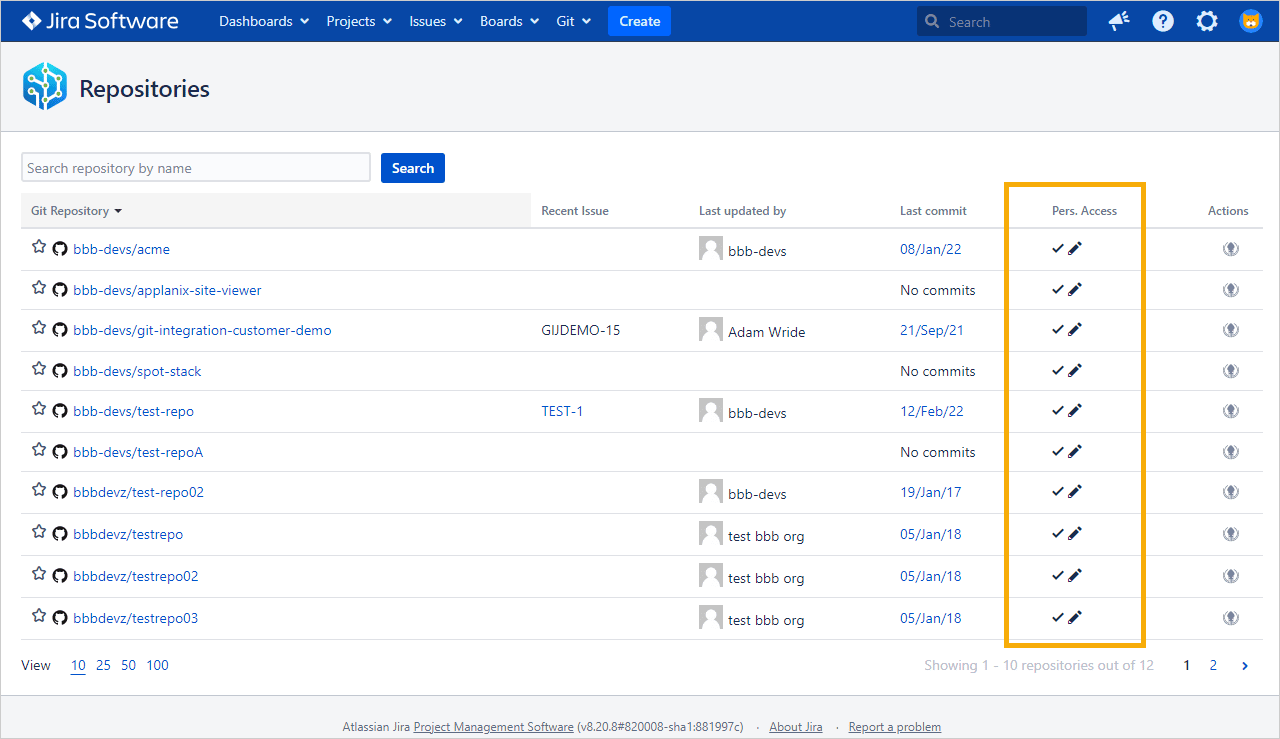
The Setup PAT dialog can also be accessed on the Repository Browser under Pers. Access column. This will display connected git repositories and which repositories have Required User PAT feature enabled..
-
Click
 to setup a PAT for the selected repository. The PAT setup dialog appears.
-
Paste a valid PAT of the current user to proceed. Invalid PATs will fail the branch creation process.
-
Click Update to use this PAT and save it to the current user profile. Otherwise, click Cancel to discard setting up PAT for this repository.
-
After the above steps have been taken, the users will be able to proceed with branch creation.
-
The adjacent checkmark indicates that the repository has configured PAT.
Click Create branch on the Create Branch dialog. The newly-created branch is now listed in the developer panel under Branches.
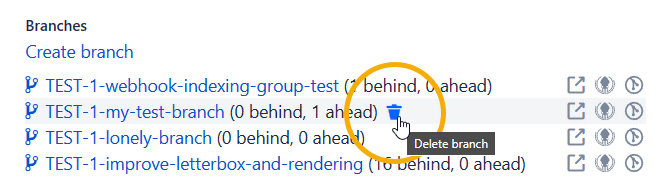
Hover the mouse pointer on the branch label to reveal the Delete icon. Click this icon to remove the created branch from the Branch list. This action will also delete it from the repository in which it was created.
Commits ahead and behind
The numbers ahead and behind represent the number of commits that are ahead/behind the main branch:
-
Ahead – number of commits in the branch which are not merged to the main branch.
-
Behind – number of commits in the main branch which are not merged to the branch.
Clicking on the branch text links will open that issue in the Repository Browser. If Repository Browser is disabled for this repository, the text links will be inactive.
The “main” branch is now displayed under the Branches list — if this setting is enabled in the General settings.
