
This process requires a git host account (e.g. GitHub/GitLab/VSTS etc.) Use the Add new integration panel in Jira Cloud/Server to connect git repositories from git hosts to Jira. This is the recommended way of integrating your multiple git repositories to Jira.
-
On your Jira dashboard menu, click Git ➜ Manage repositories.
-
Click a git host on the Add new integration panel.
Select from the supported git host integration (or click the integration links below to follow to their own integration guide):
-
The Add new integration Wizard is displayed.
-
Enter login credentials. If two-factor authentication is enabled for your git host, enter the token as the password instead.
-
Follow screen instructions to import git repositories.
-
-
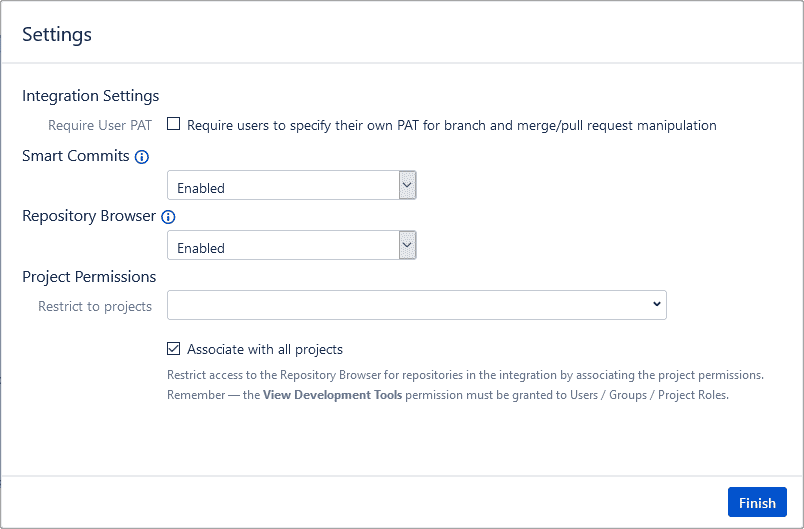
On the following screen, change settings as required or leave the default settings as is.
-
On the Integration Settings, setting the Require User PAT option to
ONwill require users to provide PAT which will be used for branch and merge/pull request creation/deletion (via the developer panel on the Jira issue page). This is a security feature of Git Integration for Jira app for git hosts that support two-factor authentication. This option requires the Repository Browser feature to be enabled. -
Jira administrators can configure the Require User PAT setting when connecting a 2FA git host via the Add new integration panel or via Edit integration settings in the Manage repositories page. If set to
ON, Jira Users are required to set their PAT for specific repositories via Repository Browser. The setup PAT link is accessible via the developer panel on Create Branch or Create Pull/Merge Request dialogs in the Jira issue page. This setting is only available for auto-connected git hosts configured via Add new integration wizard with Git Integration for Jira app.
 -
For more information on Project permissions and repository associations, see Setting Project Permissions.
-
5. Click Finish to accept the settings and complete the setup.
More related articles on integration basics
Connecting to a git host account via Add new integration panel (this page)
Connecting to a single git repository (HTTPS | SSH)
