
VERSION 4.3+
JIRA SERVER / DATA CENTER — AVAILABLE!
JIRA CLOUD — AVAILABLE!
Jira automation allows teams and groups to control processes and workflows using a rule to automate actions within Jira based on criteria.
The automation rules have 3 parts:
-
Triggers – Listens for events and starts the execution of a rule when a set condition is met.
-
Conditions – Set the scope of a rule with specific events tailored for your team.
-
Actions – Set automated tasks to perform when a condition is met.
Permissions
Any user with Browser Project permissions can create a rule.
Git Integration for Jira app supported triggers
We currently support the following triggers:
-
Branch created
-
Commit created
-
Pull request created
-
Pull request merged
-
Pull request declined
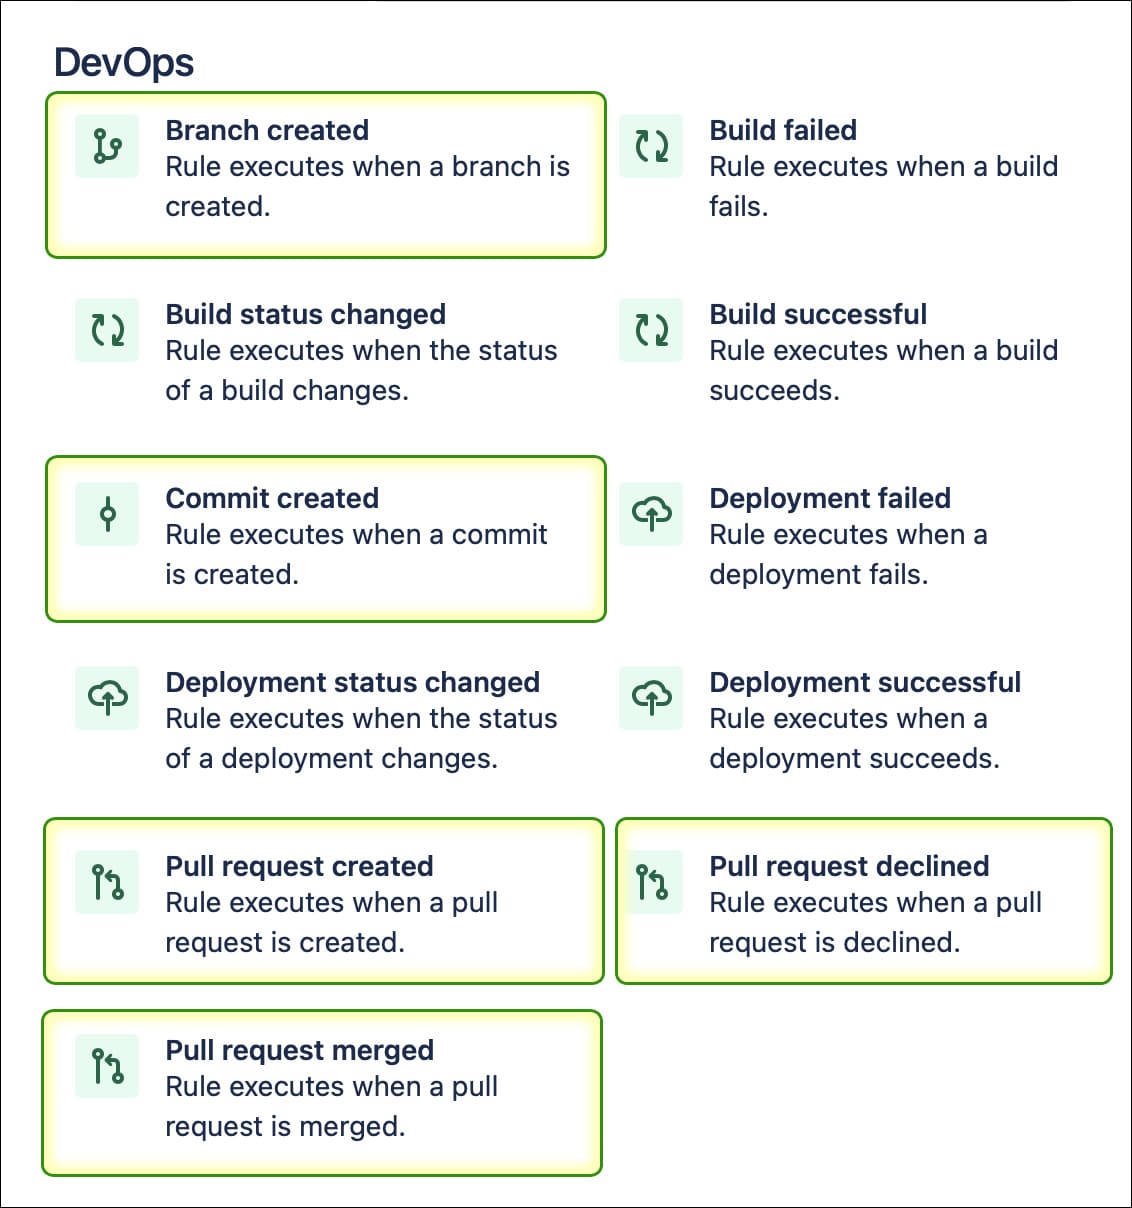
And thus, we will support all of these triggers in the coming releases. The presence of these triggers extends the automation capabilities of Jira by providing additional conditions.
Getting started with Automation for Jira
On Jira Cloud, the Automation for Jira app has been completely integrated into Jira Cloud and no longer exists as a standalone app in the Atlassian Marketplace.
For Jira Data Center 9.0 and later, there is no need to download Automation for Jira app separately as the functionality is already included in this version of Jira.
Downloading the app
-
Go to Automation for Jira – Data Center and Server and start the free trial or buy it now.
-
Login to your Atlassian account when prompted and generate a new license for the trial.
-
IMPORTANT! Make sure to copy your license and save it.
-
Click Download to download the app to your local system.
Installing the app
REQUIRES ADMIN ACCESS
-
On your Jira Server/Data Center instance, navigate to Manage apps (Jira settings ➜ Apps ➜ Manage apps).
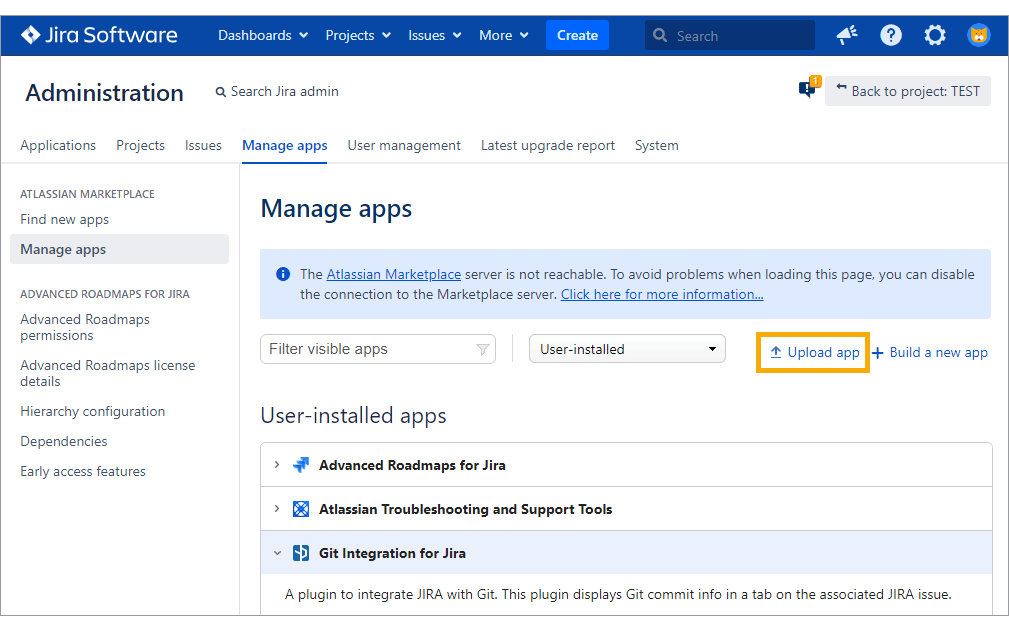
-
Click Upload app and locate the downloaded A4J JAR file.
-
After the installation, look under the User-installed apps and open the Automation for Jira tab.
-
Paste the license key into the provided box then click Update.
General settings for Automation for Jira (A4J)
ADMINS
Before you can use the full extent of this feature, make sure that it is enabled in the Git Integration for Jira app General settings.

How to set up automation templates
Create a rule to configure triggers and actions for automating tasks. There are two levels:
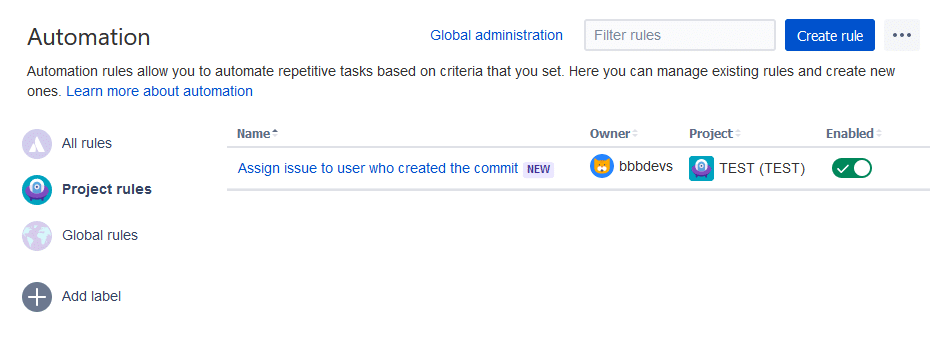
Project level (projects)
Project rules only apply within specific projects.
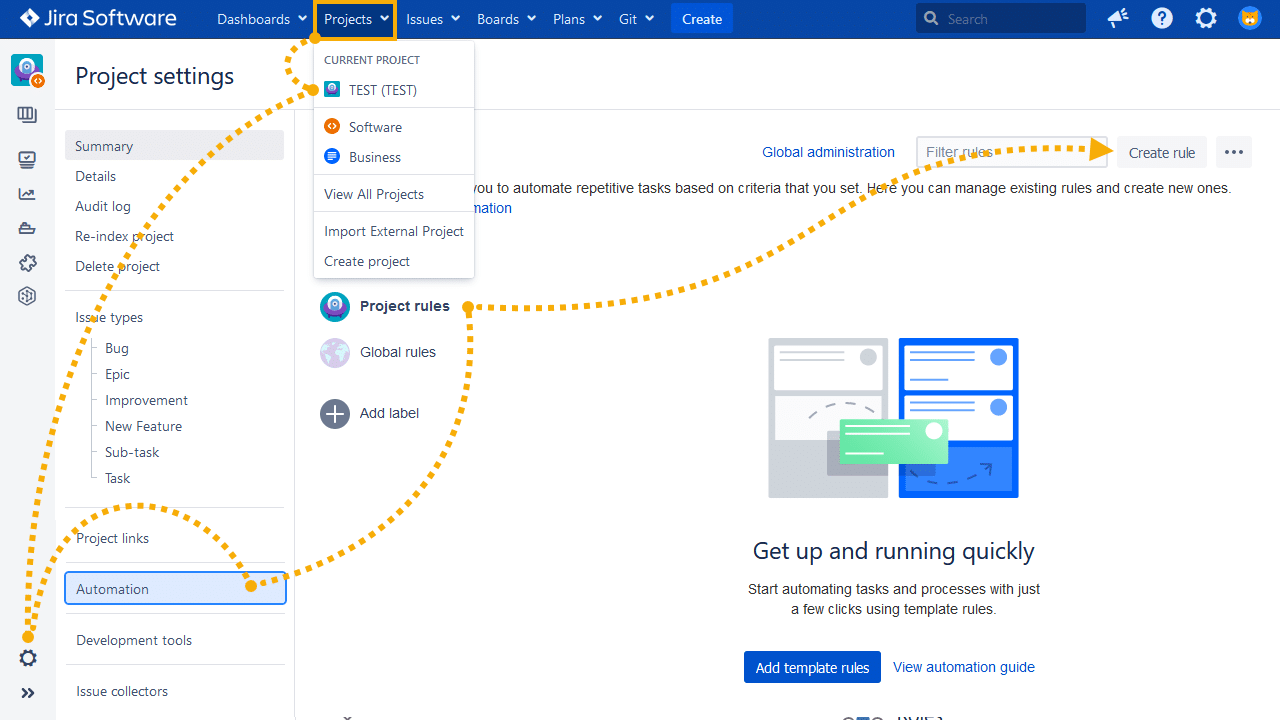
-
Open a project to work on, then go to
 Project settings.
 -
On the Project settings sidebar, click Automation.
-
On the Automation screen, click Project rules.
- OPTIONAL Click Add template rules to add built-in preset automation rules generated by Git Integration for Jira app to the current project.
-
Click Create rule (adjacent to …) to manually create a new automation rule for the current project. Skip the tour, if prompted, then proceed to start creating the new rule.
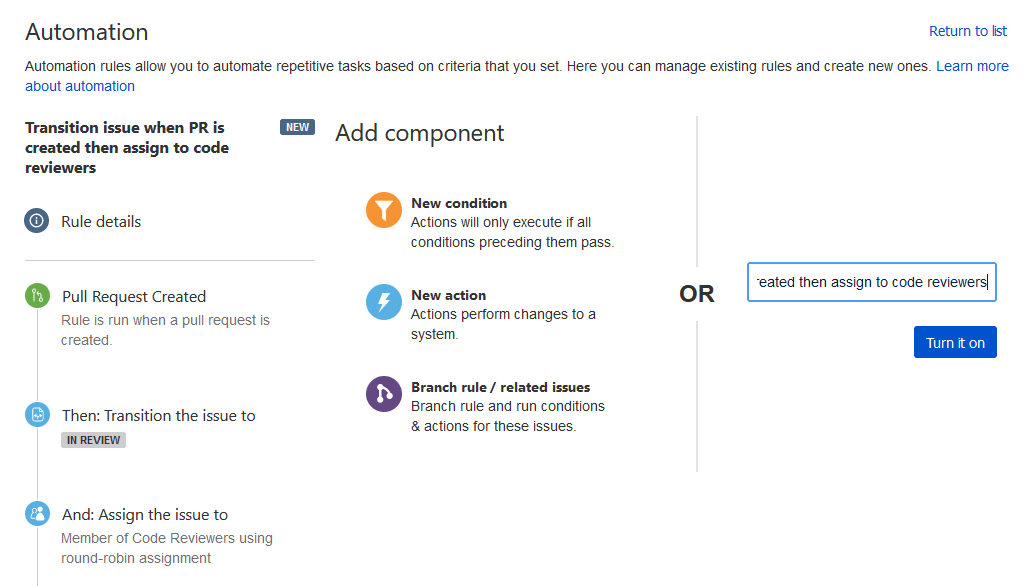
-
Configure triggers, conditions and actions for this rule.
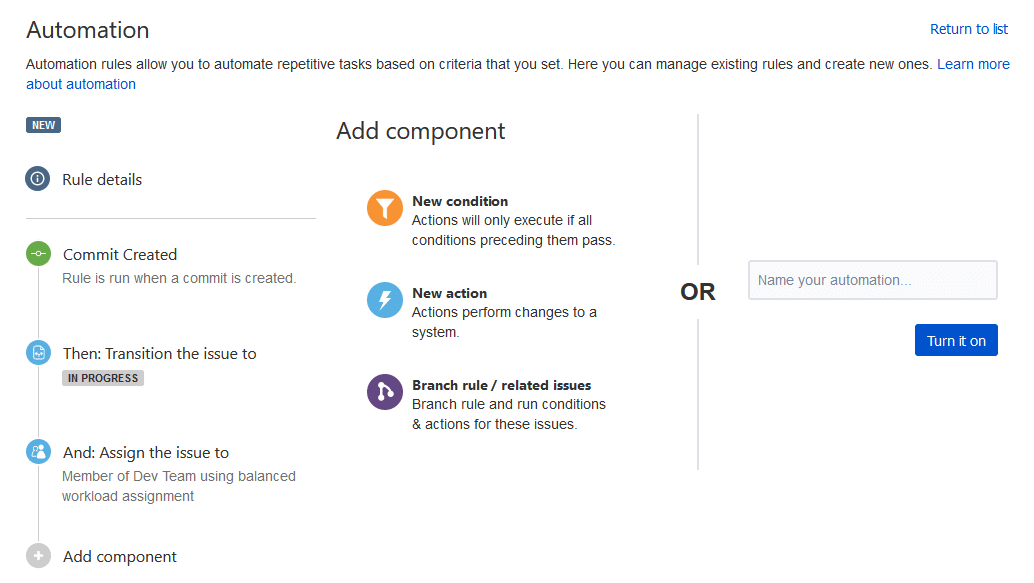
-
For the above example:
-
TRIGGER – This rule will trigger when a pull request is created.
-
CONDITION – When the status of the Jira issue is IN PROGRESS, it will perform the actions below.
-
ACTIONS – If the condition(s) are met, the rule will fire up the action(s) — assigns the issue to a specific group REVIEWERS and transitions the Jira issue to IN REVIEW.
-
-
Enter a descriptive name for this rule in the provided box.
-
Click Turn it on to publish and activate it. The new rule is added to the automation list.
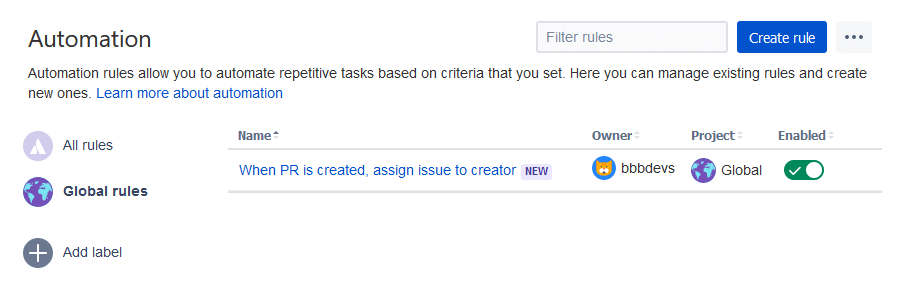
Global administration level (system)
Global rules apply to all projects. If there are similar automation rule triggers from one or more projects, the global rule is executed first.
The steps for creating automation rules for global level is exactly the same as the Project level instructions.
-
Access the global automation rules via
 Jira settings ➜ System.
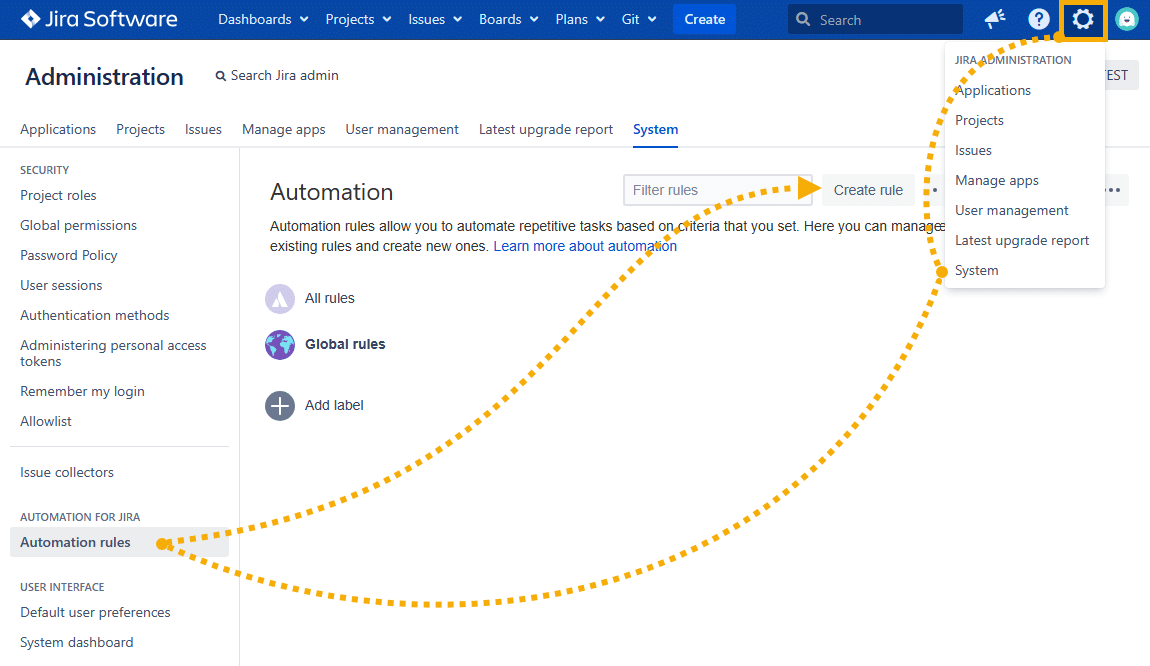
-
On the sidebar under Automation for Jira, click Automation rules.
-
Click Create rules.
-
Configure triggers, conditions and actions for this rule.
-
TRIGGER – This rule will trigger when a commit is created.
-
CONDITION – When the ASSIGNEE is the commit author, it will perform the action(s) below.
-
ACTIONS – If the condition(s) are met, the rule will fire up the actions – assign the issue to a specific group TESTERS and transitions the Jira issue to IN TESTING.
-
-
Enter a descriptive name for this rule in the provided box.
-
Click Turn it on to publish and activate it. The new rule is added to the automation list.
Known issue
Advanced Examples
For advanced examples, see sub-page Automation Advanced Examples.
More related topics about Jira automation
See more Git Integration for Jira app features
Manager permissions (Git Integration for Jira Data Center)
Cancel indexing (Git Integration for Jira Data Center)
Pull request filters (Git Integration for Jira Data Center)
Tag filters (Git Integration for Jira Data Center)
Indexing queue viewer (Git Integration for Jira Data Center)
Deep linking feature (Git Integration for Jira Data Center)
GitHub App integration (Git Integration for Jira Data Center)
Git Integration + ScriptRunner (Git Integration for Jira Data Center)
Git Integration + Jira Automation (this page)
Enforced git permissions for Jira users – Features (Git Integration for Jira Data Center)
Shared reindex queue between DC nodes (Git Integration for Jira Data Center)
Smart commits overview (Git Integration for Jira Data Center)
Associate Pull/Merge Requests to Issues Based on Commits (Git Integration for Jira Data Center)
Creating branches (Git Integration for Jira Data Center)
Creating pull/merge requests (Git Integration for Jira Data Center)
Issue Git integration panel – Features (Git Integration for Jira Data Center)
