
![]()
Integrate Windows Network/Server Share with Jira Data Center
Quickly learn how to connect Windows Network or Server Share via Git Integration for Jira app.
What’s on this page:
Adding a Repository Hosted on Window Servers or Network Share
Obtain the network folder path to the project/collaboration folder.
The Connect wizard will continue without errors if the following conditions are met:
- The network credentials accessing the git repository must be the same as the user running Jira.
- The network path is not longer than 255 characters.
- The user under which Jira is running should at least have read access to network path.
Add a new network share or Windows server hosted repository via the Connect to Git Repository wizard.
1. On your Jira dashboard menu, go to Git ➜ Manage repositories.
-
Click Connect to Git Repository to open the Connect Wizard.
-
Paste the network path in the Repository Location field.
-
Configure the fetches option by clicking the Advanced setup label:
-
Continue to the next step by following the screen instructions.
-
Click Finish to complete this process.
Make sure that the network folder share name are correct and that the user has at least read access permissions to the network path.
The network/server share folder should now be connected with Jira.
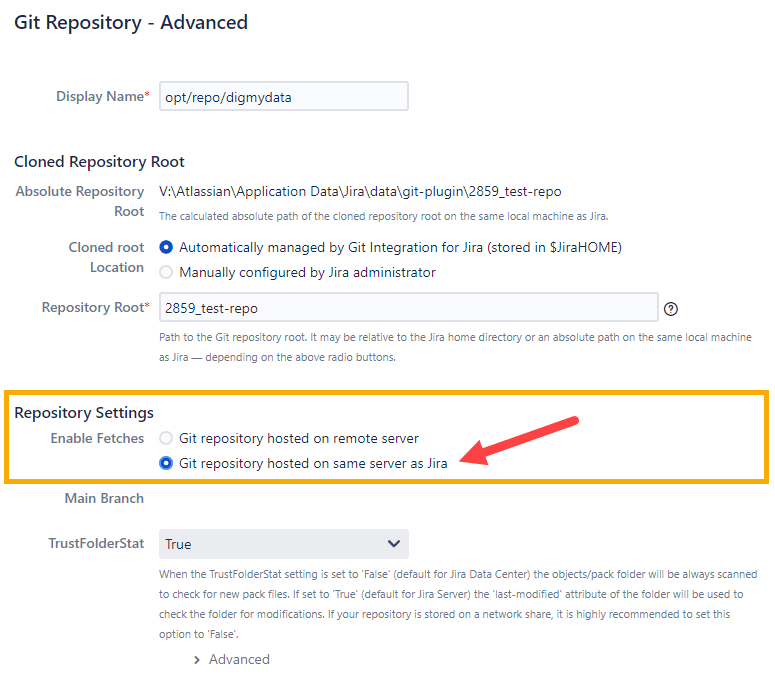
Editing Integration/Repository Settings
In the Git Repositories configuration page, edit the repository via Actions ➜ Edit repository/integration settings.
Under Repository Settings, set Enable Fetches option to Git repository hosted on the same server as Jira.
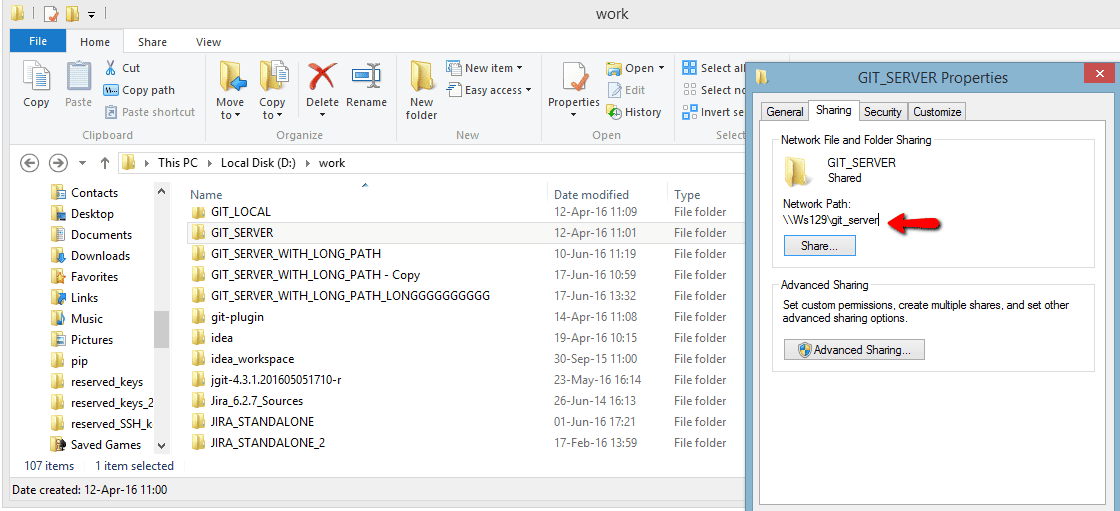
Verifying Integration Settings
Verify network folder share name by opening the shared folder properties.
For example:
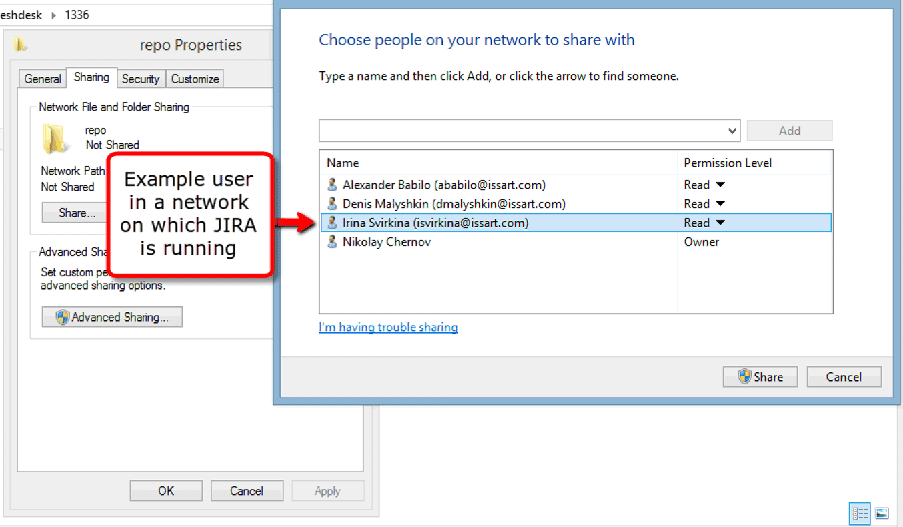
Make sure that the user has read access permissions to the network path.
For example:
Viewing Git Commits in Jira Data Center
- Perform a git commit by adding the Jira issue key in the commit message. This will associate the commit to the mentioned Jira issue.
- Open the Jira issue.
- Scroll down to the Activity panel then click the Git Commits tab.
- Click View Full Commit to view the code diff.
More Integration Guides
GitHub.com (Git Integration for Jira Data Center/Server)
GitHub Enterprise Server (Git Integration for Jira Data Center/Server)
GitHub App integration (Git Integration for Jira Data Center/Server)
GitLab.com (Git Integration for Jira Data Center/Server)
GitLab CE/EE (Git Integration for Jira Data Center/Server)
Azure DevOps | Visual Studio Team Services (VSTS) (Git Integration for Data Center/Jira Server)
Azure DevOps Server | Team Foundation Services (TFS) (Git Integration for Jira Data Center/Server)
AWS CodeCommit (Git Integration for Jira Data Center/Server)
Gerrit (Git Integration for Jira Data Center/Server)
Bitbucket Server (Git Integration for Jira Data Center/Server)
Bonobo (Git Integration for Jira Data Center/Server)
Windows Network | Server Share (this page)
Tracked Folders (Git Integration for Jira Data Center/Server)
Back to: Integration basics (Git Integration for Jira Data Center/Server)
