
Last updated: July 2025
GitKraken Automations helps you streamline your team’s workflows by codifying best practices, eliminating repetitive tasks, and proactively flagging potential issues.
Automation Examples
Teams use Automations to reduce manual effort, enforce standards, and build scalable, repeatable workflows. Here are some common use cases:
- Safe Deployments: Add a checklist for database migrations to ensure smooth rollouts.
- Critical Code Reviews: Automatically assign the right engineers to review high-impact areas of the codebase, such as a payment service.
- Security Checks: Flag changes to sensitive areas like authentication and ensure a security review is completed.
- Refactoring Guardrails: Prevent conflicting changes during refactors and trigger follow-up maintenance tasks.
- SOC 2 Compliance: Automate checklists for encryption, security scans, and documentation to meet regulatory standards.
- DevOps Enhancements: Streamline deployment pipelines, enforce pre-deployment quality checks, and manage infrastructure-as-code updates.
Note:
Currently, Automations supports GitHub and GitLab repositories.
Get Started with Automations
To begin, log in to GitKraken Automations and select Automations from the left-hand menu.
If this is your first time using Automations, you’ll see a start page where you can either create a new automation or choose from a list of suggested templates.
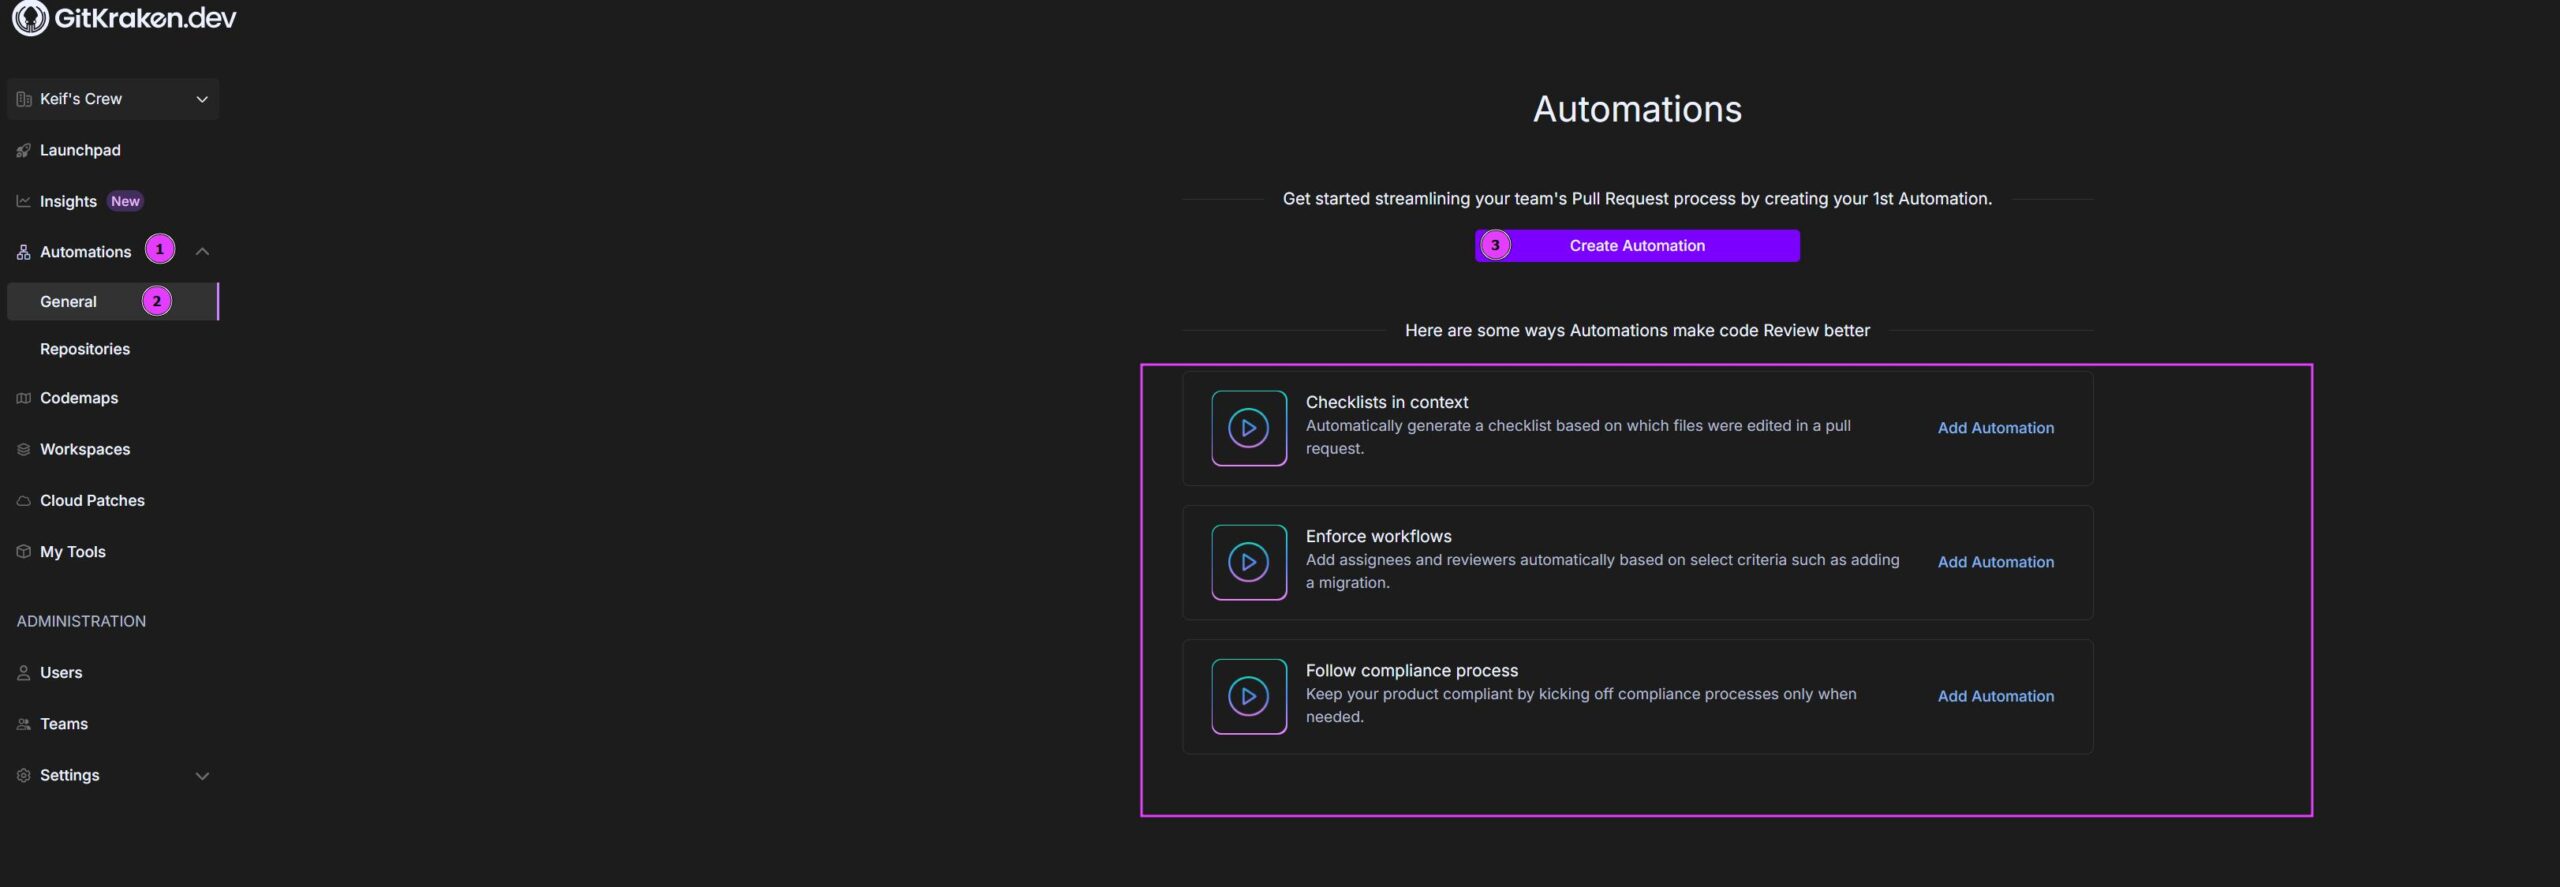
Create an Automation
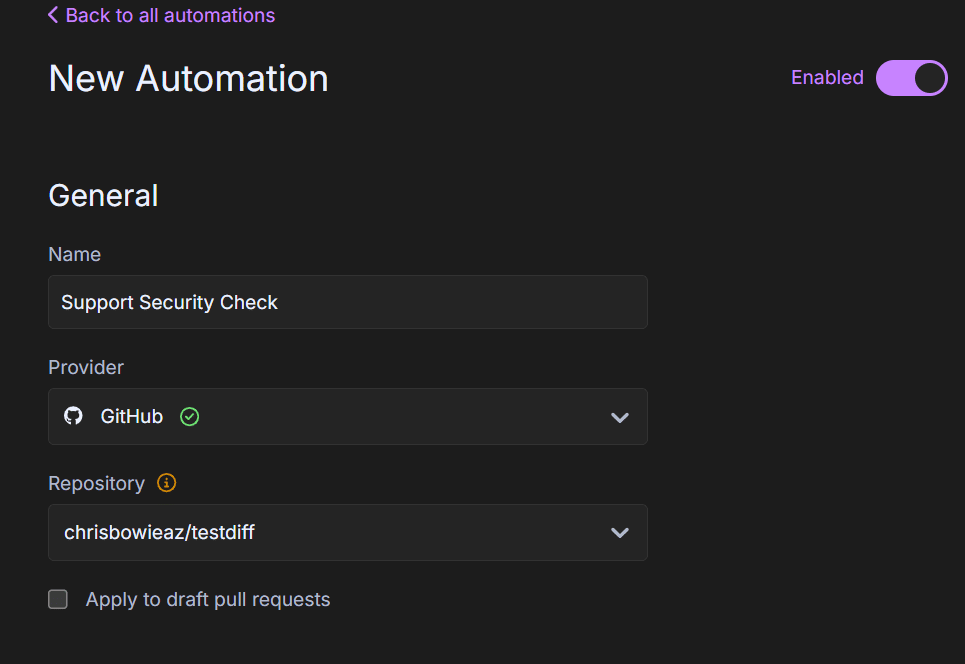
To create an automation:
- Click .
- Enter a name for your automation.
- From the Provider dropdown, select either
GitHuborGitLab. - Use the Repository dropdown to choose the repository you want to apply the automation to.
- (Optional) To include draft pull requests, check the corresponding box.
Note:
A webhook will be set up on the selected repository to trigger events when the automation is saved.
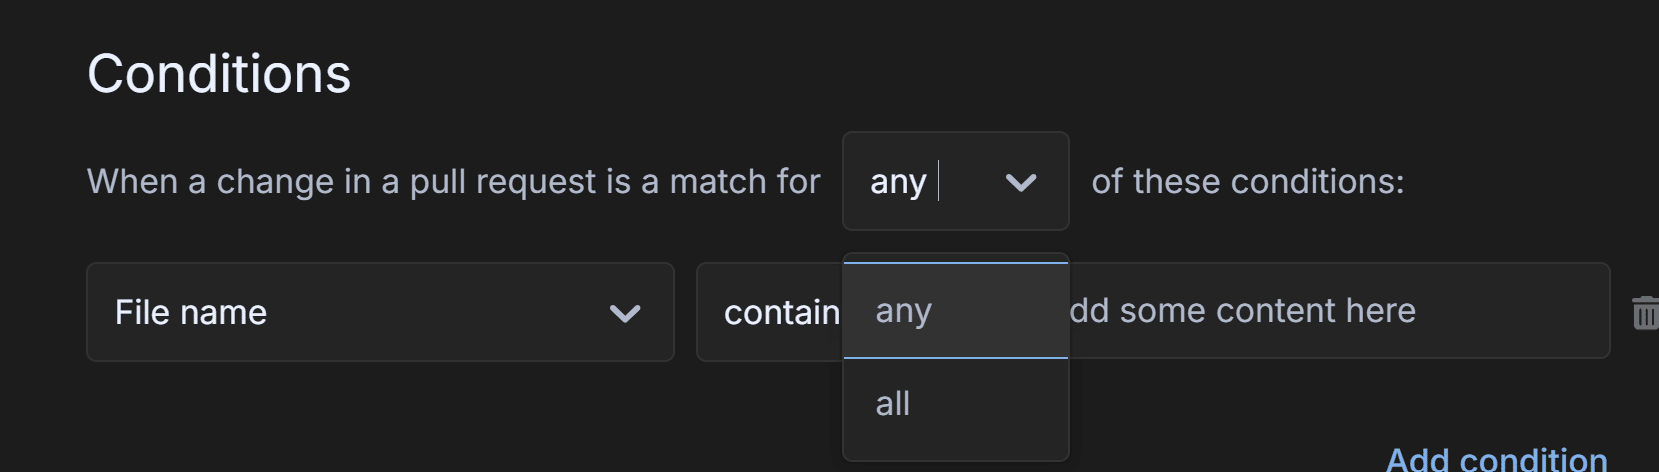
Conditions
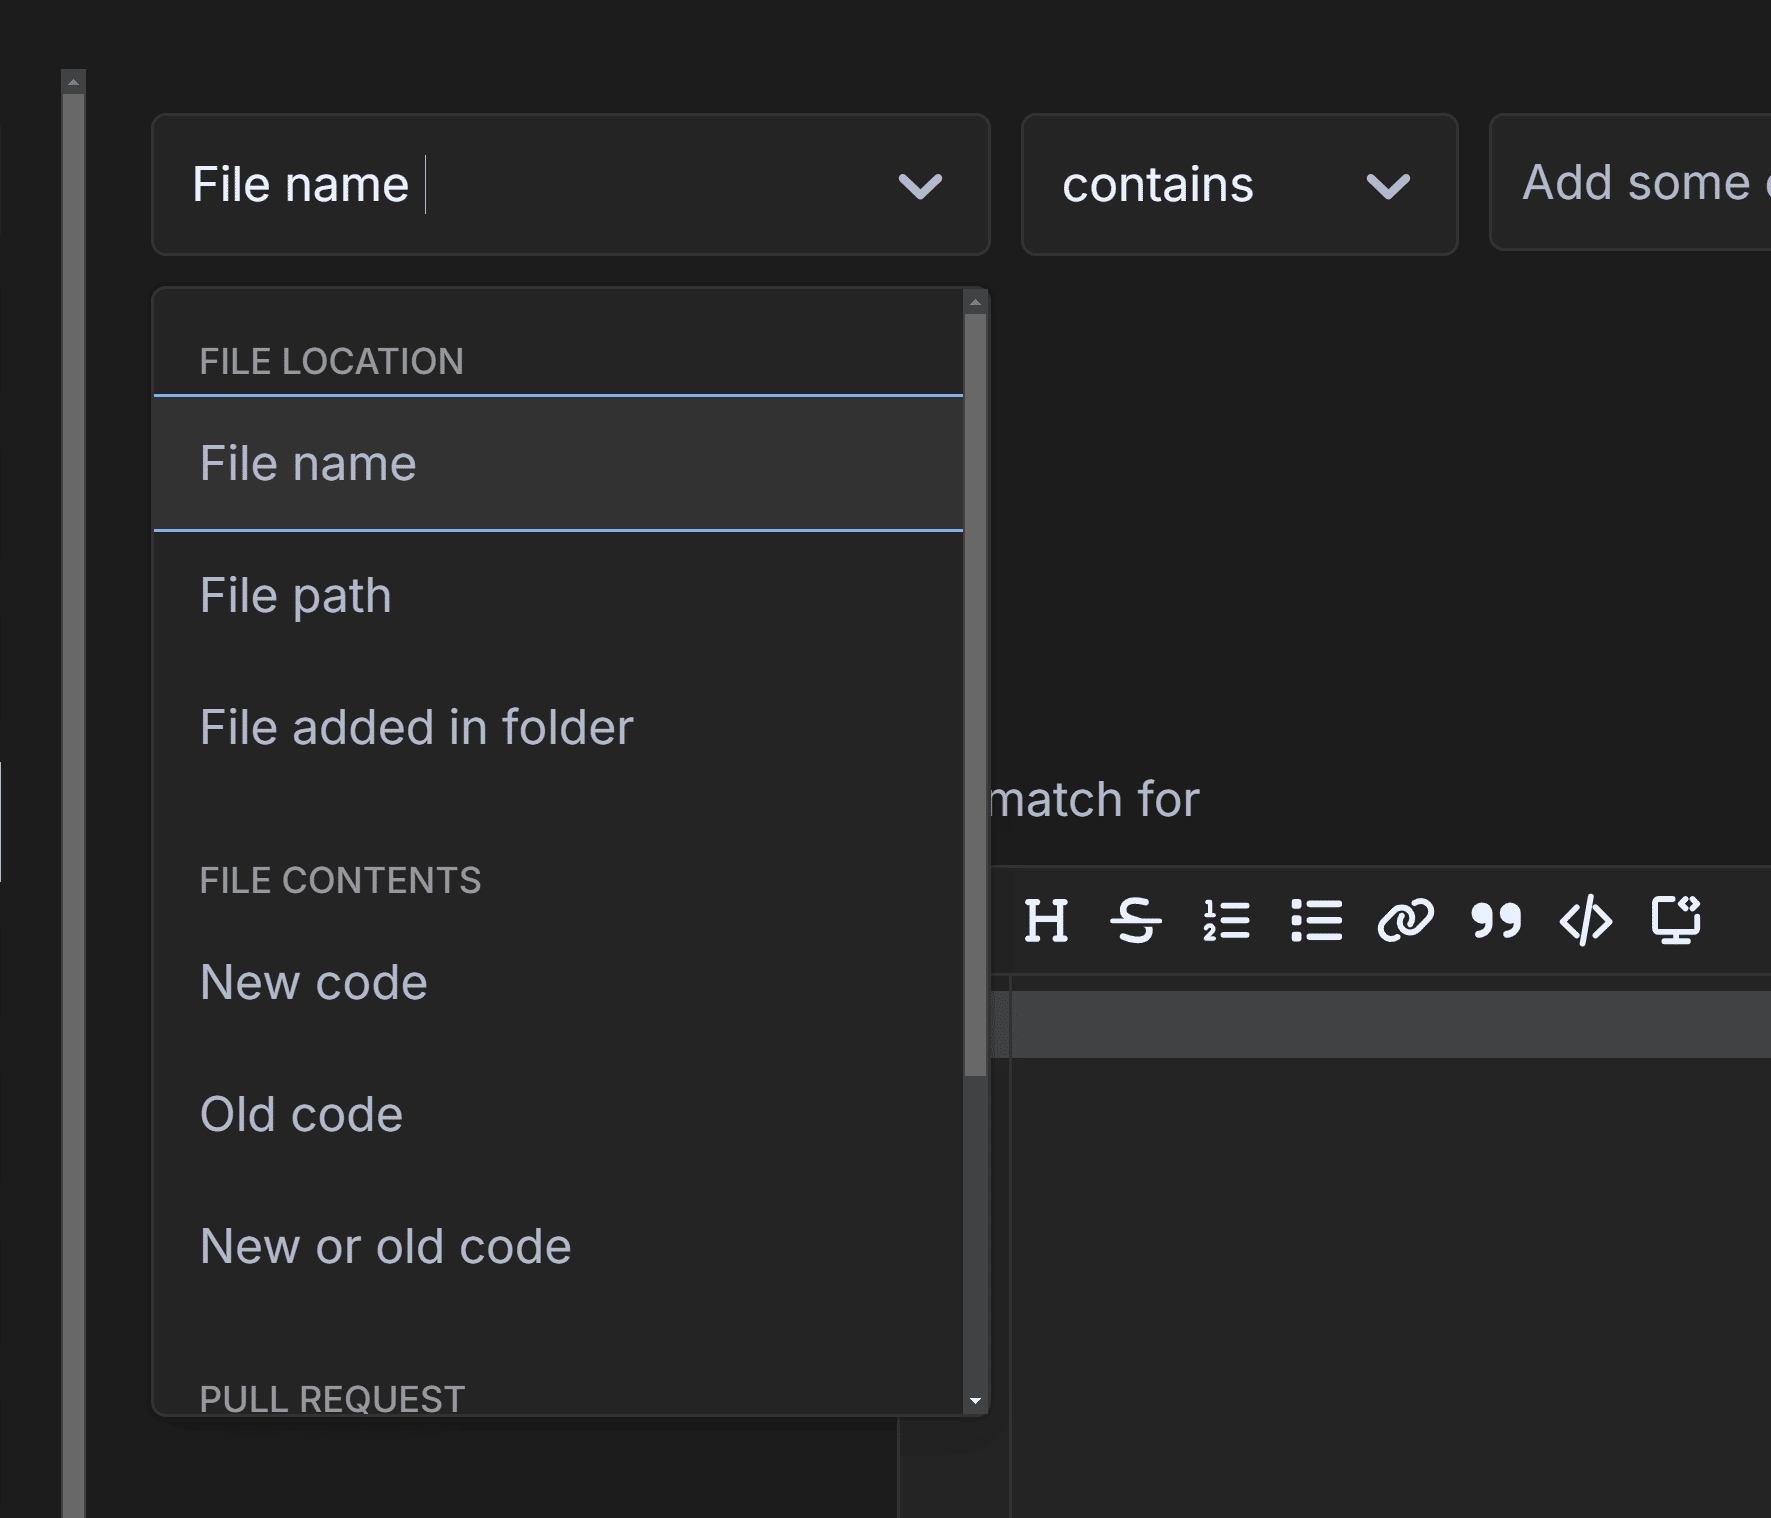
Conditions define when a trigger should execute. Automations currently support the following condition types:
- File Location
- File Content
- Pull Request
Boolean Logic
Choose whether all conditions or any conditions must be met for the trigger to execute.
- All conditions: The trigger fires only if every condition is met.
- Any condition: The trigger fires if at least one condition is met.
File Location Conditions
- File name: Matches filenames in the repository.
- File path: Matches full paths of files in the repository.
-
File added in folder: Matches when files are added to a specified folder in a pull request. For example, using:
- Filter:
File added in folder - Operator:
Folder path equals - Value:
src/components/icons
This would match any file added within the
iconsfolder or its subfolders. - Filter:
Note:
A file path includes the directory structure (e.g., src/app/index.ts), while a file name is just the filename (e.g., index.ts).
File Content Conditions
- Old Code: Matches modified lines before the code change (red in split diff view).
- New Code: Matches modified lines after the code change (green in split diff view).
- New and Old Code: Matches both sides of the split diff view.
Pull Request Conditions
- Number of changed files: Matches based on how many files are changed in the pull request.
- PR author: Matches the author of the pull request.
- Labels on the PR: Matches if specific GitHub labels are present.
Actions
The following actions can be executed when a trigger is matched:
- Add Comment: Posts a comment on the matching pull request.
- Add to Checklist: Inserts checklist items into the PR description. You can add multiple items by creating separate actions.
- Add Assignee: Assigns the pull request to a user. You can assign multiple users or include an optional comment explaining why they were assigned.
- Add Label: Adds the specified GitHub label to the pull request. Use multiple actions to assign multiple labels.
- Add Reviewer: Assigns a person or team as a reviewer. You can include an optional comment explaining the review request. Reviewers can be assigned in bulk using multiple actions.
Note:
GitKraken will not assign the PR author as a reviewer. If such a match occurs, that action is skipped while other actions still run.
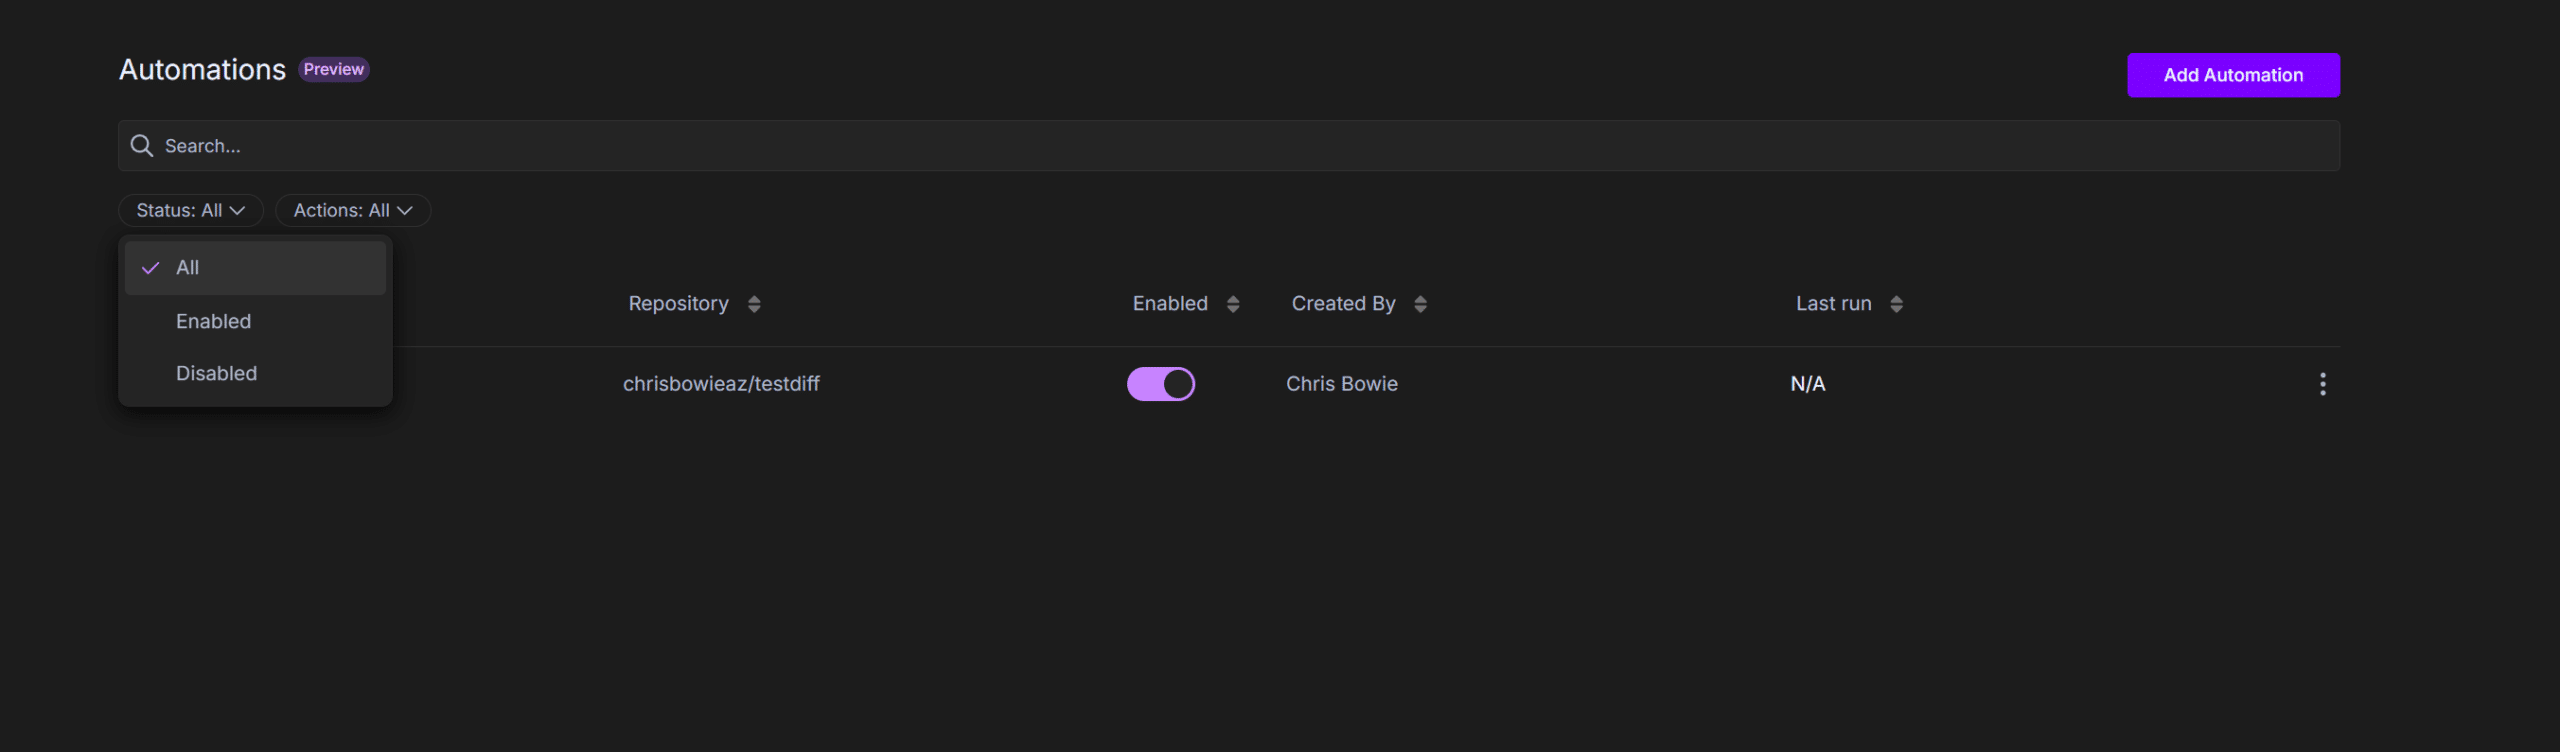
Managing Saved Automations
After creating your first automation, you’ll see a list of all your saved automations on GitKraken.dev. From this screen, you can add, disable/enable, delete, sort, edit, or duplicate automations.
Edit, Delete, or Duplicate an Automation
To edit, delete, or duplicate an automation, click the ellipsis icon next to the automation name.

Sort Automations
You can sort automations by:
- Status: Enabled or Disabled
- Action: The type of action the automation executes

Add Additional Automations
To create an additional automation, click .
