Last updated: March 2026
Use this page to connect GitKraken Desktop to GitHub Issues so you can preview, create, edit, filter, and branch from issues alongside your repository work. GitHub Issues uses the same GitHub integration connection, and Community users are limited to public repositories.
The GitHub Issues integration is limited to public repositories for Community users. To unlock full access, consider upgrading to a paid GitKraken license.
Requirements and limits
- Integration covered here: GitHub Issues for GitHub.com
- Connection model: Shares the same connection as the GitHub integration
- Community plan: Public repositories only
- Issue workflows: Preview, create, edit, filter, and branch from issues after connecting GitHub
- Filter syntax: Uses GitHub issue filtering syntax for custom filters
| Capability | Community | Paid plans | Notes |
|---|---|---|---|
| Preview issues | Yes | Yes | Uses the shared GitHub integration connection |
| Create issues | Public repositories only | Yes | Requires the connected GitHub repository and account permissions |
| Edit issue details | Public repositories only | Yes | Requires the connected GitHub repository and account permissions |
| Create branches from issues | Public repositories only | Yes | Requires the connected GitHub repository and account permissions |
| Filter issues | Yes | Yes | Uses GitHub issue filtering syntax |
Quick Start
- Go to Preferences > Integrations and select GitHub.com, or click the ISSUES section in the Left Panel.
- Click Connect to GitHub and complete authorization in the browser window that opens.
- Once connected, your GitHub issues appear in the Left Panel under default filters such as My Open Issues and All Open Issues.
To view issue details: Click any issue in the Left Panel to open its detail view. Changes made here sync with GitHub.
To create a new issue: Click the + icon in the Left Panel, fill in the required fields, and submit. The issue syncs directly to GitHub.
To create a branch from an issue: Open the issue detail view and click Create a branch for this issue. The branch name is pre-filled from the issue title.
To create custom filters: Use GitHub’s issue filter syntax to build filters in the Left Panel and narrow your view to specific labels, statuses, or assignees.
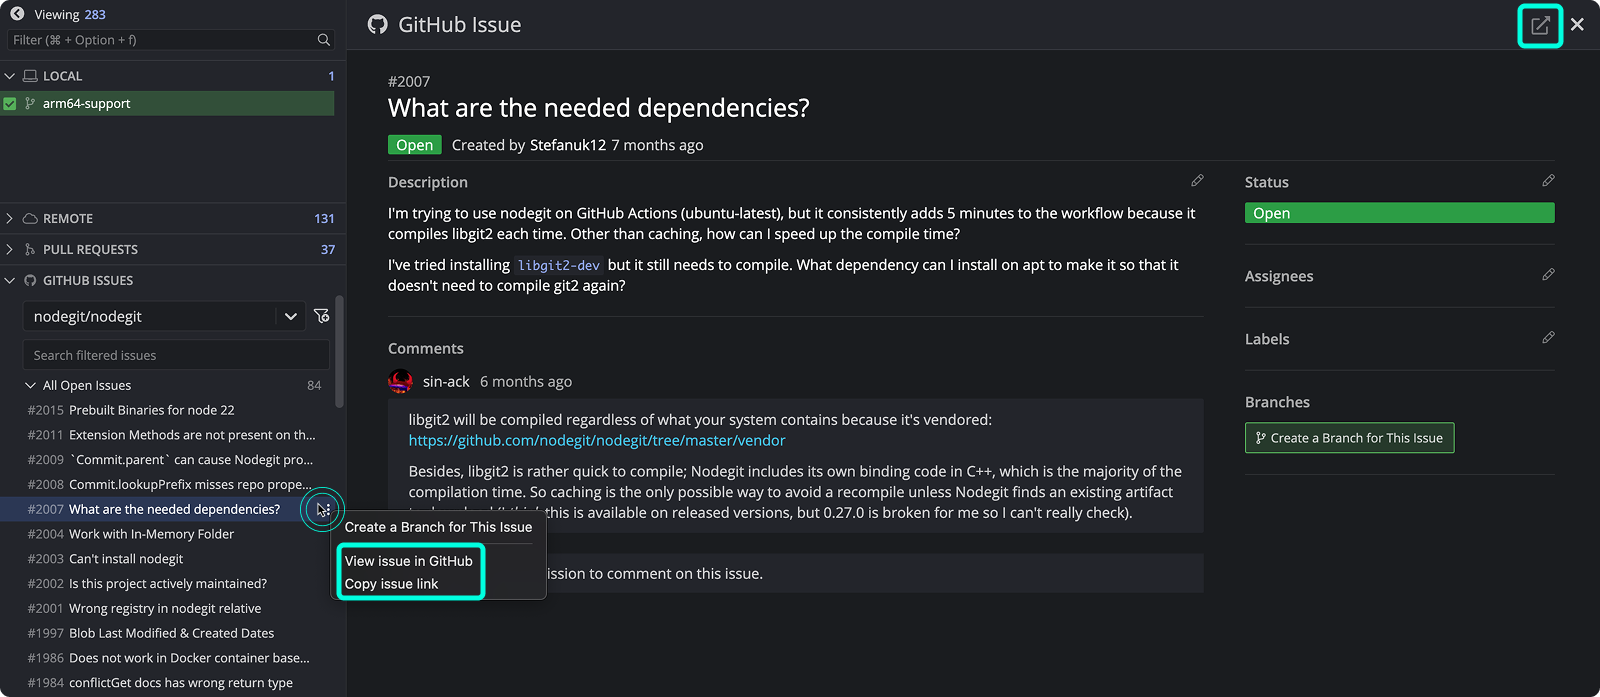
To open an issue in GitHub or copy its link, use the ellipsis menu or the external link icon in the issue detail view.
How to connect the GitHub Issues integration
The GitHub and GitHub Issues integrations share the same connection.
Use GitHub Issues in GitKraken Desktop when: you want issue triage and branch creation directly beside your Git workflow. Don’t use the in-app view alone when: you need broader GitHub project or issue-management features outside the issue flows covered here.
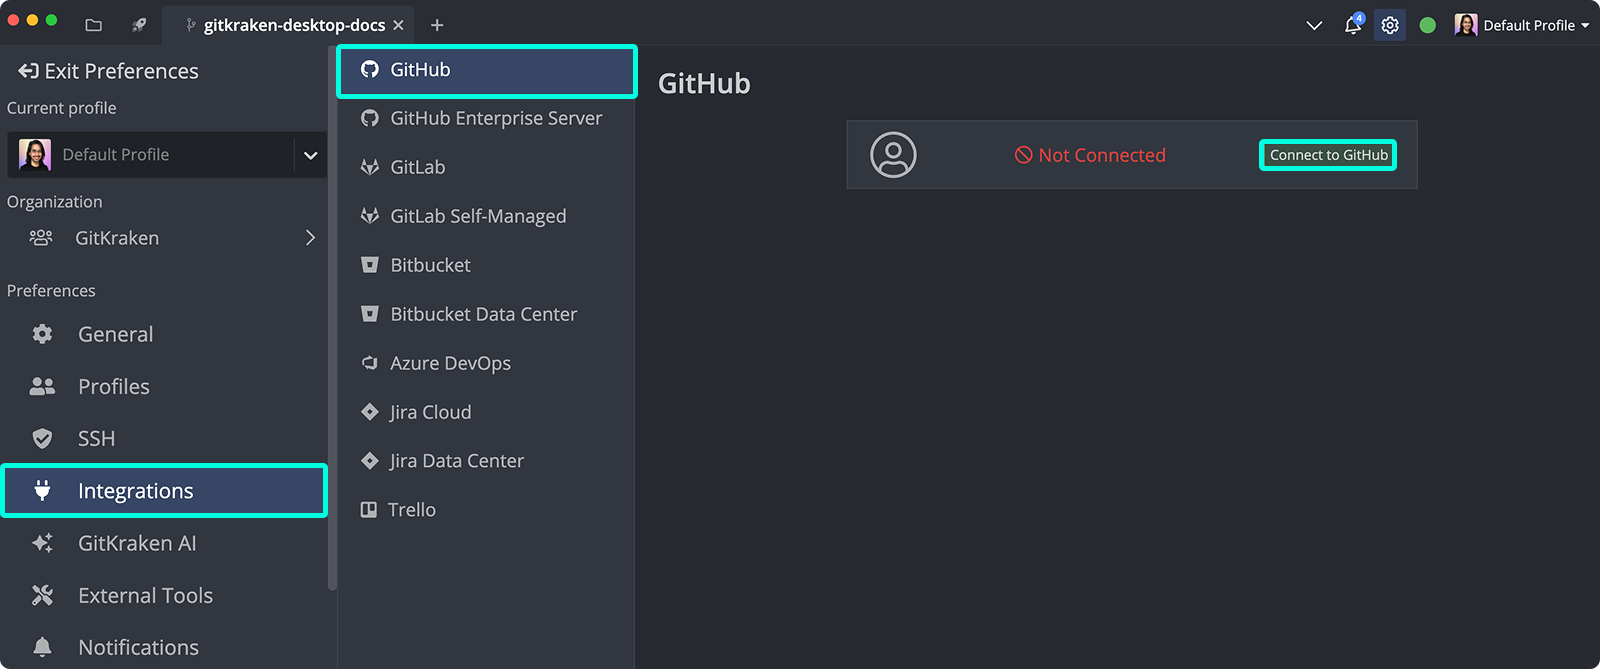
You can set up the integration from the ISSUES section in the Left Panel or from Preferences > Integrations.

From the Integrations window, select GitHub.com and click Connect to GitHub.
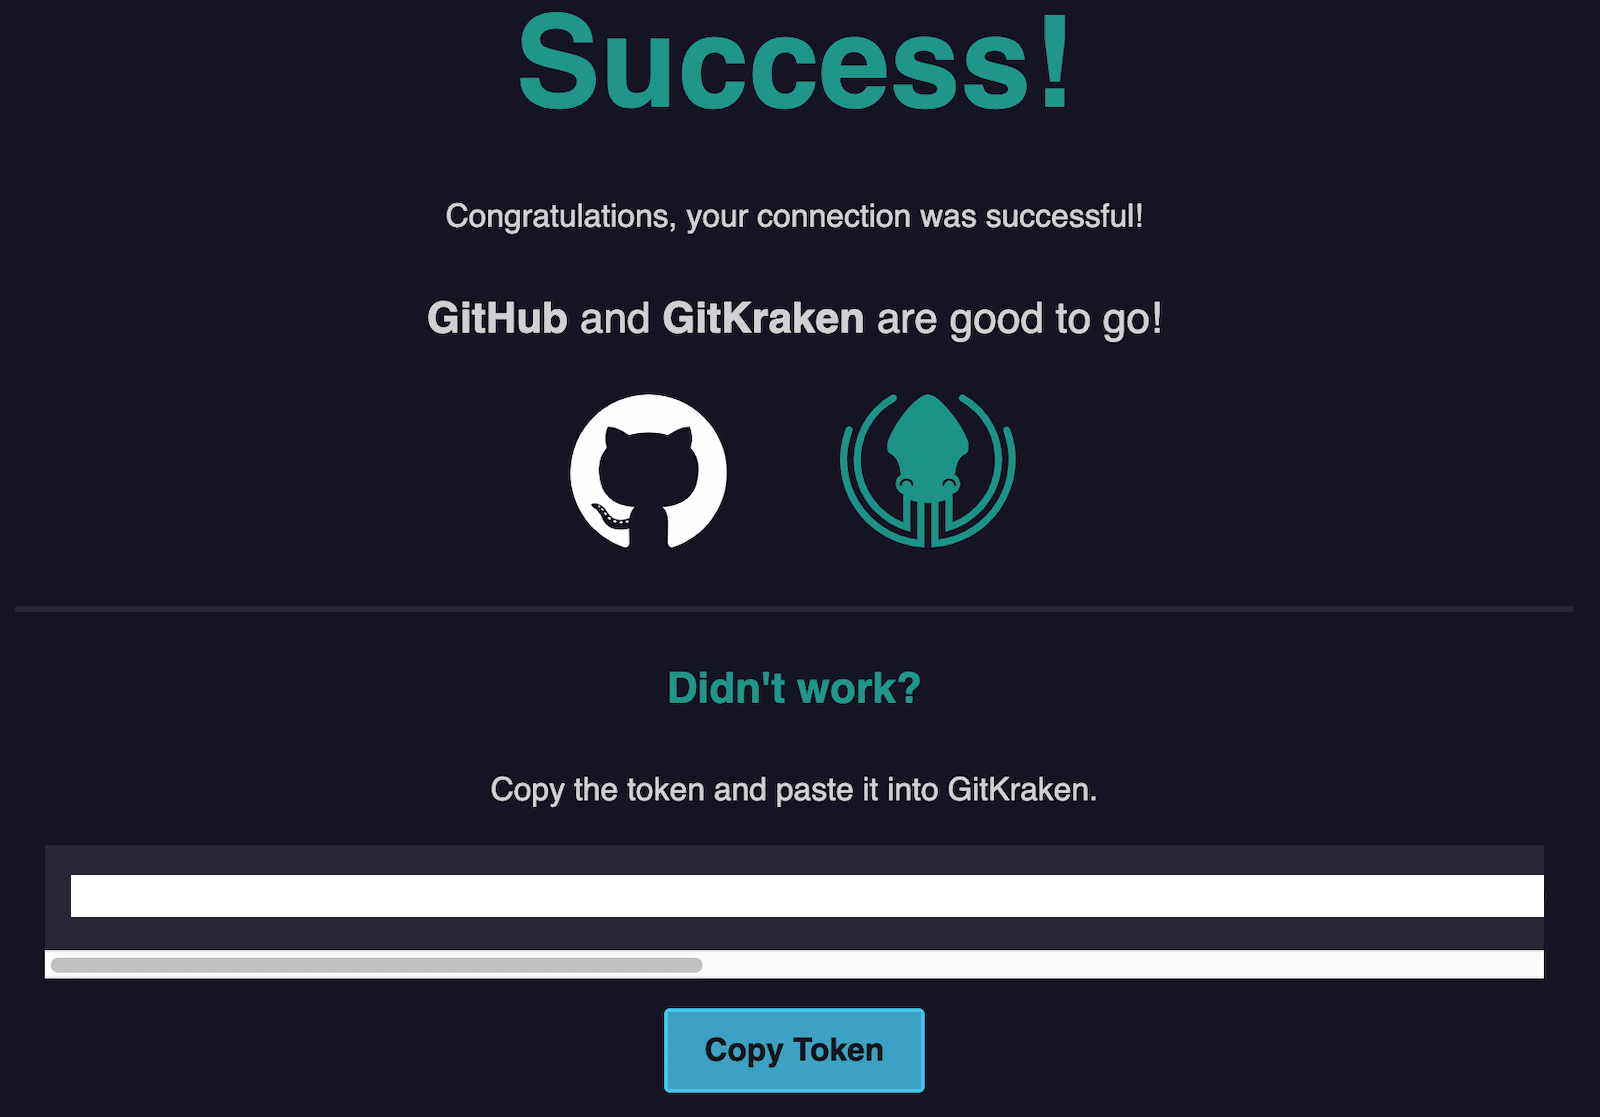
A browser window will open to complete authorization. Log in with your GitHub credentials and click Continue authorization.
Once successful, GitKraken will show a confirmation message and enable the integration.
How to preview GitHub issues
After connecting, your GitHub issues will appear in the Left Panel. Default filters include My Open Issues and All Open Issues. You can customize or remove these as needed.
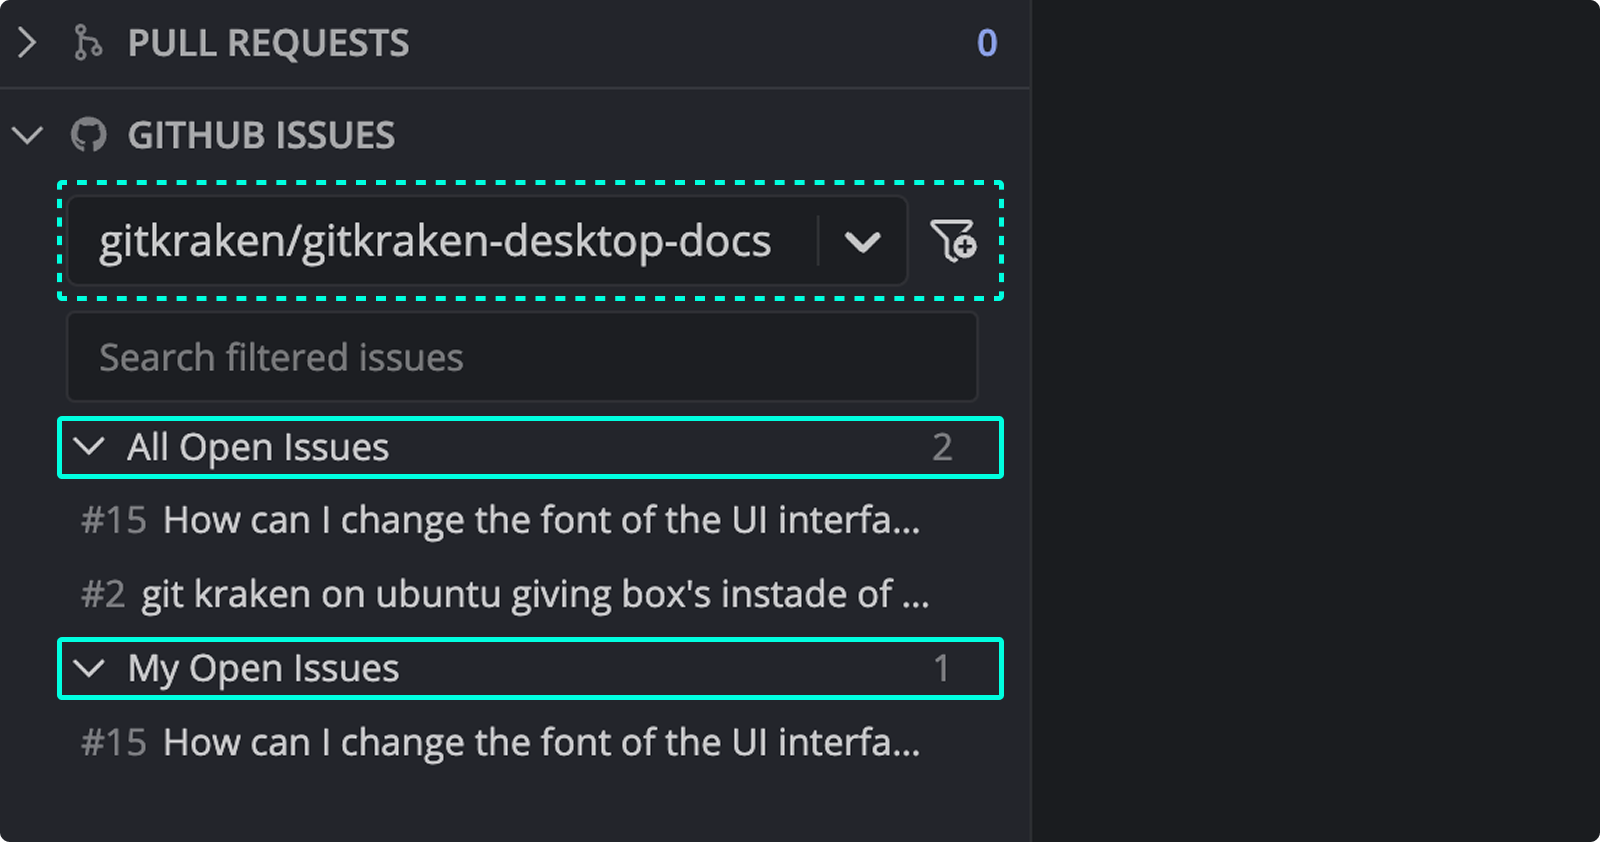
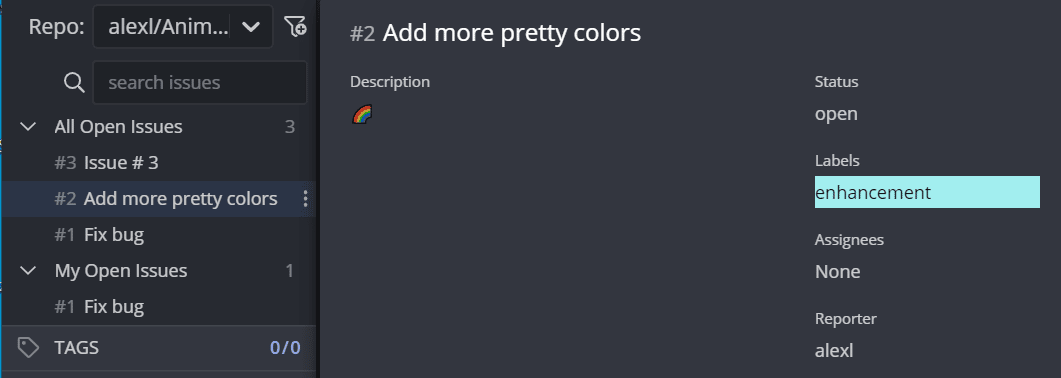
Hover over an issue to preview the title, description, status, labels, assignees, and reporter.
How to view and edit GitHub issue details
Click an issue to open the details view.
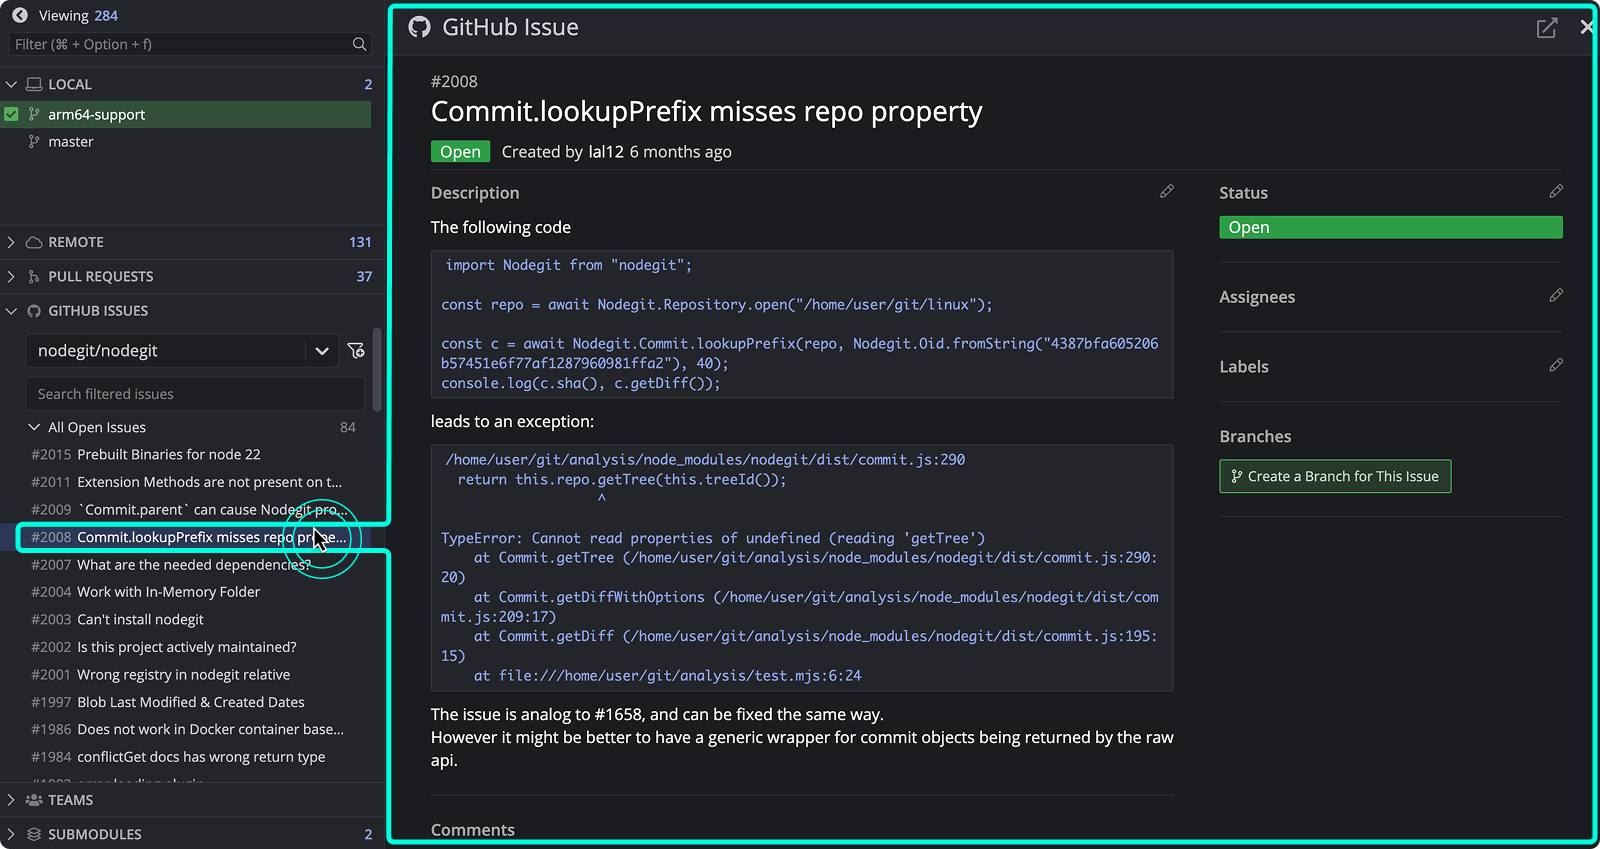
Any changes made here will be synced with GitHub.
How to create a new GitHub issue
To create a new issue, click the + icon from the Left Panel.

Required fields are marked with *. Your issue will sync directly to your GitHub repository.
How to create GitHub issue filters
Create filters using GitHub’s issue filter syntax. These help narrow your view to specific issue types, labels, or statuses.
Use custom filters when: you need to focus on a subset of issues such as bugs, assigned work, or open review blockers. Don’t rely only on default filters when: they leave you with too much issue noise.
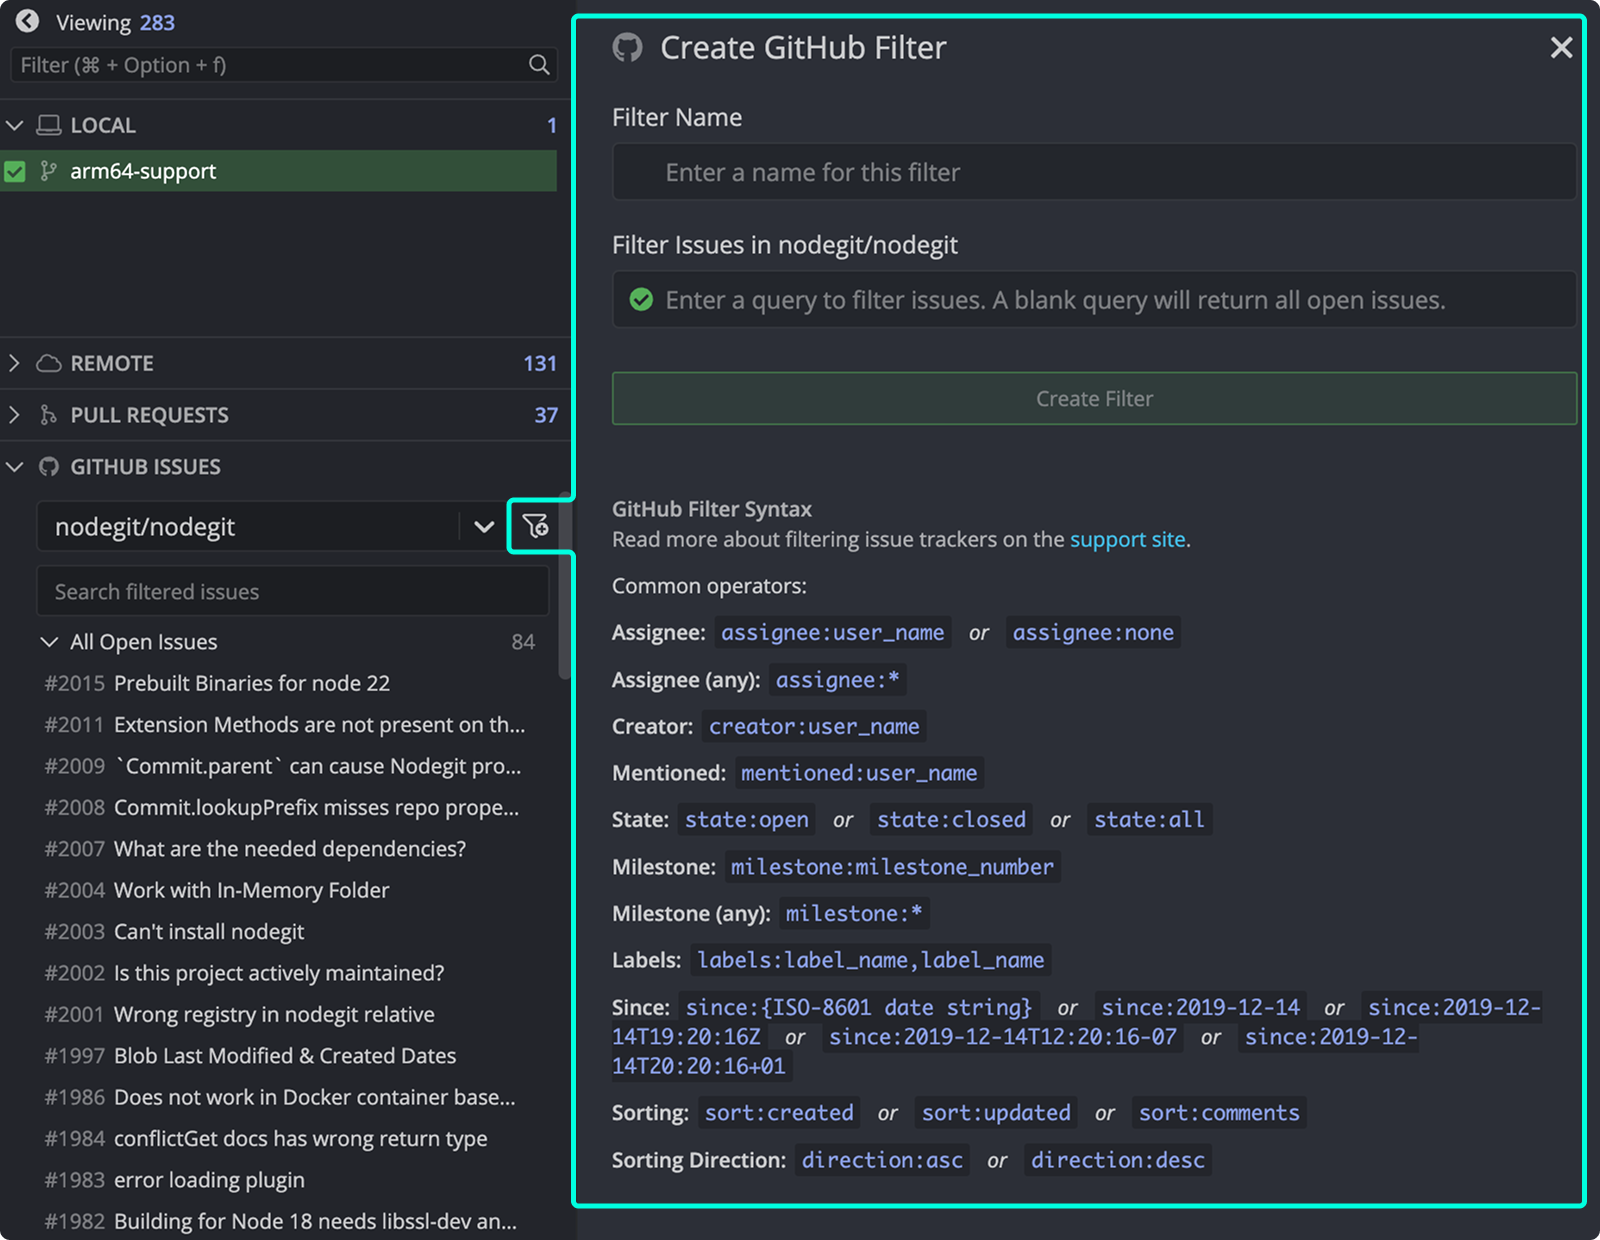
Refer to GitHub’s issue filtering guide for syntax examples.
How to create branches from GitHub issues
From the issue details view, click Create a branch for this issue. You can also right-click an issue or use the menu.
Use issue-based branch creation when: you want a clear branch-to-issue link and an auto-filled branch name. Don’t use it when: the branch should represent a larger initiative or combine work from multiple issues.
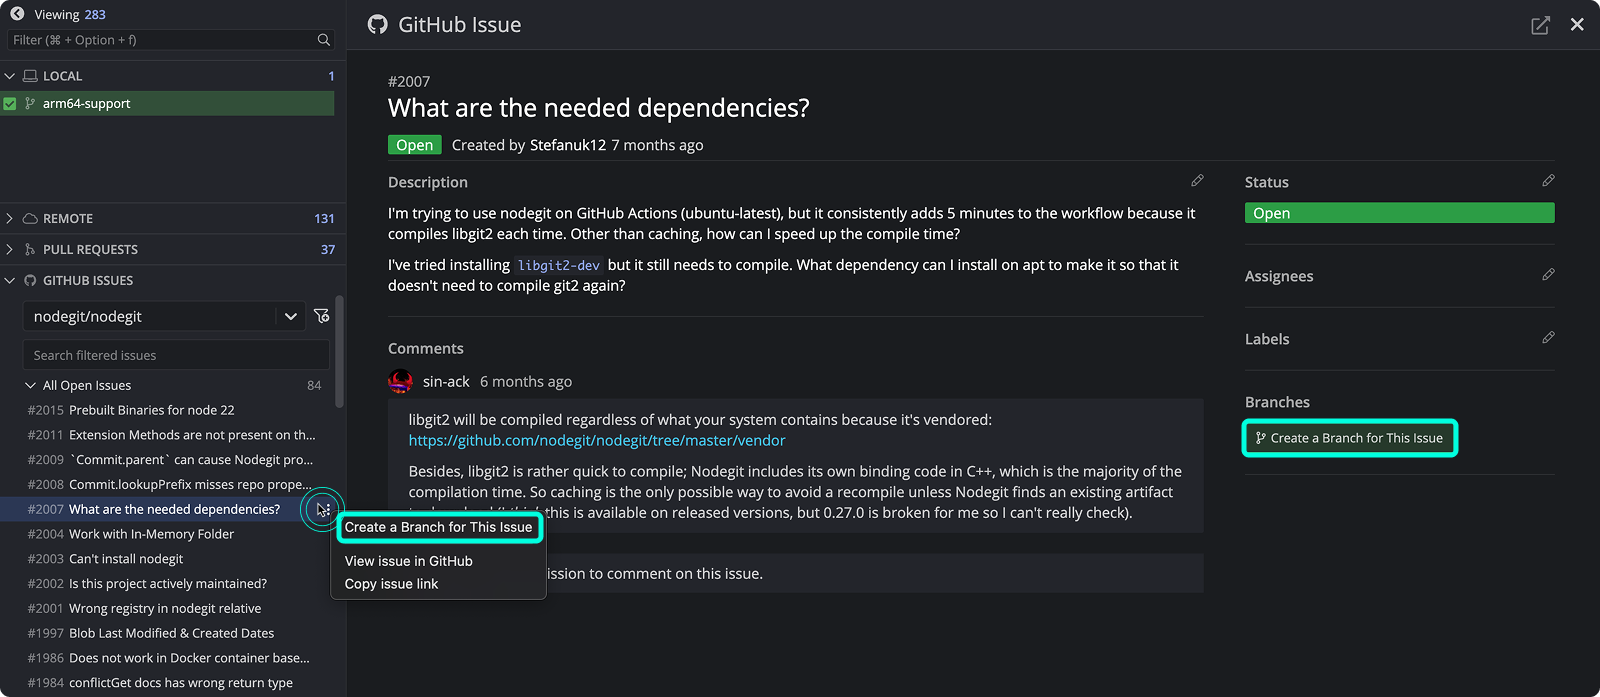
Branch names auto-fill based on the issue title. Created branches will display the GitHub icon to reflect their link.
How to copy an issue link or open it in GitHub
To open the issue in GitHub or copy its link, use the menu or click the icon in the top right.