Last updated: March 2026
Use this page to open an existing local repository, clone a remote repository, or initialize a new repository in GitKraken Desktop. It also covers shallow clone, sparse checkout, and the Repository Management tab so you can choose the right setup path for a new or existing project.
Requirements and limits
- Entry points: Repository Management tab, New Tab, or File > Clone / Init / Open
- Open workflow: Requires an existing local Git repository
- Clone workflow: Requires a remote repository URL or a connected integration
- Shallow clone: Supports branch, depth, since-date, and custom clone flags
- Sparse checkout: Root-level files are always checked out even when path rules are applied
- Initialize workflow: Creates a
.gitdirectory and can optionally add aREADME.md,.gitignore, andLICENSE
Quick Start
To open an existing local repository:
- Click the folder icon in the top-left corner or press Alt + O (Windows/Linux) or Cmd + O (Mac).
- Click Browse and select your repository folder.
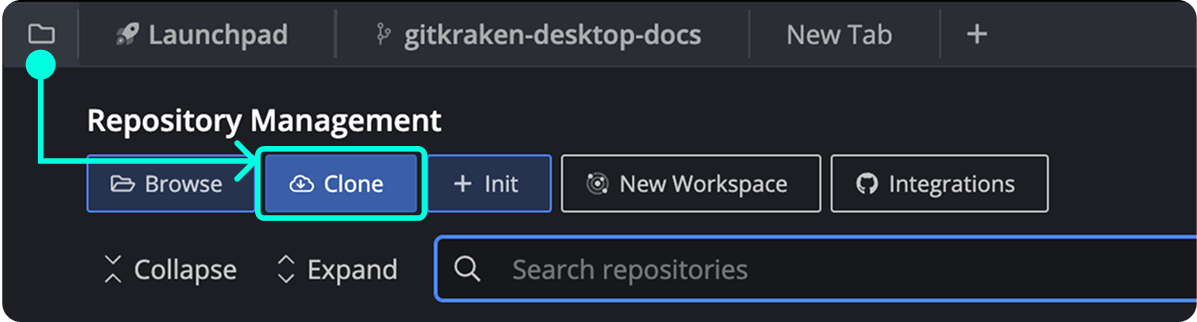
To clone a remote repository:
- Open the Repository Management tab and click Clone.
- Enter the repository URL or select a repository from your connected integration.
- Click Clone the repo to download it locally.
To initialize a new repository:
- Click Init in the Repository Management tab.
- Fill in the repository path and optional settings (
.gitignore, license). - Click Create Repository to create the repo and open it.
Shallow clone is supported when cloning. Enable the Shallow Clone option in the Clone dialog to limit commit history by depth or date. Access all three options from the Repository Management tab, the New Tab, or File > Clone / Init / Open.
How to complete the initial setup
Complete these setup steps before managing repositories:
- Install GitKraken Desktop
- Create an account and configure your profile
How Repository Management works
The Repository Management tab provides an overview of active repositories, Workspaces, and favorites. Open this tab by clicking the folder icon in the top-left or using:
- Alt + O (Windows/Linux)
- Cmd + O (Mac)
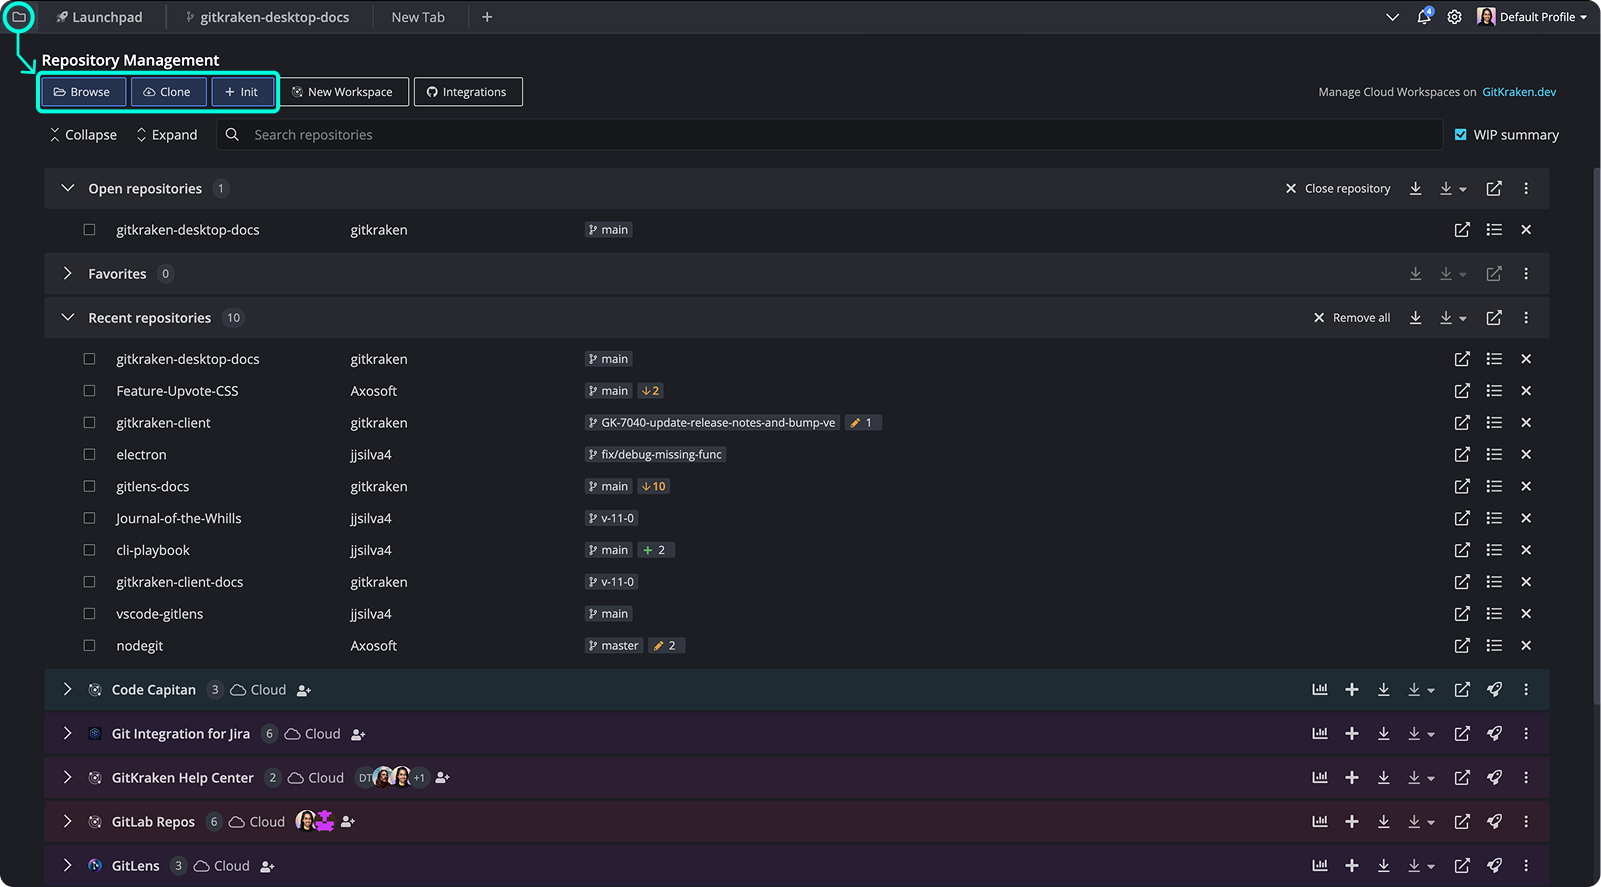
From here, you can:
- Browse: Open a local Git repository.
- Clone: Copy a remote Git repository to your machine.
- Init: Initialize a new Git repository or reinitialize an existing one.
This tab also includes Workspaces and repository actions:
- Open in VS Code
- View repository details (README.md panel)
- Open/Close repo tab
How to open an existing project
To open an existing repo:
- From Repository Management, select
- Use the file explorer to locate your repo

You can also access this via the New Tab by clicking the + icon.
How to open shallow-cloned repositories
GitKraken Desktop supports opening shallow cloned repositories.
No special setup is required. Just navigate to the shallow clone’s location and open it as you would any other repository (see above).
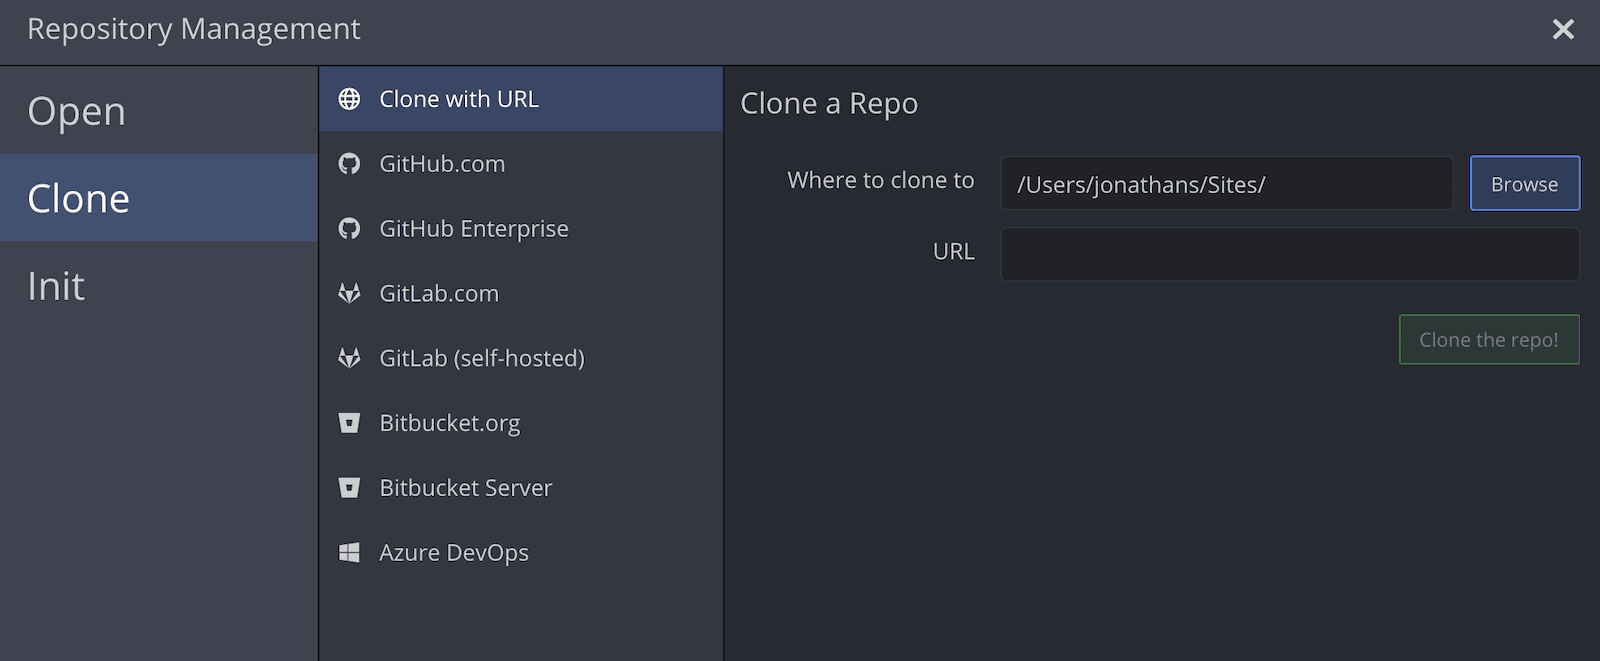
How to clone a project
To clone a remote repo:
- In Repository Management, select
- You can also access clone options via File > Clone or the New Tab.
How shallow clone works
GitKraken Desktop supports shallow cloning when cloning a repository. Shallow clones let you limit the commit history that is downloaded, which can significantly reduce clone time and disk usage for large repositories.
To perform a shallow clone:
- Open the Clone dialog from Repository Management, the New Tab, or File > Clone.
- Select the repository you want to clone.
- Enable the Shallow Clone option.

When Shallow Clone is selected, additional options become available:
- Branch to clone: Specify the branch to clone. By default, GitKraken Desktop uses the repository’s default branch.
- Depth: Set how many commits deep to clone from the selected branch.
- Since date: Limit the clone to commits newer than a specific date.
- Custom flags: Provide any additional flags you typically pass to the
git clonecommand. Enter these exactly as you would in the command-line interface.
- Click to complete the shallow clone.
After cloning, the repository opens automatically in GitKraken Desktop.
How sparse checkout works
Sparse checkout lets you check out only a subset of files from a repository, keeping your working directory smaller and improving performance on large repositories such as monorepos.
To perform a sparse checkout when cloning:
- Open the Clone dialog from Repository Management, the New Tab, or File > Clone.
- Select the repository you want to clone.
- Enable the Sparse Checkout option.
- In the Paths to include field, enter one path per line (for example,
src/,docs/,README.md). If no paths are provided, only root-level files will be checked out.

- Click to complete the clone.
Note: Files at the root of the repository are always checked out regardless of the paths you specify.
Configuring sparse checkout on an existing repository
To enable or update sparse checkout rules on a repository you have already opened, go to Preferences > Sparse Checkout for that repository.
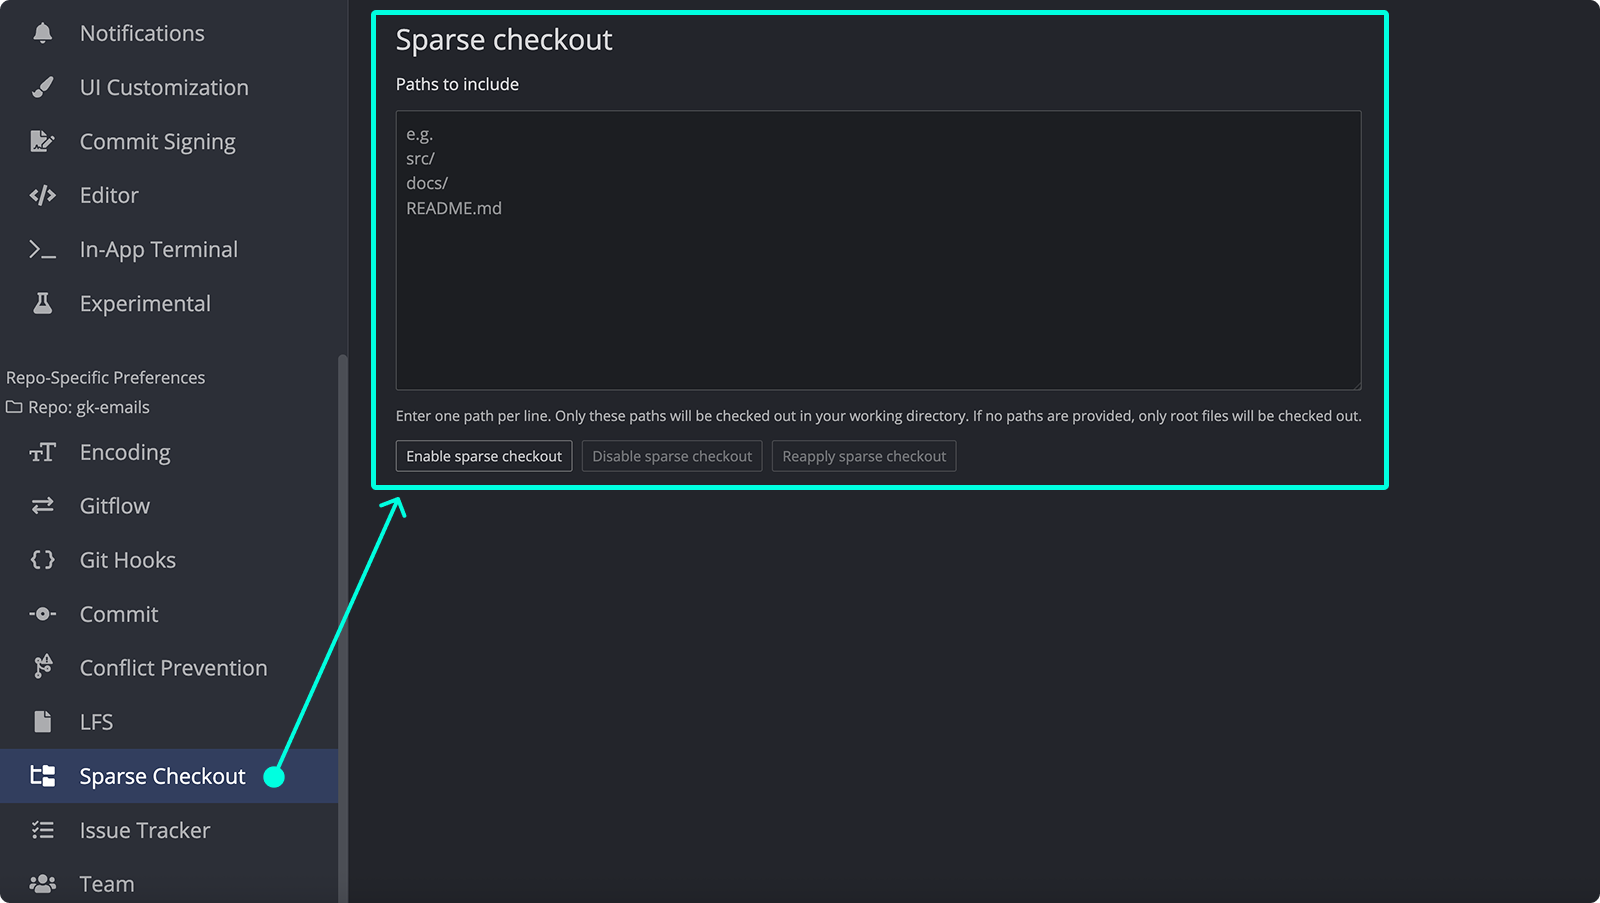
From this panel you can:
- Enable sparse checkout — activates sparse checkout using the paths you have entered.
- Disable sparse checkout — turns off sparse checkout and restores the full working directory.
- Reapply sparse checkout — re-applies the current path rules, useful after pulling in new files or resolving inconsistencies.
When a repository has sparse checkout active, a Sparse button appears in the toolbar. Click it to quickly edit your sparse checkout paths, disable sparse checkout, or reapply the current rules without opening Preferences.

How to initialize a new project
To start a new repo:
- Select in Repository Management.
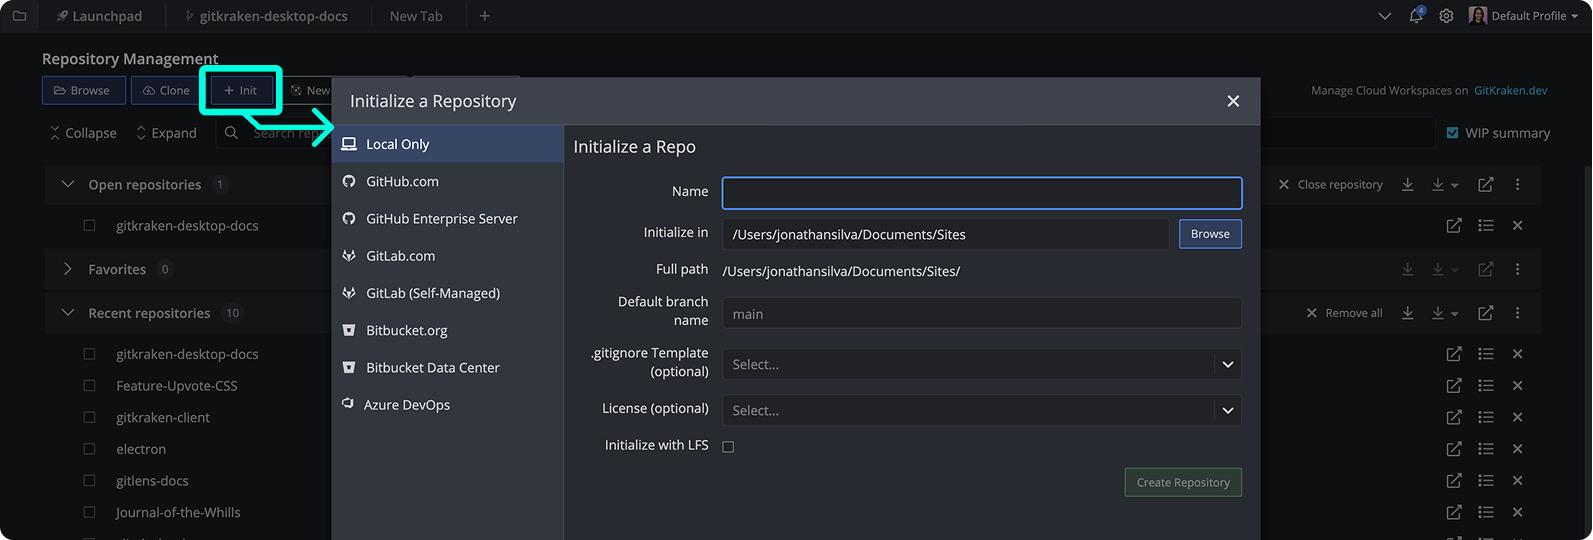
-
Fill in:
- Repository path
.gitignoretemplate (optional)- License (optional)
-
Click
Also accessible via File > Init or New Tab.
Initialization result:
.gitdirectory created- Repo opens in GitKraken Desktop
- Includes
README.md, and optionally.gitignoreandLICENSE
You can also initialize a repository directly to GitHub, Bitbucket, or other remote providers.
How to customize Repository Management
- Drag and drop group headers to reorder
- Change colors via Change color in the repo group menu
- Set default colors in Preferences > UI Customization